Table of Contents
Advertisement
Advertisement
Table of Contents

Related Manuals for Zanussi ZWT 71201 WA


Summary of Contents for Zanussi ZWT 71201 WA
- Page 1 User Manual GETTING STARTED? EASY. ZWT 71201 WA EN User Manual Washer Dryer...
-
Page 2: Safety Information
SAFETY INFORMATION Before the installation and use of the appliance, carefully read the supplied instructions. The manufacturer is not responsible for any injuries or damages that are the result of incorrect installation or usage. Always keep the instructions in a safe and accessible location for future reference. - Page 3 by clients in hotels, motels, bed & breakfast and other – residential type environments; areas for communal use in blocks of flats or in launderettes. – The appliance shall be installed as a freestanding product or • below the kitchen worktop if space margins permit. Do not install the appliance behind a lockable door, a sliding •...
-
Page 4: Safety Instructions
Items that have been soiled with substances such as vegetable • or mineral oil, acetone, alcohol, petrol, kerosene, spot removers, turpentine, waxes and wax removers should be washed separately with an extra amount of detergent before being dried in the washer dryer. Do not use the appliance if items have been soiled with •... -
Page 5: Electrical Connection
• The floor area on which the appliance is to be • Do not put flammable products or items that are installed must be flat, stable, heat resistant and wet with flammable products in, near or on the clean. appliance. •... -
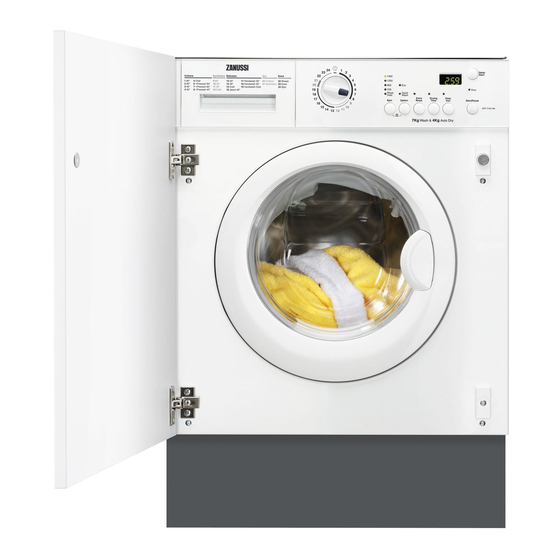
Page 6: Product Description
PRODUCT DESCRIPTION APPLIANCE OVERVIEW Detergent dispenser INSTALLATION ON SUSPENDED FLOORING Suspended wooden floors are particularly Control panel susceptible to vibration. Door handle To limit vibration we recommend placing a Rating plate waterproof wooden panel, at least 15 mm thick, Drain pump filter under the appliance. -
Page 7: Control Panel Description
CONTROL PANEL CONTROL PANEL DESCRIPTION Delay Start 1200 Door Rinse Quick Hold Wash Extra Drying Easy Spin Option Rinse Time Iron Drying Time button (Drying Time) Programme knob and On/Off position Display Extra Rinse button (Extra Rinse) Delay Start button (Delay Start) Options button (Option) Door Locked indicator (Door) Spin Reduction button (Spin) -
Page 8: Programme Chart
After the programme start, the set delay – You set a option that is not suitable for appears for few seconds, then the duration the programme. of the set programme is displayed again. – You change the programme while it •... - Page 9 Maximum load Programme Programme description Reference spin Temperature range (Type of load and soil level) speed 4 kg Drying programme for cotton items. Dry - Cottons 2 kg Drying programme for synthetic items. Dry - Synthetics Extra 7 kg To rinse and spin the laundry. All fab- 1200 rpm rics, except woollens and very delicate Rinses...
-
Page 10: Programmes For Timed Drying
PROGRAMMES FOR TIMED DRYING Spin Suggested Dryness Level Type of fabric Load (kg) speed duration (rpm) (mins) Extra Dry Cottons and Linen 1200 215 - 220 For towelling materials (bathrobes, bath towels, etc) 1200 160 - 180 1200 95 - 105 Cottons and Linen 1200 205 - 210... -
Page 11: Rinse Hold
Energy con- Approximate pro- Water con- Programmes Load (kg) sumption gramme duration (mi- sumption (litre) (kWh) nutes) Cottons Eco Cotton Energy Saving Pro- 1.05 gramme 60°C Cottons 40°C 0.85 Synthetics 40°C 0.55 Delicates 40°C 0.55 Wool/Handwash 30°C 0.25 1) «Cotton Energy Saving programme » at 60°C with a load of 7kg is the reference programme for the data entered in the energy label, in compliance with 96/60/EC Directive. -
Page 12: Acoustic Signals
DOOR LOCKED INDICATOR DOOR On cotton programmes the maximum spin speed is reduced automatically. The indicator Door shows when the door can be opened: • The indicator is on: the door cannot be opened. DELAY START • The indicator flashes: the door is opening in With this option you can delay the start of a some minutes. - Page 13 • The programme time decreases with steps CAUTION! Make sure that no laundry of one minute. stays between the seal and the door. There is a risk of water leakage or The drain pump can operate for a damage to the laundry. short time at the beginning of the washing cycle.
-
Page 14: Opening The Door
3. Press the button Start/Pause again. 3. Turn the programme knob to the position The programme continues. deactivate the appliance. OPENING THE DOOR STAND BY While a programme or the Delay Start operates, the Some minutes after the end of the washing appliance door is locked. -
Page 15: Daily Use - Drying Only
DAILY USE - DRYING ONLY • The display shows regularly a new time WARNING! Refer to Safety chapters. value. • The indicator Door is on. If you set only 10 minutes of drying, This appliance is an automatic washer the appliance performs only a cooling dryer. -
Page 16: Hints And Tips
For more information see 'At the end of the drying To have a good drying performance programme " of the previous chapter. do not exceed the maximum drying loads recommended in the user 1. Turn the selector dial to the position manual. - Page 17 – powder detergents for delicate fabrics (40 • Synthetic curtains. °C max) and woollens, • Pieces of clothing with metal inserts. – liquid detergents, preferably for low • Nylon stockings. temperature wash programmes (60 °C max) • Quilts. for all types of fabric, or special for woollens •...
-
Page 18: Care And Cleaning
CARE AND CLEANING double lip trap in the porthole seal, where they can WARNING! Refer to Safety chapters. be conveniently recovered at the end of the cycle. CLEANING THE DETERGENT DISPENSER EXTERNAL CLEANING Clean regularly the washing powder and additive dispenser drawer. -
Page 19: Cleaning The Inlet Hose And The Valve Filter
• Unplug the appliance. CAUTION! When the appliance is in • If it is necessary, wait until the water has cooled use and depending on the set down. programme there can be hot water in • Place a container the pump. close to the pump (A) to collect any spillage. -
Page 20: Frost Precautions
• Screw the hose back WARNING! Make sure that the to the machine and temperature is more than 0 °C before make sure the con- you use the appliance again. nection is tight. The manufacturer is not responsible • Turn on the water tap. for damages caused by low temperatures. -
Page 21: Possible Failures
POSSIBLE FAILURES Problem Possible solution The programme does not • Make sure that the mains plug is connected to the mains socket. start. • Make sure that the appliance door is closed. • Make sure that there is not a damaged fuse in the fuse box. •... -
Page 22: Installation
Problem Possible solution The washing results are • Increase the detergent quantity or use a different detergent. not satisfactory. • Use special products to remove the stubborn stains before you wash the laundry. • Make sure that you set the correct temperature. •... -
Page 23: Water Inlet
• Remove the power • Level the appliance by supply cable and the raising or lowering the draining hose from the feet. hose holders on the • The feet may be tight rear of the appliance. to adjust as they in- corporate a self lock- ing nut, but the appli- ance MUST be level... -
Page 24: Water Drainage
• Hooked over the edge of a sink using the • Connect the hose to a plastic hose guide supplied with the tap with a 3/4”thread. machine. Always use the hose In this case, make sure the end cannot come supplied with the ap- unhooked when the appliance is emptying. - Page 25 counterclockwise with a 3mm wrench. Adjust the height and turn the nut clockwise to fix it. 600 mm min. ~10mm 596 mm 555 mm 560 mm min. 830 mm 818 mm 75 mm 60 mm 170 mm 100 mm We recommend that you keep the packaging and the transit bolts for any movement of the appliance.
- Page 26 16-22 mm Ø 35 mm 22±1,5 mm 14 mm 595-598 mm Hinges To align the door perfectly, loosen the screw, adjust the door and tighten the screw A again. To mount the hinges drill two holes (dia. 35 mm, depth 12.5-14 mm depending on the depth of door The appliance is prearranged for a magnetic furniture) on the inner side of the door.
-
Page 27: Technical Data
TECHNICAL DATA Dimension Width/ Height/ Depth/ To- 596 mm/ 818 mm/ 544 mm/ 560 mm tal depth Electrical connection Voltage 230-240 V Overall power 2050 W Fuse 13 A Frequency 50 Hz Level of protection against ingress of solid particles and IPX4 moisture ensured by the protective cover, except where the low voltage equipment has no protection against... -
Page 28: Environmental Concerns
ENVIRONMENTAL CONCERNS with the symbol with the household waste. Recycle materials with the symbol . Put the Return the product to your local recycling facility or packaging in relevant containers to recycle it. Help contact your municipal office. protect the environment and human health by recycling waste of electrical and electronic appliances. - Page 32 WWW.ZANUSSI.COM/SHOP...