Table of Contents
Advertisement
Advertisement
Table of Contents
Troubleshooting

Related Manuals for Tableau TX1

Summary of Contents for Tableau TX1
- Page 1 Tableau TX1 USER GUIDE Version 2.0...
- Page 2 Tableau TX1 User Guide Rev.: 9/28/2018 This documentation has been created for software version 2.0. It is also valid for subsequent software versions as long as no new document version is shipped with the product or is published at https://knowledge.opentext.com.
-
Page 3: Table Of Contents
TX1 Kit Contents Navigating the TX1 Home Screen Side Navigation Menu Jobs Tab Job Status Quick Reference Guide Reading the Status LEDs Interpreting Audio Feedback On-screen Warnings USB Keyboard Support CHAPTER 3 Configuring the TX1 Startup Sequence - iii -... -
Page 4: Table Of Contents
System Settings Network Settings Default Settings Updating TX1 Firmware Connecting Drives Source Drives Destination Drives Accessory Drives Drive Detection CHAPTER 4 Using the TX1 Overview Navigating TX1 Features and Options Home Screen Jobs screen Side Navigation menu Preconditions Checking Duplicating Cloning... -
Page 5: Table Of Contents
Viewing Sources and Destinations Encryption Detection Media Utilities Wiping Destination or Accessory Drives Formatting Destination and Accessory Drives Encryption Disabling HPA and DCO Blank Checking Browse Filesystem SMART Data Export Eject Logs Module Sample Log CHAPTER 5 Adapters Overview IDE Adapter Using the TDA7-5 PCIe Adapters Apple Target Disk Mode Acquisition Adapters... - Page 6 - vi -...
-
Page 7: Chapter 1 Preface
CHAPTER 1 PREFACE About this Guide Drive Capacity and Transfer Rate Measurement Conventions... -
Page 8: About This Guide
This guide presents a wide range of technical information and procedures for using the Tableau TX1 Forensic Imager, a product of Guidance Software. It is divided into the following chapters: Overview: Provides general information about the TX1 as well as unpacking, starting up, and navigating the TX1 menus and reading the LEDs. -
Page 9: Chapter 2 Overview
CHAPTER 2 OVERVIEW TOPICS IN THIS CHAPTER: Tableau TX1 TX1 Kit Contents Navigating the TX1 Reading the Status LEDs Interpreting Audio Feedback On-screen Warnings USB Keyboard Support... -
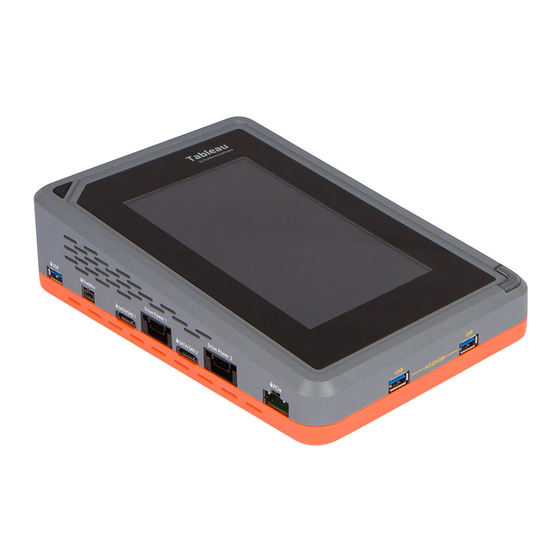
Page 10: Tableau Tx1
Tableau TX1 User Guide Version 2.0 Tableau TX1 The Tableau TX1 is a powerful, yet intuitive, forensic imager that offers superior local and networked imaging performance with no compromises. The touch screen user interface is easy to use and provides a familiar user experience similar to modern tablets and smartphones. The... - Page 11 User interface localization support for German, English, Spanish, French, Portuguese, Rus- sian, Turkish, and Chinese languages, including virtual keyboard support for user inputs. The TX1 can operate as a standalone device, as shown above. Optionally, the TX1 can operate with the destination imaging bay (TX1-S1), as shown above.
-
Page 12: Tx1 Kit Contents
Tableau TX1 User Guide Version 2.0 The left source (write blocked) side of TX1. The right destination (read/write) side of TX1. TX1 Kit Contents The TX1 ships in a boxed kit with custom foam that includes the following items:... - Page 13 Optional destination drive bay for up to two 2.5” or TX1-S1 3.5” SATA or SAS drives. The TP6 provides power to the TX1, the optional TX1-S1 Drive Bay, and most common combinations of source and destination drives. The TP6 uses a...
-
Page 14: Navigating The Tx1
Description Quick Reference Guide. Do not discard the TX1 foam packaging, as it is designed to fit several industry-standard hard sided carrying cases (for example, the Pelican 1500). If you received the TX1 kit in the cardboard box shipped by Tableau, you can reuse the stacking foam inserts in your own hard sided case. - Page 15 Home screen. Across the top navigation bar there are buttons to quickly access the Side Navigation menu, the Home screen, and view the current time. The TX1 model name in the top navigation bar links to the Home screen.
-
Page 16: Side Navigation Menu
When TX1 is first powered on, the Jobs counter is at 0. Once jobs are underway, each active or queued job will increment the counter. The... -
Page 17: Job Status
CHAPTER 2 Overview A fourth section, Media Utilities, displays media utility operations and only appears when a media utility operation is active. Media utility operations will move to the Recent section when they are complete. Media utilities cannot be queued like forensic jobs. Here are two examples of the Jobs tab in action:... - Page 18 Tableau TX1 User Guide Version 2.0 Note: The solid orange triangle in the upper right corner of the drive tiles indicates that the drive is currently being used as part of an active job. This is shown regardless of the location of the drive tile and makes it easy to spot drives that are in use.
-
Page 19: Quick Reference Guide
Job Status screen for that completed job is shown, including a link to the job log. Quick Reference Guide The TX1 ships with a Quick Reference card that illustrates the drive connections, Status LED, power button, cable recommendations, and tips for getting started. Keep this card with the TX1 as you familiarize yourself with its operation. -
Page 20: Interpreting Audio Feedback
Interpreting Audio Feedback The TX1 plays one of two sounds that indicate status at the end of a job. A chime sound plays for a successful job, and a buzzer sound plays for a failed job. You can change the volume of... -
Page 21: Usb Keyboard Support
CHAPTER 2 Overview USB Keyboard Support You can plug a standard USB keyboard into either USB port on the front of the TX1. Some users find it more convenient to use an external keyboard to enter data instead of using the virtual touchscreen keyboard. - Page 22 Tableau TX1 User Guide Version 2.0...
-
Page 23: Chapter 3 Configuring The Tx1
CHAPTER 3 CONFIGURING THE TX1 Startup Sequence Configuring the TX1 Network Settings Default Settings Connecting Drives... -
Page 24: Startup Sequence
Tableau TX1 User Guide Version 2.0 Startup Sequence When turned on, the TX1 displays an initialization screen during the boot sequence. Once booted, the TX1 displays the Home screen and then sequentially powers on connected drives. Configuring the TX1 The TX1 default settings are defined using sensible, best-practice values. There are many options and settings you can configure and customize to your specific needs. - Page 25 CHAPTER 3 Configuring the TX1 The System Settings page provides selections to configure basic TX1 system options including Date & time, 24-hour clock, Timezone, Language, brightness, Audio notification volume, and notifications. You can also perform a factory reset. Tap the toggle buttons to enable or disable a setting such as the 24-hour clock. To define a setting value, such as the LCD brightness, tap and hold the slider selector, then slide to the desired value.
-
Page 26: Network Settings
Tableau TX1 User Guide Version 2.0 Network Settings Network Settings to display the Network Settings page. -
Page 27: Default Settings
TX1 network options for the IP address and MTU (Maximum transmission unit) value. The default MTU value is 1500, but if TX1 is attached to a network that supports jumbo frames, change the MTU value to 9000 to enable much faster network transfer speeds. - Page 28 Note: Certain combinations of image directory and image name settings can result in filename duplication on the destination filesystem for a given job. The TX1 checks for this situation at job startup and, if it detects a file name conflict, it automatically appends sequential numbers to the subsequent filenames, as shown in the file browse example below.
-
Page 29: Updating Tx1 Firmware
Updating TX1 Firmware The TX1 firmware is on an SD card located on the back of the unit. When a TX1 firmware update becomes available on the Tableau website, you can use the Tableau Firmware Update (TFU) utility to update the SD card. -
Page 30: Connecting Drives
The TX1 operates as a standalone device or with the TX1-S1 drive bay. To connect the drive bay, ensure the TX1 is powered off, align the TX1 into place on top of the drive bay, and slide the TX1 back to lock it into place. -
Page 31: Destination Drives
Accessory Drives Connect up to two USB drives to the Accessory USB 3.0 ports on the front of the TX1. These drives are mostly used for saving stored log files. Note: The USB accessory ports on the TX1 are NOT write-protected! Evidence media should never be connected to these ports. - Page 32 Tableau TX1 User Guide Version 2.0...
-
Page 33: Chapter 4 Using The Tx1
CHAPTER 4 USING THE TX1 Overview Navigating TX1 Features and Options Preconditions Checking Duplicating Hashing Logical Imaging Verifying Browsing Restore Viewing Sources and Destinations Media Utilities Logs Module... -
Page 34: Overview
Tableau TX1 User Guide Version 2.0 Overview This chapter covers detailed procedures and information for using the TX1. Navigating TX1 Features and Options The outline below maps the TX1 navigation and feature structure. Home Screen Duplicate Logical Verify Hash Browse... -
Page 35: Preconditions Checking
A clone, also known as a disk-to-disk duplication, makes an exact copy of the source drive to the destination drive(s). If a destination drive is not blank, the TX1 displays a yellow warning to indicate that a clone will overwrite the contents of the destination drive. This reduces the risk of overwriting valuable data. -
Page 36: Performing A Duplication
Tableau TX1 User Guide Version 2.0 When imaging, the destination media must first be formatted with a recognized filesystem. Format destination drives by selecting the Format media utility in the Drive Details screen. The Drive Details screen can be accessed through the Destinations button on the Home screen or through the Select Destinations screen during setup of a duplication job. - Page 37 CHAPTER 4 Using the TX1 The job setup screen is organized in a natural workflow from top to bottom, but many steps and settings can be accessed in any order. The default values display for each step and setting. Tap on the step number or heading to expand the section and view or change the settings.
- Page 38 Tableau TX1 User Guide Version 2.0 4. To change or add a source drive, tap the Source heading. From the source list modal that displays, select a drive from the list. A green check confirms your selection. Close the modal by tapping the in the upper right corner or by tapping outside of the modal.
- Page 39 CHAPTER 4 Using the TX1 The TX1 also allows “shelving” of a DCO for source drives. When enabled for a given source drive, the Shelve DCO feature will, after the Duplication job is started, disable the DCO, complete the acquisition of the entire source drive, and then attempt to reapply the original DCO setting back to the source drive.
- Page 40 Tableau TX1 User Guide Version 2.0 Note: The Shelve DCO feature is only available for SATA drives that support DCO. 5. To change or add the destination drive(s) tap the Destination(s) heading. From the destination list modal that displays, select one or more drives from the list.
- Page 41 CHAPTER 4 Using the TX1 For each selected destination drive, a Job type panel expands below the Drive tile. Select the Clone radio button to clone to the destination, or select the Image radio button to image to the destination.
- Page 42 Tableau TX1 User Guide Version 2.0 dots at the right side of the drive tile) or from the Destinations button on the Home screen. To make a network share visible in the Source or Destination selection lists in a job setup screen, first add and mount the share from the Sources or Destinations buttons on the Main screen.
- Page 43 CHAPTER 4 Using the TX1 Error retry defines the number of times TX1 will attempt to read sectors with errors before skipping the sector. Be careful when selecting a value of 10 or 100 as it will drastically increase the duplication time when imaging source drives with errors.
- Page 44 Tableau TX1 User Guide Version 2.0 Files Created During Disk-to-File Duplication When performing an image, the TX1 creates files (sometimes called segments or chunks) on the destination drive that contain the data copied from the drive. Segments are written to the destination drive according to the following convention:...
-
Page 45: Duplication Over A Network
Windows or Linux server configured with an iSCSI target or CIFS share. The TX1 supports using an iSCSI target as a source or destination and a CIFS share as a destination. The TX1 must be connected to a network before using either iSCSI or CIFS settings. - Page 46 Tableau TX1 User Guide Version 2.0 2. Enter the IP address of the iSCSI server by tapping on the Address field. If needed, change the default iSCSI port from 3260 to the port used by the iSCSI server. If needed, enter a...
- Page 47 CHAPTER 4 Using the TX1 3. Tap the Discover button to discover available iSCSI targets. If the discovery is successful, a list of available iSCSI targets will appear below. Tap an iSCSI target and the iSCSI Login screen displays.
- Page 48 Tableau TX1 User Guide Version 2.0 4. Enter an optional Nickname for this iSCSI target. If needed, enter a Login username and password. Tap the Login button to login and mount the iSCSI target. If the login is suc- cessful, you can optionally save the target as a Bookmark for convenient future access.
- Page 49 CHAPTER 4 Using the TX1 5. The target should now be listed in the Sources Destinations list, depending on where you chose to mount it. The target can now be accessed like a normal drive for Duplication as a source (if mounted as a source), a Duplication as a destination (if mounted as a des-...
- Page 50 Tableau TX1 User Guide Version 2.0 Adding a CIFS Share 1. The TX1 currently supports a CIFS share as a destination. To add a CIFS share as a des- tination drive, tap the Destinations button at the bottom of the Home screen. Tap the orange plus button in the upper right corner of the drive list and tap Mount CIFS Share to display the Mount CIFS screen.
- Page 51 CHAPTER 4 Using the TX1 2. Enter an optional nickname for this CIFS share. Enter the IP address (or server name) and share name of the CIFS share. If needed, enter a username and password. Select the SMB (Server Message Block) version of the destination CIFS share server (1.0, 2.0, 2.1, or 3.0).
- Page 52 Tableau TX1 User Guide Version 2.0 3. Tap the Mount button to login and mount the CIFS share. If the mount is successful, you can optionally save the share as a bookmark for convenient future access. To save a share as a bookmark, enable or disable the desired username and password values to be...
- Page 53 CHAPTER 4 Using the TX1 4. The CIFS share should now be listed in the Destinations list and can be selected as a des- tination for an Image Duplication and/or a verify operation.
-
Page 54: Hashing
Tableau TX1 User Guide Version 2.0 A CIFS share takes the form of a filesystem so you cannot perform a Clone Duplication to a CIFS share. The Wipe, Blank Check Format options are also not available when a CIFS share is selected as a destination. - Page 55 CHAPTER 4 Using the TX1 To create a hash of a source drive: 1. From the Home screen, tap the Hash button. 2. Enter Job notes, select a Source drive, and review Settings and change if desired.
- Page 56 Tableau TX1 User Guide Version 2.0 3. Tap the Start Hash button at the bottom of the screen.
-
Page 57: Logical Imaging
TX1 logical imaging understands the structure of the recognized filesystem and acquires the desired source file data and/or metadata. Logical imaging operations on the TX1 can be targeted, limiting which files are acquired to only a subset of the source filesystem. The TX1 allows both direct selection of contents to acquire, as well as rule-based searches to target specific files based on file type or other criteria. -
Page 58: Performing A Logical Image Acquisition
As a result, the TX1 only warns the user that a destination may be too small when the used space of the source filesystem is larger than the available space on the destination, but the job can still be started. - Page 59 CHAPTER 4 Using the TX1 The job setup screen is organized in a natural workflow from top to bottom, but many steps and settings can be accessed in any order. The default values display for each step and setting. Tap on the step number or heading to expand the section and view or change the settings.
- Page 60 TX1. Note that network shares can also be used as logical image job sources. To make a network share visible in the Select a source list, tap...
- Page 61 CHAPTER 4 Using the TX1 Note: Within any screen displaying a list of drives, you can tap the options icon (three vertical dots) located on the right side of the drive tile to see more drive detail and access any available media utilities.
- Page 62 Tableau TX1 User Guide Version 2.0 As shown in the screenshot above, the default setting of All files and folders is initially selected. If no source file or folder down-selection is desired, simply exit this step by closing the Files to...
- Page 63 CHAPTER 4 Using the TX1 Regardless of whether you are including items in an empty dataset or excluding items from a full dataset, the same setup style is used to limit what is acquired, as covered in detail below. 6. Select files and folders to include/exclude.
- Page 64 Tableau TX1 User Guide Version 2.0 Individual files and/or folders can be manually selected simply by clicking on the orange box to the left of the desired item. In the example above, we have chosen to include /Default , and...
- Page 65 CHAPTER 4 Using the TX1 Include/exclude files that match the searches below From the main Files to Acquire window, selecting the Include files that match the searches below item results in the opening of a search entry screen, as shown below.
- Page 66 Tableau TX1 User Guide Version 2.0 Each of the search parameter fields makes use of drop-down selection boxes to help guide the setup of each parameter. The following sections cover each of the search parameter fields. File Type The File type search parameter restricts the search to apply only to files that match a list of file extensions.
- Page 67 CHAPTER 4 Using the TX1 Path The Path search parameter restricts the search to apply only to files with a specific, user- defined string in either the filename or directory path. A field for entering the desired search string appears after selecting one of the options. The path search parameter options are as follows: Filename Contains –...
- Page 68 Dates are entered by typing them into the text boxes in YYY-MM-DD format. Dates will match the rule if any of the TX1 supported timestamps for that filesystem match the File Date setting. Note: Some filesystem types, particularly FAT32, do not support time zone independent timestamps.
- Page 69 CHAPTER 4 Using the TX1 Metadata file in the common csv (comma separated values) format, which contains all the available metadata for every acquired file and folder. Optionally, the metadata output file can be configured to contain all the metadata for all the files/- folders on the source drive (whether the actual files/folders were acquired or not).
- Page 70 Tableau TX1 User Guide Version 2.0 Destination drives with no recognized filesystems are grayed out, with a warning message stating no filesystem is available. Such a drive can be formatted through the media utilities available on the drive details screen, which can be accessed by tapping the additional options...
- Page 71 CHAPTER 4 Using the TX1 Select the desired hash type for the logical image job - MD5 and/or SHA-1. Note that hash values for source files will be calculated based on the chosen hash settings, even if no Lx01 outputs are requested. In that case, the file data is still read to allow for hash calculation, and the file-based hash values are stored in the metadata output file.
- Page 72 Tableau TX1 User Guide Version 2.0 Logical Image Job Status Once a logical image job has been started, the Job Status screen will automatically display, as shown below.
- Page 73 CHAPTER 4 Using the TX1 This status screen is similar to other TX1 job types, with the following notable differences: While the operation is scanning for more files to acquire, the progress bar displays as an indeterminate bar (throbbing/pulsing bar with no data rate displayed). The TX1 does not know how many bytes it needs to acquire until the scan is complete.
- Page 74 Tableau TX1 User Guide Version 2.0 Files Created During Logical Imaging When performing a logical image on the TX1, multiple different files may be output to each destination depending on the job configuration, as follows: contains the forensic log of the logical imaging operation.
-
Page 75: File Extensions
In general, Basic search mode is recommended unless there is a compelling reason to switch to Advanced Logical Imaging Setup mode to target specific source evidence. File Extensions During logical imaging, Tableau TX1 can search for file types with any of the following extensions. - Page 76 Tableau TX1 User Guide Version 2.0 File Type File Extension "7z", "7zip", "zom", "apk", "xxe", "uug", "mim", "tz", "arj", "zsm", "zze", "boo", "bkp", "bak", "sav", "bac", "ful", "bag", "zso", "bplist", "bhx", "mhk", "bz", "bz2", "ckit", "boz", "ish", "rar", "r01", "jar", "cru", "cif", "gnu", "gz", "tgz", "gzip", "ha", Archives "hap", "lzs", "lha", "arc", "lzh", "pak", "hqx", "image",...
- Page 77 CHAPTER 4 Using the TX1 File Type File Extension "cch", "cfl", "cht", "ch3", "aft", "abc", "xlc", "gra", "opx", "adt", "smf", "pfc", "att", "bfx", "brk", "ezf", "can", "cci", "ccitt", "cpf", "cfp", "ef3", "fcx", "ftf", "f96", "dxn", "gam", "cg3", "fax", "tbf", "jet", "bk", "kfx", "awd", "oaz", "prd", "tef", "sci", "tri", "wpf", "q", "cvp", "mif", "zvd", "key", "sld",...
- Page 78 Tableau TX1 User Guide Version 2.0 File Type File Extension "bnk", "rol", "amr", "amf", "aif", "aiff", "avr", "cda", "aifc", "cdm", "idf", "aac", "pcm", "ra", "ram", "wav", "wma", "zad", "asf", "awm", "awa", "divx", "vob", "f4p", "f4v", "swf", "dvr- ms", "mp4", "asr", "3g2", "wm", "wmv", "filmstrip", "flc", "m4r", "m4p", "qtm", "ic1", "ic2", "ic3", "snd", "avi", "voc",...
-
Page 79: Folders
Folders "/Applications/", "/bin/", "/dev/", "/etc/", "/sbin/", "/usr/", "/boot/", "/lib/", "/proc/", "/sys/", "/unix/" Source File Metadata Logical imaging with the Tableau TX1 includes source file metadata in the CSV output file. Column Content Contains the full, filesystem-relative path for this entry. -
Page 80: Verifying
Tableau TX1 User Guide Version 2.0 Column Content The IS0 8601 UTC date/time string for the written date of Written Date this entry. This field is empty if the written date is unavailable. The MD5 Hash of the entry. This field is empty for directories. - Page 81 To verify an image file on a destination drive: 1. From the Home screen, tap the Verify button. 2. Enter Job notes and select a Destination drive. 3. Select a Packed log file. Browse the destination and locate an existing TX1 packed log file.
- Page 82 Tableau TX1 User Guide Version 2.0 Note: The packed log files will always appear at the top of the file list in a given source folder when browsing. This provides easy access to these types of files in situations where there are many segment files.
- Page 83 CHAPTER 4 Using the TX1 The verification process begins. A job status modal displays the verification status.
-
Page 84: Browsing
Tableau TX1 User Guide Version 2.0 5. To cancel the Verify operation, tap the Cancel button from the Jobs summary screen. When the Verify operation is complete, the results display on a final Job Status screen. The log for the completed job can be easily viewed by tapping on the View Log link on the right side of the top status bar or from the Side Navigation Menu. -
Page 85: Restore
Tableau TX1 image file. The uses for this feature are varied, but include the ability to use a restored drive as a system boot disk and to simply create an archival copy of the evidence in its original format for future case reference. - Page 86 Tableau TX1 User Guide Version 2.0 Note: The packed log files will always appear at the top of the file list in a given source folder when browsing. This provides easy access to these types of files in situations where there are many segment files.
- Page 87 CHAPTER 4 Using the TX1 4. Select a Destination drive and, if desired, enable the Trim feature which will apply a DCO on the destination to make it appear exactly as large as the original source drive. 5. If desired, enable read-back verification. This will read the entire destination drive back after the Restore job is complete, calculate a read-back hash value, and compare that value with the original image file acquisition hash.
- Page 88 Tableau TX1 User Guide Version 2.0 6. Tap the Start Restore button at the bottom of the screen. A job status modal displays.
-
Page 89: Viewing Sources And Destinations
CHAPTER 4 Using the TX1 To cancel the Restore operation, tap the Cancel button from the Jobs summary screen. When the Restore operation completes, the results display on-screen. The log for the completed job can be viewed by tapping on the View Log link on the right side of the top Job Status bar or through the Side Navigation menu. - Page 90 Tableau TX1 User Guide Version 2.0 Tap a drive row to view the drive details screen and to access Media Utilities, or tap the options icon (three vertical dots) located on the right side of the drive row to view more options.
-
Page 91: Encryption Detection
USB Accessory drive is connected and detected by the TX1. Encryption Detection The TX1 will automatically detect certain types of whole disk encryption present on attached drives. This detection is possible for encryption types that have known header signatures. The... - Page 92 Tableau TX1 User Guide Version 2.0 BitLocker BitLocker To Go FileVault 2 Symantec PGP Disk LUKS BestCrypt An encrypted drive informational message is provided in the drive tile summary view, as seen in the Sources and Destinations drive lists at the bottom of the main screen or when adding sources or destinations during job setup.
-
Page 93: Media Utilities
CHAPTER 4 Using the TX1 Media Utilities Accessible from the Sources, USB Accessories, or Destinations buttons at the bottom of the Home screen, the TX1 provides the following media utilities: Wipe (destination/accessory only) Format (destination/accessory only) Encryption HPA/DCO Disable (ATA drives only) - Page 94 Secure Erasing Secure Erase completely deletes all data on a solid-state drive (SSD). This operation usually takes less than ten seconds. The Secure Erase option displays in all TX1 settings but works only on SSDs that support it. The TX1 does not support Secure Erase on hard disk drives (HDD). Many manufacturers of hard disk drives (HDD) claim they support Secure Erase but not all implement this feature properly.
-
Page 95: Formatting Destination And Accessory Drives
To perform an image duplication to or save logs to a drive, you must format the destination or accessory drive with a file system that is recognizable by the TX1. The TX1 supports the following destination drive file system formats: ExFAT, NTFS, EXT4, FAT32, or HFS+. - Page 96 Guidance Software is not able to recover lost passwords for TX1 encrypted media, so take appropriate steps to ensure you never lose your password. To remove encryption from a drive, connect the drive to the TX1 as a destination or accessory and wipe the drive.
-
Page 97: Disabling Hpa And Dco
HPA/DCO is highly recommended. The TX1 never makes automatic changes to HPA and DCO on a destination drive. The TX1 is designed to give the forensic practitioner complete control over the destination drive. If you choose to restrict the destination drive capacity using HPA or DCO, the TX1 will not override that decision. - Page 98 Tableau TX1 User Guide Version 2.0...
- Page 99 CHAPTER 4 Using the TX1 IDE drives with a DCO require special considerations with TX1. This is due to the fact that IDE drives are connected via the PCIe interface using a Tableau IDE Adapter (TDA7-5). DCO setting changes require power-cycling the drive which, for SATA drives, is done directly and automatically by the TX1.
-
Page 100: Blank Checking
DCO is disabled, which would terminate any other jobs in progress. 4. After the TX1 has booted to the Home screen and the IDE drive is detected, navigate to the Sources drive list and tap on the IDE drive tile to open its drive details screen. - Page 101 CHAPTER 4 Using the TX1 The following table provides Blank Check option details: Option Description Quickly checks to determine if the drive appears to be blank by reading in Fast and checking the sectors in the Master Boot Record, the Primary GPT, and the Secondary GPT.
-
Page 102: Browse Filesystem
When in the Browse window for a given drive/share, the header row provides a brief description of the selected drive (TX1 port name) and an X for closing the window. The second row of information includes drive utilization information and a pulldown for selecting the desired filesystem (if the media being browsed has more than one). -
Page 103: Export
During the export process, the TX1 will assign a unique IQN (iSCSI Qualified Name) to each exported drive. This IQN is used by the remote initiator to gain access to the exported media. The following is an example of an IQN produced by the TX1 from exportation of a locally connected SATA drive: iqn.2015-10.com.guid:sn-000ecc5801000c.sata.1... - Page 104 10.com.guid: provided by the iSCSI naming authority). The serial number of the specific TX1 in use, which serves as a unique 000ecc5801000c. identifier within the domain. TX1 specific suffix. The default is the protocol of the drive being exported with an incrementing number at the end.
-
Page 105: Eject
TX1. For destination and accessory drives in particular (since they are read/write), failure to eject a drive prior to removal from the system could corrupt the drive filesystem which could result in loss of previously captured evidence/data. - Page 106 Tableau TX1 User Guide Version 2.0 The Log List displays a summary of each log. The first part of the log summary row specifies the type of operation, the second part displays the date and time the log was created, and the last part displays the result of the logged operation.
-
Page 107: Sample Log
To delete all of the logs stored on this TX1, tap the Delete all Logs button on the bottom of the Log List screen. Sample Log The TX1 generates a detailed log for all forensic jobs and most media utility operations. Here is a sample of a successful duplication. - Page 108 Tableau TX1 User Guide Version 2.0...
- Page 109 CHAPTER 4 Using the TX1 If the TX1 detects any bad sectors on the source drive, it adds a section at the end of the job log. This additional section lists the sector address and sector length of each unreadable region of the source drive.
- Page 110 Tableau TX1 User Guide Version 2.0...
-
Page 111: Chapter 5 Adapters
CHAPTER 5 ADAPTERS Overview IDE Adapter PCIe Adapters Apple Target Disk Mode Acquisition Adapters... - Page 112 The IDE Adapter (TDA7-5) enables the TX1 to acquire IDE drives and connects to the TX1 PCIe source interface. The IDE adapter kit (sold as an add-on to the TX1 kit) includes the IDE power and signal cables used to connect the IDE drive to the adapter. The PCIe cable used to connect the adapter to the TX1 is included with the TX1 kit.
-
Page 113: Pcie Adapters
Visit the Tableau product website to learn more about available Tableau PCIe adapters. Apple Target Disk Mode Acquisition Adapters The TX1 is designed to acquire Apple computers that support Target Disk Mode. This can be done via three different Apple computer connection interfaces: USB-C, FireWire, and Thunderbolt 2. - Page 114 USB 3.0 or USB 3.1 Gen 1 speeds (5 Gbps) will allow connection between the Mac computer and the TX1 USB source port. These adapter cables are widely available from a variety of commercial retailers, including Apple. A USB-C to USB-A adapter cable is shown below.
- Page 115 A Thunderbolt 2 to FireWire 800 (9-pin) adapter is used along with the same FireWire 800 (9-pin to 9-pin) cable shown above to connect between the Thunderbolt 2 port on the Macintosh and the TX1 FireWire 800 port. A Thunderbolt 2 to FireWire 800 adapter is shown below.
- Page 116 Tableau TX1 User Guide Version 2.0...
-
Page 117: Chapter 6 Specifications, Troubleshooting, And Support
CHAPTER 6 SPECIFICATIONS, TROUBLESHOOTING, AND SUPPORT Specifications Troubleshooting Common Problems Support... -
Page 118: Specifications
Two USB 3.1 Gen 1 (5 Gbps) Standard-A Connectors SD Card One SD Card Connector for Device Firmware DC Input One Barrel Connector for use with Tableau TP6 Power Supply User Interface 7.0 in. graphic LCD (600 x 1024 Resolution) with capacitive touch- screen... - Page 119 CHAPTER 6 Specifications, Troubleshooting, and Support Indicators Power Indicator White LED indicates TX1 is powered on Status Indicator Multi-color LED indicates TX1 job status Speaker Audio tones indicate job completion and errors Physical / Environmental 55 Watts typical operating power (not including external drive...
-
Page 120: Troubleshooting Common Problems
If the voltage is below the minimum specification, the TX1 displays a warning. If you are having difficulty turning the TX1 on, check the status of the DC power LED on the TP6 power supply connector to ensure that it is on, which indicates the TX1 is connected to power. -
Page 121: Support
CHAPTER 6 Specifications, Troubleshooting, and Support Problem Corrective Action Due to the nature of the PCIe bus not supporting hot-plugging, the TX1 can only PCIe SSD detect drives connected to the source PCIe port during start-up. Therefore, is not connect the PCIe SSD to the appropriate Tableau PCIe adapter and cable, and detected connect the PCIe adapter and cable to the TX1, while the TX1 power is off. - Page 122 Tableau TX1 User Guide Version 2.0...
-
Page 123: Index
File Duplication 44 Format 95 Cloning 35 Formatting Accessory Drives 95 Configuring the TD3 24 Formatting Destination and Configuring the TX1 23 Accessory Drives 95 Connecting Drives 30 Formatting Destination Drives 95 Default Settings 27 Disabling HPA and DCO 97... - Page 124 Logs Module 105 Reading the LEDs 19 Media Utilities 93 Sample Log 107 Secure Erase 94 Secure Erasing 94 Navigating the TX1 14 SMART Data 102 Navigating TX1 Features and Startup Sequence 24 Options 34 System Settings 24 Network Settings 26...
- Page 125 TX1 Kit Contents 12 Updating TX1 Firmware 29 USB Keyboard Support 21 Using the TD3 33 Using the TDA7-5 112 Verify 80 Verifying 80 Viewing Sources and Destinations 89 Wiping Accessory Drives 93 Wiping Destination Drives 93 Wiping Destination or Accessory...
Need help?
Do you have a question about the TX1 and is the answer not in the manual?
Questions and answers