Table of Contents
Advertisement
Advertisement
Table of Contents

Related Manuals for aero-naut LT 200 Flex


Summary of Contents for aero-naut LT 200 Flex
- Page 1 aero naut Order No. 1328/00...
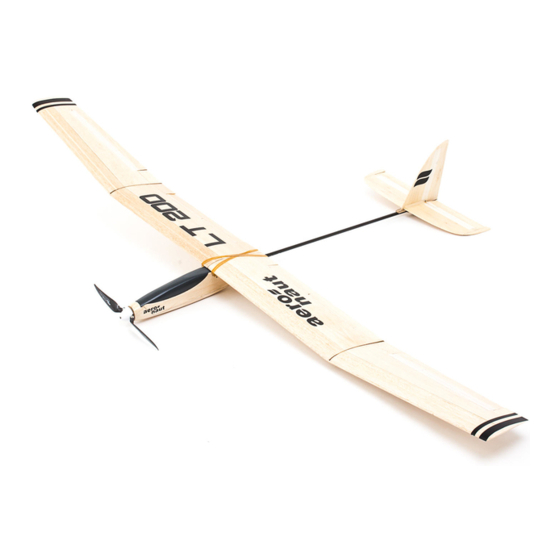
- Page 2 LT 200 Flex Tipps & Hinweise is a sailplane of conventional wood construction and designed for light-wind conditions. The fuselage is built-up in a layer technique with laser-cut wood parts, the fully sheeted wing is of conventional design with ribs and spars. Building materials are mostly balsa and light-ply to achieve Attention! Make sure you follow a light yet strong structure for maximum flying performance.
- Page 3 Inner Wing Panel Place wing jig for inner wing panel on a flat surface and secure with tape. Note that circular opening in wing jig is located beneath root rib. Insert main spar F1 and ribs F2 to F4 (3 mm poplar) into jig and glue together. Insert and glue balsa ribs F5 to F8 (2 mm balsa) as well as rib F9 (5 mm balsa) into main spar.
- Page 4 Carefully smooth upper contour of spars and ribs with sanding block. Align upper wing sheeting panel with tabs on main spar and place sheeting panel on spars and ribs. Check for correct fit, then glue in place and secure with pins. Attention: Make sure glue has completely dried before you proceed with next step! Carefully remove wing panel from jig and turn upside down.
- Page 5 F22 L/R Glue together lower wing sheeting F21, F22 (L/R) and F23 and secure with tape until dry. Optional: If the model is to be equipped with spoilers, insert spoiler servo lead now and secure in servo bay with tape. If the model is to be equipped with ailerons, F23 L/R route aileron servo lead now through cable...
- Page 6 Optional: Installing Spoilers For spoiler control use servos with a maximum thickness of 12 mm. Glue together servo mounts from up to 4 pieces F26 (depending on thickness of servo). Align servo with servo arm centred in slot of servo tray F25, hold in place and glue servo mounts to tray with a drop of white glue or medium CA.
- Page 7 Glue together upper wing sheeting F42, F43 (L/R) and secure with tape F42 L/R until dry. F43 L/R Carefully smooth upper contour of spars and ribs with sanding block. Align upper wing sheeting panel with tabs on main spar and place sheeting panel on spars and ribs. Check for correct fit, then glue in place and secure with pins.
- Page 8 F47 L/R Glue together lower wing sheeting F47, F48 (L/R) and secure with tape until dry. Optional: If the model is to be equipped with ailerons, insert aileron servo lead now and secure in servo bay F48 L/R with tape. Insert supports H3 to H10 into jig at rib positions.
- Page 9 Install servo tray F50 in wing and drill servo frame F44 with 1.5 mm. When wing is completed, attach servo tray to wing with screws F52. Glue wing tip F54 to end rib and secure with pins. Carefully sand completed outer wing panel and sand contour of wing tip flush with upper and lower sheeting.
- Page 10 Completing the Wing Note: Wing panels are shown complete with control surfaces. For version with aileron control connect servo leads of outer wing panel to servo leads of inner wing panel (solder, with or without connectors). Use tape to protect sheeting material against glue near contact surfaces of inner and outer wing panels, then glue together wing panels with 5- minute-epoxy and secure with pins.
- Page 11 Glue parts on top of each other in the order shown. Make sure to position parts in the nose section exactly on motor mount template S1; at the rear end of the fuselage R1, R4, R6, R8 and R10 are held in position by snake outers S2. R5, R7 and R9 are positoned by template S1 as well, top side is flush.
- Page 12 Glue reinforcement R18 to the inside of the canopy opening as shown. It will protect the front edge of the canopy opening R16/R17 against wear. Slide snake outer S2 through front wing dowel bore. Do not glue! Place centre section of canopy R15 in fuselage (slot at rear end resting on S2) and secure at front end with pins.
- Page 13 Secure tailpnae R23 (3 mm balsa) to building bord with pinsand glue in place tips R24. Glue together elevators R25/R26 and connector R27 (3×3 mm spruce) and secure with pins until dry. Glue reinforcement R28 (1 mm birch) on top. Make sure that slots for control horn in R25 and R28 match precisely.
- Page 14 Glue together parts R34 (3×) and R35 (2×) as shown to make up the tailpane support. Wrap 180 grit sandpaper around fuselage carbon tube R36 and sand tailplane support to fit carbon tube. Sand until birch ply side panels touch the carbon tube. Glue in place tailpane support to underside of tailplane flush with rear edge.
- Page 15 Slide wing dowels R39 into bores in fuselage and support fuselage in templates S4. Slide carbon tube into fuselage and make sure that tube protrudes 30 mm into fuselage (see also step 50). Put together template S5 and support tail unit and carbon tube as shown. Check alignment of carbon tube, then glue into fuselage with 5 minute epoxy.
- Page 16 Adjust centre of gravity by moving the battery back and forth (secure with hook and loop tape) or by adding the required amount of ballast. The exact centre of gravity location can be determined after the first couple of flights. Have fun with your LT 200 Flex! 12 mm...
- Page 17 Use these instructions for a successful maiden flight Maiden flight Choose a calm day with little or no wind. Hand-start the model into the wind with moderate thrust and a slight nose-down attitude. A small slope or an unobstructed meadow are ideal flying fields. If model does not execute a flat glide, please follwow instructions in table.
- Page 18 Stückliste P q0 Description Pieces Material Sheet Type Dimensons Dsqcj_ec balsa laser-cut 5 mm fuselage intermediate layer balsa laser-cut 5 mm fuse. intermediate layer, front balsa laser-cut 5 mm fuselage intermediate layer balsa laser-cut 5 mm fuselage intermediate layer balsa laser-cut 5 mm fuse.
- Page 19 P q0 Description Pieces Material Sheet Type Dimensions balsa 14, 15 laser-cut 1.5 mm upper wing sheeting balsa 16, 17 laser-cut 1.5 mm upper wing sheeting brass cut part Ø 7/6×125 joiner sleeve brass cut part ÇCĊ ĎD joiner sleeve birch ply laser-cut 1.5 mm...
- Page 20 Lilienthal 40 RC wingspan 1,190 mm free flying model with RC option laser cut wood kit designed with beginners and model clubs in mind aero naut aero-naut Modellbau find many more at www.aero-naut.de Stuttgarter Strasse 18-22 D-72766 Reutlingen www.aero-naut.de...
Need help?
Do you have a question about the LT 200 Flex and is the answer not in the manual?
Questions and answers