
Related Manuals for Sony UY-S100


Summary of Contents for Sony UY-S100
- Page 1 3-206-174-21 (1) Film Scanner Operating Instructions UY-S100 © 2001 Sony Corporation...
- Page 2 Record the serial number in the space provided below. You are cautioned that any changes or modifications not Refer to these numbers whenever you call upon your Sony expressly approved in this manual could void your authority dealer regarding this product.
-
Page 3: Important Safety Instructions
IMPORTANT SAFETY INSTRUCTIONS When using your photographic equipment, basic safety precautions should always be followed, including the following: 1. Read and understand all instructions before using. 2. Close supervision is necessary when any appliance is used by or near children. Do not leave appliance unattended while in use. - Page 4 Halogen lamp (1) SCSI cable clamp (1) Film tray (1) AC power cord (1) Ferrite filter (2) CD-ROM (SCANNER DRIVER UY-S100/S90/S77) (1) Operating Instructions (1) Software licence agreement (1) Warranty booklet (1) Notes • Retain the original carton and packing materials in case you have to transport the unit in the future.
-
Page 5: Table Of Contents
Table of Contents Introduction Features ................6 Location and Function of Parts and Controls ....7 Using the Film Scanner Hooking Up ................ 8 Attaching the supplied SCSI cable clamp ......9 Setting the DIP Switch ............ 10 Installing the Scanner Software........11 Usable Films and Carriers .......... -
Page 6: Features
Features The UY-S100 Film Scanner scans negative film or slides. This manual contains precautions, explanations for installation, connection, information for using the films, and so on. For information about the procedures for scanning films using the Film Scanner, please consult the Software Manual stored in the supplied CD- ROM. -
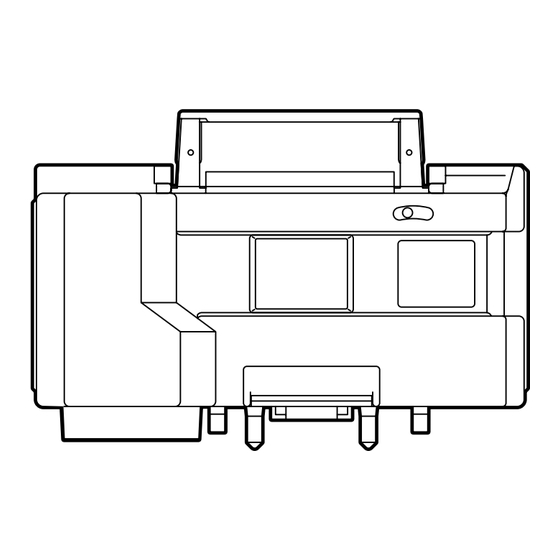
Page 7: Location And Function Of Parts And Controls
MPS-L60 lamp (not supplied). 2 BUSY indicator (green) For replacement of the halogen lamp, contact your Lights while the Film Scanner is in operation. authorized Sony dealer. 3 ALARM indicator (orange) 6 Connector cover Lights when a problem occurs. -
Page 8: Hooking Up
• Connect the AC power cord last. • For details about connections of computer, consult its manual as well. Computer To connect the SCSI cable Ferrite filters (supplied) UY-S100 Film Scanner SCSI cable (not supplied) SCSI cable clamp (supplied) (See page 9.) -
Page 9: Attaching The Supplied Scsi Cable Clamp
Notes on the SCSI cabling • Insert the connector into the socket firmly. • The total length of the SCSI cabling used with a single-host computer should be less than 3 meters (10 feet). • The length of the SCSI cabling used with a single-host computer should be less than 1 meter (3 feet 3 inches). -
Page 10: Setting The Dip Switch
Setting the DIP Switch The DIP switches on the rear panel determine the on/off state of the internal SCSI bus terminator and SCSI device ID number. The DIP switches are preset at the factory to “2” as shown below. TERMINATOR SCSI ID Note Turn off the power before changing the DIP switch setting. -
Page 11: Installing The Scanner Software
Installing the Scanner Software The UY-S100 Film Scanner is supplied with the TWAIN driver and utility program in the CD-ROM. In addition, the instruction manual (Software Manual) for the scanner is also stored in the CD-ROM. When using the scanner for the first time Before starting operation, install the scanner driver porgram and perform required setup. -
Page 12: Usable Films And Carriers
Usable Films and Carriers The carrier is a device which loads film or slides in the correct position. Mount a carrier appropriate to the type of film to be scanned. Film Carrier 135 film Film carrier (supplied) • Sleeve film •... -
Page 13: Mounting/Removing The Carrier
Mounting/Removing the Carrier Mounting and removing procedures are the same for all types of carriers. The illustration below shows the supplied film carrier. Mounting the carrier Insert the carrier down into the scanner and fold down the handle to lock. Then close the carrier cover. -
Page 14: Loading The Film In The Carrier
Loading the Film in the Carrier This section explains the procedures for loading each type of film in the carrier. For the procedures previous to loading the film, consult the instruction manual (Software Manual) stored in the supplied CD-ROM. Loading a sleeve film into the carrier Insert the film from the last frame so that the frame numbers are reversed or the emulsion side facing you. -
Page 15: Loading An Ix240 Cartridge Film Into The Carrier
Loading an IX240 cartridge film into the carrier Notes • Before inserting the cartridge, make sure that the shading lid is closed. • Be sure to use only processed cartridge film whose process indicator tab is removed. If you insert a cartridge with its tab intact or not removed completely, “Not processed film is in this cartridge. -
Page 16: Turning The Power On/Off
Turning the Power ON/OFF Note Turn on the power of the computer after turning on the power of all the other devices. ALARM indicator BUSY indicator Reset switch POWER switch and indicator Turning on the power of the Film Scanner Press the POWER switch for two seconds or more until the green POWER indicator lights. -
Page 17: Precautions
Precautions About the conditions of film ends and remedies In order to avoid feeding errors of the sleeve film in Notes the film carrier, check the curling condition of the film • If film in bad condition is inserted, it could cause and film ends before inserting it into the film carrier. - Page 18 Precautions Sleeve film conditions Remedies Perforations are broken or space between the last If there is not enough If there is enough space perforation and the film end is too small. between the broken space, cut it off perforation and the image diagonally.
-
Page 19: On Safety
They make an ideal container in which to transport the • Do not replace the halogen lamp by yourself when it unit. is burned out. Ask your authorized Sony dealer to When shipping the unit to another location, repack it replace the halogen lamp. -
Page 20: Maintenance
Maintenance Cleaning inside the film carrier There are five rubber rollers (shaded in the figure below) inside the film carrier. Clean away the dust and dirt on the rubber rollers using alcohol. Otherwise, the dust and dirt may slip on to the film and causes film misfeeding. -
Page 21: Troubleshooting
Troubleshooting Before calling service personnel, please check your unit and consult the Software Manual again. If it still doesn’t work properly, ask your dealer. The power does not turn on. • Check the power cord is connected correctly. (page 8) •... -
Page 22: Specifications
Ferrite filter (2) 50/60 Hz CD-ROM (SCANNER DRIVER Input current 1.2 A max. with maximum input UY-S100/S90/S77) (1) load at 100 V AC Operating Instructions (1) 0.6 A max. with maximum input Software licence agreement (1) load at 220 V AC... - Page 24 Sony Corporation...
Need help?
Do you have a question about the UY-S100 and is the answer not in the manual?
Questions and answers