
Related Manuals for Avery Weigh-Tronix FLSC 05


Summary of Contents for Avery Weigh-Tronix FLSC 05
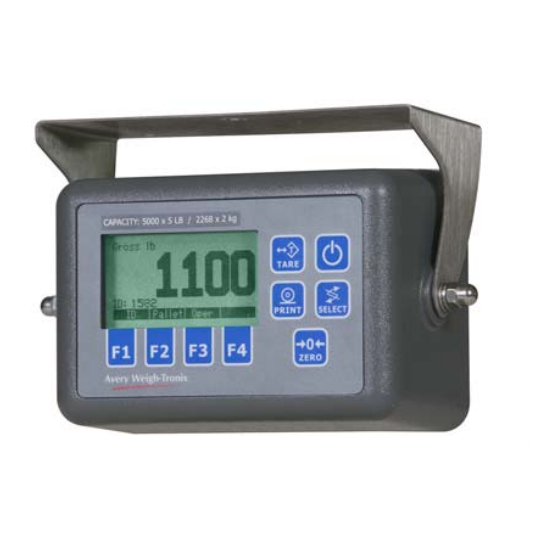
- Page 1 CONFIDENTIAL FLSC 05 Forklift Scale with FLI 225 Instrument Service Manual original instructions AWT 35-500234 Issue AK...
- Page 2 This publication was correct at the time of going to print, however Avery Weigh-Tronix reserves the right to alter without notice the specification, design, price or conditions of supply of any product or service at any time.
-
Page 3: Table Of Contents
Display ..........................27 Analog Option Card ......................27 Digital Carriage ........................ 27 FLJ 100 Status ......................28 View FLJ 100 Counts ....................28 Inputs ..........................29 Seal Switch ........................29 Error Log Viewer ......................29 FLSC 05 w/FLI 225 Instrument Service Manual... - Page 4 Calculating New Lift Capacity ..................80 Class II 5,000 lb Models .................... 81 Resistance Test for FLSC Weigh Bars ................81 Replacing Weigh Bars on the FLSC 05 Carriage ............82 Disassembly of the Carriage ..................82 Reassembly ....................... 85 Tightening Procedure ....................
- Page 5 Carriage Assembly Parts List ..................105 Exploded View of FLI 225 AWT05-500348 ..............106 FLI 225 Instrument Parts List & Options ................ 107 Menu Maps ........................108 FLSC 05 w/FLI 225 Instrument Service Manual...
-
Page 6: Manual Revision History
Added info to section 10.8, SMA Protocol. July 2013 Updated DofC. Added “original instructions” to front page. December 2013 Updated coypyright statement. Added “CONFIDENTIAL” to front page. Added Grounding section to chapter 10. FLSC 05 w/FLI 225 Instrument Service Manual... -
Page 7: Chapter 1 General Information And Warnings
ELECTROCUTION, ARC BURNS, EXPLOSIONS OR OTHER HAZARDS THAT MAY CAUSE INJURY OR DEATH. WARNING! This is a Warning symbol. Warnings mean that failure to follow specific practices and procedures may have major consequences such as injury or death. FLSC 05 w/FLI 225 Instrument Service Manual... -
Page 8: Installation
Wipe down the outside of standard products Attempt to clean the inside of the machine with a clean cloth, moistened with water and Use harsh abrasives, solvents, scouring cleaners or a small amount of mild detergent alkaline cleaning solutions FLSC 05 w/FLI 225 Instrument Service Manual... -
Page 9: Training
European Countries WARNING: This is a Class A product. In a domestic environment, this product may cause radio interference in which the user may be required to take adequate measures. FLSC 05 w/FLI 225 Instrument Service Manual... - Page 10 FLSC 05 w/FLI 225 Instrument Service Manual...
- Page 11 1 FCC and EMC Declarations of compliance FLSC 05 w/FLI 225 Instrument Service Manual...
-
Page 12: Chapter 2 Introduction
Store (save) transactions for future download, depending on configuration. Access report menu in certain modes. Zero the instrument to compensate for minor weight changes. ZERO Move to the right in data entry mode. FLSC 05 w/FLI 225 Instrument Service Manual... -
Page 13: Data Entry Procedure
Indicates a negative weight. Gross Indicates that the instrument is in gross weight mode. The instrument is in net weight mode. Weight displayed is the net weight. Tare Weight displayed is the tare weight only. FLSC 05 w/FLI 225 Instrument Service Manual... -
Page 14: Flr 100 Remote Display Option
F1 key Not used at present PRINT key Mimics the function of the PRINT key on the FLI 225 instrument ZERO key Mimics the function of the ZERO key on the FLI 225 instrument FLSC 05 w/FLI 225 Instrument Service Manual... -
Page 15: Chapter 3 Overview Of The Menus And Modules
Each successive menu shown in Figure 3.1 accesses more modules. This allows you to control access to more sensitive information by giving personnel only the password they need for their level of clearance. Figure 3.1 Menus and the modules they contain FLSC 05 w/FLI 225 Instrument Service Manual... -
Page 16: Accessing And Exiting The Menus
Press the Esc softkey to return to the previous screen. Press the Esc softkey as necessary to exit to normal operating mode. The instrument saves any changes and reboots into normal operating mode. Each module is described in the following chapters. FLSC 05 w/FLI 225 Instrument Service Manual... -
Page 17: Overview Of The Modules
Inputs (test any inputs connected to the instrument) Seal Switch (check the state of the seal switch) Error Log Viewer (view history of errors) See chapter 7, Diagnostics Manager Module for more information. FLSC 05 w/FLI 225 Instrument Service Manual... -
Page 18: Supervisor Settings
Miscellaneous (Configure various settings such as Inputs, Passwords, Display settings, Time & Date format as well as Reset system, Enable / Disable Keys and perform certain Diagnostics.) See chapter 9, Setup Manager Module for more information. FLSC 05 w/FLI 225 Instrument Service Manual... -
Page 19: Chapter 4 User Settings Module
The time is displayed in real time, 24 hour format. Figure 4.2 Time Menu Scroll in the new time using the Data Entry Procedure on page 13. Press the Enter softkey to save the changes and return to User Settings. FLSC 05 w/FLI 225 Instrument Service Manual... -
Page 20: Date
Press the Enter softkey to accept and save the change. The value is changed and the display returns to User Settings. Press the Esc softkey to exit User Settings. The instrument saves the changes, powers off and restarts in normal operating mode. FLSC 05 w/FLI 225 Instrument Service Manual... -
Page 21: Seal Status
The current status (sealed or unsealed) is displayed. Figure 4.5 Sample Seal Status Screen The default setting is “unsealed”. Press the Esc or Enter softkey to return to the previous module. The display returns to the User Settings screen. FLSC 05 w/FLI 225 Instrument Service Manual... -
Page 22: Chapter 5 About Fli 225 Module
Figure 5.1 Sample Firmware Version (left) and Part Number (right) After displaying this information, the FLI 225 returns to the previous screen. Press the Esc softkey to return to normal operating mode. FLSC 05 w/FLI 225 Instrument Service Manual... -
Page 23: Chapter 6 Audit Trail Viewer Module
Select the record from the Audit Trail Viewer. Press the Enter softkey. The details for that record are displayed. Figure 6.2 Sample Audit Trail Record Press the Enter or Esc softkey to return to the Audit Trail Viewer. FLSC 05 w/FLI 225 Instrument Service Manual... -
Page 24: Print The Audit Trail
Press the Down Arrow softkey as necessary to highlight Audit Trail Counter. Press the Enter softkey. The audit count is displayed. Figure 6.4 Sample Audit Count Press the Esc softkey to exit to normal operating mode. FLSC 05 w/FLI 225 Instrument Service Manual... -
Page 25: Chapter 7 Diagnostics Manager Module
The instrument displays the available communications ports. Figure 7.2 Communications Test Screen Press the Up or Down Arrow softkeys as necessary to highlight the port (Com2, Com3) you need to test. FLSC 05 w/FLI 225 Instrument Service Manual... - Page 26 You will get a message indicating PASS or FAIL for both the loopback and the handshaking test. A failed test for either may indicate a problem with the connection tested. Press the Esc softkey to return to the Diagnostics Manager module. FLSC 05 w/FLI 225 Instrument Service Manual...
-
Page 27: Keypad
Press either the F1 or F4 key to end the test and return to the Diagnostics Manager module. 7.4 Analog Option Card The Analog Option Card test is not available on the FLSC 05 digital system. Refer to the appropriate service manual for the QTLTSC or QTLTS. 7.5 Digital Carriage Selecting Digital Carriage from the Diagnostics Manager lets you view the status of the FLJ 100 digital Jbox and the scaled counts. -
Page 28: Flj 100 Status
When weight is applied to a corner (for example, bottom left), the counts for that cell should increase. When the weight is moved to another corner, the counts for the new location should be similar. FLSC 05 w/FLI 225 Instrument Service Manual... -
Page 29: Inputs
The Error Log Viewer can assist you in diagnosing problems with the FLI 225 instrument or the FLSC 05 system by showing you a list of dates when errors occurred. By default, FLSC communications errors and Drift errors are disabled. See Diagnostics Tools on page 78. - Page 30 FLJ CORNER ERROR Stored corner coefficients do not match between FLI 225 and FLJ 100 or FLW 100 FLJ ANGLE ERROR Stored angle coefficients do not match between FLI 225 and FLJ 100 or FLW 100. FLSC 05 w/FLI 225 Instrument Service Manual...
-
Page 31: Chapter 8 Supervisor Settings Module
Scroll in a value between 0 and the maximum capacity of the scale using the Data Entry Procedure on page 13 as necessary. Press the Enter softkey to accept the entry and return to the Supervisor Settings module. FLSC 05 w/FLI 225 Instrument Service Manual... -
Page 32: Timeouts
Select Shutdown Timeout from the Timeouts screen. Select the value from the available options. Press the Enter softkey to accept the value and return to the Timeouts screen. Press the Esc softkey to return to Supervisor Settings. FLSC 05 w/FLI 225 Instrument Service Manual... -
Page 33: Identification
Use the data entry procedure to scroll in the serial number for the device that is connected to the instrument (such as a printer or scanner). Press the Enter softkey. The information is stored and the instrument returns to the Installation module. FLSC 05 w/FLI 225 Instrument Service Manual... -
Page 34: Chapter 9 Setup Manager Module
Calibrate Select Calibrate to set gravity compensation, set zero, set span, perform corner and angle calibration. See Calibrate the FLSC 05 with FLI 225 on page 36 for details. Scale Select Scale to configure the various components of: Units, Settings, Filter, Motion/AZT, Ranges and System. - Page 35 Access the Setup Manager module as explained on page 34. After completing all changes in the Setup Manager, reseal the instrument as necessary. The steps for sealing the instrument are the same as for unsealing. FLSC 05 w/FLI 225 Instrument Service Manual...
-
Page 36: Calibrate The Flsc 05 With Fli 225
9.1 Calibrate the FLSC 05 with FLI 225 The FLSC is a digital system. This section covers calibration procedures for the FLSC with the FLI 225 instrument. Before beginning any calibration procedure, please make sure you do the following: Determine if calibration is necessary. See page 37. -
Page 37: Determining If Calibration Is Needed (Na)
For complete scale calibration, follow your local weights and measures requirements. 9.1.1 Determining if Calibration is Needed (NA) Calibration of the FLSC 05 with FLI 225 may be required when: The system fails one of the following calibration tests A Weigh Bar is replaced... - Page 38 Calibration Test Method 2 (NA) Calibration Test 2 uses a 500 pound certified test weight to establish if the Avery Weigh-Tronix legal-for-trade forklift scale requires recalibration. The allowable variance in all instances is ±1 pound. Therefore, any weight reading between 499.0 and 500.8 lb is acceptable.
- Page 39 9 Calibrate the FLSC 05 with FLI 225 Place 500 pounds on each of the corners in succession, noting the weight reading for each corner. Figure 9.5 Weight on corners If the system fails this test, perform the Corner calibration as explained on page 48 using a minimum of 500 pounds for the span weight before continuing with step 8.
-
Page 40: Determining If Calibration Is Needed (Eu)
9.1.2 Determining if Calibration is Needed (EU) For systems with EU configuration, calibration of the FLSC 05 with FLI 225 may be required when: The system fails one of the following calibration tests A Weigh Bar is replaced The FLI 225 is replaced... - Page 41 If a Weigh Bar is replaced, perform one of the preceding calibration tests to determine if calibration of the system is required. For information on replacing a Weigh Bar, see Replacing Weigh Bars on the FLSC 05 Carriage on page 82. FLSC 05 w/FLI 225 Instrument Service Manual...
- Page 42 The parameters are saved and the instrument returns to normal operating mode. Press the ZERO key if the weight displayed is not zero. Proceed to one of the calibration tests on pages 38 through 41. FLSC 05 w/FLI 225 Instrument Service Manual...
- Page 43 9 Calibrate the FLSC 05 with FLI 225 After Replacing the FLJ 100 Calibration information is stored in both the junction box (FLJ 100) and the instrument. If the FLJ 100 is replaced, you can retrieve the stored calibration information from the instrument.
-
Page 44: Gravity Compensation
If you know the local gravity factor, continue with Key in Known Gravity Factor. Select Calculate Local g Factor. The instrument prompts you to enter the local latitude. Figure 9.10 Calculate Local Gravity Screen 1 Scroll in the local latitude using the data entry procedure. FLSC 05 w/FLI 225 Instrument Service Manual... - Page 45 9 Calibrate the FLSC 05 with FLI 225 Press the Enter softkey. The instrument prompts you to enter the local altitude. Figure 9.11 Calculate Local Gravity Screen 2 Scroll in the local altitude in feet using the data entry procedure.
-
Page 46: Zero
Using the data entry procedure, scroll in the calibration weight if other than the default. Figure 9.15 Key in Calibration Weight The Cal Weight value (span weight value) is the known weight you will use when prompted to “apply load” during calibration. FLSC 05 w/FLI 225 Instrument Service Manual... -
Page 47: Flsc Calibration
9 Calibrate the FLSC 05 with FLI 225 Apply the correct load to the scale. The load must be equal to the value entered in on step 2. Figure 9.16 Span Weight Applied After all the weight is loaded and the scale has stabilized, press the Enter softkey. - Page 48 Pt 1: Right Rear Select Set/View Corner Points from the Corner Calibration menu. The Set/View Corner Points screen is displayed with Pt 1: Right Rear highlighted. Figure 9.20 Set/View Corner Points Screen Press the Enter softkey. FLSC 05 w/FLI 225 Instrument Service Manual...
- Page 49 9 Calibrate the FLSC 05 with FLI 225 Place weight on the rear, right corner of the pallet. Figure 9.21 Corner Calibration Point 1 The instrument displays both the live and the most recent stored raw count values for the cells.
- Page 50 Corner Calibration screen. Press the Esc softkey to return to the FLSC Calibration menu. Proceed to Angle Calibration or press the Esc softkey 2 times to return to the Setup Manager module. FLSC 05 w/FLI 225 Instrument Service Manual...
- Page 51 9 Calibrate the FLSC 05 with FLI 225 Angle Calibration Select Angle Calibration from the FLSC Calibration screen to display the following: Figure 9.24 Sample Angle Calibration Screen Change Cal Weight If you need to change the Cal Full Weight value (the span weight value) or the Cal Half Weight value, follow these instructions before continuing with the angle calibration.
- Page 52 6 is pitch forward. Use ramps to facilitate rolling the forklift. See Making a Ramp for Tilting the Forklift on page 79. No Weight (Points 1-5) Place all deadload (pallets, chains, etc.) on the forks. FLSC 05 w/FLI 225 Instrument Service Manual...
- Page 53 9 Calibrate the FLSC 05 with FLI 225 Select point 1 from the Set/View Angle Points screen. The instrument displays both the live and the most recent stored raw count values for the scale pitch and roll as well as for the current weight.
- Page 54 Press the Down Arrow softkey to select Pt 16 Half Weight Level. Press the Enter softkey. Level the forks. Press the Store softkey. The instrument returns to the Set/View Angle Points screen. Press the Esc softkey. Proceed to the Fit Angle Points section. FLSC 05 w/FLI 225 Instrument Service Manual...
-
Page 55: Scale
Setup Manager screen. Press the Esc softkey to return to the top of the Admin Management screen. Press the Esc softkey to exit and return to normal operating mode. FLSC 05 w/FLI 225 Instrument Service Manual... -
Page 56: Units
Procedure on page 13. Press the Enter softkey. The change is made and the instrument returns to the Custom module. Select Custom Cal Wt = 0 from the Custom module. Press the Enter softkey. FLSC 05 w/FLI 225 Instrument Service Manual... -
Page 57: Settings
By default, the capacity is 5000 lb. From the Settings screen, select Capacity. Scroll in the new capacity using the Data Entry Procedure on page 13. Press the Enter softkey to accept and return to Settings. FLSC 05 w/FLI 225 Instrument Service Manual... -
Page 58: Filtering
Scroll in a value between 1 and 128. This is the number of weight readings per second to average for the weight display value. The default value is 96. Press the Enter softkey to accept the change and return to the Filter screen. FLSC 05 w/FLI 225 Instrument Service Manual... -
Page 59: Motion/Azt
Press the Enter softkey to return to the Filter screen. 9.2.4 Motion/AZT Select Motion/AZT from the Scale module to display the following screens. Figure 9.32 Motion/AZT Screens After defining the settings, press the Esc softkey to exit and return to Scale. FLSC 05 w/FLI 225 Instrument Service Manual... - Page 60 Press the Up or Down Arrow softkey to highlight the appropriate number of seconds. The default setting is 1. Press the Enter softkey. The change is made and the instrument returns to Motion/AZT. To disable AZT, set AZT (div) and AZT (sec) to zero. FLSC 05 w/FLI 225 Instrument Service Manual...
-
Page 61: Auto Tare Clear
Scroll in the new value using the data entry procedure. For Center of Zero, choose from the 2 available options. See Table 9.3 or Table 9.4 for the valid ranges and defaults. Press the Enter softkey to accept the entry and return to the Ranges module. FLSC 05 w/FLI 225 Instrument Service Manual... - Page 62 This allows you to set a warning level as a percentage of 0 - 100 Zero Drift (%) scale capacity. If the deadload weight change exceeds this percentage, an error message is displayed.? FLSC 05 w/FLI 225 Instrument Service Manual...
- Page 63 Zero Drift (%) This allows you to set a warning level as a percentage of 0 - 100 scale capacity. If the deadload weight change exceeds this percentage, an error message is displayed.? FLSC 05 w/FLI 225 Instrument Service Manual...
-
Page 64: Communications
Figure 9.35 Com Port Screens 1- 3 Configure the port as necessary. See configuration options on the following pages. After configuring the port(s), press the Esc softkey to exit and return to the Setup Module. FLSC 05 w/FLI 225 Instrument Service Manual... - Page 65 Handshaking is available on COM 3 only. Select this option and choose None, Xon/Off or Hardware. Press the Enter softkey to accept it and return to the previous screen. The default is None. FLSC 05 w/FLI 225 Instrument Service Manual...
-
Page 66: Print Strings
After making the changes to the print strings, press the Esc softkey to return to the Setup Manager module. If you change the Application type, the print strings will return to their default settings. FLSC 05 w/FLI 225 Instrument Service Manual... -
Page 67: Print String Editor
Select the string you need to change. The configurable options for the selected print string are displayed.Refer to the figure and table below to help you move around the editor. Figure 9.38 Sample Print String Detail with Configuration Keys FLSC 05 w/FLI 225 Instrument Service Manual... - Page 68 Current character Location of the End of String character Current String The changes are made and the instrument returns to the previous screen. Refer to the table of available print tokens as necessary. FLSC 05 w/FLI 225 Instrument Service Manual...
- Page 69 CCITT CRC-16 Checksum Value 0xFD Following character will be transmitted by value. 0xFE Token extender for future development. 0xFF End of String The ASCII characters are shown on the Chart of ASCII Characters on page 70. FLSC 05 w/FLI 225 Instrument Service Manual...
- Page 70 Chart of ASCII Characters FLSC 05 w/FLI 225 Instrument Service Manual...
-
Page 71: Strings To Print
Select one of the available print strings to add the string to the mode and return to the previous screen. Figure 9.42 Updated Strings to Print Screen Repeat steps 2 through 4 until complete. Press the Esc softkey 3 times to return to the Setup Manager module. FLSC 05 w/FLI 225 Instrument Service Manual... -
Page 72: App Selection
No softkey to keep any changes made to the print strings. Selecting No does not prevent you from changing the application. The change is made and the instrument returns to the previous screen. FLSC 05 w/FLI 225 Instrument Service Manual... -
Page 73: Country Code
Under range 250 divisions (i.e.-500 kg) Zero range 100% Auto print range 0% (disabled) 0% (disabled) Separator decimal point decimal point Time format 12 hr (4:00 PM) 24 hr (16:00) Date format MM/DD/YYYY DD/MM/YYYY FLSC 05 w/FLI 225 Instrument Service Manual... -
Page 74: Miscellaneous
Select the option you wish to assign to the selected input. The change is made and the instrument returns to the Inputs module. Repeat steps 2 and 3 if enabling a second input. FLSC 05 w/FLI 225 Instrument Service Manual... -
Page 75: Reset System
Press the Yes softkey to confirm and reset the selected options. The selected parameters are reset and the instrument reboots in normal operating mode. Pressing the No softkey will abort the reset procedure and the instrument will return to the Reset System module. FLSC 05 w/FLI 225 Instrument Service Manual... -
Page 76: Passwords
Select Separator = from the Display screen to display the available options (decimal point or comma). Select the decimal separator as necessary. The change is made and the instrument returns to the Display screen. Press the Esc softkey to return to the Miscellaneous module. FLSC 05 w/FLI 225 Instrument Service Manual... -
Page 77: Time / Date
Select the key you wish to enable or disable. Select either On (enable) or Off (Disable) as necessary. The change is made and the instrument returns to the previous screen. Press the Esc softkey to return to the Miscellaneous module. FLSC 05 w/FLI 225 Instrument Service Manual... -
Page 78: Diagnostics Tools
The values shown reflect the ranges set in section 9.2.6 . Select On (enable) or Off (disable) as necessary. The changes are made and the instrument returns to the Diagnostics module. Press the Esc softkey to return to the Miscellaneous module. FLSC 05 w/FLI 225 Instrument Service Manual... -
Page 79: Chapter 10 Extras
16 in / 406.4 mm 0.5 in / 12.7 mm 8 in / 203.2 mm 14 in / 355.6 mm Ramps are constructed of 1/2” plywood. Total height is 3 inches (76.2 mm). FLSC 05 w/FLI 225 Instrument Service Manual... -
Page 80: Calculating New Lift Capacity
E = Inches from front wheel center line to J = Thickness of fork carriage face K = Thickness of scale Figure 10.1 Formula & Dimensions for Calculating New Lift Capacity FLSC 05 w/FLI 225 Instrument Service Manual... -
Page 81: Class Ii 5,000 Lb Models
2.0" 10.3 Resistance Test for FLSC Weigh Bars Perform these resistance checks to test the FLSC 05 Weigh Bars. With the meter set on the appropriate ohms scale, check the following values between the color coded wires on the section of the cord connected to the Weigh Bar or the corresponding pin out for the connector. -
Page 82: Replacing Weigh Bars On The Flsc 05 Carriage
10.4 Replacing Weigh Bars on the FLSC 05 Carriage 10.4.1 Disassembly of the Carriage Tools needed for replacement of a Weigh Bar: Minimum 12 inch/pounds torque wrench Minimum 65 foot/pounds torque wrench 5/32 and 3/8 hex Allen 6 Weigh Bar bolts, part # 17704-5929 3/4"... - Page 83 10 Replacing Weigh Bars on the FLSC 05 Carriage Remove the cable egress guard by removing the bolts shown in Figure 10.3. Cable egress guard bolts, 7/16” Jbox guard bolts, 7/16” (recessed) Figure 10.3 Bolts to remove Remove the junction box guard by removing the bolts pointed out in Figure 10.3.
- Page 84 Clip and remove the cable ties securing the cable leading from the Weigh Bar being replace. Use a 3/8 Allen wrench and socket driver to remove the Weigh Bar bolts from the Weigh Bar being replaced and discard the bolts. Remove the Weigh Bar. FLSC 05 w/FLI 225 Instrument Service Manual...
-
Page 85: Reassembly
10 Replacing Weigh Bars on the FLSC 05 Carriage 10.4.2 Reassembly Labeling the Cable from the Top Weigh Bars on the FLSC 05 To assure proper cable connection, when you replace a top Weigh Bar be sure to affix the FRONT label included in the Weigh Bar kit to the cable near the 9-pin connector. - Page 86 Be sure to cable tie the cables to the shield in a way that prevents the cables from contacting the Weigh Bar bolts. See Figure 10.9. Figure 10.9 Space must exist between the cable and the bolt and shield FLSC 05 w/FLI 225 Instrument Service Manual...
- Page 87 10 Replacing Weigh Bars on the FLSC 05 Carriage Make sure the cables are secured and will not get pinched when the carriage is reassembled. Torque each of the Weigh Bar bolts to 65 foot pounds. Start at the top then go to the bottom bolt.
- Page 88 Step 9 is important to avoid damaging the cable shield and for proper function of the scale. FLSC 05 w/FLI 225 Instrument Service Manual...
- Page 89 10 Replacing Weigh Bars on the FLSC 05 Carriage Place the screws through the recessed holes, shown in Figure 10.5, to attach the cable guards to the carriage back plate. Tighten the screws. Tighten the jam nuts to 50 ft pounds.
-
Page 90: Tightening Procedure
1/6th of a turn. This will be very close to 500 ft/lbs. See the Figure 10.16. Use medium strength thread-locking compound on all threaded hardware including the jam nut. Figure 10.16 Jam nut tightening procedure FLSC 05 w/FLI 225 Instrument Service Manual... -
Page 91: Installing The Flw 100 Wireless Carriage Option
PC with the FLW 100 Updater program (part number AWT30-500095) installed. Instructions for this software are included with the program and are outside the scope of this manual. FLSC 05 w/FLI 225 Instrument Service Manual... - Page 92 Figure 10.19 Junction box retainer plate and bolts Disconnect the interface cable from the junction box and from the back of the FLI 225. Clip all cable ties and remove the interface cable from the forklift. FLSC 05 w/FLI 225 Instrument Service Manual...
- Page 93 See figure 10.21. Figure 10.21 Carriage transceiver and hold down bolts and washers Pass both connectors down and between the carriage plates. FLSC 05 w/FLI 225 Instrument Service Manual...
- Page 94 Bolt the cable guide plate in place with the two supplied bolts. Replace the junction box guard and tighten the two bolts through the access holes in the front plate of the carriage. Reference figure 10.18. FLSC 05 w/FLI 225 Instrument Service Manual...
- Page 95 Figure 10.25 Battery guard recessed bolts The power cable should exit the battery guard as shown in figure 10.26. Figure 10.26 Power connector exiting battery guard FLSC 05 w/FLI 225 Instrument Service Manual...
- Page 96 Place the recessed end of the battery pack into the channel and snap the other end down until the latch snaps shut. figure 10.28 shows the battery pack in place. Figure 10.28 Battery pack in place (view from the back of the carriage) FLSC 05 w/FLI 225 Instrument Service Manual...
-
Page 97: Charging The Battery
FLI 225 instrument to configure it for wireless function. Ask your service representative to perform this configuration. 10.5.1 Charging the Battery To charge the battery release the catch as shown in figure 10.30. Figure 10.30 Battery pack catch release FLSC 05 w/FLI 225 Instrument Service Manual... -
Page 98: Optional Scanner Connection
COM port on the FLI 225. Disconnect the FLI 225 from the power source and the rest of the scale system. Remove the back plate. FLSC 05 w/FLI 225 Instrument Service Manual... - Page 99 Connect the FLI 225 to the scale system. Reconnect the power. Configure the COM port according to the function required. See Communications on page 64. Green Orange Power Black Ground Yellow To FLI 225 Brown FLSC 05 w/FLI 225 Instrument Service Manual...
-
Page 100: Sma Protocol
5th or more sends a ? <LF>U<CR> Toggles the units of measure if no motion. Dashes displayed if motion on scale. <LF>I<CR> Sends the SMA compliance level as SMA:compliance level / revision level FLSC 05 w/FLI 225 Instrument Service Manual... - Page 101 Multiple N commands can be sent after the I command and each one will return a different piece of data. If an N command returns a “?” or END response, an I command is needed to reset the N command. FLSC 05 w/FLI 225 Instrument Service Manual...
-
Page 102: Forklift Scale Grounding
Make sure that the ground strap or wire has free range of movement during operation of the side shifter. Re-measure the voltage readings to confirm the problem is corrected. FLSC 05 w/FLI 225 Instrument Service Manual... -
Page 103: Chapter 11 Technical Illustrations
RCVA TB1-3 XMTA Green RCVB TB1-4 XMTB Blue XMTB TB1-6 RCVB Yellow XMTA TB1-5 RCVA See Illustration and Table at right. White +5Vdd TB1-1 +5Vdd White/Orange Load TB1-7 Load Black Ground TB1-2 Ground FLSC 05 w/FLI 225 Instrument Service Manual... -
Page 104: Exploded View Of Flsc 05 Carriage Assembly
11.3 Exploded View of FLSC 05 Carriage Assembly FLSC 05 w/FLI 225 Instrument Service Manual... -
Page 105: Carriage Assembly Parts List
“CABLE CLAMP” 17783-0031 0.25” “NUT, HEX CS 1/4-20UNC” 14471-0068 “RETRACTING CABLE ASSEMBLY, 7 PIN” AWT25-500181 Not shown "LABEL,TORQUE JAM NUT LTS" 57380-0018 Not shown "THREAD-LOCK ,ADHV/SEALANT-P/N242-21" 15566-0020 Not shown "AEROSOL CAN,ANTI-SEIZE COP BAS" 48545-0019 FLSC 05 w/FLI 225 Instrument Service Manual... -
Page 106: Exploded View Of Fli 225 Awt05-500348
11.5 Exploded View of FLI 225 AWT05-500348 FLSC 05 w/FLI 225 Instrument Service Manual... -
Page 107: Fli 225 Instrument Parts List & Options
*Note: Item 8 “Enclosure, Plastic, FLI 225”-- Use part number AWT20-500353 for serial numbers before 100201251 and part number AWT20-503844 for serial numbers after. "BOX, RSC,15.68X10.88X6.88" 16362-0511 **Note: Item 12 “Gasket, Backplate, FLI 225” -- Use part number AWT20-500356 for serial numbers before 100201251. Use AWT20-503765 for serial numbers after 100201251. FLSC 05 w/FLI 225 Instrument Service Manual... -
Page 108: Menu Maps
Use the menu maps to help you move through the various menus and modules. Click on the blue text to go to the section in the manual about that topic. Figure 11.1 Setup Menu FLSC 05 w/FLI 225 Instrument Service Manual... - Page 110 Avery Weigh-Tronix USA 1000 Armstrong Dr. Fairmont MN 56031 USA Tel:507-238-4461 Fax:507-238-4195 Email: usinfo@awtxglobal.com www.wtxweb.com Avery Weigh-Tronix UK Foundry Lane, Smethwick, West Midlands, England B66 2LP Tel:+44 (0) 8453 66 77 88 Fax: +44 (0)121 224 8183 Email: info@awtxglobal.com www.averyweigh-tronix.com...
Need help?
Do you have a question about the FLSC 05 and is the answer not in the manual?
Questions and answers