Advertisement
Quick Links
For questions or missing parts, please contact GoFit at 888-530-4441
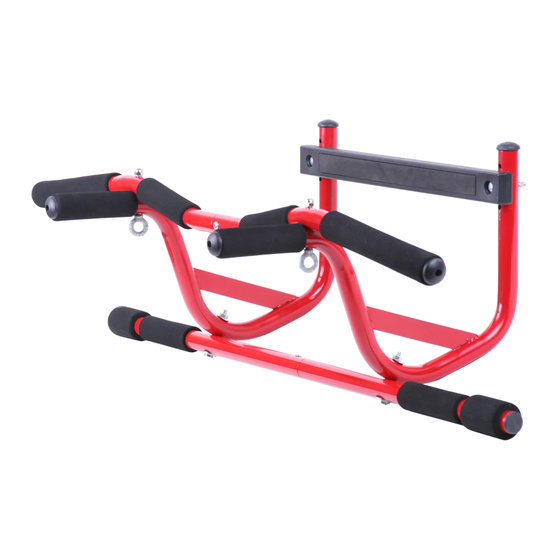
ELEVATED CHIN UP STATION
Parts
Tools required:
-Adjustable Wrench
AdjustAble HeigHt
Prior to assembly, confirm that
all parts are included in box:
-2 Side Bars (C-shaped)
-1 Curved Bar (2 halves)
-1 Straight Bar (2 halves)
-1 Leverage Bar
-2 Eyebolts
-2 Self-seating Bolts
-3 Hex Bolts with Lock Nuts
-12 Lock Washers
-1 Hex Bolt with Capped Nut
-4 Capped Nuts
-1 Metal Wedge
©2012 GOFIT, L.L.C. TULSA, OK
Advertisement

Related Manuals for GoFit ELEVATED CHIN UP STATION


Summary of Contents for GoFit ELEVATED CHIN UP STATION
- Page 1 -Adjustable Wrench AdjustAble HeigHt Prior to assembly, confirm that all parts are included in box: -2 Side Bars (C-shaped) -1 Curved Bar (2 halves) -1 Straight Bar (2 halves) -1 Leverage Bar -2 Eyebolts -2 Self-seating Bolts -3 Hex Bolts with Lock Nuts -12 Lock Washers -1 Hex Bolt with Capped Nut -4 Capped Nuts -1 Metal Wedge For questions or missing parts, please contact GoFit at 888-530-4441 ©2012 GOFIT, L.L.C. TULSA, OK...
- Page 2 ELEVATED CHIN UP STATION Metal Wedge With pointed end down, slide Metal Wedge downward, behind door frame/moulding. Position bottom edge of Plastic Leverage Bar into the installed safety wedge, guiding it down to securely rest on top of door frame/moulding. Properly installed, the Metal Wedge helps keep the Leverage Bar resting on the door frame/moulding. Before each exercise, always check that the Leverage bar is resting on the door frame/moulding. For questions or missing parts, please contact GoFit at 888-530-4441 ©2012 GOFIT, L.L.C. TULSA, OK...
- Page 3 Step 6 Slide two halves of Straight Bar together Slide two halves of Curved Bar together Position Curved Bar as shown in fully (small end into larger end). Line up holes (small end into larger end). Line up holes assembled photo (make sure the Capped and put Bolt through hole on Straight Bar. and put Bolt through hole on Curved Bar. Nut-side of Curved Bar is facing out Place Lock Washer on Bolt; Place Lock Washer on Bolt; thread on towards the handles). Line up holes in thread on Lock Nut. Capped Nut. Curved Bar with holes in Side Bars; slide Eye Bolt through holes as shown. For questions or missing parts, please contact GoFit at 888-530-4441 ©2012 GOFIT, L.L.C. TULSA, OK...
- Page 4 Fully Assembled Step 10 Put Chin Up Station in Push Up Position on a flat surface to level. Then securely tighten all Nuts with wrench. Fully assembled Chin Up Station shown to the left for reference. Easy In-Out Installation Metal wedge Standing on non-hinge side of doorway, Position bottom edge of Leverage Bar into Make sure the protective Foam End put Leverage Bar through doorway while the installed metal wedge, then guide Pieces on the non-hinge side of doorway, moving it upward—position it above Chin Up Station down until it securely are in full contact with and resting against moulding to securely hang on door frame. rests on top of door frame/moulding. the two side door frame mouldings. For questions or missing parts, please contact GoFit at 888-530-4441 ©2012 GOFIT, L.L.C. TULSA, OK...
Need help?
Do you have a question about the ELEVATED CHIN UP STATION and is the answer not in the manual?
Questions and answers