Zoom G1 Four Operation Manual
Multi-effects processor
Hide thumbs
Also See for G1 Four:
- Service manual (26 pages) ,
- Quick manual (13 pages) ,
- Operation manual (16 pages)
Table of Contents
Advertisement
Quick Links
Multi-Effects Processor
Operation Manual
You must read the Usage and Safety Precautions before use.
© 2018 ZOOM CORPORATION
Copying or reprinting this manual in part or in whole without permission is prohibited.
Product names, registered trademarks and company names in this document are the property of their respective companies. All trademarks and regis-
tered trademarks in this document are for identification purposes only and are not intended to infringe on the copyrights of their respective owners.
Advertisement
Table of Contents

Related Manuals for Zoom G1 Four


Summary of Contents for Zoom G1 Four
- Page 1 Operation Manual You must read the Usage and Safety Precautions before use. © 2018 ZOOM CORPORATION Copying or reprinting this manual in part or in whole without permission is prohibited. Product names, registered trademarks and company names in this document are the property of their respective companies. All trademarks and regis-...
-
Page 2: Introduction
Introduction This Multi-Effects Processor starts with numerous effects that can be combined for use together. Effect combinations and parameter settings can be saved as patches to be used whenever you like. By simply switching between preset patches, you can achieve dramatic changes in sound. This processor includes a wide variety of effects, including distortion, chorus and reverb effects. -
Page 3: Terms Used In This Manual
Terms used in this manual Patch A “patch” stores effect ON/OFF states and parameter setting values. Effects are saved and recalled in units of patches. Five effects can be added to one patch, and the can store up to 50 patches. Bank One group of 10 patches is a “bank”... -
Page 4: Table Of Contents
Contents Introduction ����������������� 2 Using the tuner �������������� 39 Activating the tuner ����������� 39 Terms used in this manual ���������� 3 Tuning a guitar ������������� 39 Changing tuner settings ��������� 41 Contents ������������������ 4 Using rhythms ��������������� 43 structure ���������� 5 Activating the rhythm function ������... -
Page 5: Structure
G1 FOUR/G1X FOUR structure Signal flow Patch Patch level Looper Output Output INPUT Effect volume OUTPUT Tuner Rhythm AUX IN The input guitar sound passes through effects 1 – 5 in order. “Using patches (MEMORY mode)” on page The patch level is adjusted. - Page 6 Memory overview (patches/banks) can save up to 50 patches. Patches are managed in banks of 10. Bank 1 Bank 2 Bank 3 Bank 4 Bank 5 Patch 10 Patch 20 Patch 30 Patch 40 Patch 50 Patch 11 Patch 21 Patch 31 Patch 41 Patch 51...
-
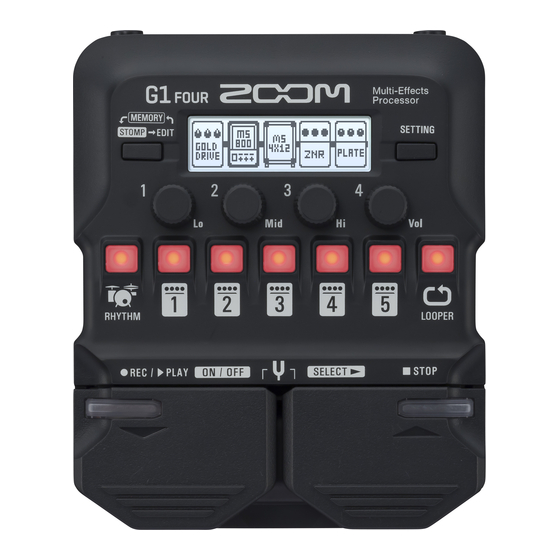
Page 7: Names Of Parts
Names of parts Front Panel Display This shows information, including the names of the selected patch and its effects and their parameter values. Mode switch Press this to cycle through the MEMORY, STOMP and EDIT modes. Parameter knobs Use these to adjust effect parameters and to make various settings. RHYTHM button Press to activate the rhythm. - Page 8 Signals input through the AUX IN jack will be sent to the OUTPUT jack directly without passing through the built-in effects. AC adapter connector Connect the dedicated AC adapter (ZOOM AD-16) here. USB port Connect a computer other external device here. By using Guitar Lab, you can manage patches and edit and add effects, for example from a computer.
-
Page 9: Loading Batteries
“Setting the type of batteries used” on page HINT • If a dedicated AC adapter (ZOOM AD-16) is connected, it can run on AC power. • Power for operation can also be supplied through the USB port. ECO mode overview •... -
Page 10: Connecting
Connecting 1, 7 Minimize the volume of the guitar amp. To use AC power supply, connect to the dedicated AC adapter (ZOOM AD-16) to the AC adapter jack and an outlet. This turns the power ON. To use a computer, connect a USB cable (not included) to the USB port and the computer. -
Page 11: Adjusting The Overall Audio Character And Output Level
Adjusting the overall audio character and out- put level In MEMORY or STOMP mode, turn – Function Operation Adjust the level of low frequencies Turn Adjust the level of middle frequencies Turn Adjust the level of high frequencies Turn Adjust the overall level Turn HINT These adjustments are retained even when the patch is changed. -
Page 12: Using Patches (Memory Mode)
Using patches (MEMORY mode) manages effects in patches. A patch can have up to five effects and save their ON/ OFF states and parameter settings. Patch Effect Up to 50 patches can be created. Groups of 10 patches are organized into banks, so effects can be quickly recalled by switching banks. -
Page 13: Selecting Patches And Banks
Selecting patches and banks Switching patches Press This changes the patch. Function Operation Switch to lower-numbered patch Press Switch to higher-numbered patch Press HINT • By continuing to press , you can continuously switch patches. • By using the PRESELECT function, you can switch to a patch at any location while continuing to use the tone of the currently selected patch. -
Page 14: Changing Individual Patch Settings
Changing individual patch settings Select the patch with settings you want to change. Press This opens the SETTING screen. Press This opens the patch setting screen. The patch level and name can be changed. ( “Changing patch levels” on page “Changing patch names”... - Page 15 Changing patch names Turn This moves the cursor. Turn This changes the character at the cursor position. HINT • Press to end patch setting and return to the original screen. • The characters and symbols that can be used are as follows. A–Z, a–z, 0–9, ! # $ % &...
-
Page 16: Turning Effects On/Off With Footswitches (Stomp Mode)
Turning effects ON/OFF with footswitches (STOMP mode) In STOMP mode, you can turn effects ON/OFF with footswitches. Activating STOMP mode When using MEMORY or EDIT mode, press Pressing repeatedly, cycles through the MEMORY, STOMP and EDIT modes in order. -
Page 17: Turning Effects On/Off With Footswitches
Turning effects ON/OFF with footswitches Press Select the effect to control. The selected effect is shown with light and dark inverted. Press repeatedly to move the selection to the right. Press This turns the effect ON/OFF . To turn an effect ON/OFF by hand, press the –... -
Page 18: Editing Effects (Edit Mode)
Editing effects (EDIT mode) In EDIT mode, you can change the effects used in a patch and adjust their parameters. Patch Effect EDIT mode screen Activating EDIT mode Select a patch in MEMORY mode. Press Pressing repeatedly, cycles through the MEMORY, STOMP and EDIT modes in order. -
Page 19: Selecting Effects
Selecting effects Press – for the effect you want to edit. This switches the effect. The LED for the selected effect lights. Unit number Effect name Parameters HINT The effect unit number is its position in the patch order. Turning effects ON/OFF Press –... -
Page 20: Changing Effect Types
Changing effect types Selecting effect types Press � Function Operation Change to the previous effect type Press Change to the next effect type Press Selecting effect categories While pressing , press The category name appears on the display. Press again to show the next category name. �... -
Page 21: Adjusting Effect Parameters
Adjusting effect parameters Turn – The parameters assigned to each knob depend on the effect. Refer to the names shown on the dis- play. If an effect has 5 or more parameters, use to change the screen. HINT • When AUTO SAVE is set to ON, parameter changes will be saved automatically. ( “Setting the AUTO SAVE function”... -
Page 22: Changing The Effect Order
Changing the effect order Press This opens the SETTING screen. Press This opens the CHAIN screen. The effects used in the selected patch are shown as icons. Press the – button for the effect you want to move. Press the –... -
Page 23: Managing Patches
Managing patches Saving patches Patch changes can be saved to the same patch, overwriting it. They can also be saved to a patch with a dif- ferent number. Press This opens the SETTING screen. Press This opens the SAVE screen. –... - Page 24 Press at the same time. This saves the patch, overwriting the content.
-
Page 25: Swapping Patches
Swapping patches The contents of the patch can be switched with a patch at a different number. Press This opens the SETTING screen. Press This opens the SAVE screen. Turn The icon on the display changes from SAVE to SWAP . –... - Page 26 Press at the same time. This swaps the patches. NOTE A patch that has been edited must be saved before it can be swapped. Save the patch before trying to swap it. ( “Saving patches” on page...
-
Page 27: Adjusting The Master Tempo
Adjusting the master tempo The master tempo is the tempo shared by effects, rhythms and the looper. Press This opens the SETTING screen. Press This opens the SETUP screen. Turn HINT • This can be set from 40 to 250. •... -
Page 28: Setting The Auto Save Function
Setting the AUTO SAVE function This function can be used automatically save changes to patch and effect settings when they are made. Press This opens the SETTING screen. Press This opens the SETUP screen. Turn Setting Explanation Automatic saving is enabled. Automatic saving is disabled. - Page 29 Turn Setting Explanation Changes will be saved. Changes will not be saved. NOTE If you select “NO” , the other patch will open without saving the changed patch settings. Press This opens a screen for selecting the patch number to use for saving. –...
- Page 30 Press at the same time. The edited patch is saved. HINT An edited patch can also be saved on the SETTING screen. ( “Saving patches” on page...
-
Page 31: Setting The Preselect Function
Setting the PRESELECT function This function can be used to switch to a patch at any location while continuing to use the tone of the cur- rently selected patch. Press This opens the SETTING screen. Press This opens the SETUP screen. Turn Setting Explanation... - Page 32 When PRESELECT is ON In MEMORY mode, use – This opens a screen for selecting the number of the preselect destination patch. Function Operation Switch to lower-numbered patch Press Switch to higher-numbered patch Press Switch to patch numbers 10 – 19 Press Switch to patch numbers 20 –...
- Page 33 When PRESELECT is OFF In MEMORY mode, use – This changes the patch. Function Operation Switch to lower-numbered patch Press Switch to higher-numbered patch Press Switch to patch numbers 10 – 19 Press Switch to patch numbers 20 – 29 Press Switch to patch numbers 30 –...
-
Page 34: Setting The Bank Hold Function
Setting the BANK HOLD function This function can be used to limit to the same bank when switching patches. Press This opens the SETTING screen. Press This opens the SETUP screen. Turn When BANK HOLD is ON Switching down from the lowest patch in a bank will open the highest patch in the same bank. Switching up from the highest patch in a bank will open the lowest patch in the same bank. -
Page 35: Making Power And Display Settings
Making power and display settings Setting the type of batteries used Set the type of battery used correctly so that the amount of remaining battery charge can be shown accu- rately. Press This opens the SETTING screen. Press This opens the PWR/LCD screen. Turn Setting Explanation... -
Page 36: Setting The Eco Mode
Setting the ECO mode This function can be used to turn the power off automatically if unused for 10 hours. Press This opens the SETTING screen. Press This opens the PWR/LCD screen. Turn Setting Explanation The power will automatically turn off if unused for 10 hours. This disables ECO mode. -
Page 37: Setting The Backlight Time
Setting the backlight time Press This opens the SETTING screen. Press This opens the PWR/LCD screen. Turn Setting Explanation The backlight stays off. The backlight stays on. The backlight turns off 15 seconds after the last operation. The backlight turns off 30 seconds after the last operation. -
Page 38: Adjusting The Display Contrast
Adjusting the display contrast Press This opens the SETTING screen. Press This opens the PWR/LCD screen. Turn HINT This can be set from 1 to 13. -
Page 39: Using The Tuner
Using the tuner Use this to tune the connected guitar. Activating the tuner When using MEMORY, STOMP or EDIT mode, press at the same time. This activates the tuner. HINT Pressing anything other than will close the tuner and return to the original screen. Tuning a guitar Play the open string that you want to tune and adjust its pitch. - Page 40 Other tuners The nearest string number and pitch detuning will be shown on the display and by the LEDs. When the pitch is accurate, the LED at the center of the meter will light green and the LEDs to the left and right will light red.
-
Page 41: Changing Tuner Settings
Changing tuner settings Press when the TUNER screen is open. This opens the TUNER setting. Setting the output method Turn Setting Explanation BYPASS Effects are bypassed and the guitar sound is output. MUTE The guitar sound is not output. HINT You can also turn on the TUNER screen to change this setting. - Page 42 Setting the tuner type Turn Setting Explanation The pitch detuning is shown according to the nearest note (in CHROMATIC semitones). The nearest string number is shown according to the selected Other tuner types type, and the amount of detuning from its pitch is shown. The following tuner types can be selected.
-
Page 43: Using Rhythms
Using rhythms You can play along with built-in rhythms. Activating the rhythm function When using MEMORY, STOMP or EDIT mode, press This opens the RHYTHM screen. HINT • Press to return to the original mode. • During rhythm playback, press to continue rhythm playback and return to the original mode. -
Page 44: Setting The Rhythm
Setting the rhythm Selecting rhythm patterns Turn This selects the rhythm pattern. ( “Rhythm patterns” on page Setting the precount Turn This sets the precount. This plays a count sound before looper recording starts. Setting Explanation A precount is not played. A precount is played. -
Page 45: Starting/Stopping Rhythm Playback
Starting/stopping rhythm playback Press This starts rhythm playback. Press This stops rhythm playback. HINT During rhythm playback, you can switch MEMORY, STOMP and EDIT modes. To stop rhythm playback, press to open the RHYTHM screen, and then press... -
Page 46: Rhythm Patterns
Rhythm patterns Name Time Name Time Name Time Sig. Sig. Sig. GUIDE R&B1 Jazz2 8Beats1 R&B2 Fusion 8Beats2 70's Soul Swing1 8Beats3 90's Soul Swing2 16Beats1 Motown Bossa1 16Beats2 HipHop Bossa2 16Beats3 Disco Samba1 Rock1 Samba2 Rock2 PopRock Breaks1 Rock3 IndiePop Breaks2 ROCKABLY... -
Page 47: Using The Looper
Using the looper You can record your playing and create mono loop phrases that are up to 30 seconds long. Activating the looper When using MEMORY, STOMP or EDIT mode, press This opens the LOOPER screen. HINT Press to return to the original mode. -
Page 48: Setting The Looper
Setting the looper Setting of the loop recording time Turn Setting Explanation Recording will continue until stopped manually or the maxi- MANUAL mum recording time is reached. Set the value to 1 – 64 quarter notes. The actual recording time ×1–64 depends on the BPM setting. - Page 49 Adjusting the volume Turn HINT This can be set from 0 to 100.
-
Page 50: Recording And Playing Loops
Recording and playing loops Press This starts loop recording. Stop recording and start loop playback. If the recording time is set to "Manual" Pressing again or allowing the maximum recording time to be reached will stop recording and start loop playback. If the recording time is set to “... -
Page 51: Overdubbing Loops
Overdubbing loops Additional performances can be added to the recorded loop. Press during loop playback. This starts overdubbing. When the end of the loop is reached, loop playback will continue from the beginning, and overdub- bing can be repeated. Press during overdubbing. -
Page 52: Clearing The Loop
Clearing the loop When loop playback is stopped, press and hold This clears the recorded loop. -
Page 53: Using The Expression Pedal ( Only)
Using the expression pedal (G1X FOUR only) If an effect in the PEDAL category is selected when using a , you can control the amount of the effect with the expression pedal. Setting pedal effects In EDIT mode, select an effect from the PEDAL category. NOTE Only one effect in a patch can be selected from the PEDAL category. -
Page 54: Adjusting The Pedal
Adjusting the pedal Adjusting the pedal sensitivity While pressing , turn the power on. This opens the PEDAL CALIBRATION screen. Operate the pedal as shown on the display, and press each time. Calibration is finished when “Complete!” appears. NOTE • Adjust the pedal sensitivity in the following cases. –... - Page 55 Adjusting the torque Insert a 5 mm hex wrench into the torque adjustment screw on the side of the pedal. Turn it clockwise to tighten the pedal and counterclockwise to loosen it. Loosen Tighten NOTE Be careful because loosening the torque adjustment screw too much could cause it to become discon- nected internally, making it impossible to keep the pedal in a fixed position.
-
Page 56: Managing The Firmware
Managing the firmware Checking the firmware versions While pressing , turn the power on. This opens the firmware VERSION screen. Press This restarts the and reopens the usual screen. -
Page 57: Updating The Firmware
Updating the firmware Check the ZOOM website (https://www.zoom.co.jp/), and download firmware for the While pressing both , use a USB cable to connect the and the computer. This turns the power on and opens the FIRMWARE UPDATE screen. Launch the firmware update application on the computer. -
Page 58: Restoring Factory Default Settings
Restoring factory default settings While pressing , turn the power on. This opens an initialization confirmation screen. Turn Select the operation. Setting Explanation Initialize settings, rewriting them with the factory defaults. Cancel the initialization and return to the usual screen. Press This starts initialization. -
Page 59: Troubleshooting
“Changing tuner settings” on page There is a lot of noise • Confirm that a shielded cable is not the cause. • Use a genuine ZOOM AC adapter. ( “Connecting” on page Effects are not working • If the effect processing power is being exceeded, “PROCESS OVERFLOW” will appear on the display. -
Page 60: Specifications
120 dB Noise floor (residual noise) −97 dBu Power AC adapter: 9V DC 500mA center negative (ZOOM AD-16) 4 AA batteries (about 18 hours continuous operation time when using alkaline batteries with the LCD backlight off) USB MIDI, USB Micro-B •... - Page 61 ZOOM CORPORATION 4-4-3 Kanda-surugadai, Chiyoda-ku, Tokyo 101-0062 Japan https://www.zoom.co.jp Z2I-3490-01...
Need help?
Do you have a question about the G1 Four and is the answer not in the manual?
Questions and answers