
Summary of Contents for CENTURION SYSTEMS WIZO-LINK
- Page 1 WIRELESS INPUT/OUTPUT MODULES WIZO-LINK USER MANUAL Centurion Systems (Pty) Ltd www.centsys.com...
- Page 2 Americas, Australia and the Pacifi c Centurion Systems (Pty) Ltd reserves the right to make changes to the products described in this manual without notice and without obligation to notify any persons of any such revisions or changes. Additionally, Centurion Systems (Pty) Ltd makes no representations or warranties with respect to this manual.
-
Page 3: Table Of Contents
Contents INTRODUCTION PAGE 5 1.1. Defining the WiZo-Link Product Page 5 1.1.1. Architecture Page 5 1.1.2. Security and Management Features Page 5 1.2. Defining the WiZo-Link Network Page 6 NETWORK REDUNDANCY PAGE 7 2.1. Full Network Redundancy Page 7 2.2. Partial Network Redundancy Page 7 2.3. Base Network - No Redundancy Page 8 2.4. - Page 4 CONTENTS 4.6. Configuring an I/O Link Page 21 4.6.1. One to One Page 21 4.6.2. One to Many Page 22 4.6.3. Implementing Further I / O Links Page 23 4.6.4. Output State Page 24 4.6.5. Modes of Operation for the WiZo Output Page 24 4.6.6.
-
Page 5: Introduction
FIGURE 1. NETWORK ARCHITECTURE 1.1.2. Security and Management Features When a factory fresh WiZo-Link device is powered up, it does not yet belong to a network of devices. The WiZo-Link device can either be added to an existing network or be used as an initiator to create a new network. Once confi gured, a WiZo-Link device... -
Page 6: Defining The Wizo-Link Network
WiZo-Link forms a standalone network of devices, which has the option of integrating via the G-ULTRA GSM unit and the G-REMOTE mobile application to be activated and used as an interface to the WiZo-Link network. This is, however, not a requirement, and the WiZo-Link network, once configured, will self-manage and self-heal, functioning independently and reliably. -
Page 7: Network Redundancy
Full network redundancy takes full advantage of the mesh network integrity by ensuring that the message that needs to travel will reach its destination. Redundancy can be achieved with three devices or more. The WiZo-Link device will continue to deliver the most recent message, indefi nitely, until the message is delivered. When the message is delivered, an acknowledgement is returned;... -
Page 8: Base Network - No Redundancy
2.4.1. Establishing the Network When planning the WiZo-Link network, it is important to consider the paths that are available for a message to travel from one point to another. It is possible to create a network where there is a combination of full- and partial-redundancy. When travelling, the message may have line-of-sight from source to destination node, or the message may be routed via multiple nodes before it reaches its destination. - Page 9 It is not always possible to install the WiZo-Link in an ideal location to guarantee optimal signal strength; therefore, it is important to plan carefully to ensure that, as the installer, the devices are not installed in such a way as to reduce signal strength, but so that signal strength is at its best.
-
Page 10: Network Transmission Integrity
To create a bridge or additional path to avoid meshed failure, a WiZo-Link can be installed and used as a repeater. Since each WiZo- Link already functions as this in its usual role, once joined to the network this role is fulfilled with no additional setup required. -
Page 11: Expanding The Network
A gateway device may, for example, be the Centurion Systems G-ULTRA GSM Ultra. This device links the WiZo-Link mesh network to the outside world and the user would be able to link to the network using Centurion Systems' G-REMOTE mobile app. -
Page 12: Power Redundancy Options And Requirements
• A siren Keep in mind that the output on the WiZo-Link is a low power type output, and it is used to ACTUATE the output system and not to drive the output system. This is referred to as relay action, where a low-powered system drives or actuates a high-power system. -
Page 13: How They Work
SECTION 3 DISTRIBUTED I/O 3.2. How they work Inputs and Outputs function in specifi c ways and this allows the installer to confi gure them in such a way that they do what the application requires. WiZo-Link also allows the installer to confi gure one device to actuate it own output, but also the outputs of other WiZo-Link devices. 3.2.1. Modes of Operation The input is an active low-type. This means that the change in the signal is recognised when the level of the input goes from high to low or from 12V to 0V. -
Page 14: I/O Relationships
TABLE 5 3.2.2. I/O Relationships The key feature of the WiZo-Link device is to actuate the outputs of adjacent devices or devices at some distance wirelessly; while still able to actuate its own output. In other words, there is no need to run extended cabling to activate, for example, a gate motor. - Page 15 SECTION 3 DISTRIBUTED I/O The below basic configurations allow for the output of a WiZo-Link device to be actuated. Relationship Connections One to One The input of the local device can: 1. Actuate the output locally, or One-to-One 2. Actuate the output of a remote WiZo One to Many The input of the local device can: 1.
-
Page 16: Quick Start Section
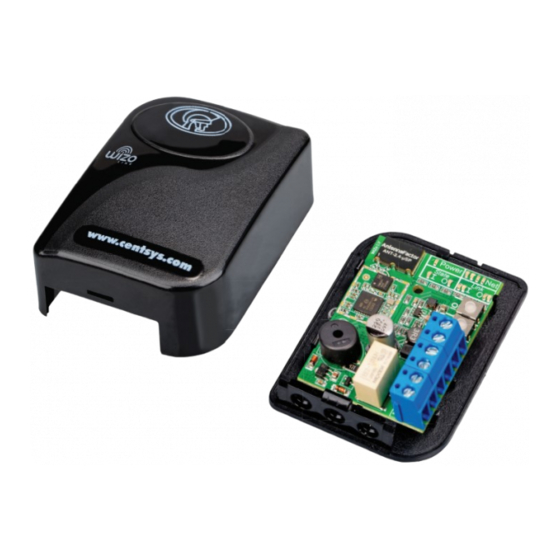
SECTION 4 QUICK START SECTION 4. Quick Start Section 4.1. Getting Started When the WiZos are removed from their packaging, it is important to remember the following: The WiZos are ready to be used; they have just not been configured or added to a network. Configuration is what the user / installer needs to do. Tampering with the manufacture of the device or modifying the manufacture of the device will void the warranty. 4.2. -
Page 17: Net Leds
HIGH The output is deactivated1 The output has been activated1 TABLE 9 For the output to be active, a link must be created from an input on a remote or the local WiZo-Link device. page 17 www.centsys.com... - Page 18 COLOUR LED State Description GREEN This input has not been configured to trigger an output; no link exists to either a local or remote WiZo-Link device. This is the factory default state. The input is linked to at least one output, either a local or remote WiZo. Fast Flash Input to Output configuration mode for this specific Input.
-
Page 19: Default State
SECTION 4 QUICK START SECTION 4.3. Default State The WiZo’s default state is that no network has been configured. The device can be returned to this state at any time. The WiZo Devices do not belong to a network; therefore, the user / installer must do the following: 1. Create a Master Device to create the network. 2. -
Page 20: Network Master Process
SECTION 4 QUICK START SECTION 3. An amber LED will illuminate indicating the channel scanning phase, followed by a red LED. The static illuminated red LED indicates that the device is ready but that no other devices have been found on the network. 4. -
Page 21: Configuring An I/O Link
SECTION 4 QUICK START SECTION • When Federated mode is exited, the device LEDs stop flashing and the buzzer will be silenced • To re-enter Federated mode, simply repeat the steps above 4.6. Configuring an I/O Link The instructions provided assume that the installer can see each of the WiZo Devices visually. It is recommended that a record be kept of which devices have been linked to avoid accidentally placing a WiZo or WiZos into Supervision mode. -
Page 22: One To Many
SECTION 4 QUICK START SECTION 2. When a single beep is heard, release the button. The network is open for configuration. a. The specific Input link LED will flash fast to indicate that this Input is in linking configuration mode. b. All Output(s) link LEDs will slow flash if they are not currently linked to this specific Input and all Output link LEDs that are will fast flash. 3. On the target WiZo, press and hold down the I/O button until a beep is heard. a. The LINK: O LED that was flashing slowly will remain on. -
Page 23: Implementing Further I/O Links
(relay) will make a clicking sound. 6. The user can continue to add I/O links using the above steps as required. The output of a single WiZo-Link device or multiple WiZo-Link devices can be actuated by more than one input. -
Page 24: Output State
SECTION 4 QUICK START SECTION 4.6.4. Output State The output or relay of the WiZo toggles or switches on and then off when the input is triggered; this is the factory default and does not require any additional setup or confi guration. Alternatively, the output can be confi gured to latch or stay on when the input is triggered. Changing the output mode is done at the output WiZo, and not at the WiZo where the input is triggered. -
Page 25: Removing An Io Link
SECTION 4 QUICK START SECTION Start 1. Locate the I/O button on the output WiZo. When working with installed WiZos, locating the output WiZo would rely on the installer keeping a record of which input WiZos activate the outputs of WiZos that aren’t visible. -
Page 26: Removing A Device From A Network
SECTION 4 QUICK START SECTION Removing an IO link does not remove the WiZo-Link device from the network, it simply removes the I/O connection. The WiZo will still be a part of the network and continue to work as a signal repeater, ensuring that the network is robust and remains fully redundant. -
Page 27: Removing I/O Links While In Supervision Mode
Either one of the supervision LEDs will now no longer fl ash. b. The I/O link has been removed. The above process will remove the WiZo-Link device that can’t be reached IO Links and takes the WiZo that has lost the link out of Supervision mode. To illustrate: 1. -
Page 28: Specifications
SECTION 5 SPECIFICATIONS 5. Specifications 5.1. Technical Specifications The following specifications were correct at the time of publishing and may be subject to change without notice. Device Specifications Supply Voltage Minimum Supply 11.5 Vdc Maximum Supply 24 Vdc Current Consumption Average Current 30 mA @ 12Vdc Peak Current 50 mA @ 12Vdc Maximum Devices Devices per network Inputs / Device Outputs / Device Number of outputs... -
Page 29: Installation
cation includes the ability to diff erentiate between AC and DC power supplies, and profi ciency in working with low-powered electronics devices. 6.1. Prepare for Installation The WiZo-Link is a DC (Direct Current) powered system. The unit is under no circumstances to be connected to an AC power supply. This action will damage the unit and void the warranty! Shown in Figure 13 below is an example installation of the product; the product is not limited to this example. -
Page 30: Troubleshooting
The orange LED indicates that the WiZo has a weak signal to adjacent WiZo-Link devices. • Ensure that no obstruction impedes the line-of-sight • An additional WiZo-Link device can be installed to act as a repeater to improve signal strength 6.3.2. I/O Scenario My input triggers intermittently, activating the output. -
Page 31: Warranty Information
4. Has been repaired by any workshop and / or person NOT previously authorised by the manufacturer. 5. Has been repaired with components not previously tested, passed or authorised by Centurion Systems (Pty) Ltd, South Africa or one of its subsidiary companies. page 31 www.centsys.com... -
Page 32: Appendix
SECTION 8 APPENDIX 8. Appendix 8.1. Wiring a G-ULTRA into a D-Series Controller via a WiZo Possible Activations Possible Notifi cations • Trigger Open • Gate Open / Closed • Gate Opening / Closing • Gate Standing Open • Mains Failure •... -
Page 33: Wiring A G-Ultra Into A Electric Fence Controller Via Wizos
SECTION 8 APPENDIX 8.2. Wiring a G-ULTRA into a Electric Fence Controller via WiZos Possible Activations Possible Notifi cations • Arm / Disarm • Arm Status • Alarm Notifi cations G-ULTRA G-ULTRA RELAY 1 RELAY 2 GND IO1 IO2 IO3 IO4 STATUS WiZo WiZo... -
Page 34: Wiring A G-Ultra Into An Alarm System Via Wizos
SECTION 8 APPENDIX 8.3. Wiring a G-ULTRA into an Alarm System via WiZos Possible Activations Possible Notifi cations • Arm / Disarm • Arm Status • Intruder / Siren G-ULTRA RELAY 1 RELAY 2 GND IO1 IO2 IO3 IO4 +12VDC WiZo WiZo WiZo... - Page 35 Notes page 35 www.centsys.com...
- Page 36 The CENTURION and CENTSYS logos, all product and brand names in this document that are accompanied by the TM symbol are trademarks of Centurion Systems (Pty) Ltd, in South Africa and other territories; all rights are reserved. We invite you to contact us for further details.
Need help?
Do you have a question about the WIZO-LINK and is the answer not in the manual?
Questions and answers