Advertisement
Advertisement
Table of Contents

Related Manuals for Sharper Image EM150


Summary of Contents for Sharper Image EM150
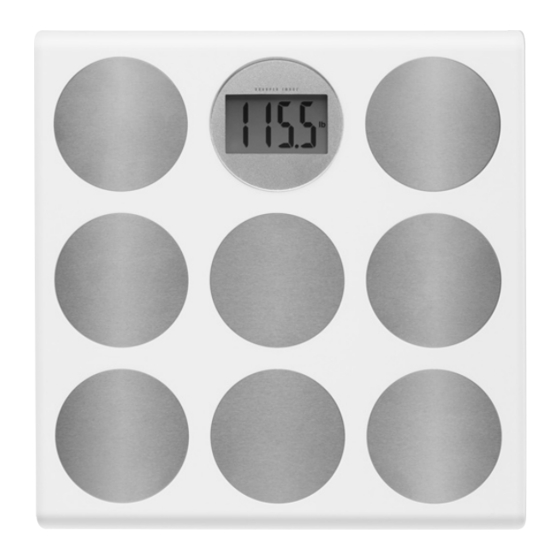
- Page 1 Slim Scale ™ EM150 Instructions Read and save these instructions.
- Page 3 Dear Sharper Image Customer, Thank you for your purchase of a Sharper Image product. We appreciate your business very much. Our goal is that you will be completely satisfied with this product’s quality and performance. We offer generous return privileges and excellent warranties on all our products.
- Page 4 • T his scale is intended for use as a personal scale in a private household. • T his scale contains sensitive electronic components and must not be placed close to heat sources or in environments that are exposed to extreme humidity. • M easurement results from various scales may differ slightly. • T he scale represents a sensitive electronic instrument. High-frequency devices may sometimes cause disturbance when used in the immediate vicinity of other products (for example, mobile phones, CB radio, remote controls and microwave ovens). • I f there are errors such as irregular or faulty readouts on the screen, remove the scale from the source of disturbance or deactivate the source of disturbance when you are using the scale. 1. R emove the insulation tab from the battery compartment. 2. O pen the battery compartment and set the desired measure- ment unit by sliding the switch located in the compartment. Important Notes Setup...
- Page 5 3. P lace the scale on a solid, flat surface. To help prevent slipping, ensure that both the floor and the scale surface are dry. IMPORTANT: Never jump on the scale. 1. G ently tap your foot on the center of the scale. CAL appears on the LCD. CAL indicates that the scale is calibrated. 2. S tand with both feet on the scale once 0.0 appears on the LCD. Stand still, without shifting your weight. 3. D uring weight measurement, the displayed value increases until your weight has been determined. 4. Y our weight is shown in 0.1kg/0.2lb. increments. o-Ld: EEEE appears on the LCD if the weight exceeds the maximum weighing capacity of 180 kg/396 lbs./28 ST. Step off the scale immediately. Setup Using the Scale Warning Indicators...
- Page 6 Lo: If Lo appears on the LCD, replace the batteries. (See Replacing the Batteries.) Err: The scale is unable to measure weight if Err appears on the display. Step off the scale, wait for a few seconds, then try again. Ensure you stand still. 1. R emove the battery-compartment cover. 2. R emove the batteries and replace with two new ones (CR2032 button cell). Observe proper +/– polarities. 3. R eplace the battery-compartment cover, ensuring the cover snaps into place. • K eep the scale in a clean, dry environment. • A void using the batteries unnecessarily. For example, do not store any items on the scale. • W hen storing the scale for a long period of time, remove the batteries. Warning Indicators Replacing the Batteries Storage...
-
Page 7: Operating Temperature
Maximum Load-Bearing Capacity 180 kg/396 lbs./28 ST Minimum Measurable Weight Selectable Measurement Units Increments Operating Temperature Power T his product has been tested to the relevant standards and complies with the requirements of the applicable EU directives. Charging Time Specifications 2 kg/4.4 lbs./.4 ST kg/lbs./ST 0.1 kg/0.2 lbs. 32°F-104°F (0°C~ +40°C) 2 CR2032 button cell (included) - Page 8 What Is Covered This warranty covers any defects in materials or workmanship, with the exceptions stated below. How Long Coverage Lasts This warranty runs for 90 days from the date of original purchase. What Is Not Covered This warranty does not cover damage caused by misuse or use other than as intended and described in the product instruction manual, or loss or damage to batteries or removable parts. What The Sharper Image Will Do The Sharper Image warrants this product against defects in materials and workmanship. When repair is not practical, The Sharper Image will have the option to replace the defective product with one that is the same or has similar functionality. How to Obtain Service Return the product and receipt, along with a brief explanation of the problem, to: If you have questions please feel free to contact our customer service representatives at 1-800-344-5555 or by email at care@web.sharperimage.com. This warranty gives you specific legal rights, and you may have other legal rights that vary from state to state. © 2006, 2007 Sharper Image Corporation Sharper Image Corporation 350 The Embarcadero, Sixth Floor San Francisco, CA 94105-1218 Shop online: Actual product may differ slightly from the product described herein. V2 02/07 Warranty T.S.I.
Need help?
Do you have a question about the EM150 and is the answer not in the manual?
Questions and answers