Table of Contents
Advertisement
Quick Links
Download this manual
See also:
Service Manual
Advertisement
Table of Contents
Troubleshooting

Related Manuals for Sharp Notevision PG-C30XU


Summary of Contents for Sharp Notevision PG-C30XU
- Page 1 OPERATION MANUAL MODEL PG - C30XU LCD PROJECTOR...
-
Page 2: Operation Manual
2. CONSUMER PRODUCT SAFETY ACT To ensure that you will promptly receive any safety notification of inspection, modification, or recall that SHARP may be required to give under the 1972 Consumer Product Safety Act, PLEASE READ CAREFULLY THE IMPORTANT “LIMITED WARRANTY” CLAUSE. -
Page 3: Important Safeguards
LCD Projector, observe the following basic rules for its installation, use and servicing. For your own protection and reliable usage of your LCD Projector, please be sure to read these “IMPORTANT SAFEGUARDS” carefully before use. -
Page 4: Outstanding Features
UXGA (1,600 1,200) resolution images are intelligently resized to 1,024 13. CUSTOMIZABLE STARTUP SCREEN Allows you to load a custom startup image (i.e. your company logo) to be displayed while the projector is warming up. (Page 38) 14. BUILT-IN PRESENTATION TOOLS A variety of helpful presentation utilities are incorporated to enhance presentations. -
Page 5: Table Of Contents
Outstanding Features …………………………… Contents …………………………………………… Usage Guidelines ………………………………… How to Access the PDF Operation Manuals (for Windows and Macintosh) ……………… For SHARP Assistance (U.S.A. only) ………… Part Names ………………………………………… Setup & Connections Supplied Accessories …………………………… 10 Connecting the Projector ……………………… 11 Operation Basic Operations …………………………………... -
Page 6: Usage Guidelines
Cautions Concerning the Setup of the Projector For minimal servicing and to maintain high image quality, SHARP recommends that this projector be installed in an area free from humidity, dust and cigarette smoke. -
Page 7: (For Windows And Macintosh)
If you encounter any problems during setup or operation of this projector, first refer to the “Troubleshooting” section on page 49. If this operation manual does not answer your question, please call toll free 1-888-GO-SHARP (1-888-467-4277) for further assistance. Or, send us an e-mail at lcdsupport@sharplcd.com . -
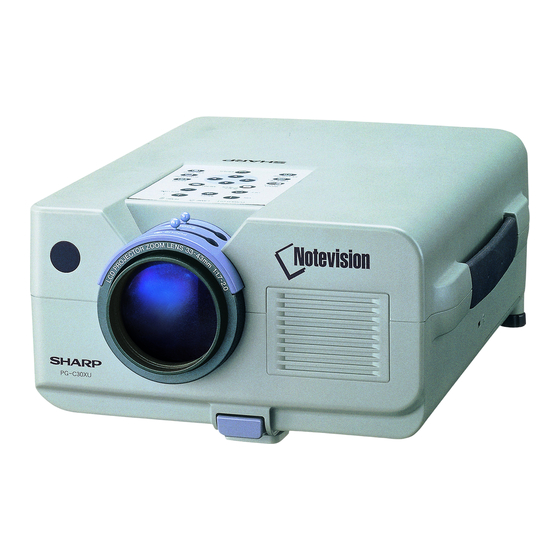
Page 8: Part Names
Part Names Numbers next to the part names refer to the main pages in this manual where the topic is explained. Projector MUTE button POWER indicator POWER buttons (ON/OFF) KEYSTONE button INPUT button FREEZE button ENLARGE button BLACK SCREEN button ADJUSTMENT buttons (∂... -
Page 9: Inserting The Batteries
Part Names Remote Control Front View MUTE button POWER buttons (ON/OFF) KEYSTONE/BLACK SCREEN button RIGHT-CLICK/ ENTER button INPUT button FREEZE button ENLARGE button TOOLS button MOUSE/ ADJUSTMENT switch Inserting the batteries Press in on the arrow mark and slide in the direction of the arrow to remove the battery cover. -
Page 10: Setup & Connections
Setup & Connections... -
Page 11: Supplied Accessories
Computer audio cable DIN-D-sub RS-232C cable QCNW-4870CEZZ QCNW-5288CEZZ PS/2 mouse control cable USB mouse control cable QCNW-5680CEZZ QCNW-5113CEZZ Extra air filter PFILD0076CEZZ LCD projector quick reference TINS-7025CEZZ Sharp Advanced Presentation Software operation manual TINS-7054CEZZ Power cord QACCU5013CEZZ Lens cap PCAPH1307CESB E-10... -
Page 12: Connecting The Projector
Connecting the Projector Connecting the Power Cord Plug the supplied power cord into the AC socket on the back of the projector. Connecting the Projector to a Computer You can connect your projector to a computer for projection of full color computer images. -
Page 13: Connecting The Projector To Video Equipment
• Before using the “Plug and Play” function, be sure to turn on the projector first and the connected computer last. • The DDC, Plug and Play function of this projector operates only when used in conjunction with a VESA DDC compatible computer. - Page 14 Audio cable (sold separately) To audio output terminals CAUTION • Always turn off the projector while connecting to audio components, in order to protect both the projector and the components being connected. • By using external audio components, the volume can be amplified for better sound.
-
Page 15: Connecting Rs-232C Port
• The arrows (→, ↔) indicate the direction of the signals. • A Macintosh adaptor may be required for use with some Macintosh computers. Contact your nearest Authorized Sharp Industrial LCD Products Dealer or Service Center. -
Page 16: Connecting The Remote Mouse Receiver
Connecting the Projector Connecting the Remote Mouse Receiver You can use the remote control as a remote mouse. Connecting to the USB port on a PC or Macintosh 1 Connect one end of the supplied USB mouse control cable to the corresponding terminal on the computer. -
Page 17: Operation
ON and Power OFF can only be used on the remote control. (See page 41.) • After the projector is unpacked and turned on for the first time, a slight odor may be emitted from the exhaust vent. This odor will soon disappear with use. - Page 18 Press INPUT again to change the mode. • When no signal is being received, “NO SIGNAL” will be displayed. When a signal that the projector is not preset to receive is being received, “NOT REG.” will be displayed. 6 Press VOLUME to adjust the volume.
-
Page 19: Setting Up The Screen
Move the projector forward or backward if the edges of the image are distorted. • The projector lens should be centered in the middle of the screen. If the lens center is not perpendicular to the screen, the image will be distorted, making viewing difficult. -
Page 20: Reversed Image Setup
• Optimal image quality can be achieved when the projector is positioned perpendicular to the screen with all feet flat and level. CAUTION • When using a mirror, be sure to carefully position both the projector and the mirror so the light does not shine into the eyes of the audience. - Page 21 Setting up the Screen Projector Remote control 1, 4a On-screen Display On-screen Display (Example: (Example: 4:3 NORMAL image) 16:9 WIDE image) 2 Test Pattern Digital Keystone Correction Pressing ∂ ∂ ∂ ∂ ∂ in Step 2 Digital Shift Press ∂.
-
Page 22: Operating The Wireless Mouse From The Remote Control
Remote Control/Mouse Receiver Positioning • The remote control can be used to control the projector within the ranges shown below. • The remote mouse receiver can be used with the remote control to control the mouse functions of a connected computer within the ranges shown below. - Page 23 RIGHT-CLICK button. Using the remote control in a dark room Press BACKLIGHT, and the buttons will light up. Green lights refer to mouse operations, and red lights to projector adjustments. Button name Position of MOUSE/ADJUSTMENT switch MOUSE LASER POINTER/MENU...
-
Page 24: Using The Gui (Graphical User Interface) Menu Screens
E-23 (Graphical User Interface) Menu Screens Remote control This projector has two sets of menu screens (INPUT 1 or 2 and INPUT 3) that allow you to adjust the image and various projector settings. These menu screens can be operated from the projector or the remote control with the following buttons. -
Page 25: Main Menu
[ON/OFF] 1152 870 Auto Sync Disp [ON/OFF] 1152 882 Audio Treble Resolution Bass Hor Freq Vert Freq Reset Options Lamp Timer Sharp BLK SCRN Disp [ON/OFF] Custom OSD Display [ON/OFF] Blue Background None Startup Image Sharp Economy Mode Custom Auto Power Off [ON/OFF]... -
Page 26: Selecting The On-Screen Display Language
Selecting the On-screen Display Language Projector 1, 5 2, 3 (GUI) On-screen Display Selecting the Video Input System Mode (INPUT 3 (VIDEO) mode only) Projector 1, 6 2, 3, 4 (GUI) On-screen Display E-25 Remote control English is the preset language for the On-screen Display. -
Page 27: Picture Adjustments
• “Color”, “Tint” and “Sharp” do not appear for COMPUTER/ RGB input in INPUT 1 or 2 mode. • “Sharp” do not appear for COMPONENT input in INPUT 1 or 2 mode. (Slide the MOUSE/ADJUSTMENT switch on the remote control to the ADJ. position.) 1 Press MENU. -
Page 28: Adjusting The Color Temperature
This function can be used to adjust the color temperature to suit the type of image input to the projector (video, computer image, TV broadcast, etc.). Decrease the color temperature to create warmer, reddish images for natural flesh tones. Increase the color temperature to create cooler, bluish images for a brighter picture. -
Page 29: I/P Conversion
Use this mode when projecting still images to avoid flicker and stripes that result from interlaced source still images. This projector’s audio is factory preset to standard settings. However, you can adjust it to suit your own preferences by adjusting the following audio settings. -
Page 30: Computer Image Adjustments (Input 1 Or 2 Mode Only)
Computer Image Adjustments (INPUT 1 or 2 mode Only) Projector 1, 5 2, 3, 4 (GUI) On-screen Display E-29 Remote control Adjusting the Computer Image When displaying computer patterns which are very detailed (tiling, vertical stripes, etc.), interference may occur between the LCD pixels, causing flickering, vertical stripes, or contrast irregularities in portions of the screen. -
Page 31: Saving And Selecting Adjustment Settings
2, 3, 4 (GUI) On-screen Display Saving and Selecting Adjustment Settings This projector allows you to store up to seven adjustment settings for use with various computers. Once these settings are stored, they can be easily selected each time you connect a computer to the projector. -
Page 32: Special Mode Adjustment
Computer Image Adjustments (INPUT 1 or 2 mode Only) Projector 1, 6 2, 3, 4 (GUI) On-screen Display Projector 1, 4 2, 3 (GUI) On-screen Display E-31 Remote control Special Mode Adjustment Ordinarily, the type of input signal is detected and the correct resolution mode is automatically selected. -
Page 33: Auto Sync Adjustment
• The sync adjustment is automatically made each time the projector is turned on while connected to a com- puter or the input selection is changed. • The Auto Sync adjustment setting previously made is cleared when the projector’s setting is changed. -
Page 34: Useful Features
Useful Features Freeze Function Projector 1, 2 On-screen Display E-33 Remote control This function allows you to instantly freeze a moving image. This is useful when you want to display a still image from a computer or video, giving you more time to explain the image to the audience. -
Page 35: Digital Image Magnification
Digital Image Magnification Projector Remote control On-screen Display This function allows you to magnify a specific portion of an image. This is useful when you want to display a detailed portion of the image. (Slide the MOUSE/ADJUSTMENT switch on the remote control to the ADJ.) 1 Press ENLARGE. -
Page 36: Gamma Correction
Standard picture without gamma correction. Brightens darker portions of image for more enhanced presentations. Gives greater depth to darker portions of image for a more exciting theater experience. Allows you to adjust gamma value using Sharp Advanced Presentation Software. MOUSE ADJ. -
Page 37: Selecting The Picture Display Mode
Selecting the Picture Display Mode Projector Remote control COMPUTER EXAMPLE aspect ratio Other aspect ratios Input Signal 4:3 aspect ratio Other aspect ratios VIDEO/DTV EXAMPLE 4:3 aspect ratio 480I/P, NTSC, PAL, SECAM 16:9 aspect ratio, 720P, 1080i *The digital image shift function can be used with these picture display modes. -
Page 38: Black Screen Function
Black Screen Function Projector BLACK SCREEN button 1, 5 2, 3, 4 Projected Image (GUI) On-screen Display On-screen Display Override Function Projector 1, 5 2, 3, 4 (GUI) On-screen Display E-37 Remote control This function can be used to superimpose a black screen over the projected image. -
Page 39: Selecting A Background Image
(i.e. your company logo) as the startup image. The custom image must be a 256-color BMP file with a picture size no larger than 1,024 768 pixels. Please see the Sharp Advanced Presentation Software operation manual for how to save (or change) a custom image. -
Page 40: Economy Mode
(GUI) On-screen Display E-39 These functions allow you to reduce the power consumption when the projector is in standby mode. Automatic Power Shutoff Function When no input signal is detected for more than 15 minutes, the projector will automatically shut off. The on-screen message on the left will appear five minutes before the power is automatically turned off. -
Page 41: Password
Password Projector Remote control 1, 6 2, 3, 4, 5 (GUI) On-screen Display (GUI) On-screen Display A password can be set by the user and used with the keylock level to prevent adjustments to certain settings on the GUI. Setting the Password (Slide the MOUSE/ADJUSTMENT switch on the remote control to the ADJ. -
Page 42: Selecting The Keylock Level
(GUI) On-screen Display E-41 Remote control This function can be used to lock the use of certain operation buttons on the projector. The user can still operate the projector fully with the remote control. Description of Keylock Levels Selected item... -
Page 43: Reverse/Invert Image Function
When “Ceiling Front” is selected. When “Rear” is selected. When “Ceiling Rear” is selected. This projector is equipped with a reverse/invert image function which allows you to reverse or invert the pro- jected image for various applications. Description of Projected Images... -
Page 44: Using The Presentation Tools
Menu Window Green Blue Yellow Projector 2, 4 1, 5 When selecting Sharp default image E-43 Remote control This projector is equipped with presentation tools that can be used to emphasize keypoints within your presentation. (Slide the MOUSE/ADJUSTMENT switch on the remote control to the ADJ. position.) 1 Press TOOLS to display the presentation tools menu window on the screen. -
Page 45: Status Function
Status Function Projector Remote control 1, 4 (GUI) On-screen Display This function can be used to display all the adjusted settings on the screen simultaneously. (Slide the MOUSE/ADJUSTMENT switch on the remote control to the ADJ. position.) 1 Press MENU. -
Page 46: Maintenance & Troubleshooting
Maintenance & Troubleshooting E-45... -
Page 47: Air Filter Maintenance
• This projector is equipped with four air filters to ensure the optimal operating condition of the projector. • The air filters should be cleaned every 100 hours of use. Clean the filters more often when the projector is used in a dusty or smoky location. -
Page 48: Lamp/Maintenance Indicators
• If the TEMPERATURE WARNING indicator lights up, follow the above possible solutions and then wait until the projector has cooled down completely before turning the power back on. (At least 5 minutes.) • If the power is turned off and then turned on again, as during a brief rest, the LAMP REPLACEMENT indicator may be triggered, preventing the power from going on. -
Page 49: Replacing The Projection Lamp
Carefully change the lamp by following the steps below. If the new lamp does not light after replacement, take your projector to the nearest Authorized Sharp Industrial LCD Products Dealer or Service Center for repair. Purchase a replacement lamp unit (lamp/cage module) of the current type BQC-PGC30XU/1 from your nearest Authorized Sharp Industrial LCD Products Dealer or Service Center. -
Page 50: Using The Kensington Lock
• The bottom filter cover is not securely installed. • Selected input is wrong. (See page 17.) • Cables incorrectly connected to rear panel of the projector. (See pages 11–15.) • Remote control batteries have run down. (See page 8.) •... -
Page 51: Appendix
CAUTION • Always put on the lens cap to prevent damage to the lens when transporting the projector. • Do not lift or carry the projector by the lens or the lens cap as this may damage the lens. E-50... -
Page 52: Connection Pin Assignments
Connection Pin Assignments Analog Computer 1 and 2 Signal Input Ports: 15-pin mini D-sub female connector RS-232C Port: 9-pin D-sub male connector of the DIN-D-sub RS-232C cable Pin No. RS-232C Terminal: 9-pin Mini DIN connector Pin No. E-51 Computer Input Analog 1. -
Page 53: Rs-232C Port Specifications
• When using the computer control function of the projector, the projector operating status cannot be read to the computer. Therefore, confirm the status by transmitting the display commands for each adjustment menu and checking the status with the On-screen Display. - Page 54 COMMAND PARAMETER CONTROL CONTENTS C1 C2 C3 C4 P1 P2 P3 P4 AUTO PAL (50/60 Hz) SECAM NTSC 4.43 NTSC 3.58 DISPLAY SHARP CUSTOM BLUE NONE SHARP CUSTOM NONE AUTO POWER OFF AUTO POWER ON LEVEL SETTING (0 2) ENGLISH DEUTSCH ESPAÑOL...
-
Page 55: Computer Compatibility Chart
125.6 • This projector may not be able to display images from notebook computers in simultaneous (CRT/LCD) mode. Should this occur, turn off the LCD display on the notebook computer and output the display data in “CRT only” mode. Details on how to change display modes can be found in your notebook computer’s operation manual. -
Page 56: Specifications
Weight (approx.) Supplied accessories Replacement parts This SHARP projector uses LCD (Liquid Crystal Display) panels. These very sophisticated panels contain 786,432 pixels ( Film Transistors). As with any high technology electronic equipment such as large screen TVs, video systems and video cameras, there are certain acceptable tolerances that the equipment must conform Specifications are subject to change without notice. -
Page 57: Dimensions
Dimensions Side View Rear View Top View (97.5) (10) (243.5) (229) (10.5) Front View (25) (11) Bottom View (96.5) (43) 2 (76) (83) Units: inches (mm) E-56... -
Page 58: Guide To Effective Presentations
Guide to Effective Presentations Yellow on Black E-57 Electronic presentations are one of the most effective tools presenters can use to persuade an audience. There are several ways to enhance your presentation and maximize your effectiveness. The following are guidelines to help you create and deliver a dynamic presentation. - Page 59 Guide to Effective Presentations Blue Green Black Sans-serif Serif • Background colors can subconsciously affect the audience: Red—increases viewers’ pulse and breathing and encourages risk taking but can also be associated with financial loss. Blue—has a calming and conservative affect on the audience but can also create boredom among corporate audiences that are often inundated with this background color.
- Page 60 Guide to Effective Presentations Good Presentation from SHARP E-59 c. Set-Up Good When giving a presentation, you need to set the stage both figuratively and literally for success. The way you set up a presentation room will have a great impact on the audience’s perception of you and your message.
- Page 61 AC adaptor for added safety. • Make sure you are completely familiar with the control panel on your projector and remote controls. • If you are using a microphone, check it out before hand and walk around to see where you might have problems with feedback.
-
Page 62: Freeze Function
Presentation tools Helpful tools used to emphasize keypoints throughout a presentation. RS-232C Function to control the projector from the computer by using the RS-232C ports on the projector and computer. Startup image The image displayed when the projector is turned on. -
Page 63: Index
Index AC socket ... 11 ADJUSTMENT buttons ... 23 Air filter ... 46 Anti-aliasing digital keystone correction ... Aspect ratio ... 36 Audio adjustments ... 28 AUDIO INPUT 3 terminals ... 13 AUDIO INPUT terminal for INPUT 1, 2 ... 11 AUDIO OUTPUT terminal ... - Page 64 SHARP CORPORATION...