Sharp Carousel R-1512 Installation Instructions Manual
Over the range models
Hide thumbs
Also See for Carousel R-1512:
- Cooking manual (40 pages) ,
- Service manual (32 pages) ,
- Manual (40 pages)
Table of Contents
Advertisement
Quick Links
Advertisement
Table of Contents

Related Manuals for Sharp Carousel R-1512


Summary of Contents for Sharp Carousel R-1512
- Page 1 ® O V E R T H E R A N G E M O D E L S R-1510, R-1511, R-1512, R-1514...
-
Page 2: For Customer Assistance
F O R C U S T O M E R A S S I S T A N C E To aid in reporting this microwave oven in case of loss or theft, please record below the model number and serial number located on the unit. -
Page 3: Table Of Contents
C O N T E N T S For Customer Assistance ... Precautions to Avoid Possible Exposure to Excessive Microwave Energy ... Contents ... Consumer Limited Warranty ... Product Information Card ... Important Safety Instructions ... Unpacking and Installation Instructions . Unpacking and Examining Your Oven ... -
Page 4: Consumer Limited Warranty
Sharp to the purchaser with respect to the Product, and shall constitute full satisfaction of all claims, whether based on contract, negligence, strict liability or otherwise. In no event shall Sharp be liable, or in any way responsible, for any damages or defects in the Product which were caused by repairs or at- tempted repairs performed by anyone other than an authorized servicer. -
Page 5: Save These Instructions
9. This appliance should be serviced only by qualified service personnel. Contact nearest Sharp Authorized Servicer for examination, repair or adjustment. 10. Do not cover or block any openings on the appliance. -
Page 6: Unpacking And Installation Instructions
If there is any damage, do not operate the oven and contact your dealer or SHARP AUTHORIZED SERVICER. See Installation Instructions for more details. -
Page 7: Electrical Grounding Instructions
1. If you have any questions about the grounding or electrical instructions, consult a qualified electrician or serviceperson. 2. Neither Sharp nor the dealer can accept any liability for damage to the oven or personal injury resulting from failure to observe the correct electrical connection procedures. -
Page 8: Tools Recommended For Installation
U N P A C K I N G A N D I N S T A L L A T I O N I N S T R U C T I O N S 5 TOOLS RECOMMENDED FOR INSTALLATION •... -
Page 9: Preparation Of The Oven
U N P A C K I N G A N D I N S T A L L A T I O N I N S T R U C T I O N S 7 PREPARATION OF THE OVEN 1. -
Page 10: Ventilation System (Preparing Oven For Installation)
U N P A C K I N G A N D I N S T A L L A T I O N I N S T R U C T I O N S 8 VENTILATION SYSTEM (PREPARING OVEN FOR INSTALLATION) This Microwave Oven/Hood is designed for adaptation to three types of hood ventilation systems. Select the type required for your installation. - Page 11 U N P A C K I N G A N D I N S T A L L A T I O N I N S T R U C T I O N S (C) VERTICAL EXHAUST: OUTSIDE VENTILATION 1.
- Page 12 U N P A C K I N G A N D I N S T A L L A T I O N I N S T R U C T I O N S 9 OVEN INSTALLATION THIS OVEN CANNOT BE PROPERLY INSTALLED WITHOUT REFERRING TO THE MOUNTING INSTRUC- TIONS FOUND ON WALL AND TOP CABINET TEMPLATES.
-
Page 13: Microwave Oven
U N P A C K I N G A N D I N S T A L L A T I O N I N S T R U C T I O N S 10 PREPARATION AND USE OF THE CARTON TO ASSIST IN THE INSTALLATION OF THE MICROWAVE OVEN Utilization of the carton may make installation easier. -
Page 14: Mounting Oven To The Wall
U N P A C K I N G A N D I N S T A L L A T I O N I N S T R U C T I O N S MOUNTING OVEN TO THE WALL Two people are recommended to attach the Microwave Oven/Hood to the Mounting Plate. 1. Thread the Power Supply Cord through the hole made in the bottom of the top cabinet. Install the oven by snapping it onto the Mounting Plate. -
Page 15: Information You Need To Know
A good microwave cookbook is a valuable asset. Check it for microwave cooking principles, techniques, hints and recipes. See pages 34 and 35 for ordering the Ultimate Accessory, the Sharp Carousel Microwave Cookbook. NEVER use the oven without the turntable and support nor turn the turntable over so that a large dish could be placed in the oven. -
Page 16: About Utensils And Coverings
A micro- wave-safe thermometer will assist you in determining correct doneness and assure you that foods have been cooked to safe temperatures. Sharp is not responsible for any damage to the oven when acces- sories are used. -
Page 17: About Microwave Cooking
NEVER leave the thermometer in the food during cooking, unless it is approved for microwave oven use. • Rearrange foods such as meatballs halfway through cooking both from top to bottom and from the center of the dish to the outside. -
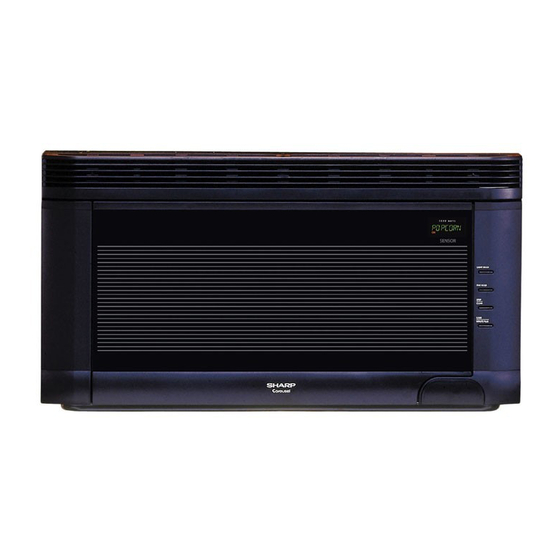
Page 18: Part Names
P A R T N A M E S FRONT VIEW BOTTOM VIEW 1 Oven door with see-through window Be careful with the edge of the oven door as it is glass and could chip or break. 2 Door hinges 3 Waveguide cover: DO NOT REMOVE. -
Page 19: Part Names
P A R T N A M E S Words in the lower portion of the display will light to indicate what function is in progress. R - 1 5 1 0 / R - 1 5 1 1 / R - 1 5 1 2 / R - 1 5 1 4 indicates pages on which there are feature descriptions and usage information. -
Page 20: Before Operating
B E F O R E O P E R A T I N G • Before operating your new microwave oven make sure you read and understand this operation manual completely. • Before the oven can be used, follow these procedures: 1. -
Page 21: Manual Operation
M A N U A L O P E R A T I O N TIME COOKING Your oven can be programmed for 99 minutes 99 seconds (99.99). Always enter the seconds after the minutes, even if they are both zeros. •... -
Page 22: Sensor Cook
S P E C I A L F E A T U R E S SENSOR COOK Sharp's Sensor is a semi-conductor device that detects the vapor (moisture and humidity) emitted from the food as it heats. The sensor adjusts the cooking times and power level for various foods and quantities. -
Page 23: Instant Sensor
S P E C I A L F E A T U R E S INSTANT SENSOR Instant Sensor allows you to cook or reheat many of your favorite foods by touching just one pad. • Suppose you want to cook 2 baked potatoes. P R O C E D U R E Touch BAKED POTATOES pad. -
Page 24: Sensor Cook Center
S P E C I A L F E A T U R E S SENSOR COOK CENTER You can cook many foods by touching the Sensor Cook Center pad and the food number. You don’t need to calculate cooking time or power level. •... -
Page 25: Sensor Cooking Recipes
S P E C I A L F E A T U R E S SENSOR COOKING RECIPES Mexican Seasoned Potatoes 4 medium baking potatoes (8 ounces each) cup olive oil 1 tablespoon instant minced onion teaspoon chili powder 1 Cut each potato lengthwise into 4 equal wedges. Place potato wedges into 10-inch square casserole. Toss potatoes with oil to coat well. -
Page 26: Sensor Cook Recipes
S P E C I A L F E A T U R E S SENSOR COOK RECIPES Glazed Apple Slices 1/4 cup brown sugar tablespoons margarine or butter tablespoons apricot preserves 1/2 teaspoon ground nutmeg 1/4 teaspoon salt 1/2 cup sugar 1 Combine brown sugar, margarine and apricot preserves in a small bowl. -
Page 27: Reheat
S P E C I A L F E A T U R E S REHEAT Reheat allows you to heat three of your favorite foods by touching just one pad. • Suppose you want to heat 2 fresh rolls or muffins. P R O C E D U R E FRESH ROLLS/ MUFFINS... -
Page 28: Defrost Center
S P E C I A L F E A T U R E S DEFROST CENTER DEFROST CENTER automatically defrosts all the foods shown in the DEFROST CENTER CHART below. Round the weight to the nearest half pound. (Ex: if the steak's actual weight is 2.2 lb round to 2.0 lb. -
Page 29: Keep Warm Plus
S P E C I A L F E A T U R E S KEEP WARM PLUS KEEP WARM PLUS allows you to keep food warm for 30 minutes. DIRECT USE • Suppose you want to keep a cup of soup warm for 30 minutes. -
Page 30: Other Convenient Features
O T H E R C O N V E N I E N T F E A T U R E S CUSTOM HELP Custom Help provides 4 features that make using your oven easy because specific instructions are provided in the interactive display. -
Page 31: Multiple Sequence Cooking
O T H E R C O N V E N I E N T F E A T U R E S MULTIPLE SEQUENCE COOKING Your oven can be programmed for up to 4 automatic cooking sequences, switching from one power level setting to another automatically. -
Page 32: Cleaning And Care
C L E A N I N G A N D C A R E Disconnect the power cord before cleaning or leave the door open to inactivate the oven during cleaning. Exterior The outside surface is precoated steel and plastic. Clean the outside with mild soap and water;... -
Page 33: Replacing Parts
R E P L A C I N G P A R T S CHARCOAL FILTER Charcoal Filter, Sharp part number RK-240 which was installed in your oven, is used for nonvented, recircu- lated installation. The filter should be changed every 6 to 12 months depending on use. -
Page 34: Reference Guide
If “NO” is the answer to any of the above questions, please check electrical outlet, fuse and/or circuit breaker. If they are functioning properly, CONTACT YOUR NEAREST SHARP AUTHORIZED SERVICER. A microwave oven should never be serviced by a “do-it-yourself” repair person. -
Page 35: Specifications
Please send me ______ cookbooks at $10.25 each Illinois sales tax, (if applicable) per book $.44 no. of books _____________ Other tax, (if applicable) I have enclosed a check made payable to Sharp Accessories & Supplies Center. Please bill my Acct. No. _______________________________________... -
Page 36: Notes
N O T E S... - Page 37 N O T E S...
-
Page 38: Guia Auto-Touch
6 a 17 onzas 0,5 a 2,0 libras 0,25 a 1,25 libras FRESH ROLLS & MUFFINS START MINUTE PLUS CANTIDAD 1 a 8 0,5 a 2,0 tazas 1 a 8 START MINUTE PLUS ® es una marca registrada de Sharp Corporation. -
Page 39: Guia Auto-Touch
G U I A A U T O - T O U C H Continuado de la página 38. DEFROST CENTER 1 Pulse la tecla DEFROST CENTER y el numero 2 para Bistec/Costillas. Ingrese el peso correspondiente y a continuacion pulse la tecla. Pulse la tecla START/ MINUTE PLUS. - Page 40 A U T O - T O U C H G U I D E For more complete information and safety precautions, refer to your Operation Manual. SET CLOCK SHARP SIMPLY THE BEST PRESS CLEAR AND PRESS is in the display, first touch STOP/CLEAR. CLOCK 1 Touch TIMER/CLOCK pad and number 2.
Need help?
Do you have a question about the Carousel R-1512 and is the answer not in the manual?
Questions and answers