Table of Contents
Advertisement
Quick Links
Advertisement
Table of Contents

Related Manuals for Sharp PC-MM1 series


Summary of Contents for Sharp PC-MM1 series
- Page 1 NOTEBOOK COMPUTER PC-MM1 Series OPERATION MANUAL...
-
Page 3: Notice For Users In The Usa
(2) this device must accept any interference received, including interference that may cause undesired operation. Responsible Party: SHARP ELECTRONICS CORPORATION Sharp Plaza, Mahwah, New Jersey 07430-2135 TEL: 1-800-BE-SHARP ® Partner, SHARP has determined that this product meets ® guidelines for energy efficiency. - Page 4 For disposal or recycling information, please contact your local authorities or the Electronics Industries Alliance: www.eiae.org Copyright It is the intent of Sharp that this product be used in full compliance with the copyright laws of the United States and that prior permission be obtained from copyright owners whenever necessary.
- Page 5 TO PREVENT ELECTRICAL SHOCK, DISCONNECT THE AC CORD AND THE BATTERY BEFORE SERVICING. CAUTION: FOR A COMPLETE ELECTRICAL DISCONNECTION, PULL OUT THE MAIN PLUG AND THE BATTERY. VORSICHT: UM DIE STROMZUFUHR VOLLSTÄNDIG ZU UNTERBRECHEN, DEN NETZSTECKER HERAUSZIEHEN UND DIE BATTERIE ÈNTFERNEN. ATTENTION: POUR UN ARRET TOTAL DU SYSTEME, DECONNECTEZ LA PRISE DE COURANT SECTEUR ET LA BATTERIE.
-
Page 6: Safety Precautions
Safety Precautions General • Follow all cautions and instructions, which may be marked, on the computer. • Except as described elsewhere in this manual, refer all servicing to qualified personnel. Immediately shut off the computer and seek servicing under the following conditions: when the power cord or plug is damaged or frayed •... -
Page 7: Battery Precautions
Do not drop the computer nor hit it with other equipment. • Do not scratch the surface of the LCD screen. • Turn off the computer and disconnect the AC power cord before cleaning. Battery Precautions CAUTION DANGER OF EXPLOSION IF BATTERY IS INCORRECTLY REPLACED. REPLACE ONLY WITH THE SAME OR EQUIVALENT TYPE RECOMMENDED BY THE MANUFACTURER. - Page 8 Charging • Charge the battery pack only with the AC adapter included with your computer. Discharging • Do not use the battery pack for any purpose other than powering your computer. Storage • Store the battery pack in a cool and dry place. Never allow the temperature to exceed 60°C (140°F) during storage.
- Page 9 Caution Your computer is integrated with a magnet on the right side of the display. Be sure to keep the magnetic cards or floppy disks away from the right side of your computer. Otherwise the data on the cards or floppy disks may be erased. This computer has a sensor on the right side of the keyboard which responses to the magnet.
-
Page 10: About This Manual
Information in this manual is subject to change without notice and does not represent a commitment on the part of SHARP Corporation and its sales subsidiaries. SHARP Corporation and its sales subsidiaries shall not be liable for technical or editorial errors or omissions contained herein; nor for incidental or consequential damages resulting from the furnishing, performance, or use of this material. -
Page 11: Recording Important Information
Recording Important Information For future reference, please record the following information in the spaces provided below. Model Number: Serial Number: Date of purchase: Dealer’s Name: Place of purchase: Password: The serial number is printed on a sticker located on the bottom of the computer. -
Page 12: Manual Conventions
Manual Conventions This manual uses a set of style conventions described below. Notes and Cautions are italicized with icons: A note icon informs you of a special technique or information that may help you perform a task or better understand a process. A caution icon alerts you to something that may cause problems or damage to hardware, software or data. -
Page 13: Table Of Contents
Table of Contents Notice for Users in the USA...i Safety Precautions ...iv About This Manual...viii Recording Important Information...ix Manual Conventions...x Table of Contents ...xi Overview of Computer ...xiv Quick Setup Installing Battery Pack...1-1 Connecting to AC Power Source...1-4 Setting Up Windows...1-6 Turning Off Your Computer ...1-8 Basic Operations Choosing Power Source ...2-1... - Page 14 Peripherals Using Peripherals ... 4-1 Optional External Floppy Disk Drive Unit ... 4-3 Optional External CD-ROM Drive Unit ... 4-6 Display ... 4-11 Audio System ... 4-14 USB Device... 4-16 PC Card ... 4-17 Printer... 4-21 Communication Functions LAN Unit ... 5-1 Wireless LAN...
- Page 15 Appendixes Maintenance and Care ...A-1 Troubleshooting Index xiii...
-
Page 16: Overview Of Computer
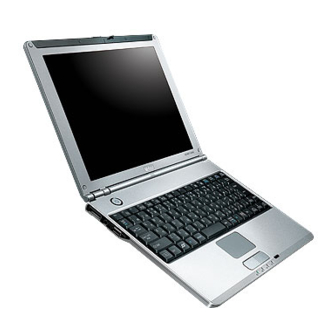
Overview of Computer Each number after an arrow indicates the page referring to the part. Actual appearance of your computer may be slightly different depending on the model. Front Wireless LAN Antenna →5-4 Power Button →1-5 Status Indicators →xv LCD Screen →2-8 Keyboard →2-6... - Page 17 Status Indicators Never turn off the computer when the hard disk indicator is on. This may damage the data on the hard disk. Right AC Adapter Jack→1-4 PC Card Slot→4-17 Left Headphone/Audio Output Jack →4-14 Connection Cradle Connector →7-5 USB Port →4-3,7,16,21 USB port→4-3,7,16, 21 Hard Disk Indicator...
- Page 18 Rear Display Connector →4-12 Bottom Reset Switch →2-3 Speaker Battery Pack→3-1 RESET Ventilation Openings→ iv...
-
Page 19: Quick Setup
Quick Setup Your computer is designed and pre-configured for easy setup and use. This chapter describes the steps to set up your computer and operate it as quickly as possible. Read this chapter first. Installing Battery Pack Your computer is powered with either the battery pack or AC power source. See the next chapter for more information on the power sources. - Page 20 Insert the battery pack into your computer by matching the notched parts of the battery to the projected parts on your computer. Notched Part Push the battery pack all the way until you hear the clicking sound. Projected Part Projected Part Notched Part...
- Page 21 Slide the battery stopper to the locked position ( ). Turn over your computer and go to the next section.
-
Page 22: Connecting To Ac Power Source
Connecting to AC Power Source Plug the AC adapter cable into the AC adapter jack on the right side of your computer. Plug the AC power cord into the AC adapter. Plug the AC power cord into a wall outlet. •... - Page 23 Slide the display cover lock lever to the right until the display cover releases, and raise the cover. Display Cover Lock Lever Press the power button to turn on your computer. Power Button Power Indicator When you turn on your computer, the power indicator ( computer goes through a self test to detect any problems, and Windows setup process starts.
-
Page 24: Setting Up Windows
Setting Up Windows The steps in the setup process are as follows: • Configuring your location, language and keyboard type • Configuring your time zone • Accepting license agreement • Naming your computer • Creating an account • Completing configuration To setup Windows, follow the instructions on the screen. - Page 25 Properties Dialog Box in Windows In this manual, you will often see the expression “XXX Properties dialog box.” A dialog box is a window containing text boxes, check boxes, buttons, etc., with which you can send commands to Windows or other application programs. To open the properties dialog boxes, click start - Control Panel.
-
Page 26: Turning Off Your Computer
Turning Off Your Computer When you’ve finished using your computer, turn it off with one of the following ways: • From the start menu Click start – Turn Off Computer. In the Turn off computer dialog box, click Turn Off. •... -
Page 27: Basic Operations
Basic Operations This chapter describes the basic operations of your computer. Choosing Power Source You can use your computer with one of the following power sources: • AC power from a wall outlet Use AC power whenever possible; rely on the battery only when AC power is not available. - Page 28 • When the battery is hot, the battery indicator may turn off and stay off until the battery becomes cool. • For more information on System standby/hibernate, see Chapter 3. Using AC Adapter When connected to a wall outlet, the AC adapter provides power for operation and charges the battery.
-
Page 29: Resetting System
Resetting System You may need to restart the system if your computer hangs up or a new hardware or software is installed. When a message appears after the installation, click OK, Yes, etc. to restart Windows. You can also restart Windows by clicking start - Turn Off Computer; then, Restart. Warm Boot (Software Reset) If the system is locked up because of a software problem, you can reset or reboot the system by pressing the Ctrl+Alt+Del keys simultaneously and select Applications tab... -
Page 30: Using Glide Pad
Using Glide Pad Your computer is equipped with an integrated pointing device called a glide pad. Using the glide pad, you can move the pointer, select an item from a menu, and perform other tasks in the same way you would with a mouse. •... - Page 31 Click, Double-click, and Right-click To click or double-click, you can use the left button just like that of a mouse. Instead of clicking the left button, you can also just tap gently anywhere on the rectangular pad. For right-clicking, you must use the right button. If the interval between clicks is too long, the double-click will not function.
-
Page 32: Using Keyboard
Using Keyboard Your computer, equipped with the Windows Enhanced Keyboard, provides all the functionality of a full-sized desktop keyboard. Special Keys Windows Key Application Key System Function Keys Your keyboard contains the function keys labeled F1 through F12 for special actions. Use them in conjunction with Fn key. -
Page 33: Controlling Volume
Controlling Volume You can adjust the output volume of your computer with the following volume controls which interact with each other. With Keyboard Press Fn and F3 ( ) keys simultaneously to decrease the output volume. Press Fn and F4 ( ) keys simultaneously to increase the output volume. -
Page 34: Adjusting Display
Any software containing audio function may also have its own volume control. Note that the volume controls discussed on the previous page and the software volume control will interact with each other. Adjusting Display You can adjust the brightness, resolution, and number of colors of the internal LCD display for more comfortable viewing. - Page 35 Only 1024 x 768 dots appear even on the internal LCD screen of 1280 x 1024, or 2048 x 768 resolution. To see the hidden parts, move the mouse pointer to the parts and scroll it. To set 1280 x 1024, and 2048 x 768 resolution mode selectable, open the Display Properties dialog box, click Settings tab, then, Advanced button and uncheck Hide modes that this monitor cannot display of Monitor tab.
- Page 36 Changing Wallpaper and Setting Screen Saver You can enjoy various desktop patterns or screen savers. Changing Wallpaper In the Display Properties dialog box, select Desktop tab. Select appropriate wallpaper in Background. Click OK. Setting Screen Saver In the Display Properties dialog box, select Screen Saver tab. Select an appropriate screen saver in Screen saver and set time when screen saver starts.
-
Page 37: Sharing Your Computer
Sharing Your Computer If you are sharing your computer with your colleagues or family members, set a user account for each person. Every user can choose their favorite desktop setting, web site lists, or make their own My Documents folder etc., and save them to their user accounts. - Page 38 Select a new account to start Windows XP again. If you cannot see Switch User in Log Off Windows dialog box, click Change the way users log on or off string in User Accounts dialog box, and check Use Fast User Switching and click Apply Options. Setting Password to User Account You can set a password to each user account to avoid unauthorized use of your computer.
- Page 39 Changing Password Follow the steps 1-2 on the previous section. Select the account you want to change, if you log on to your computer as a member of the Computer administrators group. If you log on your computer with a limited account, go to the next step. (You cannot change the password of another user account.) Select Change the password string or Change my password string.
- Page 40 2-14...
-
Page 41: Battery And Power Management
Battery and Power Management This chapter explains how to manage your computer’s power effectively and use the battery pack. In this section, you often see the expression “Power Options Properties dialog box”. To open the dialog box: 1. Click start - Control Panel. 2. -
Page 42: Checking Battery Level
Charging Battery Pack Connect the AC adapter to your computer. While the battery is being charged, the battery indicator lights orange. When the battery is fully charged, the battery indicator turns green. Charging time may vary according to the status of your computer. •... - Page 43 • The remaining operating time depends on the amount of the power you are consuming. If you are using the audio system, PC card slot, hard disk drive, or peripheral devices with your computer, it may consume more battery life. •...
- Page 44 On Windows, you can set the battery level for sounding an alarm and letting your computer go on System standby, System hibernate or shut down afterward. In the Power Options Properties dialog box, select Alarms tab. Set the battery level at which the alarms are activated. We recommend you set Critical battery alarm to 5 % or more and Low battery alarm to more than the value of Critical battery alarm.
- Page 45 Changing Battery Pack to Optional High Capacity Battery Pack The capacity of a battery pack gradually decreases when used repeatedly (the deterioration rate depends on the operating environment). If the battery life becomes extremely short even after the conditioning, you should buy an optional high capacity battery pack (CE-BL25).
- Page 46 Insert the high capacity battery pack into the computer by matching the notched parts of the battery to the projected parts of the computer. High Capacity Battery Pack (CE-BL25) Checking Battery Level of High Capacity Battery Pack Follow the steps in Checking Battery Level in this chapter. Conditioning High Capacity Battery Pack Follow the steps in Conditioning Battery Pack in this chapter.
-
Page 47: Power Management
Power Management Power management saves electricity and extends battery life by controlling power supply to built-in devices. You can set the following power management properties on Windows. • Stopping power supply to the hard disk • Stopping power supply to the display •... - Page 48 Using System Standby/Hibernate System standby/hibernate is a very useful power management tool. For example, after your computer has entered System standby mode, you can restart your computer more quickly when compared to a restart, after a normal shutdown operation. When your computer resumes from System standby/hibernate, the system restores the exact last state of your computer.
- Page 49 Supporting System Hibernate If your battery becomes completely discharged during System standby, you will lose unsaved data and will need to reboot your computer. Therefore, if you are planning to leave your computer powered by battery for long periods of time, we recommend System hibernate. Confirm that System hibernate is supported with the following steps below.
- Page 50 Close the Control Panel window. • You press the power button. The above functions if you perform the following: In the Power Options Properties dialog box, select Advanced tab. Select Hibernate or Stand by in When I press the power button on my computer field.
-
Page 51: Peripherals
Peripherals This chapter describes how to use peripheral devices with your computer. You can connect an optional floppy disk drive unit, an optional CD-ROM drive unit, a printer, an external monitor, a PC card, or other devices to your computer. To ensure proper use, be sure to read the instructions for each peripheral device before connecting it to your computer. - Page 52 Peripheral Connection Overview USB Device* *Including the optional external floppy disk drive unit (CE-FD05) and the optional external CD-ROM drive unit (CE-CD05). External Monitor Headphone/ Audio Equipment USB Device*...
-
Page 53: Optional External Floppy Disk Drive Unit
Optional External Floppy Disk Drive Unit You can use double-density (2DD) 720KB or high-density (2HD) 1.44MB floppy disks with the optional external floppy disk drive unit (CE-FD05). Connecting Optional External Floppy Disk Drive Unit • Do not place the floppy disk drive unit on its side or upside down. •... - Page 54 Inserting Floppy Disk Hold the floppy disk with the arrow facing up, toward the drive. Slide the disk into the drive until it locks into place. Arrow Facing Up • Always insert a floppy disk straight into the floppy disk drive. •...
- Page 55 Formatting Floppy Disk Make sure the floppy disk is not write-protected, and insert it into the floppy disk drive. Click start - My Computer. Right-click 3 ½ Floppy (A:) icon; then, click Format… from the pop-up menu. Select the appropriate formatting options. Click Start to start formatting.
-
Page 56: Optional External Cd-Rom Drive Unit
Optional External CD-ROM Drive Unit A compact disc (CD) is a storage medium, with which you can read data, play music, install and run programs, etc. The optional external CD-ROM drive unit (CE-CD05) can be connected to either of the USB ports on your computer. CAUTION FOR LASER Use of controls or adjustments or performance of procedures other than those specified herein may result in hazardous radiation exposure. - Page 57 Connecting Optional External CD-ROM Drive Unit (CE-CD05) • Do not place the CD-ROM drive unit on its side or upside down. • Do not press on the CD-ROM drive unit. It may damage the drive or cause malfunction. • Do not place the AC adapter on the CD-ROM drive unit. It may cause the drive to malfunction.
- Page 58 Slide the cover latch to the right and open the cover. Cover Latch Remove the protection sheet before you use the drive for the first time. Protection Sheet Handling CD • Do not write on either side of the disk, particularly the non-label side. Data is read from the non-label side.
- Page 59 Place your CD onto the disk spindle and press on the center of your CD with label side up, until it locks onto the disk spindle. Close the disk cover. • Insert a CD firmly until it is locked onto the spindle; then, close the disk cover, or the disk may fall off the spindle and get damaged.
- Page 60 Playing CD With some CD-ROMs, you can hear the sound of them through the audio out jack of the CD-ROM drive unit. Connect headphones or speaker system with an amplifier to the audio out jack. Audio Out Jack Disconnecting Optional External CD-ROM Drive Unit To remove the unit, you need to perform the following steps before you remove it.
-
Page 61: Display
Display You can use an external monitor with your computer. To display the images on both displays simultaneously, use the 1024x768 resolution. • Some monitors, which are not compatible with your computer, may not display correctly. • In this section, you often see the expression “Display Properties dialog box.”... - Page 62 Connect the display converter cable to the display connector, then, the other end of the display cable to your external monitor. If the display cable has screws, be sure to tighten them. Turn on the external monitor; then, your computer. Disconnecting External Monitor Turn off your computer and the external monitor.
- Page 63 Select Lynx3DM+ tab; then, click the button before the output display you desire and click OK. Click OK to close the Control Panel window. • You can also switch the display with Fn+F5 ( ). • When you log on your computer as a member of the Limited group, you cannot switch the display with the dialog box.
-
Page 64: Audio System
Audio System You can output sound to speakers, audio equipment or headphones. Connecting Speaker You can connect stereo speakers with an amplifier to the audio output jack on the left side of your computer. Stereo Mini Plug Connecting Audio Equipment You can connect analog audio equipment to the audio output jack on the left side of your computer. - Page 65 You can adjust the output volume on Windows by clicking the speaker symbol on the taskbar or use Fn + F3 ( ) or F4 ( ) keys combination. Connecting Headphone Use the headphone with an impedance of 8Ω.or more (32Ω is recommended.) Headphone Headphone/Audio Output Jack Stereo Mini Plug...
-
Page 66: Usb Device
USB Device Your computer has an interface called Universal Serial Bus (USB) and its two USB ports support USB1.1 and USB2.0. With a USB connection, you can connect/disconnect peripherals without turning off your computer. Generally, when you connect a device to your computer, the necessary driver will be installed automatically. -
Page 67: Pc Card
PC Card Your computer is equipped with a PC card (PCMCIA) slot, which can accommodate a Type II card or a CardBus compliant card. You can insert/eject the card without turning off your computer. Inserting PC Card When a new card is correctly inserted, the appropriate driver is automatically installed. -
Page 68: Ejecting Pc Card
Push the PC card eject button again until the protection card pops out, then remove it. Push the PC card eject button all the way inside the cabinet for safekeeping. Insert a PC card into the slot with the label face up until it locks into place. If the dialog box asking you What do you want Windows to do? appears, select the task you want. - Page 69 Push the PC card eject button so that it will pop out from the side of your computer. Push the eject button until the inserted PC card pops out; then, remove it. Push the PC card eject button all the way inside the cabinet for safekeeping. 4-19...
- Page 70 Insert the protection card. Be sure to insert the protection card after you finish using the PC card slot to protect the PC card slot from being damaged. 4-20...
-
Page 71: Printer
Printer You can connect a printer to either of the USB ports on your computer. Before using a printer, read the printer manual and install the printer driver. Connecting Printer Be sure to read the printer manual before connecting the USB printer to your computer. - Page 72 4-22...
-
Page 73: Communication Functions
Communication Functions This chapter explains how to use the wired LAN unit, the wireless LAN function and the modem card. • When you use communication software: • Connect your computer to the AC power source. • Disable power management. (Refer to Disabling Power Management of Chapter 3.) •... - Page 74 Connecting Your Computer To LAN Turn off your computer. Open the cover for the LAN jack on the right side of your computer. To avoid damaging the LAN unit, close the cover after you finish using the LAN unit. Connect one end of the LAN cable to the LAN jack and the other end to the network hub.
- Page 75 Configuring LAN Unit Click start - Control Panel. Click Network and Internet Connections; then, Network Connections. If Classic view is selected, double-click Network Connections icon. Right-click Local Area Connection. From the pop-up menu, click Properties. In the Local Area Connection Properties dialog box, set the network setting according to the instruction of your network administrator.
-
Page 76: Wireless Lan
Wireless LAN Your computer has an integrated wireless LAN function compliant with IEEE 802.11b standard. You can access the network by the wireless LAN. There are two kinds of wireless networks: a network using an access point and an Adhoc network. You can connect your computer to a wired LAN or the Internet through an access point that is also compliant with IEEE 802.11b standard. - Page 77 Connecting to Internet via an Access Point You can connect your computer to the Internet or a wired network via an access point supporting IEEE 802.11b. Refer to the manual of the access point or consult your network administrator if you are not sure. Communicating with Other Computers •...
- Page 78 11. Configure the network by setting the name of your computer and workgroup. To communicate with other wireless enabled computers, set your computer name and the workgroup name. Your computer name should be unique and the workgroup name should be same as others. Confirming the Status of Wireless Connection Before performing the following instructions, confirm the devices that you want to communicate with are enabled for wireless LAN.
- Page 79 Connecting WEP configured network Wireless communication has security issues. Some networks are configured with WEP (Wired Equivalent Privacy) keys or encryption keys to protect the transmitted data. To connect into the WEP configured network, follow the steps below. Right-click Wireless Network Connection icon ( View Available Wireless Networks.
-
Page 80: Network Setup Utility
To set your specific network settings, confirm that your computer is connected into the network and has the proper settings for your current environment and follow the instructions below. Click start – All Programs – SHARP Network Setup Utility – SHARP Network Setup Utility. Click OK. - Page 81 Changing Network Settings To change the loaded network settings, right-click on the icon you want to change the settings in the Network Setup Utility window and click Edit settings in the pop-up menu. Then, edit the settings. Deleting Network To delete the loaded network settings, right-click on the icon you want to delete in the Network Setup Utility window and click Delete setting in the pop-up menu.
-
Page 82: Modem Card (May Not Be Available In Some Countries)
Modem Card Your computer may come with the modem card. In order to use the modem on your computer, install the supplied modem card in your computer. • The modem in your computer is designed only for regular analog telephone lines. The modem may be damaged when connected to a digital ISDN terminal or a digital PBX. - Page 83 Connecting Modem To Telephone Line Turn off your computer. Connect PC card connector end of the included modem cable to the connector of the inserted modem card. Connect the modular jack end of the modem cable to the telephone line. Turn on your computer.
- Page 84 Power Management To use communication software, you may have to disable power management. See Disabling Power Management of Chapter 3. • See also the manual or online help of the software you are using. • Within the communications software you are using, set the COM port of the built-in modem to COM3.
-
Page 85: Setup Utility
Setup Utility This chapter describes how to run the Setup Utility to change settings on your computer. Running Setup Utility With the Setup Utility, you can customize the system configuration information, such as time and date, port assignments, or passwords. The information you have specified is saved in a special area called CMOS RAM, which the system reads every time you turn on your computer. - Page 86 Entering and Exiting Setup Utility Turn on your computer. When Press <F2> to enter SETUP appears, press F2. Change to the desired settings. Refer to the next section. Select Exit menu; then, press Enter. Select one of the exit methods, and press Enter. Confirm the message and press Enter again.
-
Page 87: Main Menu
Quick Boot defines whether the system skips the check of the internal memory while booting, to shorten the boot time Quiet Boot defines whether the SHARP logo appears on the screen while booting. CPU Information shows the information on the CPU. -
Page 88: Advanced Menu
Advanced Menu Internal Pointing Device enables or disables the built-in glide pad. Resolution Expansion defines whether the Setup Utility screen is expanded when the resolution is 640x480 or 800x600. Enabled means that the screen is expanded. Plug&Play O/S enables or disables plug & play function. PCI Configuration normally has to be as default Security Menu Set Supervisor Password defines the supervisor password (up to eight characters). - Page 89 Your computer supports two different levels of password security: Supervisor password and User password. You cannot set a user password unless you have set a supervisor password. If you share your computer with others, we recommend that you set both the supervisor and the user password, and let others know the user password only.
-
Page 90: Boot Menu
Select Exit menu and confirm Exit Saving Changes is highlighted; then press Enter Confirm Yes is highlighted and press Enter. The system restarts. Boot Menu Boot Sequence specifies where the system boots from. Press Enter to open the sub menu. The system boots from the drive at the top of the list. If the system cannot find the drive, it will boot from the second one;... -
Page 91: Connection Cradle
Connection Cradle This chapter describes how to use the connection cradle with your computer (hereafter called MM series). Using the connection cradle, you can connect MM series to another computer (hereafter called Host computer). • Never insert anything but the MM series inside the cradle. •... - Page 92 Installing Application Program You cannot install an application program to the MM series from the host computer when the MM series is inserted in the cradle. In order to install an application program into the MM series, do either of the following performance: •...
-
Page 93: Setting Up Connection Cradle
Setting Up Connection Cradle 1. Attach the stand plate to the connection cradle matching the projection on the bottom panel of the connection cradle with the hole of the stand plate. Hole Stand Plate Connection Cradle Bottom 2. Tighten two screws to fasten the stand plate to the connection cradle. Screws Projection... -
Page 94: Overview Of Connection Cradle
Overview of Connection Cradle Front Panel READY Lamp Hard Disk Lamp Battery Indicator Host PC Connection Switch Rear Panel Charging Battery Pack Using Connection Cradle Set the connection cradle on a stable and even work surface. Be sure to attach the stand plate to the connection cradle before inserting the MM series into the connection cradle. - Page 95 Plug the AC adapter cable to the AC adapter jack on the rear side of the connection cradle. Plug the AC power cord to the wall outlet. Always use the AC adapter and the AC power cord included with your computer or the optional one.
-
Page 96: Using Mm Series As External Hard Disk
Using MM Series as External Hard Disk Using the connection cradle, you can use MM series as an external hard disk of your host computer. Ordinarily, you can utilize the data between the mobile PC and the host PC via LAN or using the medium such as a memory card. By using the connection cradle, however, you can read /modify/save data stored in MM series without powered Host computer Back Up Important Data Periodically... -
Page 97: Connecting To Host Computer
Connecting to Host Computer MM series can be used as an external hard disk of the computer with one of the following operation systems installed: • Microsoft Windows XP Home Edition/ Microsoft Windows XP Professional (hereafter called Windows XP) • Microsoft Windows 2000 Professional (hereafter called Windows 2000) •... - Page 98 Connecting MM Series To Host Computer The following shows how to connect the MM series to the host computer for the first time using the connection cradle. Do not connect the USB cable until instructed to do so (in Step5 below). 1.
- Page 99 Slide the host PC connection switch on the connection cradle to the ON position. The READY indicator on the connection cradle turned green. When you connect the connection cradle to the host computer for the first time, necessary drivers are automatically installed. Wait until installation process completes.
- Page 100 The drive names such as (E:) and (F:) differs depending on the environment of the host computer. If you set a user password to MM series in the Setup Utility, MM series is shown not as hard disk drive, but as removable disk drive with the icon representing the MM series inserted in the connection cradle with the key mark.
-
Page 101: Stopping Connection From Host Computer
Stopping Connection from Host Computer You can stop the connection from the host computer while keeping MM series inserted in the connection cradle, by first stopping the device on the host computer then sliding the host PC connection switch of the connection cradle to OFF. Be sure to stop the device before sliding the switch on the connection cradle to OFF. -
Page 102: Removing From Connection Cradle
Connecting to Host Computer Again While you keep MM series inserted in the connection cradle, slide the connection switch back to ON to connect to the host computer again. When you do not remove MM series from the connection cradle after stopping the device, the connection is stopped, although the READY indicator is on. -
Page 103: Setting Password
Setting Password You can set a “user password” to your computer to avoid unauthorized use of the hard disk of the MM series when connected to the host computer using the connection cradle. Set the Supervisor password and User Password in the SetupUtility . Setting Password Set a user password of the MM series in the Setup Utility. - Page 104 In case of Windows Me When the host computer is Windows Me, cancel the password on the host computer, before deleting the user password in the Setup Utility of the MM series. Cancel the password. Stop the device. Remove your computer from the connection cradle. Run the Setup Utility on MM series and delete the user password.
-
Page 105: Maintenance And Care
Appendixes The appendixes contain additional information on the use and care of your computer. Maintenance and Care This appendix provides you with information on how to maintain your computer in excellent working condition. Cleaning Your Computer Cabinet Apply a small amount of mild cleaning solution to a dry, lint-free cloth and wipe the cabinet with the cloth. - Page 106 • Do not carry your computer powered on. This may result in loss of data and/or damage to the hard disk drive. • Make sure the display cover is closed before traveling. Otherwise, the cover may be opened unawares, and the display or the keyboard will be damaged. •...
-
Page 107: Troubleshooting
Troubleshooting This chapter describes how to troubleshoot computer problems. Common Problems Problems with your computer can be caused by something as minor as an unplugged power cord or as major as a damaged hard disk drive. The information in this troubleshooting section is designed to help you find and solve minor problems. - Page 108 Trouble when Starting Question: Why doesn't the power indicator or the battery indicator turn • Make sure the AC adapter is correctly connected to the AC adapter jack of your computer. • Make sure the AC power cable is correctly connected to a live wall outlet. Connect another electric equipment to the wall outlet and check whether it is live or not.
- Page 109 Trouble with Display See the Display section in Chapter 2 and 4. Question: Why is the screen blank? • Press any key to see if any power management feature has turned off the screen to save power. • See the power indicator to check whether your computer is turned on. •...
- Page 110 • When you select Extended Desktop mode, Fn+F5 key combination does not work. Trouble with Keyboard/Glide Pad Question: Why doesn't the keyboard or the glide pad function? • Try the following in this order: Press Ctrl+Alt+Delete and select Users tab of Windows Task Manager dialog box.
- Page 111 Trouble with Hard Disk Question: Why can't I read or write data to/from the hard disk? • Confirm the drive and file names are correct. • Confirm the hard disk has sufficient free space. Trouble with CD Question: Why can’t I read data from a compact disc or play files? •...
- Page 112 Question: Why can't I access the LAN? • Confirm the cable is properly connected to the LAN jack and the network hub. • Confirm the network configuration is appropriate. • Confirm the LAN driver is enabled in System Properties dialog box. Click Hardware tab, then, Device Manager.
- Page 113 • When you have more than one available access points, your computer may be connected to the access point other than the one you want to access: Right-click Wireless Network Connection icon ( View Available Wireless Networks. Select the desired network in the Available wireless networks list; then, connect to the network.
- Page 114 to connect again. (The distance between computers or access points should be less than approximately 190 ft. (60 m) in the direct line-of-sight.) • Confirm the IP address and the subnet mask of each computer are set correctly. • Confirm the WEP key is correctly entered if the WEP security of other devices, which you want to communicate with, is enabled.
- Page 115 Other Troubles Question: Why is the battery pack discharged so quickly? • Condition the battery pack. (Refer to Conditioning the Battery Pack section of Chapter 3.) Question: Why is the date and/or time incorrect? • Correct the date and time in Windows. Double-click the time appearing on the taskbar and set them in Date and Time Properties dialog box.
- Page 116 Question: Why can’t find the drivers and applications? • You may accidentally remove them. They are stored on the last recovery disk. (i.e. when two recovery CDs are provided, they are stored on the “Disk 2”.) When you are not sure how to install them or the CD does not have the drivers or applications, consult local service staff.
- Page 117 hibernate mode. Be sure to turn off the MM series before setting it into the connection cradle. • Once you stop the device on the host computer with the MM series in the connection cradle, it is not recognized as an external hard disk. Slide the host PC connection switch once to OFF, then back again to ON.
- Page 118 T-12...
- Page 119 Index AC adapter connecting, 1-4 using, 2-2 Account creating, 2-11 switching, 2-11 Antenna, 5-4 Audio controlling output volume, 2-7 Battery pack changing, 3-5 charging, 3-2 checking level, 3-2 conditioning, 3-4 indicator, 2-1 3-3 low battery indication, 3-3 Cleaning computer, A-1 handling, 4-8 inserting, 4-8 removing, 4-9...
- Page 120 Glide pad changing configuration, 2-5 clicking and double-clicking, 2-5 drag and drop, 2-5 scroll, 2-5 troubleshooting, T-4 Hard disk drive troubleshooting, T-5 Indicators antenna,5-4 power,1-5, 2-1 battery status, 2-1,3-3 status, xv Keyboard function keys, 2-6 special keys, 2-6 troubleshooting, T-4 windows key, 2-6 configuring, 5-3 connecting to wired network, 5-2...
- Page 121 generating conditions, 3-9 resuming from, 3-8 System hibernate about, 3-8 generating conditions, 3-9 resuming from, 3-8 supporting, 3-9 Status indicators, xv Troubleshooting common problems, T-1 communications, T-5 CD, T-5 Connection Cradle, T-10 display, T-3 floppy disk drive, T-4 hard disk drive, T-5 keyboard or glide pad, T-4 peripherals, T-8 wired LAN, T-6...
- Page 122 Index-2...
- Page 123 SHARP CORPORATION 2003 SHARP CORPORATION PRINTED IN JAPAN TINSE3551ACZZ...