Table of Contents
Advertisement
32
ACCESSORIES
Recommended accessories for use with your tool are available from your
local dealer. If you need assistance regarding accessories, please contact
manufacturer at 1-877-571-2391.
W A R N I N G
The use of any accessory not recommended for use with
this appliance could be hazardous.
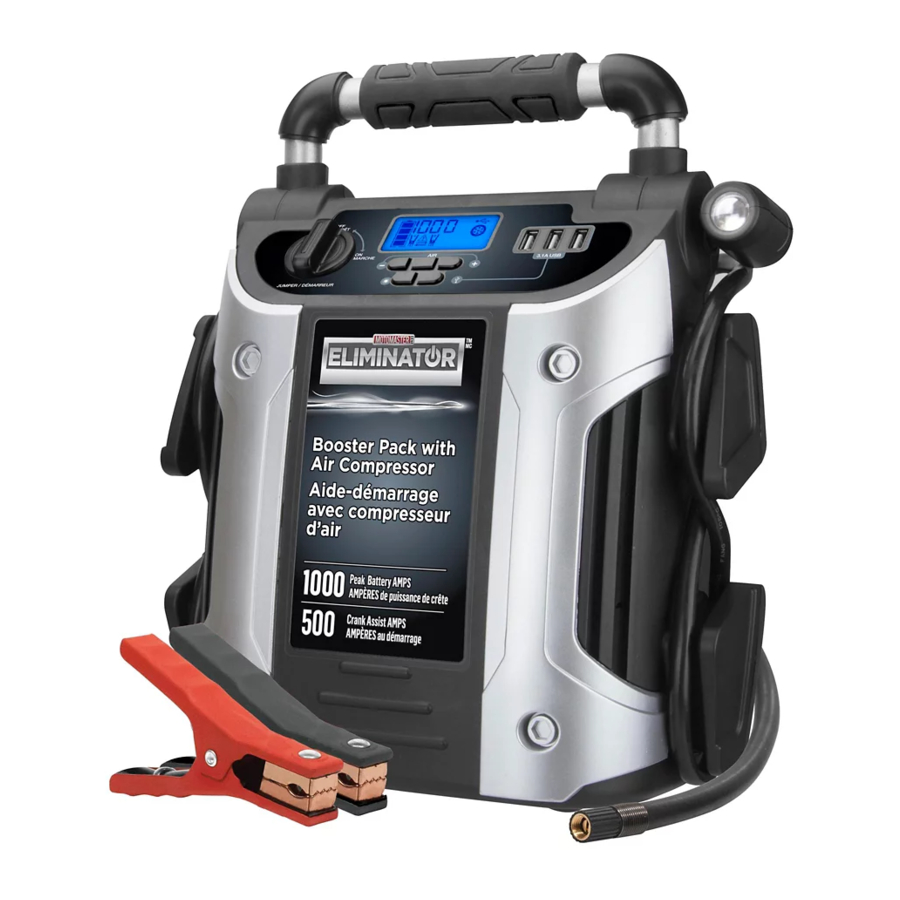
SPECIFICATIONS
Boost Ampere
12 V DC, 700 A instantaneous,
On: 5 seconds, 350 A Off: 1 minute
Peak Amperage
1400 A
Battery Type
Maintenance-free, sealed lead acid,
12 V DC, 21 aH
Area Light
1 long-life white LED
USB Port
3.1 A max., 5 V DC
Compressor Maximum
120 PSI
Pressure
12 V DC Adaptor
12 V DC
J7C09ME_11-1913_EN_082418.indd 32-1
011-1913-6
®
8/24/2018 11:15:43 AM
Advertisement
Table of Contents

Related Manuals for Motomaster Eliminator 11-1913-6


Summary of Contents for Motomaster Eliminator 11-1913-6
- Page 1 011-1913-6 ACCESSORIES ® Recommended accessories for use with your tool are available from your local dealer. If you need assistance regarding accessories, please contact manufacturer at 1-877-571-2391. W A R N I N G The use of any accessory not recommended for use with this appliance could be hazardous.
- Page 2 Owner’s Manual MODEL 11-1913-6 Booster Pack with Air Compressor ® J7C09ME_11-1913_EN_082418.indd 2-3 8/24/2018 11:15:43 AM...
-
Page 3: Table Of Contents
TABLE OF CONTENTS INTRODUCTION INTRODUCTION .................... The Booster Pack with Air Compressor is a compact, durable, portable jump-start system for vehicles that have a standard 12 V battery system. SAFETY INFORMATION ................This self-contained, rechargeable system will start most vehicles without General Safety Warnings and Instructions ........ -
Page 4: Safety Information
SAFETY INFORMATION SAFETY INFORMATION (cont’d) • The following conventions are used in this guide: Do not abuse cord. Never carry appliance by cord or yank it to disconnect from receptacle. Keep cord from heat, oil, and sharp edges. W A R N I N G •... - Page 5 SAFETY INFORMATION (cont’d) SAFETY INFORMATION (cont’d) • • Use of an attachment not supplied, recommended or sold by When using this unit close to the vehicle’s battery and engine, stand the manufacturer specifically for use with this unit may result in a risk of unit on a flat, stable surface, and be sure to keep all clamps, cords, clothing electrical shock and injury to persons.
-
Page 6: First Aid
SAFETY INFORMATION (cont’d) FIRST AID damage that may shorten the unit’s working life, protect it from direct C A U T I O N sunlight, direct heat and/or moisture. • All ON/OFF switches should be in the OFF position when the unit is To reduce the risk of injury charging or not in use. -
Page 7: Preparing For Use
PREPARING FOR USE PREPARING FOR USE (cont’d) Lead acid batteries require routine maintenance to ensure a full charge and W A R N I N G long battery life. All batteries lose energy from self-discharge over time and more rapidly at higher temperatures. Therefore, batteries need periodic SHOCK HAZARD charging to replace energy lost through self-discharge. -
Page 8: Controls & Features
PREPARING FOR USE (cont’d) PREPARING FOR USE (cont’d) Controls and Features ARRÊT MARCHE 3.1A USB JUMPER / DÉMARREUR ® ® Feature Description Feature Description Area Light Power Button Built-in 120 Volt AC Charger (under protective cover) Jump-Starter Power Switch 12 V DC Charging Port (under Compressor Controls: protective cover) Decrease Pressure Control (–),... -
Page 9: Charging With An Ac Source
PREPARING FOR USE (cont’d) COMMON ACTIONS AND UNIT RESPONSES Charging with an AC Source Important Œ Pull open the AC adaptor cover located on the back of the unit. • The DC recharging method will NOT recharge the unit as effectively as ... -
Page 10: Jump-Starting Your Vehicle
COMMON ACTIONS AND UNIT RESPONSES (cont’d) JUMP-STARTING YOUR VEHICLE Negative Grounded Battery The following actions turn the unit on and activate the LCD screen: ... the backlit LCD screen will display the Battery Status Icon, Battery Voltage If the clamp connections Indicator, and the Clamp Icons. -
Page 11: Positive Grounded Battery
JUMP-STARTING YOUR VEHICLE (cont’d) JUMP-STARTING YOUR VEHICLE (cont’d) Positive Grounded Battery ’ “ Turn on ignition switch and Turn the Jump-Starter Power crank the engine in 5-6 second Switch back to the OFF bursts until engine starts. The position. Disconnect the negative (–) clamp first, then backlit LCD screen will display disconnect the positive (+) - Page 12 JUMP-STARTING YOUR VEHICLE (cont’d) JUMP-STARTING YOUR VEHICLE (cont’d) W A R N I N G ’ “ Turn on ignition switch and Turn the Jump-Starter Power crank the engine in 5-6 second Switch back to the OFF To reduce the risk of injury or property damage bursts until engine starts.
-
Page 13: Charging A Usb Device
JUMP-STARTING YOUR VEHICLE (cont’d) USB PORTS discontinue jump-start procedure and look for other problems that need – Allow the unit to cool down for several minutes before to be corrected. attempting to use the USB Ports again. • If vehicle fails to start, turn off the ignition, turn off the Jump-Starter Power –... -
Page 14: Emergency Area Light
EMERGENCY AREA LIGHT USING THE COMPRESSOR The Emergency Area Light is controlled by the Area Light Power Button on The built-in 12 volt DC compressor is the ultimate compressor for all front of the unit. vehicle tires, trailer tires and recreational inflatables. A needle adaptor is supplied that screws onto the end of the Sure Fit®... - Page 15 USING THE COMPRESSOR (cont’d) USING THE COMPRESSOR (cont’d) Inflating Tires or Products With Valve Stems Important Œ Screw the Sure Fit® nozzle onto the valve stem. Do not overtighten. Make sure the Jump-Starter Power Switch has been turned OFF before ...
-
Page 16: Troubleshooting
USING THE COMPRESSOR (cont’d) TROUBLESHOOTING Inflating Other Inflatables Without Valve Stems Condition Solution Make sure all of the unit’s functions are turned off. Unit will not charge Make sure a suitable gauge extension cord is properly connected to both the unit and a functioning AC outlet. -
Page 17: Maintenance And Care
Never submerge the unit in water. If the unit gets dirty, gently clean the MotoMaster® warrants this battery booster for 1 year from the date of outer surfaces of the unit with a soft cloth moistened with a mild solution of purchase at retail against defective material or workmanship that may water and detergent.
Need help?
Do you have a question about the Eliminator 11-1913-6 and is the answer not in the manual?
Questions and answers
how do you charge the charger it self..how do you know if it's charged
To charge the MotoMaster Eliminator 11-1913-6, connect it to an AC power source. The unit features a battery status indicator on the backlit LCD screen. When fully charged, the display will show four solid bars. If the battery is partially charged, two or three solid bars will appear. One solid bar indicates a nearly empty battery, and four blank bars mean the battery is completely empty and needs charging.
This answer is automatically generated
@Mr. Anderson mine does it is fully charged but once I unplug the unit. The battery gage shows me it's not charged.
Allo, j’ai fermé l’appareil et il fait un bruit comme un sifflement sans arrêt et n’est pas branché ( non branché et fermé? Je n’arrive pas à arrêter le bruit Que dois-je faire? Quelle est la cause? Merci
J ai un Eliminator 1400 amps 700 La batterie ne charge plus qu’au plus bas des 3 lumières guide. Peux-t-on changer la batterie et combien serait le coût.
The manual states that except for the fuse in the 12 V DC Charging Adaptor, there are no user-replaceable parts. It does not mention the battery being replaceable. The cost of a replacement battery is not provided.
This answer is automatically generated
My batteries are fully charged, when I want to put air in my ro water tank, the compressor does not run. This booster pack does not hold its charge. I would not recommend this product.