Table of Contents
Advertisement
Advertisement
Table of Contents

Related Manuals for dji Smart Controller


Summary of Contents for dji Smart Controller
- Page 1 DJI Smart Controller User Manual v1.0 2019.01...
- Page 2 Searching for Keywords Search for keywords such as “battery” and “install” to find a topic. If you are using Adobe Acrobat Reader to read this document, press Ctrl+F on Windows or Command+F on Mac to begin a search. Navigating to a Topic View a complete list of topics in the table of contents.
-
Page 3: Using This Manual
Important Hints and Tips Explanation Video Tutorials Please watch the tutorial videos in the link below, which demonstrate how to use this product safely: http://www.dji.com/dji-smart-controller Download DJI ASSISTANT Download DJI Assistant 2 at http://www.dji.com/dji-smart-controller © 2019 DJI All Rights Reserved. -
Page 4: Table Of Contents
Introduction Overview Preparing the Smart Controller Charging the Battery Attaching the Control Sticks Smart Controller Operations Turning the Smart Controller On and Off Activating the Smart Controller Linking the Smart Controller Controlling the Aircraft Operating the Camera Display Interface Homepage... -
Page 5: Product Profile
-4° F (20° C) to 104° F (40° C). DJI GO Share: The brand new DJI GO Share function enable users to transfer images and videos to smart devices after they have been downloaded from playback in DJI GO™ 4. -
Page 6: Overview
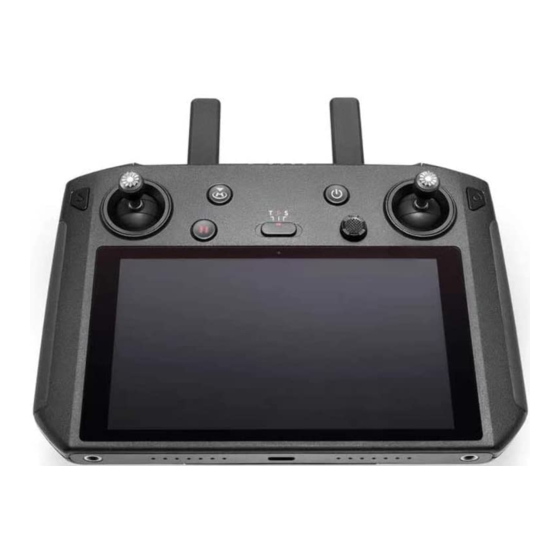
The default configuration is listed below. The homepage. Hold to view a guide to using functions can be set in DJI GO 4. button combinations. Refer to the Button Up: Recenter gimbal/move gimbal downward Combinations section for more information. - Page 7 17 Record Button Press to start recording video. Press 25 Customizable Button C2 again to stop recording. The default configuration is playback. The configuration can be set in DJI GO 4. 18 HDMI Port For video output. 26 Speaker Outputs sound.
-
Page 8: Preparing The Smart Controller
Attaching the Control Sticks Two pairs of control sticks are included in the packaging for the Smart Controller. One pair is stored in the sticks storage slot on the back of the remote controller. Follow the steps below to attach the control sticks stored in the sticks storage slot to the remote controller. -
Page 9: Smart Controller Operations
2. Connect the remote controller to the internet via Wi-Fi. After connecting, tap “Next” to continue and select the time zone, date, and time. 3. Log in with your DJI account. If you do not have an account, create a DJI account and log in. 4. Tap “Activate” on the activation page. -
Page 10: Linking The Smart Controller
If the Smart Controller and the aircraft were purchased separately, follow the steps below to link the remote controller to the aircraft. - Page 11 DJI Smart Controller User Manual In each of the three pre-programmed modes, the aircraft hovers in place at a constant orientation when both sticks are centered. See the figures below to see the function of each control stick in the three preprogrammed modes.
- Page 12 DJI Smart Controller User Manual Center position: Control sticks are centered. Moving the control stick: Control sticks are pushed away from the center. Control Stick Mode 2 Aircraft Remarks Moving the left stick up or down changes the Left Stick aircraft’s altitude.
- Page 13 Note that Vision Systems are disabled in this mode. Regardless of the position the switch is in on the remote controller, the aircraft begins in P-mode by default. To switch flight modes, first go to camera view in DJI GO 4, tap and enable “Multiple Flight Modes”.
-
Page 14: Operating The Camera
However, the function of the button when linked to an aircraft can be customized in DJI GO 4. The functions of the C1 and C2 buttons are set in DJI GO 4. The default configuration for the C1 button is center focus and the default configuration for the C2 button is playback. -
Page 15: Display Interface
Display Interface Homepage The screen displays the homepage when the Smart Controller is powered on. 11:30 100% 1 Time 3 Gallery Displays local time. Tap to check stored images and videos. 2 DJI GO 4 4 App Center Tap to enter DJI GO 4. The button is blue... -
Page 16: Quick Settings
DJI bears no responsibility for the safe use of or compatibility support for third-party apps. If a third-party app is affecting the performance of the Smart Controller, try to delete the third- party apps or reset the Smart Controller to factory settings. To reset the Smart Controller to factory settings, go to Factory Data Reset under Settings. -
Page 17: Dji Go 4 App
DJI GO 4, you can check the flight status and set flight and camera parameters. Since the Smart Controller is compatible with multiple aircraft models, and the interface of DJI GO 4 may change based on the aircraft model, refer to the DJI GO 4 app section in the aircraft’s user manual for more information. -
Page 18: Appendix
After linking, you can use DJI GO 4 to select to store images and videos on the aircraft. Users can also use DJI GO 4 to select to store images and videos to the Smart Controller or on the microSD card in the Smart Controller. -
Page 19: Status Led And Battery Level Indicators Description
DJI Smart Controller User Manual 2. Run DJI GO 4 on your smart device and scan the QR code using DJI GO 4. 3. Wait until the remote controller and the smart device are successfully connected. After connecting, you can check all the images and videos downloaded to the remote controller on your smart device. -
Page 20: Smart Controller Warning Sounds
When the controller beeps and the status LED is solid green, this error may be related to the aircraft or flight status, and a warning will appear in DJI GO 4. If this error is related to the Smart Controller, the controller’s screen will display a warning or alert. -
Page 21: Calibrating The Compass
After the remote controller is used in places with electro-magnetic interference, the compass may need to be calibrated. If the attitude indicator is abnormal in DJI GO 4, calibrate the remote controller manually. Follow the steps below to calibrate your remote controller. -
Page 22: Blocking Third-Party Notifications
2. Follow the diagram on the screen to calibrate your remote controller. Tap HDMI to enable or disable the HDMI connection. Hold to enter settings and adjust HDMI resolution, rotation, output mode, and screen zoom. After-sales Information Please visit http://www.dji.com/support for more information about after-sales service and warranty policies. © 2019 DJI All Rights Reserved. -
Page 23: Specifications
One month to three months: -22° to 113° F (-30° to 45° C) Storage Temperature Range Three months to six months: -22° to 95° F (-30° to 35° C) More than six months: -22° to 77° F (-30° to 25° C) © 2019 DJI All Rights Reserved. - Page 24 5.2 GHz frequency is only allowed for indoor use. ** The Smart Controller supports microSD cards with a maximum storage capacity of 128 GB. *** The Smart Controller will support more DJI aircraft in future. Please visit the official website for the latest information.
- Page 25 This content is subject to change. Download the latest version from http://www.dji.com/dji-smart-controller If you have any questions about this document, please contact DJI by sending a message to DocSupport@dji.com. © 2019 DJI All Rights Reserved. © 2019 DJI All Rights Reserved.
Need help?
Do you have a question about the Smart Controller and is the answer not in the manual?
Questions and answers