MEI CashFlow 690 Series Operator's Handbook Manual
Changegiver
Hide thumbs
Also See for CashFlow 690 Series:
- Manual (41 pages) ,
- Quick reference card (2 pages) ,
- Quick reference card (2 pages)
Table of Contents
Advertisement
Advertisement
Table of Contents

Related Manuals for MEI CashFlow 690 Series


Summary of Contents for MEI CashFlow 690 Series
- Page 1 Operator’s Handbook 722611044 G2...
- Page 2 (natural or computer), without the prior permission of MEI. MEI reserves the right to change the product or the product specifications at any time. While every effort has been made to ensure that the information in...
-
Page 3: Table Of Contents
Operator’s Handbook Changegiver Contents Contents..............iii Safety ................vii National and International Standards Conformance ....... vii Rated Operating Voltage ............vii Dangerous Environments ............vii Product Disposal ..............vii About This Handbook........... ix Changegiver Overview........... 1 Configuration................1 Mechanical Configuration ..............1 Electronic Configuration ............. - Page 4 Contents Operator’s Handbook Service Mode Functions ............. 5 Options..................6 Options Overview..............7 Float..................8 Configure ................. 9 Price Teach ................10 Cassette Set................11 Audit ..................12 Manually Filling Coin Tubes............12 Emptying Coin Tubes ............... 13 Cleaning ..............15 Requirements................
- Page 5 Operator’s Handbook Changegiver Removing................31 Installing ................32 Installation Checks ................32 Connecting ..................32 Product Support ............35 Index................. 37 © Mars, Inc., 2000...
-
Page 6: Contents
Contents Operator’s Handbook This page is intentionally blank ©, Mars, Inc., 2000... -
Page 7: Safety
Operator’s Handbook Safety Safety National and International Standards Conformance CashFlow® 690 Series products operate at Safety Extra Low Voltage Level (SELV) as defined in IEC335/EN60335 ‘Safety of Household and Similar Appliances’. They may be designed into equipment complying with IEC335/EN60335 or IEC950/EN60950 ‘Safety of Information Technology Equipment’. - Page 8 Safety Operator’s Handbook This page is intentionally blank viii ©, Mars, Inc., 2000...
-
Page 9: About This Handbook
It provides high standards of security and reliability that have become the hallmark of MEI products. This Operator’s Handbook compliments your product training and provides you with the information you need to support the day-to-day use of your CashFlow®... - Page 10 About This Handbook Operator’s Handbook This page is intentionally blank ©, Mars, Inc., 2000...
-
Page 11: Changegiver Overview
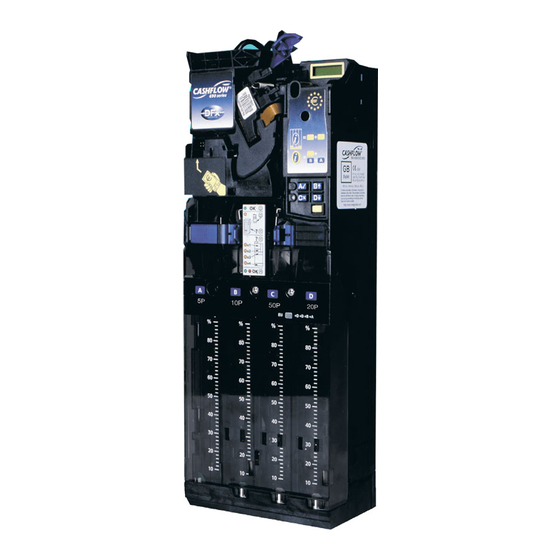
Operator’s Handbook Changegiver Overview Changegiver Overview This section provides a brief introduction to the CashFlow® 690 Series changegiver and its principal components. Configuration The changegiver is modular in structure. Four modules are of particular interest to you because they can be serviced in the field. -
Page 12: Electronic Configuration
Changegiver Overview Operator’s Handbook Electronic Configuration The changegiver is electronically configured prior to dispatch but you can make changes to the configuration on site as described in Service Procedures later in this Handbook. Keypad and Display You use the keypad when you carry out servicing and configuration procedures. -
Page 13: Display (2)
Operator’s Handbook Changegiver Overview q Amber – indicates there is a fault with the vending machine that can usually be rectified q Amber (flashing) – indicates there is a fault that can be rectified, the flashing sequence identifying the faulty module q Red –... -
Page 14: Coin Tube Cassette
Changegiver Overview Operator’s Handbook Coin Tube Cassette The function of the coin tube cassette is to provide a supply of coins for dispensing as change, thus enabling coins of high denomination to be accepted. Acceptor/Separator The acceptor and separator are assembled as one unit. The acceptor has sensors that compare the characteristics of each coin or token inserted with those of a pre-programmed set. -
Page 15: Service Procedures
Operator’s Handbook Service Procedures Service Procedures This section describes procedures you can carry out, via the keypad, using the Service mode. It also includes one procedure, “emptying the coin tubes” that does not involve entering the Service mode. Accessing the Service Mode To access the Service mode, you press the yellow Mode key quickly, without holding it down for more than 1.5 seconds. -
Page 16: Options
Service Procedures Operator’s Handbook To access a service function, press the Mode key followed by a single press of a service function key listed below. q A4 for Float q Bá for Config q C7 for Price Teach q Dâ for Cassette Set q Mode for Audit Each function is independent. -
Page 17: Options Overview
Operator’s Handbook Service Procedures Options Overview Float Up Float Reset Float Float Down Float Teach Enable or Inhibit a Coin Configure View Coin Channel Select a Service Transition Stage for Euro Price Teach Set a Group 1 Cassette Cassette Set Set a Group 2 Cassette Customise a... -
Page 18: Float
Service Procedures Operator’s Handbook Float Note: Exiting from “Float mode” clears any existing credit (EM variants) and resets the “Clean Me” errors message – see page Option What it enables you to do To fill each tube to the programmed float level. This Float Up operation must be carried out when the changegiver is first installed. -
Page 19: Configure
Operator’s Handbook Service Procedures Option What it enables you to do Float Teach To reconfigure the float level. This may be necessary if the coins in the coin tubes are more than is necessary or insufficient to meet trading needs. Bá... -
Page 20: Price Teach
Service Procedures Operator’s Handbook Option What it enables you to do Select a Euro To select a transition stage for the Euro from the following options: Transition Stage (1 to 4) Transition Stage 1 (accept national only, pay out in National only - press key A) Transition Stage 2 (accept national and Euro, pay out in National only –... -
Page 21: Cassette Set
Operator’s Handbook Service Procedures Cassette Set Option What it enables you to do To select a Group 1 (National) cassette and make it Select a Group active. The code you must enter is printed on the 1 Cassette label, stuck on the side of the tube cassette. Enter the code Press Install the new... -
Page 22: Audit
Service Procedures Operator’s Handbook Audit Option What it enables you to do Audit Displays a quick audit that shows the total money value of the coins held in all the coin tubes, followed by the number of physical coins held in each tube. This information will not be displayed if the tube cassette is not fitted as this procedure will park the dispense arms. -
Page 23: Emptying Coin Tubes
Operator’s Handbook Service Procedures Emptying Coin Tubes Option What it enables you to do To empty the coin tubes – for instance if the cassette Empty the Coin is being replaced or simply to empty a coin tube Tubes Example:- If Key A4is pressed coins will be dispensed from tube A Bá... - Page 24 Service Procedures Operator’s Handbook This page is intentionally blank ©, Mars, Inc., 2000...
-
Page 25: Cleaning
Operator’s Handbook Cleaning Cleaning This section describes the cleaning procedures you are advised to carry out on a regular basis. Requirements Apart from general cleaning near the changegiver, the coin pathways, dispenser arms and guides must also be kept clean. You must do this on a regular basis as a build-up of dirt can cause the changegiver to malfunction. -
Page 26: Acceptor
Cleaning Operator’s Handbook Acceptor To clean the acceptor: Switch off the power supply to the vending machine Open the acceptor by pulling on the left-hand side and lifting upwards and to the right Clean the shaded areas shown below, leaving the surfaces clean and dry Close the acceptor. -
Page 27: Cassette, Dispenser Arms And Guides
Operator’s Handbook Cleaning Cassette, Dispenser Arms and Guides To clean the coin tube cassette, dispenser arms and guides: Remove the coin tube cassette by pressing the blue tabs together and then lifting the cassette outwards and upwards – steps A B and C below Clean the upper and lower ends of the coin tubes Without removing the dispenser from the changegiver, carefully clean the arms and guides using a soft brush. - Page 28 Cleaning Operator’s Handbook This page is intentionally blank ©, Mars, Inc., 2000...
-
Page 29: Troubleshooting
Operator’s Handbook Troubleshooting Troubleshooting This section describes how you can use the changegiver built- in troubleshooting facilities. Overview The current status of the changegiver is indicated by the colour of the LED on the keypad. q Red/Amber/Green (alternating) – occurs briefly when the changegiver is first switched on q Green - the changegiver is working correctly q Green (flashing) –... -
Page 30: Amber Led On Or Flashing
Troubleshooting Operator's Handbook Amber LED On or Flashing When there is a fault, the amber LED comes on. It may be steady or flash in a sequence of one to four flashes. At the same time, an error message is shown on the display (A). The number of flashes identifies the problem module as illustrated below. -
Page 31: Amber Led Steady
Operator’s Handbook Troubleshooting After clearing an error, insert a coin in the changegiver to check that it is working properly. Multiple errors are reported in sequence. The system requires you to clear one error before you can move on to the next. Some errors may clear automatically after a short time delay when the changegiver is operated. -
Page 32: Amber Flash X 1
Troubleshooting Operator's Handbook Amber Flash x 1 Four messages can appear as follows: Displayed message: ”Coin Jam” Faulty module: discriminator Effect: no coins are accepted Possible cause: coin jam Action to take: Check for a coin jam Check that the reject lever mechanism is functioning freely Check there is clearance between the changegiver and vending machine escrow levers –... -
Page 33: Amber Flashes X 2
Operator’s Handbook Troubleshooting Check escrow mechanics of the vending machine are functioning freely Check there is clearance between the escrow lever on the changegiver and the lever on the vending machine – see page 32 Displayed message: ”Coin Sensor Error” Faulty module: discriminator Effect: no coins accepted Possible cause: electronics error... -
Page 34: Amber Flashes X 3
Troubleshooting Operator's Handbook Amber Flashes x 3 Error message: ”Separator errorr x” (x can be A, B, C or D) Problem module: separator Possible causes: coin jam at the top of a coin tube; dirty cassette; cassette not properly in place; dirt on the top-level sensor;... -
Page 35: No Led On
Operator’s Handbook Troubleshooting Action to take: Remove the coin tube cassette - see page 17 Free the jam Check the loom is fitted correctly Press the Mode key twice to park the dispenser arms Replace the cassette No LED On If the LED on the keypad does not come on at all: Visually check the power supply to the vending machine –... -
Page 36: Error Messages
Troubleshooting Operator's Handbook Error Messages In addition to the amber LED sequences, to help diagnose problems you can access a list of error messages via the Setup mode. To do so: Press the Mode key and hold it down for 1.5 seconds to access the Setup mode. - Page 37 Operator’s Handbook Troubleshooting Error Message Description View Errors Enables you to access a list of error messages. Press Dâ key to scroll through the list: CM1110 = coin jam View SW Version Software Version Number. Press to see which software version and chips are installed. View VMC Type VMC=Vending Machine Controller.
- Page 38 Troubleshooting Operator's Handbook This page is intentionally blank ©, Mars, Inc., 2000...
-
Page 39: Replacing A Changegiver
Operator’s Handbook Replacing a Changegiver Replacing a Changegiver This section tells you how to replace a changegiver. Before You Begin TURN OFF THE POWER SUPPLY TO THE VENDING MACHINE Check the voltage of the replacement changegiver. Be sure that it is compatible with the voltage supplied by the vending machine. -
Page 40: Fixing Arrangements
Replacing a Changegiver Operator's Handbook Fixing Arrangements The changegiver has three fixing keyholes as shown below. The vending machine is fitted with three screws in matching locations. Alternatively, there may be two location studs and one retaining screw, or a similar arrangement. ©, Mars, Inc., 2000... -
Page 41: Removing
Operator’s Handbook Replacing a Changegiver Removing Disconnect the power cable connecting the changegiver to the vending machine. Also disconnect the comms and display cables if they are fitted Loosen any the upper right-hand retaining screw. You can access it through the hole in the keypad assembly Lift the changegiver off the location screws or studs ©... -
Page 42: Installing
Replacing a Changegiver Operator's Handbook Installing Locate the changegiver on the screws or studs fitted to the vending machine, making sure it is flat against the vending machine panel Retighten the upper right-hand retaining screw Installation Checks Check that when the changegiver is idle there is a gap (dimension x) between the lever on the vending machine and the lever on the... - Page 43 Operator’s Handbook Replacing a Changegiver jack, there will be cables attached to the changegiver with matching connectors which you must also plug in Tuck the unused cables away tidily. Make sure they will not be trapped when the changegiver lever is pressed or when the vending machine door is closed Switch on the power to the vending machine Check that after an initial multi-colour flashing sequence...
- Page 44 Replacing a Changegiver Operator's Handbook This page is intentionally blank ©, Mars, Inc., 2000...
-
Page 45: Product Support
Operator’s Handbook Index Product Support In addition to the MEI offices around the world, an international network of Distributors and Approved Service Centres can offer you technical support and other services as well. These services include repairs, re-programming of your CashFlow ®... - Page 46 Index Operator's Handbook GREAT BRITAIN UNITED STATES ESKDALE ROAD 1301 WILSON DRIVE WINNERSH TRIANGLE WEST CHESTER WOKINGHAM PA 19380 BERKSHIRE, RG41 5AQ TELEPHONE: +1 610 – 4302500 TELEPHONE: +44 (0)118 - 9697700 FACSIMILE: +1 610 – 4302694 FACSIMILE: +44 (0)118 - 9446412 AUSTRALIA ITALY SUITE A...
-
Page 47: Index
Operator’s Handbook Index Index removing ......... 17 Coin tubes emptying.......... 13 manually filling ....... 12 Coin, enable/inhibit ....... 9 Audit, visual ........12 Conformance Standards.......vii Cassette group, selecting ..... 11 Error messages........26 Cassette, customising......11 Euro transmission stage ....... 10 Changegiver overview acceptor/separator ...... - Page 48 Index Operator's Handbook configure ........... 9 float down.......... 8 float reset........... 8 Service mode float teach .......... 9 accessing ........... 5 float up ..........8 functions..........5 gathering an audit ......12 Service mode procedures price teach ........10 cassette set........11 Servicing procedures ......
Need help?
Do you have a question about the CashFlow 690 Series and is the answer not in the manual?
Questions and answers