Table of Contents
Advertisement
Advertisement
Table of Contents

Related Manuals for Clevemed SleepView


Summary of Contents for Clevemed SleepView
- Page 1 ® SleepView User Manual...
- Page 2 CleveMed. Sani-Cloth is a registered trademark of Professional Disposables International, Inc.
-
Page 3: Table Of Contents
Chapter 9: Using SleepView Manager (Offline) ..................27 Preparing SleepView for a Study (Offline Usage) ................... 27 Downloading Study Data from SleepView Monitor (Offline Usage) ............29 Chapter 10: Collecting Data ........................30 Chapter 11: Tips for Dispensing SleepView ....................32 Appendix A: Electromagnetic Immunity and Emissions ................ -
Page 4: Chapter 1: Introduction
SLEEPVIEW USER MANUAL Chapter 1: Introduction The SleepView Monitor complies with Part 15 of the FCC rules. Operation is subject to the following two conditions: (1) this device may not cause harmful interference, and (2) this device must accept any interference received, including interference that may cause undesired operation. -
Page 5: Minimum System Requirements
CleveMed under this warranty is limited to the repair, re-work or replacement, at CleveMed’s option of any non-conforming product, part or component thereof, which within one (1) year from date of delivery is examined by CleveMed and discloses to... - Page 6 Technical support is included free of charge within the warranty period. Technical support for SleepView is offered from 8:00 am to 8:00 pm eastern standard time. CleveMed offers 24/7 technical support for some of its medical products to accommodate urgent customer calls.
-
Page 7: Chapter 2: About Sleepview
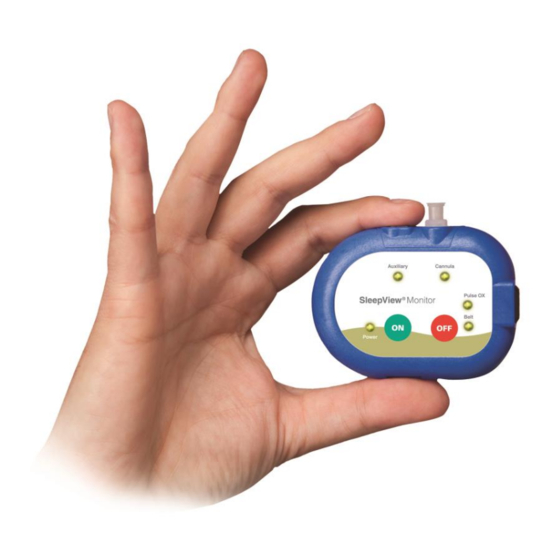
Chapter 2: About SleepView General Device Description SleepView is a type III sleep system capable of recording, displaying, scoring and analyzing physiological signals for sleep studies. The system is also capable of generating flexible, customizable reports for efficient interpretation and diagnosis. The SleepView system consists of one hardware component, SleepView®... -
Page 8: Chapter 3: Accessories, Sensors And Maintenance
Airflow A nasal oral cannula is most commonly used with SleepView to detect nasal and oral airflow as well as snore. A nasal cannula can also be used with the system and is commonly combined with a thermistor. - Page 9 IDcheck™ – This sensor is used to verify the identity of the patient recording the sleep test. CleveMed customer service can provide more information about using an IDcheck sensor. Cleaning SleepView and Accessories...
- Page 10 3. Wipe down thoroughly using disinfecting cloths or spray 4. Wipe dry with clean cloth, 5. Store item for next usage. 6. The exterior of the SleepView must also be wiped clean with a disinfecting cloth or spray or a standard household surface cleanser. Maintenance SleepView does not require calibration.
-
Page 11: Chapter 4: Sleepview Manager Software
The SleepView interfaces with the PC through a micro USB port located inside the battery door. The battery must be removed to connect the USB cable. The SleepView Monitor must be manually turned on by pushing the ON button after connecting to the PC. - Page 12 PLEASE NOTE: If you are unable to register the system with www.clevemedsleepview.com at the time of installation, you can re-initiate registration by selecting “Upload Client” from the SleepView Manager Program menu. Additionally, this dialog will appear after every reboot until you have...
-
Page 13: Chapter 5: Data Upload Management
Chapter 5: Data Upload Management An important component of the SleepView Manager called the “PSG Upload Client” runs continuously in the background to ensure any data taken from a SleepView device will be transferred to the website. Once registered, this component automatically starts and as a rule will always be running even after a reboot without user intervention. - Page 14 SLEEPVIEW USER MANUAL Upload Status The software is configured to monitor a specific directory for files. When files become available it immediately queues them for upload to the server. The software employs multiple threads to do its work, which can be configured using the options screen. As shown in the picture at the left, the “Upload Status”...
-
Page 15: Chapter 6: Using Sleepview With Clevemedsleepview.com
Chapter 6: Using SleepView with clevemedsleepview.com SleepView is designed for use with the clevemedsleepview.com website, which provides a guided workflow for patient and study management. The SleepView Manager software is integrated with the website at specific points in the process. Creating a New Study 1. - Page 16 Create a new study record for an Study existing or new patient. Step 2 Check-In Check in recorded data files from a Device, Manage SleepView and assign those data Recordings files to scheduled studies Step 3 Review Retrieve study reports or check the Studies...
- Page 17 SLEEPVIEW USER MANUAL 4. To create a new study, click the “Schedule Study” button from the “Home” page and the following page will appear PLEASE NOTE: The Patient List will be empty if this is the first time you are scheduling a study with the company.
- Page 18 SLEEPVIEW USER MANUAL 7. The final step of study creation is “Enter/Edit ID into Device”. Each SleepView device that is registered with the portal is provided in the drop-down menu labeled “Select Device”. Select the device that is used for the study. If the desired SleepView Monitor has never been registered with the system, select “New Device”...
- Page 19 3. Click <Next> and the “Prepare device” screen will appear with the recording options. 4. If you would like the SleepView unit to automatically turn on and remain on for a specified duration, click the check box labeled “Begin recording at a specified time and duration”...
- Page 20 “Study will take place in a different time zone” and select the time zone using the drop-down list provided. This will adjust the internal clock within the SleepView to the time zone where the study will be performed.
-
Page 21: Check-In Study Data From Sleepview Monitor
2. Connect your SleepView to the computer using the USB cable provided. There is a connection inside the battery compartment for one end of the USB cable. 3. Once the SleepView is connected to the computer, press and hold the ON button for at least 3 seconds. - Page 22 SLEEPVIEW USER MANUAL 8. At this point SleepView data will be transferred to the portal and processed to become available within the “Manage Recordings” section.
-
Page 23: Chapter 7: Manage Recordings
SLEEPVIEW USER MANUAL Chapter 7: Manage Recordings 1. On the home page, select “Step 2 Manage Recordings” to assign the data files to scheduled patient studies. You will be presented with a list of scheduled studies with recordings uploaded to them. - Page 24 In the event that a study was not properly acquired and submitted without a proper “Study ID”, you may need to look for it in this list and try to match the time, date, and unit ID, to the actual study date and time and SleepView Monitor that went home with the patient.
-
Page 25: Chapter 8: Reviewing Studies
SLEEPVIEW USER MANUAL Chapter 8: Reviewing Studies To review a study, click “Review Studies” from the “Home” page and a list of available studies for your practice will be presented: The list can be searched, filtered and sorted by selecting menu button at the top of each column. - Page 26 SLEEPVIEW USER MANUAL Click the “Report Ready” button to view, save or print the study report in PDF. Each report is electronically signed by the interpreter. An e-mail will be sent to the primary contact for your practice when a report is completed by the interpreter.
-
Page 27: Chapter 9: Using Sleepview Manager (Offline)
1. Click <Prepare device> and the “Connect Device” page will appear with instructions on how to connect the system to the PC. 2. Connect your SleepView to the computer using the USB cable provided. There is a connection inside the battery compartment for one end of the USB cable. - Page 28 SLEEPVIEW USER MANUAL 6. If you would like the SleepView unit to automatically turn on and remain on for a specified duration, click the check box labeled “Begin recording at a specified time and duration” and select the desired start time and duration (specified in hours and minutes).
-
Page 29: Downloading Study Data From Sleepview Monitor (Offline Usage)
Downloading Study Data from SleepView Monitor (Offline Usage) When a patient returns a SleepView, the study data must be downloaded to a computer before it can be sent for review and interpretation. The following instructions will provide a walkthrough of the process of downloading data from a SleepView. -
Page 30: Chapter 10: Collecting Data
It is recommended that the SleepView only be detached from the belt when a new belt is needed. The SleepView and the belt may be cleaned with the same cleaner while they are connected to each other as described in chapter 3. - Page 31 SleepView Manager software. Smart-Check Feature The SleepView offers a feature for the patient to see if the system collected enough data that is of good quality (at least 2 hours). Each time the unit is turned OFF, the status LEDs will show a light moving in a circular pattern to indicate the following: 1.
-
Page 32: Chapter 11: Tips For Dispensing Sleepview
Verify that the correct size belt is connected to the SleepView Train the patient on hooking up the sensors and give them hookup instructions Instruct the patient to turn OFF the SleepView by pressing the OFF button until the LED change. -
Page 33: Appendix A: Electromagnetic Immunity And Emissions
Appendix A: Electromagnetic Immunity and Emissions Guidance and manufacturer’s declaration – electromagnetic immunity The SleepView System is intended for use in the electromagnetic environment specified below. The customer or the user of the SleepView System should assure that it is used in such an environment. - Page 34 Guidance and manufacturer’s declaration – electromagnetic emissions The SleepView System is intended for use in the electromagnetic environment specified below. The customer or the user of the SleepView System should assure that it is used in such an environment.
-
Page 35: Appendix B: Technical Specifications
SLEEPVIEW USER MANUAL Appendix B: Technical Specifications System Specifications Storage Humidity: 25% to 95% (non-condensing) 10-40 C Operating Temperature: Case Weight (all parts & accessories): 4 lbs Patient Unit 3” x 2.6” x 0.7” (7.6 cm x 6.6 cm x 1.8 cm)
Need help?
Do you have a question about the SleepView and is the answer not in the manual?
Questions and answers