Table of Contents
Advertisement
Quick Links
RB4011 series
The device is already configured with basic settings, you can simply plug in your ISP cable and start using the
Internet. We recommend you to set up a password to secure your device.
Powering
The power consumption under maximum load can reach 55 W. The device accepts powering from the power jack
or from the first Ethernet port:
Direct-input power jack (5.5 mm outside and 2 mm inside, female, pin positive plug) accepts 12-57 V DC.
•
First Ethernet port accepts Power over Ethernet 18-57 V DC.
•
Setup
1. Connect your Internet cable to the first port, and if you have wired devices, connect them to the other ports.
2. Set your computer IP configuration to automatic (DHCP).
3. From your PC or smartphone, connect to the wireless network name which starts with "MikroTik".
4. Once connected to the wireless network, open http://192.168.88.1 in your web browser to start
configuration, since there is no password by default, you will be logged in automatically. Set up your
password in the screen that loads. Please also specify your country, to make sure local wireless
regulations are observed.
Configuration
Once logged in, we recommend clicking the "Check for updates" button in the QuickSet menu, as updating your
RouterOS software to the latest version ensures the best performance and stability. For wireless models, please
make sure you have selected the country where the device will be used, to conform with local regulations.
RouterOS includes many configuration options in addition to what is described in this document. We suggest to
start here to get yourself accustomed to the possibilities: http://mt.lv/help. In case IP connection is not available, the
Winbox tool (http://mt.lv/winbox) can be used to connect to the MAC address of the device from the LAN side (all
access is blocked from the Internet port by default).
For recovery purposes, it is possible boot the device from network, see section Buttons and jumpers.
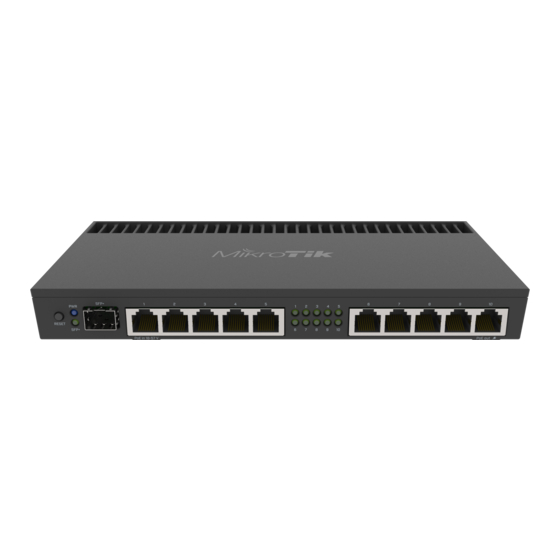
Extension slots and ports
The Ethernet ports are connected in two groups of five, each group is connected through a switch chip.
The ports can be configured individually and support automatic cross/straight cable correction (Auto
MDI/X), so you can use either straight or cross-over cables for connecting to other network devices.
SFP+ port accepts SFP and SFP+ modules. Note: The RB4011 does not support passive DAC modules,
1GB copper SFP modules and SFP GPON modules.
Integrated wireless module which supports AP/CPE/P2P/repeater modes (select models).
RJ45 console port for serial console access, set by default to 115200 bit/s, 8 data bits, 1 stop bit, no parity.
See mikrotik.com for more information.
Document #44748, modified on 01/07/19
Advertisement
Table of Contents

Related Manuals for MikroTik RB4011 Series


Summary of Contents for MikroTik RB4011 Series
- Page 1 2. Set your computer IP configuration to automatic (DHCP). 3. From your PC or smartphone, connect to the wireless network name which starts with “MikroTik”. 4. Once connected to the wireless network, open http://192.168.88.1 in your web browser to start configuration, since there is no password by default, you will be logged in automatically.
-
Page 2: Operating System Support
The enclosure includes a grounding screw hole with an M4 thread (screw not included). In locations with risk of ESD discharge, you are encouraged to connect the grounding screw to verified grounding infrastructure. See mikrotik.com for more information. Document #44748, modified on 01/07/19... -
Page 3: Federal Communication Commission Interference Statement
L'exploitation est autorisée aux deux conditions suivantes: (1) l'appareil ne doit pas produire de brouillage, et (2) l'utilisateur de l'appareil doit accepter tout brouillage radioélectrique subi, même si le brouillage est susceptible d'en compromettre le fonctionnement. See mikrotik.com for more information. Document #44748, modified on 01/07/19... -
Page 4: Ce Declaration Of Conformity
UE jest dostępny pod następującym adresem internetowym: https://mikrotik.com/products PT O(a) abaixo assinado(a) Mikrotīkls SIA declara que o presente tipo de equipamento de rádio RouterBOARD está em conformidade com a Diretiva 2014/53/UE. O texto integral da declaração de conformidade está disponível no seguinte endereço de Internet: https://mikrotik.com/ products RO Prin prezenta, Mikrotīkls SIA declară... - Page 5 Bruksanvisningen: Koble strømadapteren for å slå på enheten. Åpne 192.168.88.1 i en nettleser for å konfigurere produktet. Mer informasjon på http://mt.lv/help RU. Руководство по эксплуатации: подключите адаптер питания чтобы включить устройство. Откройте 192.168.88.1 в своем веб-браузере для конфигурации. Дополнительная информация: http://mt.lv/hel p See mikrotik.com for more information. Document #44748, modified on 01/07/19...
Need help?
Do you have a question about the RB4011 Series and is the answer not in the manual?
Questions and answers