Table of Contents
Advertisement
Advertisement
Table of Contents

Related Manuals for Sennheiser E W 300 IEM G2


Summary of Contents for Sennheiser E W 300 IEM G2
- Page 1 W 300 IEM SR 350 IEM Instructions for use...
-
Page 3: Table Of Contents
We have designed this product to give you reliable operation over many years. Over 60 years of accumulated expertise in the design and manufacture of high-quality electro-acoustic equipment have made Sennheiser a world-leading company in this field. Please take a few moments to read these instructions carefully, as we want you to enjoy your... -
Page 4: Important Safety Instructions
11. Only use attachments/accessories specified by Sennheiser. 12. Use only with the cart, stand, tripod, bracket, or table specified by the manufacturer, or sold with the device. When a cart is used, use caution when moving the cart/apparatus combination to avoid injury from tip- over. - Page 5 Danger due to high volumes This is a professional transmission system. Commercial use is subject to the rules and regulations of the trade association responsible. Sennheiser, as the manufacturer, is therefore obliged to expressly point out possible health risks arising from use.
-
Page 6: The Ew 300 Iem G2 Systems
The ew 300 IEM G2 systems With the Sennheiser evolution wireless in-ear monitoring systems ew 300 IEM G2 (suitable for both stage and broadcast use), musicians, video and sound amateurs, reporters/broadcasters, etc. can directly monitor the received sound signals without troublesome cables or monitor speakers being required. -
Page 7: The Channel Bank System
The ew 300 IEM G2 systems are available in six UHF frequency ranges with 1440 transmission/receiving frequencies per frequency range. Please note: Frequency usage is different for each country. Your Sennheiser agent will have all the necessary details on the available legal frequencies for your area:... -
Page 8: Overview Of Operating Controls
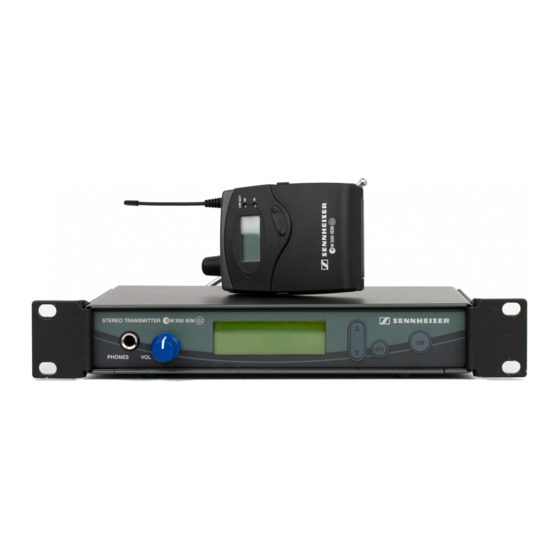
Overview of operating controls Stereo transmitter – front view (SR 350 IEM G2 twin transmitter) Operating controls Graphic display panel Rack mount “ears” Display for the current channel bank “1...8, U” (preinstalled with the SR 350 IEM G2 only) Display for the current channel number “1 ... 12” Headphone output (PHONES), “B.CH“... -
Page 9: Stereo Transmitter - Rear View
Stereo transmitter – rear view Operating controls on the SR 350 IEM G2 twin transmitter 3-pin IEC mains socket Cable grip for power supply DC cable Label with hazard warnings Type plate Service interface; connection to the NET 1 network system Audio input (AF IN BAL/UNBAL), XLR-3F socket (left and MONO) Audio input (AF IN BAL/UNBAL), XLR-3F socket (right) Antenna output (ANT A/B), BNC socket... -
Page 10: Ek 300 Iem G2 Stereo Receiver
EK 300 IEM G2 stereo receiver Operating controls LC display panel Headphone output (PHONES), 3.5 mm jack socket Alphanumeric display Antenna “B.CH“ – appears when the channel bank and the channel number are displayed Red LED for operation and battery status indication (ON/LOW BAT) “MHz“... -
Page 11: Indications And Displays On The Transmitter
Indications and displays on the transmitter Modulation display The level display for audio signal “AF” shows the modulation of the transmitter. When the transmitter’s audio input level is excessively high, the level display for audio signal “AF” shows full deflection. When the transmitter is overmodulated frequently or for an extended period of time, the text “PEAK”... - Page 12 “MUTE” display The “MUTE” display appears on the display panel when the RF signal of the received transmitter is too weak. “PILOT” display The “PILOT” display appears on the display panel when the pilot tone evaluation is activated (see “Activating/deactivating the pilot tone evaluation (receiver only)”...
-
Page 13: Preparing The Devices For Use
Preparing the devices for use SR 300 IEM G2 transmitter/ SR 350 IEM G2 twin transmitter Fitting the device feet To ensure that the transmitter cannot slip on the surface on which it is placed, four self-adhesive soft rubber feet are supplied. Note: Do not fit the rubber feet when rack mounting the transmitter. - Page 14 Rack mounting the SR 350 IEM G2 The rack mount “ears” are already fitted to the twin transmitter on delivery. twin transmitter To mount the twin transmitter into a 19’’ rack: Slide the twin receiver into the 19’’ rack. Secure the rack mount “ears” to the rack using four screws (not included). Rack mounting the SR 300 IEM G2 For mounting one or two transmitters into a 19”...
- Page 15 When mounting only one transmitter into a rack, use the blanking plate instead of the second transmitter. To mount only one transmitter into a rack: Hook the two rack mount “ears” to the front panel of the transmitter. Secure the rack mount “ears” to the transmitter using two of the supplied recessed head screws (M 3x6) respectively.
- Page 16 The antenna mounts consist of: 2 BNC extension cables (screw-in BNC socket to BNC connector 2 washers 2 nuts 2 antenna holders (GA 3030 AM only) 4 screws (GA 3030 AM only) To front mount the antenna of the SR 300 IEM G2 transmitter: Screw the BNC socket of the BNC extension cables to the blanking plate...
-
Page 17: Changing The Transmission Power (Sr 350 Iem G2 Only)
Connect the two BNC connectors to the BNC sockets on the twin transmitter. Slide the twin transmitter into the 19’’ rack. Resecure the rack mount “ears” to the rack Connect the telescopic antennas to the BNC sockets Pull the end caps to extend the telescopic antennas Changing the transmission power (SR 350 IEM G2 only) With the SR 350 IEM G2 twin transmitter, you can choose between two different transmission powers. - Page 18 Connecting the transmitter to the mains CAUTION! Damage due to electric current! If you connect the transmitter to an unsuitable power supply, this can cause damage to the device. Use the supplied mains cable to connect the receiver to the mains (100 to 240 V AC, 50 or 60 Hz).
-
Page 19: Ek 300 Iem G2 Receiver
Inserting and charging the accupack The receiver can also be powered via the rechargeable Sennheiser BA 2015 accupack. Insert the accupack into the battery compartment as described above. The receiver has two charging contacts and a sensing contact on its short sides. -
Page 20: Using The Components
Set the volume for the connected headphones to the minimum before putting the headphones on. For monitoring purposes, connect the supplied earphones or any Sennheiser stereo headphones with 3.5 mm stereo jack plug to the headphone output (PHONES) First, set the volume control to the lowest volume by turning it to the left as far as possible. -
Page 21: Adjusting The Volume
Adjusting the volume CAUTION! Danger of hearing damage! Listening at high volume levels for long periods can lead to permanent hearing defects. Set the volume for the connected headphones to the minimum before putting the headphones on. You can adjust the volume at the headphone output on both the transmitter and the receiver. -
Page 22: The Operating Menu
The operating menu To ensure intuitive operation of both transmitter and receiver, the operating menus have been largely standardized. As a result, adjustments to the settings can be made quickly and “without looking” – even in stressful situations, for example on stage or during a live show or presentation. The buttons Buttons Mode... -
Page 23: Overview Of Menus
Overview of menus Transmitter Receiver Display Function of the menu Display Function of the menu Bank Switching between channel banks BANK Switching between channel banks Channel Switching between the channels in CHAN Switching between the channels in a channel bank a channel bank Tune Setting a transmission frequency for the... - Page 24 Getting into the operating menu Press the button to get from the standard display into the operating menu. The last menu selected flashes on the display. With the transmitter, the current setting is additionally displayed. Selecting a menu Press the rocker button to select a menu.
-
Page 25: Operating Menu Of The Stereo Transmitter
Operating menu of the stereo transmitter Exit Bank Bank Menu 1.01 3.01 Exit 786.300 790.250 B.CH B.CH Bank Channel Current channel bank 1...8, U (User Bank) Changing the channel bank Stores the setting Stored Menu Channel Channel Bank 3.01 3.08 790.250 807.900 Channel... - Page 26 Name GUITAR Menu Reset Reset Name GUITAR Reset? Reset? Reset LCD Contr IIIIII..Security check No, Yes Loading the factory-preset "reset"= Yes: default settings SET: Transmitter loads factory- preset default settings, transmitter is restarted, standard display appears "reset"= No: SET: Reset is cancelled Menu LCD Contrast LCD Contrast...
-
Page 27: Operating Menu Of The Stereo Receiver
Operating menu of the stereo receiver EXIT BANK BANK BANK Changing the channel Current channel bank 1...8, U (User bank Bank) Stores the setting STORED 1.01 1.12 CHAN B.CH B.CH Changing the channel Channel 01...12 Current channel or frequency Stores the setting STORED 790.025 790.025... - Page 28 SQELCH STEREO FOCUS ST--FOC Switching between Current setting Stereo, Focus stereo and FOCUS operation Stores the setting STORED LTD.OFF LTD. Limiter activated or Limiting the volume at : OFF, ON deactivated the headphone output Stores the setting STORED HI--BST HB.OFF Frequency boost Boosting the AF OFF, ON...
- Page 29 NAME RST. RST. RESET Security check OK, NO Loading the factory- preset default settings "reset" = OK: SET: Receiver loads factory- preset default settings (only pilot tone setting is kept), receiver is restarted, standard display appears "reset" = NO Reset is cancelled PLT.
-
Page 30: Adjustment Tips For The Operating Menu
Adjustment tips for the operating menu Switching between channel banks BANK Via the “Bank” menu, you can switch between the nine channel banks of the ew 300 IEM G2 transmitter and receiver. The channel banks “1” to “8” have Bank up to 12 switchable channels that are factory-preset to a transmission/ receiving frequency (see “The channel bank system”... -
Page 31: Multi-Channel Operation
Select “START” and confirm your selection by pressing the button. After the scan is completed, the number of free channels is displayed. Pressing the button once more will store the scan result and lock all channels that are used or subject to interference. Releasing locked channels Select the “SCAN”... -
Page 32: Stereo/Focus Selection (Receiver Only)
Stereo/FOCUS selection (receiver only) ST-FOC Via the “ST-FOC” menu, you can switch between stereo and FOCUS operation. In both operating modes, the transmitter has to be set to stereo operation. When the receiver is set to stereo operation, the left-right signals are available as usual. -
Page 33: Selecting The Standard Display
Selecting the standard display DISPLY Via the “Display” menu, you can select the standard display. Display SR 300 IEM G2 transmitter/SR 350 IEM G2 twin transmitter Selectable standard display Contents of standard display “Frequency” (display of the frequency) “Bank/Channel” (display of the channel bank and channel number) “Name”... -
Page 34: Entering Names
Entering names NAME Via the “Name” menu, you can enter a freely selectable name for the transmitter and the receiver. You can, for example, enter the name of the Name performer for whom the adjustments have been made. The name can be displayed on the standard display and can consist of up to ten characters (transmitter) and up to six characters (receiver) such as: letters (without pronounciation marks), numbers from 0 to 9,... -
Page 35: Stereo/Mono Selection (Transmitter Only)
Stereo/mono selection (transmitter only) Mode Via the “Mode” menu, you can switch the transmitter between mono and stereo operation. Note: Connect any unit that only delivers a mono signal to the transmitter’s left XLR-3F socket and set the transmitter to mono operation. The receiver automatically “identifies”... -
Page 36: If A Problem Occurs
(receiver only)” on the channel has been locked page 28 If a problem occurs that is not listed in the above table or if the problem cannot be solved with the proposed solutions, please contact your local Sennheiser agent for assistance. -
Page 37: Recommendations And Tips
Recommendations and tips ... for the EK 300 IEM G2 receiver The antenna should hang freely and be at least 1 cm away from the body. The antenna must not be in direct contact with the skin..for optimum reception Transmission range depends to a large extent on location and can vary from about 10 m to about 150 m. -
Page 38: Additional Information
Wireless transmission systems With the ew 300 IEM G2 system, Sennheiser puts an end to cable tangles and enables complete freedom of movement. The systems operate exclusively in the UHF band. UHF transmission is extremely reliable and is far less prone to interference than the overcrowded VHF band –... -
Page 39: Squelch
Squelch Pilot tone squelch The transmitter adds a 19-kHz pilot tone to the audio signal. The receiver checks incoming audio signals to see if the pilot tone is present. In the absence of the 19-kHz signal, the receiver’s audio output will remain muted, even if a strong RF signal is present. -
Page 40: Specifications
± 24 kHz/± 48 kHz Nominal/peak deviation ≤ ± 15 ppm Frequency stability AF characteristics Noise reduction system Sennheiser AF frequency response 40–15,000 Hz MPX pilot tone (frequency/deviation) 19 KHz/±4 kHz ≥ 91 dB(A) S/N ratio (at 1 mV and peak deviation) ≤... -
Page 41: Connector Assignment
SR 300 IEM G2 transmitter/SR 350 IEM G2 twin transmitter RF characteristics SR 300 IEM G2 SR 350 IEM G2 RF output power at 50 Ω 20 mW 100 mW, switchable to 15 mW depending on depending on antenna type used antenna type used BNC socket, 50 Ω... -
Page 42: Accessories And Spare Parts
Accessories and spare parts Cat. No. Accessory/spare part 009823 GA 2: 19’’ rack adapter 009912 AM 2 (for SR 300 IEM G2): Antenna mount for mounting antennas to the front of the GA 2 rack adapter 004645 A 1031-U: UHF antenna, passive, omni-directional, can be mounted onto a stand 003658 A 2003 UHF: UHF antenna, passive, directional, can be mounted onto a stand... -
Page 43: Manufacturer Declarations
Consumers may be entitled to statutory rights in their own countries which are not restricted by these warranty terms and conditions, as the warranty is governed by the laws of the country in which the Sennheiser product was purchased by the consumer. The provisions of the UN Convention on the International Sale of Goods do not apply to this service. - Page 44 Consult the dealer or an experienced radio/TV technician for help. This class B digital apparatus complies with the Canadian ICES-003 Changes or modifications made to this equipment not expressly approved by Sennheiser electronic Corp. may void the FCC authorization to operate this equipment.
- Page 46 Sennheiser electronic GmbH & Co. KG Am Labor 1 30900 Wedemark, Germany Phone +49 (5130) 600 0 Printed in Germany Fax +49 (5130) 600 300 Publ. 03/08 www.sennheiser.com 524170/A01...
Need help?
Do you have a question about the E W 300 IEM G2 and is the answer not in the manual?
Questions and answers