Advertisement
i/Save
This Manual _'_''\
For Future Reference
MODEL NO,
113,244501
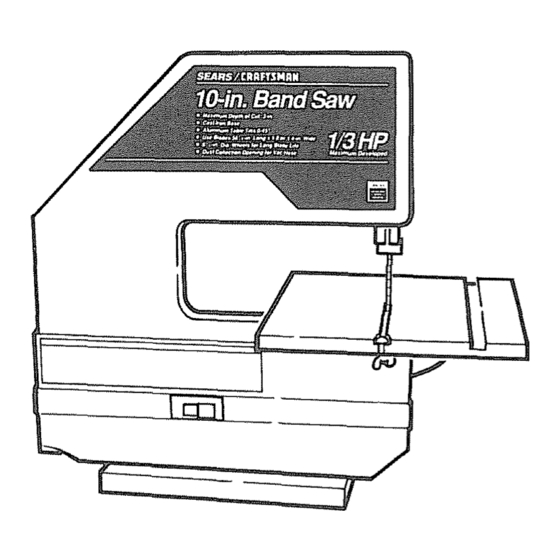
10-INCH BAND SAW
Se;iot.....
Number
Model
and serial numbers
may be found
on the back
of the saw
You should record
both
modet and serial number
in
a safe place
for future use
FOR YOUR
SAFETY:
READ ALL
INSTRUCTIONS
CAREFULLY
/
O-IN©H
e assembUy
® operating
repair parts
../
j
SEARS, ROEBUCK AND CO., Hoffmann Estates, IL 60179 U.S.A.
Part No_ SP5640
Printed in Taiwan
Advertisement
Table of Contents

Related Manuals for Craftsman 113.244501


Summary of Contents for Craftsman 113.244501
- Page 1 FOR YOUR SAFETY: READ ALL INSTRUCTIONS CAREFULLY SEARS, ROEBUCK AND CO., Hoffmann Estates, IL 60179 U.S.A. Part No_ SP5640 O-IN©H e assembUy ® operating repair parts Printed in Taiwan...
- Page 2 If this Band Saw fails due to a defect in material or workmanship, date of purchase, RETURN IT TO THE NEAREST SEARS SERVICE CENTER IN THE UNITED STATES, and Sears will repair it, free of charge. If this Band Saw is used for commercial or rental purposes, days from the date of purchase.
- Page 3 • USE THE RIGHT TOOL Don't force tool or attachment to do a job it was not designed to do • Use this band saw to cut onty wood, wood like products, and plastics Any power saw can throw foreign objects...
- Page 4 A careless fraction second is enough to cause a severe injury. Before starting your cut, watch the saw while it runs If it makes an unfamiliar noise or vibrates a tot, stop imme- diately Turn the saw off Unplug the saw Do not restart...
- Page 5 If an electrical shock occurs there is the potential of a secondary hazard such as your hands con- tacting the saw blade. If power cord is worn or cut, or damaged in any way, have it replaced immediately.
- Page 6 Make certain all items are accounted for, before dis- carding any packing material WARNING: tf any parts are missing, do not try to assemble the band saw, plug in the power cord, or turn the switch on until the missing parts are obtained and installed correctly,...
- Page 7 MOUNTING BAND SAW TO WORKBENCH If band saw is to be used in a permanent location, it should be fastened securely to a firm supporting sur- face such as a workbench If mounting to a workbench, holes should be drilled...
-
Page 8: Installing The Table
An alternate method of mounting is to fasten band saw to a mounting board The board should be of suf- ficient size to avoid tipping el saw while in use Any good grade of plywood or chipboard with a 3/4" mini-... -
Page 9: Installing The Blade
I Loosen the upper slide lock knob and position the guide assembly about half way between the table and the frame Tighten the !ock knob 2 Open th_ front cover of the saw by pulling forward on the finger hold located on the left side of the band saw... -
Page 10: Tensioning The Blade
7 The upper wheel needs to be placed in its lowest position Locate the tension lock knob on the back of the saw and turn it counterclockwise approximately two turns Lift the tension away from the teeth and move it to its lowest... -
Page 11: Tracking The Blade
2 Insert a 1/8" hex wrench into the tracking adjust- ment screw located on the back of the saw behind the upper wheel 3 a If the blade moved toward the front of the saw turn the adjustment screw in (clockwise) while... -
Page 12: Final Table Assembly
WARNINGI Never start the saw with the cover pen. Thrown blades can cause injury, FINAL TABLE ASSEMBLY 1 Close the front cover of the band saw and snap in place 2, Locate a 1/4-20 x 5/8 truss head screw, and a 1/4-... - Page 13 Hose Clip in the loose parts Identify the barbs on the clip 2, Open the front cover of the saw by pulling forward on the finger hold located on the left side of the band saw, Locate the notch in the Frame at the...
- Page 14 Always adjust the upper guide assembly and lock the upper slide by tightening the upper slide lock knob before turning on the band saw, 3 Table lock knob Loosening the knob allows the table to be tilted and tightening the knob locks the table in place.
- Page 15 ,, in the event of a power failure (all of your lights go out) turn switch off. _. remove the key and store it away from band saw. This will prevent the machine from starting up again when the power comes back onr...
- Page 16 • KEEP WORK AREA CLEAN Cluttered areas an changing benches invite accidents pery To avoid burns or other fire damage, never use the saw near flammable liquids, vapors or gases Plan ahead to protect your eyes, hands, KNOW YOUR SAW Read and understand the owner's...
- Page 17 A careless fraction enough to cause a severe injury. Before starting your cut, watch the saw while it runs If it makes an unfamiliar noise or vibrates a lot, stop imme- diately, Turn the saw off Unplug the saw Do not restart...
-
Page 18: Basic Band Saw Operation
The blade should cut in the middle of the pattern line (saw kerf) since wood cutting band saw blades are thin NOTE: Blade guard is raised and right hand removed for clarity of picture only... -
Page 19: Maintenance
A!t of the BALL BEARINGS are permanently lubricat- ed They require no further lubrication IM I1,,I,' sears recommends the following Sears may recommend other accessories not listed in manual See your nearest Sears Store or Catalog Department for other accessories... -
Page 20: Troubleshooting
REMEDY Replace damaged parts before using Band Saw again Consult Sears Service, Any attempt to repair this motor may create a HAZARD unless repair is done by a qualified service technician service is available at your nearest Sears Store. -
Page 21: Repair Parts
Scr Soc Set 1/2 Dog Pt 1/4-20 x 1/2 " Scr Soc Set 1/4-20 x 114 STD502502 820279 Support Guide 820281 Shaft w/Bearing 820284 Slide Upper BAND SAW 113.244501 NO,,,II, 60323 817935 820874 817915 815865_2 817149 FIGURE 2 Description , i, i1,, i,i, i... - Page 22 :E FIGURE 2 FIGURE 3 FOR 10-INCH BAND SAW 113.244501 Always order by Part Number- Not by Key Number _,..1 "_" SEE FIGURE 1 "_l SEE FIGURE 1 =m=lm...
- Page 23 * Belt Crge 1/4-20xl STD502502 *Screw Soc. Set t/4-20 x 1/4 -t-Stock item - May Be Secured Through The Hardware Department Of Most Sears Retail Stores Or Catalog Order Houses. * Standard Hardware item - May Be Purchased Locally. BAND SAW 113.244501...
- Page 24 * Model Number • Part Number • Part Description SEARS, ROEBUCK AND CO., Hoffmann Estates, IL 60179 U.S.A. Part No, SP5640 For the repair or replacement parts you need Call 7 am - 7 pm, 7 days a week t -800-366-PART...