Aiphone IX-DV Operation Manual
Video door station ix system
Hide thumbs
Also See for IX-DV:
- Owners & installation manual (16 pages) ,
- Web setting manual (157 pages) ,
- Operation manual (100 pages)
Table of Contents
Advertisement
IX System
Video Door Station
IX-DV, IX-DVF,
IX-DVF-2RA, IX-DVF-RA,
IX-DVF-P, IX-DVF-L
Door Station
IX-SSA, IX-SSA-2RA,
IX-SSA-RA, IX-SS-2G
Operation Manual
Software version 1.00 or later
IX-DV
IX-DVF
IX-DVF-L
IX-SSA
Important
• Be sure to read this document (Operation Manual) prior to usage to ensure correct
operation, After reading this document, store it in a safe location so that it can be
referred to at any time.
• The illustrations and images in this manual may vary from the actual ones.
IX-DVF-2RA
IX-DVF-RA
IX-SSA-2RA
IX-SSA-RA
IX-DVF-P
Advertisement
Table of Contents

Related Manuals for Aiphone IX-DV


Summary of Contents for Aiphone IX-DV
-
Page 1: Door Station
IX System Video Door Station IX-DV, IX-DVF, IX-DVF-2RA, IX-DVF-RA, IX-DVF-P, IX-DVF-L Door Station IX-SSA, IX-SSA-2RA, IX-SSA-RA, IX-SS-2G Operation Manual Software version 1.00 or later IX-DV IX-DVF IX-DVF-2RA IX-DVF-RA IX-DVF-P IX-DVF-L IX-SSA IX-SSA-2RA IX-SSA-RA IX-SS-2G Important • Be sure to read this document (Operation Manual) prior to usage to ensure correct operation, After reading this document, store it in a safe location so that it can be referred to at any time. -
Page 2: Literature Information
• In this document, Video Door Stations (IX-DV and IX-DVF(-*)) and Door Stations without cameras (IX-SSA(-*) and IX-SS-2G) are referred to collectively as "Door Stations." • "Video Door Station" is used when describing the operation and explanation of Video Door Stations (IX-DV and IX- DVF(-*)). -
Page 3: Precautions
Precautions Precautions Precautions Warning Negligence could result in death or serious injury. If the device is emitting smoke, an abnormal Do not, under any circumstances, open up the odor, or an abnormal sound, or if the device device. is dropped or damaged, immediately unplug Voltage within some internal components may the LAN cable. -
Page 4: Precautions On Operation
Refer to the relevant page of this document for information on how to clear information. (→page 87) • When using sensors or other devices from a non-AIPHONE brand with this system, do so according to the specifications and guarantees provided by the manufacturer and seller. - Page 5 • If the device is used in areas where there are business-use wireless devices such as a transceiver or mobile phones, it may cause malfunction. • This device is not meant to protect lives or property. AIPHONE is not to be held responsible for any and all resulting serious accidents, disaster accidents, or physical damage.
-
Page 6: Table Of Contents
Part Names ..........................8 Part Names .......................... 8 About indicators ........................16 About indicators ......................... 16 microSD Cards (IX-SSA(-*), IX-DV, and IX-DVF(-*)) ............22 microSD Cards (IX-SSA(-*), IX-DV, and IX-DVF(-*)) ................22 Inserting/Removing microSD Cards ................... 23 How to use the device To make a call / To respond to an incoming call .............. -
Page 7: Table Of Contents
Table of contents Maintenance ........................87 Viewing video from IX-DV or IX-DVF(-*) with 3rd party products (ONVIF) ......88 Other Appendix ..........................89 Specifications ........................89 Maintenance ........................90 Notice regarding the software ....................91 Notice regarding the software .................... 91 FOR PROPER USE OF THE STATION ................ -
Page 8: Part Names
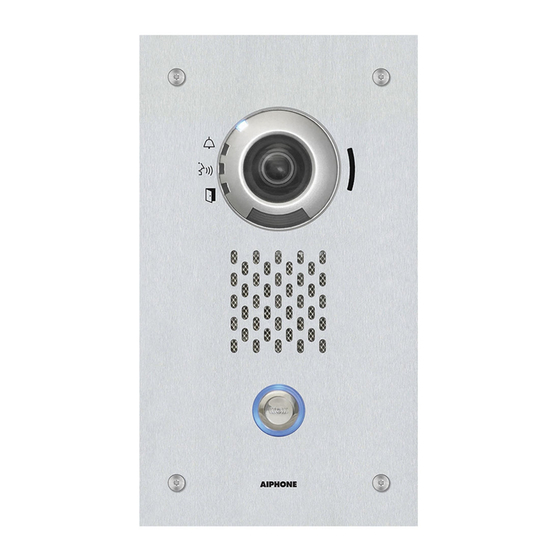
Before you start using the device Part Names Part Names Video Door Station IX-DV Camera angle adjusting Status indicator (orange/ Microphone lever blue) Call indicator (green) Camera Communication indicator Door release indicator (green) Night LED MAC address illumination Speaker Terminal cover... - Page 9 Before you start using the device Part Names Pressing the [Call] button turns the light ON when in a dark location, such as at night. The light turns OFF once the call has ended. It also lights ON when being monitored by the Master Station. There may be cases where it is configured to not light ON.
- Page 10 Before you start using the device Part Names Video Door Station IX-DVF-2RA Camera angle Status indicator Microphone (orange/blue) adjusting lever Call indicator (green) Camera MAC address Communication indicator (orange) Night LED Door release indicator illumination (green) Terminal cover Speaker Reset button* Call button microSD card slot* Area around is lit up...
- Page 11 Before you start using the device Part Names The angle of the camera can be adjusted up and down. This is for use by service personnel only. Do not press it.
- Page 12 Before you start using the device Part Names Video Door Station IX-DVF-P Status indicator (orange/blue) Camera angle Microphone adjusting lever Call indicator (green) Camera Communication indicator (orange) MAC address Night LED Door release indicator illumination (green) Speaker Terminal cover Reset button* Call button Area around is lit up microSD card...
- Page 13 Before you start using the device Part Names There may be cases where it is configured to not light ON. The angle of the camera can be adjusted up and down. This is for use by service personnel only. Do not press it. This station emits an electromagnetic field for hearing aids equipped with T-mode to produce clear audio.
- Page 14 Before you start using the device Part Names Audio Only Door StationIX-SSA Status indicator (orange/blue) Microphone Call indicator (green) Communication indicator (orange) MAC address Door release indicator (green) Terminal cover Speaker Reset button* microSD card slot* (→page 22) Call button Area around is lit up with blue light *Found by removing terminal cover.
- Page 15 Before you start using the device Part Names Audio Only Door StationIX-SSA-RA Status indicator (orange/blue) Microphone Call indicator (green) Communication MAC address Speaker indicator (orange) Door release indicator (green) Terminal cover Reset button* Braille microSD card slot* Urgent call (→page 22) button *Found by removing terminal cover.
-
Page 16: About Indicators
Before you start using the device About indicators About indicators IX-DV, IX-DVF, IX-DVF-2RA, IX-DVF-RA, IX-DVF-P, IX-DVF-L Status indicator (orange/ IX-DV blue) Call indicator (green) Status indicator (orange/ blue) Communication indicator (orange) Call indicator (green) Door release indicator (green) Communication indicator... - Page 17 Before you start using the device About indicators Name Status (Pattern) Description Call indicator Green Fast flashing Outgoing calling flashing 0.25sec 0.25sec Communicati Orange light In communication on indicator Door release Green Normal flashing Door releasing indicator flashing 0.5sec 0.5sec Flashes when the electrical lock connected to this station is released.
- Page 18 Before you start using the device About indicators IX-SSA, IX-SSA-2RA, IX-SSA-RA Status indicator (orange/blue) Illustrations shown are for IX-SSA. Call indicator (green) Communication indicator (orange) Door release indicator (green) : On, : Off Name Status (Pattern) Description Status Orange Normal flashing Booting indicator flashing...
- Page 19 Before you start using the device About indicators Name Status (Pattern) Description Call indicator Green Fast flashing Outgoing calling flashing 0.25sec 0.25sec Communicati Orange light In communication on indicator Door release Green Normal flashing Door releasing indicator flashing 0.5sec 0.5sec Flashes when the electrical lock connected to this station is released.
- Page 20 Before you start using the device About indicators IX-SS-2G Status indicator (orange/ blue) Communication Call indicator (green) + communication indicator (orange) indicator (orange) Call indicator (green) : On, : Off Name Status (Pattern) Description Status Orange Normal flashing Booting indicator flashing 0.75 sec 0.75 sec...
- Page 21 Before you start using the device About indicators Name Status (Pattern) Description Call indicator Green Normal flashing Door releasing flashing Communicati 0.5sec 0.5sec on indicator Orange flashing Flashes when the electrical lock connected to this station is released. If door release timeout is set to 3 seconds or less, it will flash at a 3 second interval.
-
Page 22: Microsd Cards (Ix-Ssa(-*), Ix-Dv, And Ix-Dvf(-*))
• A maximum of 999 video/audio files can be saved. However, this may vary depending on the size of the video/audio files and the capacity of the microSD card. • Please note that Aiphone is not to be held responsible in any way for microSD cards. -
Page 23: Inserting/Removing Microsd Cards
Before you start using the device microSD Cards (IX-SSA(-*), IX-DV, and IX-DVF(-*)) Inserting/Removing microSD Cards Inserting a microSD card Slide the terminal cover on the rear of the main unit downward to open Remove the main unit cover. • For IX-DV <Bottom surface>... - Page 24 Before you start using the device microSD Cards (IX-SSA(-*), IX-DV, and IX-DVF(-*)) Important • Calls and other operations cannot be performed while the microSD card is being mounted. • Be sure to reattach the terminal cover. Otherwise, condensation or water could enter the device, causing a...
- Page 25 Before you start using the device microSD Cards (IX-SSA(-*), IX-DV, and IX-DVF(-*)) Taking the microSD card out Return the terminal cover, main unit, and panel to their original Detach the main unit. positions. • Refer to Steps 1 through 3 in "Inserting a microSD card"...
-
Page 26: To Make A Call / To Respond To An Incoming Call
How to use the device To make a call / To respond to an incoming call Placing an Outgoing Call (except for IX-DVF- RA and IX-SSA-RA) Press the [Call] button Speak when the other party answers • The calling tone will play from the speaker. •... - Page 27 How to use the device To make a call / To respond to an incoming call Note • The call is placed using the priority that was set during programming. • The outgoing call timer and the calling tone count may vary depending on the settings.
- Page 28 How to use the device To make a call / To respond to an incoming call Placing an Urgent Outgoing Call (IX-DVF- 2RA, IX-DVF-RA, IX-SSA-2RA, and IX-SSA- Press the [EMERGENCY] button. Speak when the other party answers • The calling tone will play from the speaker. •...
- Page 29 How to use the device To make a call / To respond to an incoming call Note • The call is placed using the priority that was set during programming. • The outgoing call timer and the calling tone count may vary depending on the settings.
-
Page 30: To Use An External Device To Make A Call
How to use the device To make a call / To respond to an incoming call To use an external device to make a call Use an external device (sensor, call button, etc.) to place a call to a pre-determined location. Input Outgoing Call button, etc. - Page 31 How to use the device To make a call / To respond to an incoming call Note • The call is placed using the priority that was set during programming. • The outgoing call timer and the calling tone count may vary depending on the settings.
-
Page 32: To Respond To An Incoming Call
How to use the device To make a call / To respond to an incoming call To respond to an incoming call Answering automatically Answering with the [Call] button (except for IX-DVF-RA and IX-SSA-RA) When an incoming call is received, the incoming tone plays and the device automatically answers. - Page 33 How to use the device To make a call / To respond to an incoming call Note • If Auto Answer (→page 61) is "ON," the device will automatically answer when it receives a call. • Depending on the settings, communication sounds may play from separately installed speakers.
-
Page 34: To Receive A Paging Call
How to use the device To receive a paging call To receive a paging call Paging will begin after the paging pretone. To receive a paging call Answering with the [Call] button (except for IX-DVF-RA and IX-SSA-RA) The pretone will ring, then paging This can be used when configured by the administrator will begin. - Page 35 How to use the device To receive a paging call Note • If the [ADDRESS BOOK] button is pressed and an outgoing call is made during paging, paging may be canceled and the outgoing call placed, depending on the priority. •...
-
Page 36: Confirming Video/Audio Recording
How to use the device Confirming Video/Audio Recording Playing Recorded Video/Audio on a PC Insert the microSD card into the microSD card slot on the PC or into an microSD card reader connected to the PC to play video/audio files recorded to the microSD card on the PC. •... -
Page 37: Other Functions
How to use the device Other functions To make the device sound a tone on a schedule You can set up the device so that a registered chime sounds on a schedule you create. Refer to "Configuring the device on a PC" - “Chime (→page 76)”... -
Page 38: To Make The Device Send An Email Message
How to use the device Other functions To make the device send an email message The device can be configured to send an email message to a registered address when making an urgent outgoing call or when a specific event occurs such as an outgoing call failure. For how to configure email settings, refer to “Email (→page 67)”. -
Page 39: Configuring The Device On A Pc
Settings and Adjustments Configuring the device on a PC Configuring the device on a PC Connecting a PC to the same network as the device allows you to configure it on the PC using a Web browser. System requirements The PC must satisfy the following requirements to configure settings. Network Ethernet (10BASE-T, 100BASE-TX) Web browser... - Page 40 Settings and Adjustments Configuring the device on a PC Select the language • The selected language is used to display messages on the PC. • Display the login screen of the selected language. Enter the ID and password, and click [Login] •...
- Page 41 Settings and Adjustments Configuring the device on a PC Note • Do not login multiple times using multiple browsers at one time on the same PC. • The initial IP address and Subnet mask values are below. – IP Address: 192.168.1.160 –...
- Page 42 • Depending on PC and OS being used, the window may be slightly different. • After configuring the station, confirm its operation by referring to "Operation Manual (this document)." • The window shown in this manual is the Web configuration window for IX-DV. <Setting window sample>...
- Page 43 Settings and Adjustments Configuring the device on a PC Note • To stop configuring, do not use [X] to close the window. Instead, click [Log out]. If [Log out] is not used, you will be unable to login for approximately 1 hour. •...
- Page 44 Call Origination User ID page 46 Call origination advanced settings User Password page 46 Call Method page 54 ONVIF ID (IX-DV and IX-DVF(-*) page 46 Ringback Tone page 55 only) Call Timeout page 55 ONVIF Password (IX-DV and IX- page 46...
- Page 45 Periodic Log Transmission Subject page 69 Auto Answer Tone page 82 Send Test Email page 70 Key Received page 82 Additional Settings (IX-DV and IX-DVF(-*) only) Error page 83 Attach Image page 70 Communication Image Filename page 70 Talk Timeout [sec]...
-
Page 46: Station Information
• The ONVIF port number is "10080" and the RTSP port number is "554." • Refer to “Viewing video from IX-DV or IX-DVF(-*) with 3rd party products (ONVIF) (→page 88)” for information on connecting IX-DV and IX-DVF(-*) with a 3rd party product. - Page 47 Settings and Adjustments Configuring the device on a PC Language Entry Description Settings Default values Language Select the language for email and system • Japanese English log. • English • Language used for various settings (including the station name) • Language used for email and system log Note •...
-
Page 48: Date And Time
Settings and Adjustments Configuring the device on a PC ■ Daylight Savings Time Entry Description Settings Default values Enable automatic Adjusts the daylight saving time • Yes daylight savings time automatically to match the region selected in • No "Select time zone." ■... -
Page 49: Network Settings
Settings and Adjustments Configuring the device on a PC Network Settings Video (IX-DV and IX-DVF(-*)) ■ Video Encoder 1 Configure video settings for calls between IX system stations. The coding system will be H.264 / AVC. Important • When the "Frame Rate" is set to "7.5," 10," 15," 20," or "30," the frame rate will drop to "5" fps once approximately 10 minutes have elapsed since an outgoing call was made. - Page 50 Configuring the device on a PC ■ Video Encoder 2 Set when transmitting video using ONVIF. To view video from IX-DV or IX-DVF(-*) with a 3rd party product, refer to “Viewing video from IX-DV or IX-DVF(-*) with 3rd party products (ONVIF) (→page 88)”.
- Page 51 Settings and Adjustments Configuring the device on a PC ■ Enable NTP Entry Description Settings Default values Enable NTP Set whether to obtain the time from an NTP • Yes No Use server. • No Use An NTP server must be configured separately if using an NTP server.
-
Page 52: System Information
Note • When using this as a calling tone or ringtone, add a period of silence after the audio source. • Sample files of custom tones are provided on our website (https://www.aiphone.net/product/) for download and use as audio sources. How to register an audio file Click [Browse] on the row of the station with which to register the audio file. - Page 53 Settings and Adjustments Configuring the device on a PC How to delete a custom tone Check the [Delete] box of the audio file to delete. Click [Update].
-
Page 54: Call Settings
Settings and Adjustments Configuring the device on a PC Call Settings Call Origination Click [Call Origination]. Or, click "Call Origination" in the Setting menu to switch to the outgoing call screen. ■ Call Origination advanced settings How to configure advanced Call Origination In [Call Button / Option Input #], select "Call Button,"... - Page 55 Settings and Adjustments Configuring the device on a PC Entry Description Settings Default values Ringback Tone Configure the calling tone heard from this • None Call Button: Call station when an outgoing call is made. • Call Pattern 1 Pattern 1 •...
- Page 56 Settings and Adjustments Configuring the device on a PC How to configure Standard Mode Settings Configure the call group number and call priority when “Call Method (→page 54)” is set to [Standard Destination]. Entry Description Settings Default values Call Destination This item lets you define the destination 01 to 10 Call Button: 01...
- Page 57 Settings and Adjustments Configuring the device on a PC How to configure Schedule Settings Configure this if “Call Method (→page 54)” is set to [Change Destination by Schedule]. ● Weekly Schedule Configure the switchover time, call group number, and call priority for the outgoing call destination, each day from Sunday to Saturday.
- Page 58 Settings and Adjustments Configuring the device on a PC ● Daily Schedule Configure the switchover time, call group number, and call priority for the outgoing call destination, in units of one day. A schedule one year from the set day can be configured. 12 schedules can be set for each day. Calendar Set schedule list How to configure Daily Schedule...
- Page 59 Settings and Adjustments Configuring the device on a PC ■ Tone Settings Entry Description Settings Default values Busy Tone Select the tone heard from this station when • None Busy Response Tone an outgoing call is made and the other •...
- Page 60 Settings and Adjustments Configuring the device on a PC ■ Call Restart Function Entry Description Settings Default values Call Restart Function Enable/disable the call restart function. • Enable Disable Call Restart Function: If the station is reset • Disable during an outgoing call, the call is automatically resumed after the station recovers.
- Page 61 Settings and Adjustments Configuring the device on a PC Incoming Call ■ Call Answer Settings Entry Description Settings Default values Auto Answer Configure Auto Answer for incoming • ON: Auto Answer enabled. individual calls. • OFF: Auto Answer Auto Answer: When an incoming call is disabled.
- Page 62 Settings and Adjustments Configuring the device on a PC ■ VoIP Phone Entry Description Settings Default values VoIP Phone Call Configure the incoming priority when a call • Normal Normal Priority is received from a VoIP Phone. • Priority • Urgent...
-
Page 63: Option Input / Relay Output Settings
Settings and Adjustments Configuring the device on a PC Option Input / Relay Output Settings Relay Output ■ Relay Output advanced settings How to configure relay output specifications Select the relay output to set in "Relay Output #." • Settings for the selected relay output are displayed. Configure each item. - Page 64 Settings and Adjustments Configuring the device on a PC Entry Description Settings Default values Sound Settings You can select tones for relay output. • None Door Release: • Door Release: Configure the tone heard • Call Pattern1 Operation Sound when relay output is performed to release •...
- Page 65 Settings and Adjustments Configuring the device on a PC Note • A single optional relay authentication key can be configured for a station. It will be shared among multiple output terminals. • The "Option Relay Control Authentication Key" is displayed as "●●●●●" in the Settings screen.
-
Page 66: Function Settings
Settings and Adjustments Configuring the device on a PC Function Settings Paging Settings Entry Description Settings Default values Paging Pretone Configure the announcement tone when a • None Pre Tone2 page is received. • Call Pattern1 • Call Pattern2 • Call Pattern3 •... - Page 67 Settings and Adjustments Configuring the device on a PC Email Configure the email function (function that sends information on station operation to the set email address). Important • If an SMTP server is not configured, email will not be sent even if email is configured. If email is not sent, contact the system administrator.
- Page 68 Settings and Adjustments Configuring the device on a PC Entry Description Settings Default values Outgoing Urgent Call An email message will be sent when an • Checked: Send Unchecked: Do not outgoing call of "Urgent" priority is made. • Unchecked: Do not send send Incoming Urgent Call An email message will be sent when an...
- Page 69 Settings and Adjustments Configuring the device on a PC Entry Description Settings Default values Subject Set the subject text of the email message for 1 - 64 alphanumeric each trigger. This will be used for all characters destinations. Important • "UTF-8" is used to encode "Subject." Characters may display incorrectly depending on the email client. To avoid this, set the encoding method to "UTF-8."...
- Page 70 Station Location: [2F West] Important • "UTF-8" encoding is used for "Subject" and "Image Filename." Characters may display incorrectly depending on the email client. To avoid this, set the encoding method to "UTF-8." ■ Additional Settings (IX-DV and IX-DVF(-*) only) Entry Description Settings...
- Page 71 Important • Video/audio cannot be recorded even if configured if no microSD card is inserted. Refer to “microSD Cards (IX-SSA(-*), IX-DV, and IX-DVF(-*)) (→page 22)” for details.
- Page 72 Settings and Adjustments Configuring the device on a PC Entry Description Settings Default values Prevent Overwrite Configure whether overwriting old video/ • Enable Disable audio files is prohibited, when the number of • Disable saved video/audio files or the microSD card storage space is full.
- Page 73 Settings and Adjustments Configuring the device on a PC ■ Schedule Settings Configure the time to record video/audio when “Record Event (→page 71)” is set to "Schedule." ● Weekly Schedule Configure the video and audio recording time for each day from Sunday to Saturday. 12 schedules can be set for each day.
- Page 74 Settings and Adjustments Configuring the device on a PC Communication Audio Messages Configure the Communication Audio Messages. Communication Audio Messages: This function transmits messages such as the location when a call starts or when receiving a key entered on the numerical keypad of the other station (IX-MV7-* or a VoIP Phone). ■...
- Page 75 Settings and Adjustments Configuring the device on a PC ■ Code Received Configure the message sent when the key is received. Four patterns can be set for the received key and message. Entry Description Settings Default values Code Configure the authentication key that 1 - 20 digits authenticates the input key commands from IX-MV7-* or a VoIP Phone.
- Page 76 Settings and Adjustments Configuring the device on a PC Chime Configure the chime tone that plays from this device linked with the set schedule. Click [Chime]. Or, click "Chime" in the Setting menu to display the Chime screen. ■ Weekly Schedule Configure the chime tone start time and the chime tone for every day from Sunday through Saturday.
- Page 77 Settings and Adjustments Configuring the device on a PC Entry Description Settings Default values Chime Configure the chime tone to play. • None None • Call Pattern1 • Call Pattern2 • Call Pattern3 • Call Pattern4 • Call Pattern5 • Call Pattern6 •...
- Page 78 Settings and Adjustments Configuring the device on a PC ■ Daily Schedule Configure the start time and chime tone for the chime tone, in units of one day. A schedule one year from the set day can be configured. 50 schedules can be set for each day. Calendar Set schedule list How to configure the Daily Schedule...
- Page 79 Settings and Adjustments Configuring the device on a PC Entry Description Settings Default values Chime Configure the chime tone to play. • None None • Call Pattern1 • Call Pattern2 • Call Pattern3 • Call Pattern4 • Call Pattern5 • Call Pattern6 •...
-
Page 80: Station Settings
• +12dB from VoIP, -12dB to VoIP Ringtone Configure the ringtone and paging received 0: Mute, 1 - 10 IX-SS-2G: 10 pretone volume. IX-DV, IX-DVF(-*), IX- SSA(-*): 6 Paging (except for IX- Set the receive volume when receiving a 1 - 10 SS-2G) page. - Page 81 Settings and Adjustments Configuring the device on a PC ■ Tone Entry Description Settings Default values Communication Configure the tone that plays when an • None Error Timeout Notification outgoing call is made but the call times out • Call Pattern1 without the destination station answering.
- Page 82 Settings and Adjustments Configuring the device on a PC Entry Description Settings Default values Auto Answer Tone Configure the tone heard when an individual • None Pre Tone1 call is received with “Auto Answer • Call Pattern1 (→page 61)” set to "ON." •...
- Page 83 Settings and Adjustments Configuring the device on a PC Entry Description Settings Default values Error This item lets you select a tone which • None Error sounds when an error occurs. • Call Pattern1 • Call Pattern2 • Call Pattern3 •...
- Page 84 Settings and Adjustments Configuring the device on a PC Communication Entry Description Settings Default values Configure the call duration when making an • 30-600 sec: Choose this to 60sec Talk Timeout [sec] outgoing call from this station or answering a set a time between 30 and call from an incoming page.
- Page 85 Settings and Adjustments Configuring the device on a PC Monitor Entry Description Settings Default values Monitored Notification Configure the tone that is heard when • None None Tone monitoring from another station starts. • Call Pattern1 • Call Pattern2 • Call Pattern3 •...
- Page 86 Settings and Adjustments Configuring the device on a PC Camera (IX-DV and IX-DVF(-*) only) Configure the settings for the camera. ■ Adjustment Entry Description Settings Default values Backlight Send an image for which backlight • Enable Disable Compensation compensation was performed to the other •...
-
Page 87: Maintenance
Settings and Adjustments Configuring the device on a PC Maintenance Initialization Initialization puts all the settings in “List of settings (→page 44)” back to the default. How to initialize Click [Initialize User Settings]. Click [OK]. • Click [Cancel] to cancel the initialization process. Important •... -
Page 88: Viewing Video From Ix-Dv Or Ix-Dvf(-*) With 3Rd Party Products (Onvif)
Important • Video from IX-DV and IX-DVF(-*) cameras cannot be viewed simultaneously by more than two 3rd party products. • Audio will not be distributed if "Audio Codec (administrator setting)" is set to "G.722." • The "ONVIF ID" and "ONVIF Password" may be changed by the 3rd party product. -
Page 89: Appendix
IX-SS-2G: 120 mm (4-3/4") [W], 120 mm (4-3/4") [H], 2.5 mm (1/8") [D] (exposed area; excluding projection) IX-DV: 115 mm (4-1/2") [W], 207 mm (8-1/8") [H], 45 mm (1-3/4") [D] (excluding projection) IX-DVF and IX-SSA: 150 mm (5-7/8") [W], 265 mm (10-7/16") [H], 2.5 mm (1/8") [D] (exposed area;... - Page 90 Other Appendix Maintenance • Clean the unit gently with a soft, dry cloth. If difficult to clean, dip a soft cloth in neutral detergent diluted with water, wring it out well, and then clean unit. Important • Do not use chemicals such as benzene or paint thinner. You may damage the surface of the device, or cause discoloration.
-
Page 91: Notice Regarding The Software
Customers can obtain, modify, and re-distribute the source code of the software components according to the GPL/LGPL. Please see the website below for how to obtain sequence GPL/LGPL of this source code. http://www.aiphone.co.jp/data/software/source/gpl/download/ix/ * Be sure to read the following before downloading. <<Please confirm>>... - Page 92 OF OR IN CONNECTION WITH THE USE OR PERFORMANCE OF THIS SOFTWARE. (5) MIT License Copyright (c) 2018 Aiphone co.,Ltd. Released under the MIT license. Permission is hereby granted, free of charge, to any person obtaining a copy of this software and associated documentation files (the "Software"), to deal in the Software without restriction, including without limitation the...
- Page 93 (10) zlib License (C) 1995-2010 Jean-loup Gailly and Mark Adler See the following website for source code including changes for software that has been authorized under the above licenses. http://www.aiphone.co.jp/data/software/source/gpl/download/ix/ * Be sure to read the following before downloading. <<Please confirm>>...
- Page 94 Other Notice regarding the software – Please note that we cannot answer questions regarding the content of the source code of the software components.
-
Page 95: For Proper Use Of The Station
Other FOR PROPER USE OF THE STATION REGULATIONS This device complies with part 15 of the FCC Rules. Operation is subject to the following two conditions: (1) This device may not cause harmful interference, and (2) this device must accept any interference received, including interference that may cause undesired operation. -
Page 96: Warranty
This warranty shall not apply to any Aiphone product which has been subject to misuse, neglect, accident, power surge, or to use in violation of instructions furnished, nor extended to units which have been repaired or altered outside of the factory. - Page 97 MEMO...
- Page 98 AIPHONE CO., LTD., NAGOYA, JAPAN Ⓐ Issue Date: Nov.2018 P1118 MQ 60163...
Need help?
Do you have a question about the IX-DV and is the answer not in the manual?
Questions and answers