Table of Contents
Advertisement
CAUTION:
Read And Follow
All Safety
Rules
And Instructions
Before
Operating
This
Equipment.
®
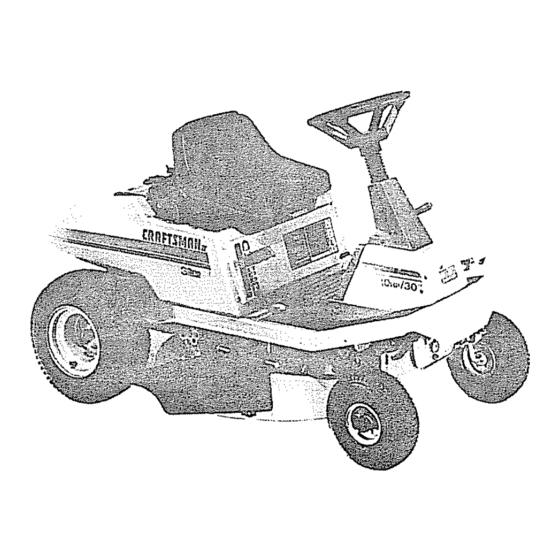
10
30"
5
REAR
HP° ELECTRIC
START
MOWER
/ MULCHE
ENGU E
IDER
o Assembly
• Operation
• Customer
Responsibilities
= Maintenance
• Service
and Adjustment
= Repair Parts
F-92533
11-22-91
Sears, Roebuck and Co,, Chicago,
tL. 60684
U,SA,
Printedin USA
Advertisement
Table of Contents

Related Manuals for Craftsman 502.25502


Summary of Contents for Craftsman 502.25502
- Page 1 F-92533 11-22-91 HP° ELECTRIC MOWER 30" REAR ENGU E o Assembly • Operation • Customer Responsibilities = Maintenance • Service and Adjustment = Repair Parts Sears, Roebuck and Co,, Chicago, tL. 60684 ® START / MULCHE IDER U,SA, Printedin USA...
- Page 2 As Recommended This cutting machine is capable of amputating safety instructions could result in serious GENERAL OPERATION: Read, understand and follow all instructions before starting Only allow responsible adults familiar Clear the area of objects such as rocks, toys, wire, Be sure the area is clear of other people Never carry passengers.
-
Page 3: Carburetor
CHILDREN: Tragic accidents can occur if the operator mowing activity NEVER assume that Keep children out of the mowing area and in the watchful Be alert and turn the engine off if children Before and when backing, took behind Never carry children or any... - Page 4 For two 2 years from the date,of purchase, if this riding equipment is manta ned, ubricated and tuned up acco d to the instructions in the owners manual Sears will repair or rep ace free of charge, any parts oundto be de ec ve...
-
Page 5: Table Of Contents
SAFETY RULES ... CUSTOMER RESPONSIBILITIES PRODUCT SPECIFICATIONS WARRANTY TABLE OF CONTENTS INDEX RIDER ATTACHMENTS ASSEMBLY OPERATION Adjustments: glade Engagement Control grake. Drive ... Carburetor Mower Housing. Level ... Throttle Control Cable ... Air Screen Assembly 7 - 11 Attachments Bagging Tips ... Batter/: Charge Clean and Check... - Page 6 These accessories arrd attachments were available when the unit was purchased. They are also available at most Sears retail outlets, catalog arrd service centers. Most Sears stores can order these items for you when you provide the model number of your riding mower...
- Page 7 PREPARATION Before being put in the carton, the u nit was carefully carton made to protect the unit dudng The unit !s completely assembled except this page These items are in the carton contains the fasteners to assemble the unit these items TO REMOVE...
- Page 8 TO PREPARE CHARGE THE BATTERY NOTE: Before install battery, (Electrolyte) and charge the battery Battery paint and parts, WARNING: Read the instructions the battery acid container. and eyes from the battery will protect you. If the vent caps are not installed on the battery vent caps...
- Page 9 TO ASSEMBLE THE STEERING WHEEL Use the fasteners shown below to install the steering fasteners are shown at full slze 1x10² Bottom View Make sure the front wheels point forward over the steering post Make sure the collar of the bellows on top Push on the top of the bellows Attach...
- Page 10 TO INSTALL THE BAI-rERY Use the fasteners shown below to install the battery, are shown full size 91565 15x66 Check the level of the acid If the acid has fallen correct level, add water to the correct Attach the drain tube to the bottom Fasten...
- Page 11 If you remove mulcher of the mower discharge is not acceptable need to replace a standard blade A standard blade, available from your nearest housing as a the mu!eher grass some grass cover grass bagger the mulcher part number Sears Service...
- Page 12 When you read this instruction accident followthe operating instructions C]ulch, Bfake Peda_ Blade Engag Igrlilion SwiIch MEETS Sears Mowers conform to the safety standards Commission BLADE ENGAGEMENT CONTROL LEVER: lever to start and stop the rotation of the blade CLUTCH/BRAKE PEDAL:...
- Page 13 F-92533 OPERATION mower can result in the eyes, which Always wear safety starting your lawn Shift Gate recommend available at Sears BRAKE pedal forward pedal and then brake completely push parking brake will leave operator's brake Move the blade...
- Page 14 TO USE THE THROTTLE Use the throttle control to increase or decrease engine To start a cold engine move the lever CHOKE position FAST position is marked with operations and when using a grass bagger the FAST position For maximum charging also for a cooler running...
- Page 15 BEFORE STARTING THE ENGINE CHECK OIL - Add as needed NOTE: check level runs Make sure the unit is tevel Clean the area around the dipstick Wipe the oil from the dipstick Insert the dipstick into the oil fill tube Turn the dipstick clockwise untiI it is tight Remove the dipstick...
- Page 16 If you remove mulcher of the mower discharge or grass you need to replace the mulcher a standard blade. A standard blade, part available from your nearest Sears fences, of the gear. will grass. grass plate bagger number Service...
- Page 17 D_4S33 nuts to the plate types grass. some grass plate and the grass bagger the mulcher blade, part number Sears Service wire to the spark Side Tab from starting blade engagement position bolts from the mulcher plate under the bolts and wing...
-
Page 18: Air Screen
CUSTOMER PROCEDURE Blade, Inspect & Sharpen Blade Engagement Control, Check Brake, Check Clutch, Check Tires, Check Batter/, Check & Charge Ba_er T, Clean Lubrication Oi!, Check Air Screen, Check Oil, Change Air Filter, Clean Muff!er, Check Spark P!ug, Check Spark Plug, RepIace MOWER GENERAL RECOMMENDATIONS... -
Page 19: Install
iNSPECT BLADE WARN!NG: Before inspect d_sc_nn_, t ... _._ ,o ... the b!adeh nobj_ct, stop the engine the un.t for damage The blade When ho!d the blade, material to protect _o,,. h.n_ l, TO,- ,,eer, ,h ... e ... _, _,,d ,n_.._.,c ... - Page 20 TO CHECK ADJUST THE BLADE ENGAGEMENT engagement control must WARNING: prevent Stop the engine Disconnect the wire from Before you adjust the blade engagement tevet mower housing Mower Housing" Set the height of the mower housing Move the blade engagement control position Check the blade engagement...
- Page 21 Washer Cotter /"\ Washer TO CHECK ADJUST BRAKE Before you adjust the broke, check the clutch adjustment the instructions on "How To Check And Adjust The Clutch " Make sure the shift lever is in the NEUTRAL (N) position Disconnect the adjustable nut from the brake arm as shown Carefully push the brake arm forward and hold in position With the brake...
- Page 22 TO REMOVE THE SIDE PANEL To help service and clean the engine or the battery panels can be easity removed Remove the large screws that hold panel Slide the side panel back approximately the side panet BATTERY To charge or clean the battery remove the battery...
- Page 23 ENGINE TO CHECK THE OIL NOTE: check level runs, Make sure the unit is level Clean the area around the dipstick Wipe the oil from the dipstick Insert the dipstick into the ell fill tube wise until it is tight Remove the dipstick on the dipstick...
- Page 24 TO CLEAN THE AIR FILTERS Some engines have two filters, an outer foaro filter around an inner paper filter Clean the air filters every 50 hours dirty conditions service more often NOTE: Never run the engine with the air filters filters will help protect the engine...
- Page 25 Check See step Control speed When the the engine speed is control is in the SLOW governor If the engine Sears Service experience make Screw Jet Screw turn the main jet screw in a counterclockwise until the engine runs rough...
- Page 26 TO REMOVE THE MOWER Move _he lift lever to the MIDDLE Move blade engagement DISENGAGE position Disconnect the blade drive link bracket assembly See illustration Remove [he hair pins thai hold time hangers plates See illustrabons A'and'B Move [he mower housing to the left hanger...
- Page 27 SERVICE HOW TO REPLACE THE MOWER Move the lift lever into the low cut position Slide the mower drive belt between the stack pulley belt guide Remove the mower drive pulley Pull the belt guide away from theidler belt from the idler pulley While push...
- Page 28 SERVICE HOW TO LEVEL THE MOWER if the mower housing is level, the mower iawn will look better Make sure the unit is on a hard level surface Check [he air pressure in the tires incorrect tile mower housing will not cut level the rear tires are inflated to !4 psi(lO tires are inflated...
- Page 29 FRONT WHEEL control to the The alignment steering is damaged control to the nearest Sears Service housing of the mower Hair Pin THE FUSE the enginewitlnot start Thelocationofthe battery Remove fuse and replace fuse...
-
Page 30: Storage
At the end of each year, prepare the unit for storage MOWER CLEAN THE UNIT Clean the mower housing See "How Housing" LUBRICATE UNIT See the "Lubrication" instructions in this book ENGINE Clean the dirt and grass from the engine Change the oil See theinstrucdons Oi!"... -
Page 31: Operation
TROUBLE SHOOTING PROBLEM: The engine will not start Follow the steps How To Start The Engine Clean the battery terminals Tighten Check for a loose wire Tighten the limit switches wiring diagram Drain the fuel tank Clean the fuel filter Remove the spark plug(s) Move... -
Page 32: Mulcher
" ENGINE MODEL NO_ - 14&426072 PART NUMBER PART DESCRIPTION Your Seat's merchandise has added value when you consider Sears has service units nationwide staffed with Sears trained necessary parts, tools, and equipment to meet the Sears pledge, "We Service What We Sell"...