Tynetec Advent xt Installation Manual
Warden call system
Hide thumbs
Also See for Advent xt:
- Programming manual (28 pages) ,
- Manual (9 pages) ,
- User manual (4 pages)
Table of Contents
Advertisement
Quick Links
Advent xt
Warden Call System
____________________________________________________________________________________________________
Tynetec operates a policy of continual product improvement and
reserves the right to modify the specification of its products.
If any variation to the details in this document are suspected please
contact Tynetec's Technical Support on 01670 352371.
Doc No. FM0410 issue M‐1 Page 1
Installation Guide
Tynetec, a business unit of Legrand Electric Ltd
Unit 10 Cowley Road, Blyth Riverside Business Park, Blyth
Northumberland, NE24 5TF. Tel: 01670 352 371 Fax: 01670 362 807
Email: sales@tynetec.co.uk Web: www.tynetec.co.uk
Advertisement
Table of Contents

Related Manuals for Tynetec Advent xt


Summary of Contents for Tynetec Advent xt
- Page 1 Tynetec operates a policy of continual product improvement and reserves the right to modify the specification of its products. If any variation to the details in this document are suspected please contact Tynetec’s Technical Support on 01670 352371. Tynetec, a business unit of Legrand Electric Ltd Unit 10 Cowley Road, Blyth Riverside Business Park, Blyth Northumberland, NE24 5TF. Tel: 01670 352 371 Fax: 01670 362 807 Doc No. FM0410 issue M‐1 Page 1 Email: sales@tynetec.co.uk Web: www.tynetec.co.uk...
-
Page 2: Table Of Contents
INDEX Section Topic Page Introduction System Overview Controller Installation Network Wiring Requirements Network Load Considerations Network Termination Board Network Cable Colour Code PA Amplifier & SMPSU Installation Intercom Unit Installation Intercom Unit Auxiliary Devices Intercom Unit DIL Switches & Link Settings Remote Intercom Unit Installation Fitting & Removing the Intercom Front Intercom Unit Test Mode ... -
Page 3: Introduction
1. INTRODUCTION The Advent xt is an alarm monitoring and communication system designed specifically for grouped housing schemes. A typical installation will comprise of an Advent xt controller with intercom units and peripheral devices connected on a common bus wiring network. Alarm calls are reported to an onsite manager via a DECT cordless or desk telephone, calls may also be reported via a standard PSTN line to a remote control centre or mobile telephone. LIFT MOTOR ROOM LIFT CALLPOINT SYSTEM INTERFACE NETWORK TELECARE RADIO DEVICES 169MHz AERIAL MANAGER CALLPOINT REMOTE INTERCOM 169MHz NETWORK STATUS ... -
Page 4: System Overview
ZXT548 700VA UPS 1 per site for Matrix IP PBX & PoE/Fastswitch ZXT330 BT Line Selector Unit optional 1 per system ZXT130 Digital Communicator optional 1 per system WIRING REQUIREMENTS On new installations the system wiring network should be a 6 pair CW1308 BT spec cable, on sites with existing cabling a minimum of 5 twisted pairs are required (or 4 pairs without PA or door entry). The telephone wiring network should be a 2 pair CW1308 BT spec cable with BT master sockets. A dedicated PSTN line is required if the facility to report calls to a remote Control Centre is specified. A 4 pair Cat 5e cable (max distance 100 metres) is required between the PoE injector/Fastswitch and the Kirk 400 Wireless Server/IP Base Stations. RJ45 wall sockets and patch leads are required to terminate the Cat 5e cable. SYSTEM PROGRAMMING A Laptop PC with Windows 98, 2000 or XP lnternet Explorer and a serial data cable is required for all system programming. Windows 7 Laptops can be used with a MicroSoft application that runs XP mode (only compatible with Windows 7 Professional, Enterprise or Ultimate editions). See the Advent xt Programming Manual (Tynetec Doc No. FM0411). Doc No. FM0410 issue M‐1 Page 4... - Page 5 A Matrix IP PBX is required to interface the Kirk 400/6500 DECT telephone system to the Advent xt and an outside telephone line. The Kirk 400 DECT system will usually cover most installations, large or complex sites may require Kirk 6500. The radio coverage of base stations can be increased with repeaters. To maintain operation of the DECT system during a mains failure an additional UPS is required. BT LINE SELECTOR OPTION If specified, the Advent xt can have 2 dedicated telephone lines (primary & secondary) or a primary line and a secondary GSM cellular terminal connected via a BT line selector unit. If the primary line fails the secondary line/GSM module will automatically be selected, once the primary line is restored the system will automatically switch back. ETHERNET INTERFACE OPTION The Ethernet Interface Kit will store all system activity for download and analysis using Tynetec’s iCare software. A Broadband connection with a fixed IP address is required. REMOTE CONTROL CENTRE (PSTN ARC) The chosen PSTN Alarm Receiving Centre must support BS8521 or TT92 protocol. DIGITAL COMMUNICATOR (IP ARC) The optional Digital Communicator allows the Advent xt to connect with an IP Alarm Receiving Centre. Doc No. FM0410 issue M‐1 Page 5...
-
Page 6: Controller Installation
3. CONTROLLER INSTALLATION The Advent xt controller is housed in a 400x500x75mm (HxWxD) steel enclosure with an integral power supply unit and rechargeable standby batteries. ... - Page 7 3. CONTROLLER INSTALLATION 27V SMPSU MODULE The controller includes a 27V/150W (5.6A) switched mode power supply unit with solid state overload protection. With the mains supply ON the green output healthy LED should be illuminated. The output voltage is factory set to 27.5V DC (with the batteries disconnected) using a DVM across V+/V‐. MAINS LIVE MAINS NEUTRAL MAINS EARTH 27V/150W SMPSU 0V (W00581) 0V 27.5VDC 27.5VDC 27V OUTPUT HEALTHY LED 27V ADJUST BATTERY STANDBY In the event of a mains failure, two 12V 5Ah rechargeable batteries will maintain a typical system for approx. 8 hours. A protection circuit will disconnect the battery supply in the ...
-
Page 8: Network Wiring Requirements
ONSITE LOCAL REMOTE OFFSITE OFFSITE MANAGER LAST FAULTS EXIST BT LINE FAULT INTERCOM PRINTER ADVENT xt CONTROLLER Single auxiliary devices such as the status module, manager callpoint, network receivers, etc. can be connected to the system network wiring as shown above. To eliminate the possibility of data reflections and corruption the network should never be split into multiple legs from a mid‐point in the wiring; small groups of intercoms spurred off at any point should also be avoided. ... -
Page 9: Network Load Considerations
5. NETWORK LOAD CONSIDERATIONS It is very important to take voltage drop across the system network into consideration when planning an installation. It is the cable resistance on the power supply wiring that gives rise to voltage drop ‐ the longer the cable run and the larger the current requirement, the larger the voltage drop. To perform a detailed assessment of voltage drop is complex; you need to know the current requirement of each device, the distance between each device and the resistance of the cable per metre. To estimate the worst case scenario simply take the maximum cable run and calculate the voltage drop as if all devices were at the end of the cable. THE RESISTANCE OF CW1308 CABLE IS Ω APPROX 100 PER 1000 METRES Typical current requirements of devices connected to the Advent xt network are given below: 24V Network Devices Standby Active Standard Intercom Unit 2mA 10mA Remote Intercom Unit 2mA 10mA Ceiling Pullcord with 24V LED 0mA 10mA Door Entry Telephone 3mA 15mA Door Entry Telephone with LED on 4.5mA N/A Combined Intercom 2mA ... -
Page 10: Network Termination Board
SMPSU INPUTS EXT PSU INPUTS AUDIO INPUT PA & D/E I/P LINK 7 RS232 PORTS The standard 9 pin “D” RS232 port 1 is used to connect a laptop PC to monitor the network comms using Windows Hyper Terminal (19200 baud, 8 data bits, 1 stop bit, no parity). The second RS232 port 2 (MMJ data socket) is used to connect a Tynetec interface (P/No. ZXT295) to program network devices in‐circuit (this is provided with a Windows utility which can also be used to monitor network comms). The correct link settings LK1‐LK6 must be selected depending on what the RS232 port is being used for. LINK SETTINGS Links LK1 to LK6 will normally be fitted as shown on the drawing above. These settings allow either RS232 port to be used to monitor the Advent xt network data via Windows Hyper Terminal or the Tynetec interface. If the RS232 port 2 (MMJ data socket) is being used to program network devices then the link settings must be changed as below. Link 7 has no current function ‐ leave fitted in position A. RS232 Port Mode Link Settings Monitor Advent xt Comms LK1A LK2A LK3B LK4B ... - Page 11 CPU LED 1 Any Alarm Output or DTMF Relay 1 LED 4 2 Fire Alarm Output or DTMF Relay 2 LED 5 3 BT Line Selector or DTMF Relay 3 LED 6 4 BT Line Fault or DTMF Relay 4 LED 7 When an output is activated the relevant LED4‐7 will illuminate on the main CPU board. Note; all outputs can be activated with DTMF keys or set as system outputs ‐ see the Advent xt Programming Manual (Tynetec Doc No. FM0411). EXTERNAL PSU INPUT There are screw connectors provided for additional 12V & 24V DC power supplies if the network current requirement exceeds that of the system SMPSU. The power rating and standby battery capacity of additional PSU’s must be calculated accordingly. Consideration should also be given to the power conductors on the site wiring network to ensure they are capable of carrying the increased current with minimum voltage drop. Fuses F1‐F6 will need to be up‐rated in line with the increased current capacity. FUSES There is fuse protection on the 12V and 24V DC supplies on each of the 3 network connections. The LED alongside each fuse will extinguish if a fuse is blown. Fuse No. Rating Function LED ...
- Page 12 EN Enable signal connected to PA amplifier board AUD DECT audio connected to PA amplifier input 0V DECT audio 0V reference RS485 + RS485 bi‐directional data bus RS485 ‐ PA1 PA audio signal (100V line) from PA amp output PA2 C1 C1 = audio to door door panel audio C2 C2 = audio to phone See Tynetec wiring diagram Drg No. ZXT100 sheet 2. SYSTEM NETWORK There are 3 blocks of pluggable XT network terminals ‐ if there are more than 3 legs simply connect in parallel in any block. The terminals on the system network have the following functions; Terminal Function 24V 24V DC supply for network devices ‐ fused at 1.6A 12V 12V DC supply for auxiliary devices ‐ fused at 1.6A 0V system Earth reference RS485 + RS485 bi‐directional databus RS485 ‐ SP1 ...
-
Page 13: Network Cable Colour Code
7. NETWORK CABLE COLOUR CODE CW1308 NETWORK CABLE The recommended colour code using a 6 pair CW1308 BT spec cable is given below; Pair No. Diameter Colour Signal White/Blue 24V 1 0.5 mm Blue/White 12V White/Orange 2 2 x 0.5 mm 0V Pair White/Green RS485+ 3 0.5 mm Green/White RS485‐ White/Brown SP1 4 0.5 mm Brown/White SP2 White/Grey Mic 5 0.5 mm ... -
Page 14: Pa Amplifier & Smpsu Installation
Green Advent xt Termination Board 0V RS485+ Red Advent xt Termination Board RS485+ 2 Core RS485‐ Black Advent xt Termination Board RS485‐ Transformer PA1 Red Advent xt Termination Board PA1 2 Core Transformer PA2 Black Advent xt Termination Board PA2 Note: the transformer PA1/PA2 connection is not polarity conscious. SMPSU & DC-DC MODULES The 15V/100W switch mode power supply unit (P/No. W00585) is factory set to 13.75V DC output to supply the two 24V DC‐DC converters and the PA amplifier board. This voltage also charges the 12V standby battery. The SMPSU has an internal 20mm 3.15A mains fuse and solid state overload protection on the output. For details on changing the mains fuse see “27V SMPSU Module” on Page 7. The two 24V/50W DC‐DC converter modules (P/No. W00590) are factory wired to provide +/‐ 24V DC supply for the PA amplifier board. The DC‐DC converters have solid state overload protection and contain no user serviceable parts. PROGRAMMING The All Call and Fire Tone options must be enabled in the “General Setup” programming ‐ see the Advent xt Programming Manual (Tynetec Doc No. FM0411). Doc No. FM0410 issue M‐1 Page 14... -
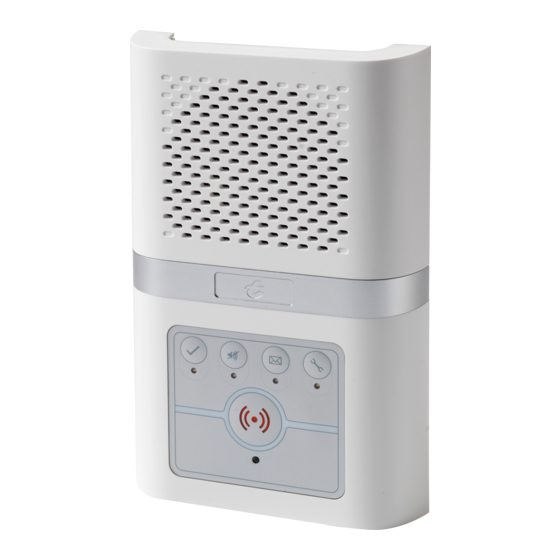
Page 15: Intercom Unit Installation
9. INTERCOM UNIT INSTALLATION The intercom unit should be wall mounted in a central location within each dwelling. Screw fix the intercom rear securely to the wall using the 4 holes marked “A”. The 2 holes marked “B” can be used for an embedded box. Ensure the case is not twisted as this may prevent the lid fitting correctly. CABLE ENTRY FIXING HOLES CABLE 97mm “B” ON 60mm ENTRY ... -
Page 16: Intercom Unit Auxiliary Devices
INTERCOM 10 (SM) INTERCOM 0V If low voltage detectors are used then these must be powered from an additional power supply unit. DO NOT POWER FROM THE ADVENT xt SYSTEM. Multiple smoke/heat detectors can be connected in parallel within each dwelling. - Page 17 N/O clean contacts to 0V. INTERCOM 18 (SDATA) NATURAL GAS (44) The input types shown are the factory defaults. These are programmable with V2.0 firmware. STROBE LIGHT ZSL045 Tynetec P/No. ZSL045 shown. ADVENTxt STROBE ...
-
Page 18: Intercom Unit Dil Switches & Link Settings
11. INTERCOM UNIT DIL SWITCHES & LINK SETTINGS Before fitting the intercom front the “Address” and “Options” DIL switches must be set. The jumper links LK1, LK2 & LK3 must also be set in the correct position. INTERCOM ADDRESS DIL SWITCH The intercom Address must be set sequentially using an 8 bit binary code starting from “1” in the lowest flat number on the site. 1 2 3 4 5 6 7 8 1 2 3 4 5 6 7 8 OPTIONS ADDRESS Note: binary “0” (all DIL switches set OFF) is not used. DIL SWITCH DIL SWITCH Address ON = ... -
Page 19: Remote Intercom Unit Installation
12. REMOTE INTERCOM UNIT INSTALLATION The remote intercom (P/No. ZXT221) can be connected to any standard intercom if a second speech unit is required within a dwelling. The remote intercom is also available with PA facility (P/No. ZXT226) if all call speech/fire tone is required through both intercoms. Note; the Extracare reset function is not available on a remote intercom. INSTALLATION A 6 pair CW1308 cable is required between the master intercom (connected to the network) and the remote. The cable run between the master and remote should not exceed 20 metres, only one remote can be connected per master. All auxiliary input devices such as pullcords, smoke detectors, PIR’s, etc. are connected to the master intercom as normal, only the clean contact relay output is available on the remote. See wiring diagram Drg No. ZXT100 sheet 4 for connection details. DIL switch and link settings must be made to identify an intercom as a “master” or “remote”. DIL SWITCH & LINK SETTINGS 1 2 3 4 5 6 7 8 1 2 3 4 5 6 7 8 OPTIONS ADDRESS... -
Page 20: Fitting & Removing The Intercom Front
13. FITTING & REMOVING THE INTERCOM FRONT Before fitting the intercom front; set the Address and Options DIL switches and check links LK1‐3 are fitted in the correct positions. Ensure all cables are properly terminated and secure spare wires in the clips provided. FITTING THE INTERCOM FRONT Locate the 2 top corners of the intercom front over the 2 top corners of the intercom back, swing downwards and clip together ensuring the pullcord is located in its slots. BASE FIXED TO WALL LOCATE TOP TWO CLIPS FIRST ALWAYS CHECK THE PULLCORD OPERATES AFTER THE FRONT IS FITTED ... -
Page 21: Intercom Unit Test Mode
14. INTERCOM UNIT TEST MODE The intercom unit Test Mode allows all input devices to be tested on a per‐flat basis without putting a call on the system. Once in Test Mode the intercom will beep as each device is activated, the system printer will log each test with the flat number, device type, time and date. The intercom must be in a quiescent state to enter the Test Mode, i.e. not in privacy mode, no message waiting, no alarm call in progress and not awaiting Extracare cancellation. PRESS AND HOLD THE BUTTON FOR ABOUT 5 SECONDS UNTIL THE INTERCOM BEEPS ONCE THEN RELEASE.. ... -
Page 22: Manager Callpoint Installation
The Manager Callpoint (P/No. ZXT250) is an external speech unit used to initiate a call from outside the building. It is connected to the system network similar to a standard intercom. ADVENT xt NETWORK ZXT250/255 MANAGER CALLPOINT 1 2 3 4 5 6 7 8 1 2 3 4 5 6 7 8 FIT 4K7 RESISTOR ACROSS TERMINALS 2 &... -
Page 23: Lift Callpoint Installation
16. LIFT CALLPOINT INSTALLATION The Lift Callpoint (P/No. ZXT260) is used to initiate a call from inside a lift car. The callpoint requires four wires via the lift company’s travelling cable to an interface unit in the motor room. The interface unit is connected to the system network similar to a standard intercom. ADVENT xt NETWORK INSTALLATION The Lift Callpoint is designed to be retrofitted in place of an existing Tunstall Telecom lift unit. It requires a horizontal cut‐ out 212mm x 94mm with 4 fixing holes on 216mm x 106mm centres. ... -
Page 24: Status Module Installation
Prefix ID Level Date Time Mode AL 0001 INTERCM 16/12 15:47 ON . e.g. intercom alarm from flat 1 at 15:47 on 16 December ‐ system in onsite mode For full details of all text abbreviations see the Printer User Guide (Tynetec Doc No. FM0416). For replacement 34 metre thermal paper rolls order Tynetec P/No. W00336. PROGRAMMING The Network Keyswitch Unit (Status Module) must be enabled in the “General Setup” programming ‐ see the Advent xt Programming Manual (Tynetec Doc No. FM0411). Doc No. FM0410 issue M‐1 Page 24... -
Page 25: Managers Display Panel Installation
Red +12V DC The PSU requires connection to a mains power supply. Blue 0V PSU dimensions: 205x240x85mm (HxWxD). Battery: 12V 3.4Ah. RS485 DATA CONNECTION The Manager’s Panel has a 3 metre data cable factory fitted. Grey Data Cable Advent xt A junction box with screw terminals is provided to extend this Red RS485+ connection to the Advent xt controller. The data connection Black RS485‐ must be made using a separate twisted pair cable. Drain Wire 0V The drain wire should be connected to the system 0V. PROGRAMMING The Manager’s Display Panel must be enabled in the “General Setup” programming ‐ see the Advent xt Programming Manual (Tynetec Doc No. FM0411). 1GB SD CARD The 1GB SD memory card, accessible on the lower rear face alongside the cable entry point, stores the display software and event log. If software upgrades become available in the future a new SD card will be supplied. Always turn off the mains supply before removing/replacing the memory card. Doc No. FM0410 issue M‐1 Page 25... -
Page 26: Network Receiver Installation
19. NETWORK RECEIVER INSTALLATION Up to 16 x 169MHz Network Receivers (P/No. ZXT325) can be installed throughout a site to provide radio coverage for personal pendants or other Altec radio devices. BNC CONNECTOR FOR AERIAL ABS ENCLOSURE 160x80x55mm RESET ... - Page 27 PROGRAMMING The total number of Network Receivers must be set in the “General Setup” programming ‐ see the Advent xt Programming Manual (Tynetec Doc No. FM0411). Doc No. FM0410 issue M‐1 Page 27...
-
Page 28: Zoned Network Receiver Installation
give approx. 20m radius When a pendant is activated the zone with the strongest Radio Signal Strength (RSSI) radio coverage will be identified in the alarm message. If the pendant is not within range of any Zoned Receiver then the call will still be picked‐up by the Standard Receivers and reported without any zone information. ATTENUATOR & AERIAL To give the reduced range, Zoned Network Receivers are supplied with a 10dB BNC Attenuator and a Helical Stub Aerial. Simply plug the BNC Attenuator between the Network Receiver and the Aerial. These 2 parts MUST BE fitted to Zoned Network Receivers ‐ DO NOT fit 1/2 Wave Aerials (W06250). CONNECTION Zoned Network Receivers require a power and data from the Advent xt system network using a 2 pair CW1308 cable. INSTALLATION Zoned Network Receivers should be sited in a dry secure area, they are NOT suitable for outdoor locations. Choose locations central to the zone you intend covering. Try and space the Receivers to minimise radio overlap between neighbouring zones. See the following page for details of testing and RSSI attenuation. ID SETTING DIL switches 1 to 4 are used to set a unique ID on each Zoned Network Receiver, DIL switches 5 to 8 are not used. ID’s must follow on sequentially after the Standard Network Receivers. See table on previous page. PROGRAMMING The ID’s of the Zoned Network Receivers must be set in the “Zoning Setup” programming. The total number of Standard + Zoned Network Receivers must be set in the “General Setup”. See the Advent xt Programming Manual (Tynetec Doc No. FM0411 issue “F” onwards). Doc No. FM0410 issue M‐1 Page 28... - Page 29 20. ZONED NETWORK RECEIVER INSTALLATION ENABLE RSSI PRINT-OUT Firstly set the Advent xt system to print the Zoned Network Receiver Signal Strengh (RSSI) using the DECT handset; 1. Press the LINE key, enter 8 1 and wait for the “Ready” prompt in the earpiece 2. Enter the code 7004 followed by the key 3. Radio device RSSI print‐out enabled/disabled will be heard in the earpiece 4. Press the # key to toggle between enabled/disabled ‐ the new mode will be heard in the earpiece 5. Press the LINE key to clear the connection IMPORTANT: remember to disable RSSI print‐out when testing is complete to save paper. TESTING Perform a walk test around zone 1 and activate a pendant at all extremes where you expect radio coverage. The print‐out will show the RSSI values for all Zoned Network Receivers that pick‐up the pendant transmission. Typical print‐out; RP 0095 ZONE 01 20/05 13:16 ON (Received Power = 95 for Zone 1) RP 0078 ZONE 02 20/05 13:16 ON (Received Power = 78 for Zone 2) RP 0067 ZONE 03 20/05 13:16 ON (Received Power = 67 for Zone 3) AL 0038 PENDANT 20/05 13:16 ON ...
-
Page 30: Digital Door Panel Installation
21. DIGITAL DOOR PANEL INSTALLATION The Advent xt system can be upgraded to include a door entry facility with the addition of digital door panels and telephone handsets. Visitors can call residents direct from the door panels with full duplex speech via door entry telephones. The onsite Manager can be contacted via the DECT (or fixed CLI telephones) by pressing the door panel “Manager” button ‐ this type of call will also operate in Local Offsite or Remote Offsite mode. In all modes of operation an electric lock release can be activated to allow visitors access. The “Trade” button can allow access during 3 programmable time periods each day and the “Code” button can be used with a programmable 4 digit access code to allow access at any time (or during 3 programmable periods) each day. The door entry mode can be set to allow calls to residents 24 hours a day or to automatically transfer all calls to the Manager during the evening and night. In addition, if a resident is away their calls can be temporarily transferred to a neighbour or the Manager. DIGITAL DOOR PANELS Up to 16 digital door panels (P/No. ZSD411) can be connected to the Advent xt controller. A local PSU is required at each door to provide power for the electric lock release. A “press to exit” pushbutton and a door status contact can also be connected locally into each door panel. The backbox should be orientated with the single ... - Page 31 21. DIGITAL DOOR PANEL INSTALLATION TERMINATION See Tynetec Drg No. ZXT100 sheet 3 for detailed wiring connections; Terminal Function Connection DOOR PANEL AMPLIFIER BOARD IP 1 Play Welcome Message 0V Trigger IP 2 No Function Not Connected RELAY Activates for duration of call Not Connected 1 pair CW1308 to Warden Call Loudspeaker Audio Advent xt Controller 1 wire CW1308 to ...
- Page 32 21. DIGITAL DOOR PANEL INSTALLATION PROGRAMMING The number of door panels, Access Codes, Trade Times and Call Transfer Times must be set in the “Door Entry Setup” programming ‐ see the Advent xt Programming Manual (Tynetec Doc No. FM0411). VOLUME ADJUSTMENT The 5 potentiometers VR2 ‐ VR6 in each door panel are used to independently adjust the audio level to/from the door entry and warden call system. To reduce feedback the door panel microphone gain is automatically muted when the person in the flat (or the warden) speaks ‐ the speed at which this mute is applied can be adjusted using the VOX sensitivity pot (VR4). Pot No. Function VR2 audio to door entry phone VR3 audio to door panel (from door entry phone) VR4 door panel VOX sensitivity adjustment VR5 audio to warden VR6 wardens audio to door & voice messages All adjustments should be made carefully to achieve optimum volume without feedback or echo. Call a door entry telephone via the digital keypad and adjust VR2/VR3/VR4. Press the “Manager” button to call the warden and adjust VR5/VR6. As adjustments are made, temporarily replace the panel in the backbox whilst performing the test call. LCD CONTRAST The potentiometer VR1 on the door panel board is used to adjust the LCD contrast. ...
-
Page 33: Door Entry Telephone Installation
22. DOOR ENTRY TELEPHONE INSTALLATION Door entry telephones (P/No. ZFT220/221) are connected to the intercom unit within each dwelling. When called the telephone will ring for a preset time or until the handset is lifted. Speech is private between the door panel and the dwelling called and cannot be overheard by other users from their handsets or visitors at other door panels. PUSHBUTTON LED INDICATOR The telephone has a single pushbutton to release the door lock or select privacy mode. ... - Page 34 0V supply reference white/orange 1 pair CW1308 15 10V DC supply & strobe +ve orange/white Note, the Advent xt controller must be reset for it to detect a telephone handset has been connected. DUAL HANDSETS Normally only one telephone will be connected per channel, if a flat requires a second handset then both telephones should be ZFT221 Dual Handset models. Alternatively, dual handset interface boards (P/No. A00438) must be fitted in both ZFT220 telephones. The second handset MUST have link LK3 moved to position “B” (slave) ‐ it is not possible to have more than 2 telephones per flat. For connection details see Tynetec Drg No. ZXT100 sheet 4. Note: the RESET button on the Advent xt controller must be pressed for it to detect a second handset has been connected. OPTIONAL HARD OF HEARING STROBE A hard of hearing strobe light (P/No. ZSL041) can be connected across the telephone “STROBE” (‐ve) and 10V (strobe +ve) terminals. Note; a maximum of 2 strobes per flat is permitted. TELEPHONE LINK SETTINGS Links LK1 & LK2 should always be set in the “SDATA” & “SCLK” positions on Advent xt systems. Link No. Link Position “A”...
-
Page 35: Combined Intercom Installation
23. COMBINED INTERCOM INSTALLATION Combined intercoms provide both warden call and door entry functions in a single unit. They are available with PA, Extracare and an integral 433MHz Receiver for use with an optional Remote Control. The Remote Control can be used to answer door entry calls and release the door lock. It can also be used to select privacy mode, acknowledge I’m OK and play a message waiting. Part No. Description ZXT280 Combined Intercom ZXT281 Combined Intercom + RX ZXT282 Combined Intercom + PA ZXT283 Combined Intercom + PA & RX ... - Page 36 Standard A A Remote Intercom Connected B A RELAY OUTPUT A relay output is ONLY available on a REMOTE INTERCOM connected as a slave to the combined intercom. The N/O clean contact output can be activated by the manager/control centre when a speech channel is open. The N/O contacts are on terminals 16 & 17 ‐ contact rating: 30VDC @500mA. TRIGGER 3 OUTPUT An open collector output can be activated for 5 seconds when the OPEN button is pressed on the Remote Control with no other call in progress. Terminal 16 of the combined intercom can be connected to a Tynetec A00073 universal relay to give a clean contact output. The clean contacts can be used to release a local door lock. If DIL switch 7 is “ON” the green Door Open LED will illuminate and a tone will sound on the combined intercom when the Trigger 3 output is active. PROGRAMMING The total number of intercom units and their ID’s must be set in the “General Setup & Tenants Unit Identity” programming. See the Advent xt Programming Manual (Doc No. FM0411). BEEPING COMBINED INTERCOMS If a combined intercom “beeps” every 10 seconds then its ID has been set greater than the number of intercoms set in the system programming. If an intercom beeps every few minutes it is not receiving data (or the data is corrupt). REMOTE INTERCOMS One remote intercom (P/No. ZXT221/226) can be connected per combined intercom, see the Advent xt wiring diagrams ...
- Page 37 Dim Red = normal operating mode Alarm Steady Bright Red = Alarm Call in progress Flashing Bright Red = Awaiting Extracare cancellation PRIVACY MODE Press the Privacy button once to select privacy mode, the LED will illuminate STEADY AMBER. The Manager cannot hear the resident and the resident will not receive any door entry calls when privacy mode is selected. Press the Privacy button again to turn privacy mode off. Privacy can operate as a simple on/off action or with a timed auto‐reset. The privacy auto‐reset time must be set in the “Door Entry Setup” programming ‐ see the Advent xt Programming Manual (Tynetec Doc No. FM0411). Note: the privacy setting applies to both door entry and warden call mode. LEARNING THE OPTIONAL REMOTE CONTROL The Advent xt system must be operational before attempting to learn the Remote Control. 1. Press and hold the Test Mode button for 5 seconds until the unit beeps once, release the button and an upward STEADY WHITE series of tones will play, the LED will illuminate . 2. Press the Lock Release button once, an upward series of tones will play and the LED illuminates STEADY GREEN. You now have 15 seconds to learn the Remote Control ‐ up to 2 Remotes can be learned per combined intercom. 3. Press the OPEN button on the Remote Control, an upward series of tones will play and the Speak/Listen button AMBER LED will flash once. If the Remote is already registered a downward series of tones will be heard. ...
-
Page 38: Door Open Alarm Installation
The Door Open Alarm (P/No. ZDA025) can be connected to an Advent xt system to initiate an alarm call when an Emergency Exit door is left open. The Door Open Alarm must be connected via an Advent xt intercom unit to provide an alarm location message and 2 way speech. CONNECTED TO ADVENT xt CUT LK1 & FIT LK2 INTERCOM IF SUPPLY VOLTAGE IS LESS THAN 12V DC. NORMALLY ADJUST POT TO SET DELAY CLOSED... -
Page 39: Bt Line Selector Installation
The BT Line Selector (P/No. ZXT330) can be connected to the Advent xt controller if a second dedicated BT line or a GSM cellular terminal is specified for fail safe operation. If the primary line fails the secondary line will automatically be selected, once the primary line is restored the system will automatically switch back. ZXT330 ADVENT XT LINE SELECTOR ZXT100 ADVENT XT CONTROLLER INSTALLATION ... -
Page 40: Network Data Repeater Installation
RS485 DATA OUT INSTALLATION The Network Data Repeater is housed in a wall mounted ABS enclosure; 85 x 170 x 35 mm (HxWxD). TERMINATION The 24V & 0V power connection can be taken from the Advent xt network. Cut the Advent xt network data wires (TX+/TX‐) at a point before the signal begins to fail. Connect TX+/TX‐ FROM the Advent xt controller into the RS485 IN terminals Connect the remaining Advent xt network data wires TX+/TX‐ into the RS485 OUT terminals. LINK SETTINGS LK1‐LK4 will normally be fitted in position “A”. Only move if advised by Tynetec Technical Support. Link No. Function Link Position “A” Link Position “B” RS485 IN + 1K2 pull‐up open circuit ... -
Page 41: Ethernet Interface Kit Installation
27. ETHERNET INTERFACE KIT INSTALLATION The optional Ethernet Interface Kit stores all alarm and Telecare data with the time and date of each event on a local Memory Card. The stored data can be downloaded and analysed using Tynetec’s I‐Care software. There are 3 generations of interface kits as the Rabbitcore Module/Memory Card has changed over the years. ZXT120 KIT (MK1) ZXT121 KIT (MK2) ZXT122 KIT (MK3) A00382 Expander A00382 Expander A00382 Expander RCM3365 Rabbitcore Module RCM3900 Rabbitcore Module RCM3900 Rabbitcore Module 128MB XD Memory Card 1GB Mini SD Memory Card 1GB Micro SD Memory Card RJ45 Crossover Lead RJ45 Crossover Lead RJ45 Crossover Lead Any of the above kits can be used with Advent xt Controller V1.05 firmware onwards. V1.05 only stores alarm calls and PIR activity, with V2.0 onwards all Telecare and Telehealth data is also stored. The ZXT121 or ZXT122 kit is recommended for V2.0 as it has almost 8 times the memory capacity of the ZXT120 for the increased volume of data stored on the card. LOCAL/REMOTE CONNECTION A 2 metre RJ45 Crossover Lead is provided for direct connection to a local PC ‐ this can be extended up 100 metres using CAT5e cable and RJ45 outlet sockets. A standard RJ45 Patch Lead (not supplied) and Broadband with a fixed IP address is required for remote connection. INSTALLATION ... -
Page 42: Led Indicators
SEE NOTE BELOW LED INDICATORS LED No. Label Function Will be lit when the factory default IP address is set. LED1 DEFLT ADDR SET Will be out when a site specific IP address is set. Should be lit to confirm the File Allocation Table LED2 FAT MOUNTED (FAT) has been mounted. If not lit contact Tynetec’s Customer Support. Will be lit when the Memory Card is down to its last LED3 CARD FULL 5% of storage capacity. Download the data and reformat the card. Will be lit when an Email is being sent to notify LED4 SENDING EMAIL system administrators that site parameters have been changed. LED5 ‐ No Function LED6 ‐ No Function ... -
Page 43: Digital Communicator Installation
The optional Digital Communicator (P/No. ZXT130) allows the Advent xt to communicate digitally via the internet to a digitally enabled Alarm Receiving Centre (ARC). The Advent xt can also retain the PSTN analogue connection which will then be used as a secondary connection. The Digital Communicator can only be used with; Advent xt motherboard issue A‐G and firmware V3.01A onwards or Advent xt motherboard issue H and firmware V4.01A onwards To check your firmware version see Section 36. ZXT100 ZXT130 ADVENT XT CONTROLLER DIGITAL COMMUNICATOR ... -
Page 44: Dect & Fixed Cli Telephones
Locating the wireless server/base station as high and free from immediate obstruction as possible will help to maximise its range. Even if the wireless server/base station is placed in the optimum position it may not always achieve coverage in the most remote corners, if this is the case then additional repeaters will be required. Repeaters are generally placed in a star configuration around the wireless server/base station; however, it is possible to extend the coverage in one direction with up to 3 repeater jumps. A site survey will always be required to establish the best DECT system and base/repeater configuration required. The wireless server, base stations and repeaters should always be located at least 5 metres away from the Advent xt controller or network receivers and any other electrical equipment to avoid the risk of interference. There are 3 DECT options; Kirk 400 Solo Base ‐ for small installations Kirk 400 Multi Cell ‐ for most medium/large installations Kirk 6500 ‐ for very large or complex installations TELEPHONE OPTIONS The Spectralink 7202 (Tynetec P/No. ZXT523) is the basic DECT handset DECT which comes complete with a desktop charger and plug‐top PSU. Spectralink 7202 The Spectralink 7212 (Tynetec P/No. ZXT524) is a higher DECT spec IP54 rated DECT handset with hands‐free speech Spectralink and vibration alert. It also comes complete with a 7212 desktop charger and plug‐top PSU. ... -
Page 45: Kirk 400 Solo Base Dect
Repeaters (max 6) External Tel Line 12V DC PSU Matrix Advent xt Line 2 Channel Multi Cell Repeaters IP PBX 240V AC Desk CLI Telephone See Tynetec Drg No. ZXT100 issue L sheet 7 for detailed connections PART NUMBERS Part No. Description Notes ZXT548 700VA UPS 1 per site ZXT556 Matrix Eternity IP PBX 1 per site ZXT502 PoE Injector ... - Page 46 ‐ connect to a sound Earth terminal using the Earth wire provided The Matrix is factory programmed so all incoming lines ring all extensions. If an incoming line is to ring specific extensions then the Matrix must be reconfigured. Note; in the event of a mains failure i.e. if the UPS batteries run flat or if a UPS is not fitted, the Matrix connects CO1 to SLT1 and the Advent xt will only ring the fixed CLI desk telephone. KIRK 400 WIRELESS SERVER (SOLO BASE) PROGRAMMING The Matrix must have its IP address set to 192.168.0.2 The Kirk 400 Wireless Server must have its IP address set to 192.168.0.3 and its Radio Part Number set to 3. ADVENT xt PROGRAMMING The PBX Ring must be enabled in the “General Setup” programming ‐ see the Advent xt Programming Manual (Tynetec Doc No. FM0411). 2 CHANNEL MULTI CELL REPEATERS A maximum of six 2 Channel Multi Cell Repeaters can be used with the Kirk 400 Wireless Server Solo Base. Repeaters require a power connection only; they communicate with the Solo Base via low power radio signals and do not require a line connection. To maintain DECT coverage during a mains failure all Repeaters must be connected to a battery backed 12V DC PSU. See Repeater Deployment Rules on the following page. REPEATER POSITIONING ...
-
Page 47: Kirk 400 Solo Base Dect – Repeater Deployment
31. KIRK 400 SOLO BASE DECT ‐ REPEATER DEPLOYMENT REPEATER DEPLOYMENT RULES A maximum of 6 Repeaters can be configured on a Kirk 400 Solo Base Wireless Server (KWS400) RPN 3 A maximum of 3 Repeaters can be configured in a chain If you have up to 3 Repeaters they should be numbered: 67, 131 and 195 i.e. RPN 3 +64, +128 and +192 If you have more than 3 Repeaters they should be assigned one of the following: 35, 67, 99, 131, 163, 195 & 227 2 Repeaters cannot have the same number See deployment examples below; RPN = the Radio Part Number KWS400 is shaded RED Repeaters are shaded GREEN Radio handover BLUE Solo Base Repeater RPN 3 RPN XX 1 REPEATER DEPLOYMENT 1 Repeater connected directly: ... - Page 48 31. KIRK 400 SOLO BASE DECT ‐ REPEATER DEPLOYMENT 3 REPEATER DEPLOYMENT EXAMPLES CONTINUED… 3 Repeaters connected directly: Repeater RPN 131 Repeater Solo Base RPN 67 RPN 3 Repeater RPN 195 Y‐shaped 3 Repeater deployment: Repeater RPN 131 ...
- Page 49 31. KIRK 400 SOLO BASE DECT ‐ REPEATER DEPLOYMENT 5 REPEATER DEPLOYMENT EXAMPLES 1 chain of 3 Repeaters and 1 chain of 2 Repeaters; the Repeater connected to 35 needs to be +64 so this Repeater is numbered 99. Repeater Repeater Solo Base Repeater Repeater Repeater RPN 99 RPN 35 RPN 3 RPN 67 RPN 131 RPN 195 2 chains of 2 Repeaters and 1 single Repeater: Repeater Repeater ...
- Page 50 31. KIRK 400 SOLO BASE DECT ‐ REPEATER DEPLOYMENT 6 REPEATER DEPLOYMENT EXAMPLES CONTINUED… 2 chains of 2 Repeaters and 2 single Repeaters connected directly: Repeater RPN 195 Repeater Repeater Solo Base Repeater Repeater RPN 99 RPN 35 RPN 3 RPN 67 RPN 131 ...
-
Page 51: Kirk 400 Multi Cell Dect
Matrix 12V DC PSU IP PBX 2 Channel Multi Cell Repeaters Desk CLI 240V Telephone AC See Tynetec Drg No. ZXT100 issue L sheet 8 for detailed connections PART NUMBERS Part No. Description Notes ZXT548 700VA UPS 1 per site ZXT556 Matrix Eternity IP PBX 1 per site ZXT549 16 Port Fastswitch (8 x PoE) 1 per site ... - Page 52 The Matrix is factory programmed so all incoming lines ring all extensions. If an incoming line is to ring specific extensions then the Matrix must be reconfigured. Note; in the event of a mains failure i.e. if the UPS batteries run flat or if a UPS is not fitted, the Matrix connects CO1 to SLT1 and the Advent xt will only ring the fixed CLI desk telephone. KIRK 400 WIRELESS SERVER (MULTI CELL) PROGRAMMING The Matrix must have its IP address set to 192.168.0.2 The Kirk 400 Wireless Server must have its IP address set to 192.168.0.3 and its Radio Part Number set to 3. Additional IP 12 Channel Base Stations must IP addresses set 192.168.0.4/5/6 and Radio Part Numbers 4/5/6. ADVENT xt PROGRAMMING The PBX Ring must be enabled in the “General Setup” programming ‐ see the Advent xt Programming Manual (Tynetec Doc No. FM0411). 2 CHANNEL MULTI CELL REPEATERS A maximum of three 2 Channel Multi Cell Repeaters can be connected to the Kirk 400 Multi Cell Wireless Server plus three per IP 12 Channel Base Station (total 12 per site). Repeaters require a power connection only; they communicate with the Server/Base Station via low power radio signals and do not require a line connection. To maintain DECT coverage during a mains failure all Repeaters must be connected to a battery backed 12V DC PSU. See Repeater Deployment Rules on the following page. REPEATER POSITIONING ...
-
Page 53: Kirk 400 Multi Cell Dect – Repeater Deployment
33. KIRK 400 MULTI CELL DECT ‐ REPEATER DEPLOYMENT REPEATER DEPLOYMENT RULES A maximum of 3 Repeaters can be configured on a Kirk 400 Multi Cell Wireless Server (KWS400) ‐ RPN 3 If you have up to 3 Repeaters on a Kirk 400 Multi Cell Wireless Server they should be numbered: 67, 131 and 195 i.e. RPN 3 + 64, +128 and +192 A maximum of 3 Repeaters can be configured on a IP 12 Channel Base Station ‐ RPN 4/5/6 If you have up to 3 Repeaters on an IP 12 Channel Base Station they should be numbered as: Base Station RPN 4/5/6 +64, +128 and +192 A maximum of 3 Repeaters can be configured in a chain 2 Repeaters cannot have the same number See deployment examples below; RPN = the Radio Part Number KWS400/IP Base is shaded ORANGE Repeaters are shaded GREEN Radio handover BLUE KWS400/IP Base Repeater RPN 3‐6 RPN XX 1 REPEATER DEPLOYMENT 1 Repeater connected directly: ... - Page 54 33. KIRK 400 MULTI CELL DECT ‐ REPEATER DEPLOYMENT 3 REPEATER DEPLOYMENT EXAMPLES 3 Repeaters connected in a chain: KWS400/IP Base Repeater Repeater Repeater RPN 3‐6 RPN +64 RPN 128 RPN +192 1 Repeater connected directly and 2 in a chain: KWS400/IP Base Repeater Repeater Repeater RPN 3‐6 RPN +64 ...
-
Page 55: Kirk 6500 Dect
34. KIRK 6500 DECT If full site coverage cannot be achieved using the Kirk 400 multi cell option then the Kirk 6500 must be used. The standard Kirk 6500 can expand up to 8 base stations, 24 repeaters and 64 DECT telephones, larger systems are possible by adding additional Fastswitch’s to increase the number of PoE Ports, contact Tynetec’s customer support for advice. KIRK 6500 CONFIGURATION DECT Telephones (64 standard) 16 Port Fastswitch (8 x PoE) 700VA UPS 240V AC IP 12 Channel Base Stations (8 standard) Kirk 6500 Wireless Server (1 only) External Tel Line Advent xt Line Repeaters (max 3 per Base Station = 24 standard) Matrix 12V DC PSU IP PBX 4 Channel Multi Cell Repeaters Desk CLI 240V Telephone AC ... - Page 56 ‐ connect to a sound Earth terminal using the Earth wire provided The Matrix is factory programmed so all incoming lines ring all extensions. If an incoming line is to ring specific extensions then the Matrix must be reconfigured. Note; in the event of a mains failure i.e. if the UPS batteries run flat or if a UPS is not fitted, the Matrix connects CO1 to SLT1 and the Advent xt will only ring the fixed CLI desk telephone. KIRK 6500 WIRELESS SERVER PROGRAMMING The Matrix must have its IP address set to 192.168.0.2 The Kirk 6500 Wireless Server must have its IP address set to 192.168.0.3 IP 12 Channel Base Station IP addresses must start at 192.168.0.4 with Radio Part Numbers 4 and carry on sequentially. ADVENT xt PROGRAMMING The PBX Ring must be enabled in the “General Setup” programming ‐ see the Advent xt Programming Manual (Tynetec Doc No. FM0411). 4 CHANNEL MULTI CELL REPEATERS A maximum of three 4 Channel Multi Cell Repeaters can be connected per IP Base Station. Repeaters require a power connection only; they communicate with the Base Station via low power radio signals and do not require a line connection. To maintain DECT coverage during a mains failure all Repeaters must be connected to a battery backed 12V DC PSU. See Repeater Deployment Rules on the following page. REPEATER POSITIONING Before installing power cables to Repeater positions it is important that the optimum position for coverage is established. ...
-
Page 57: Kirk 6500 Dect – Repeater Deployment
35. KIRK 6500 DECT ‐ REPEATER DEPLOYMENT REPEATER POWER CONNECTION Repeaters should be connected using 1.0 mm pair cabling, if CW1308 is being used then spare pairs can be doubled‐up and/or looped back to form a ring circuit to reduce the voltage drop. 12V DC PSU including 4 Channel Multi Cell Repeaters Standby Battery (3 per IP 12 Channel Base Station) 240V AC Repeater Power Lead Colour Code Max 100m Use 1.0mm Cable YELLOW = 12V BLACK = 0V Typically the maximum distance to a repeater via CW1308 should not exceed 100 metres. Note: connect a maximum of 6 Repeaters per 12V 2A PSU. REPEATER DEPLOYMENT RULES ... - Page 58 35. KIRK 6500 DECT ‐ REPEATER DEPLOYMENT 3 REPEATER DEPLOYMENT EXAMPLES 3 Repeaters connected in a chain: IP Base Station Repeater Repeater Repeater RPN 4 → RPN +64 RPN +128 RPN +192 1 Repeater connected directly and 2 in a chain: IP Base Station Repeater Repeater ...
-
Page 59: Controller Firmware Level Report
6. Press the LINE key to clear the connection The 3 firmware levels are announced in the following order; 04 01 A ARM Firmware Version 4.01A (Main Processor) 04 00 A PIC Firmware Version 4.00A (Co‐Processor) 04 01 A DSP Firmware Version 4.01A (Digital Speech Processor) Contact Tynetec’s customer support for advice on upgrades available. ... -
Page 60: Amendments Record
37. AMENDMENTS RECORD The table below lists significant changes to this manual; Issue Amendments Date Connection details for hard of hearing strobe option added to door entry A 03/04/06 telephone. 169MHz Network Receivers and Door Open Alarm connection details B 07/07/06 added. Controller requires V1.03a firmware for 169MHz Network Receivers. C BT/Siemens DECT equipment changed to Kirk Telecom. 31/10/06 C‐1 Programming information added for Kirk Telecom. 23/11/06 Door Panel connections amended for ESD mods and Kirk Distybase Duo C‐2 19/12/06 programming updated. Distybase configuration changed, Kirk 1500 option added, Door Panel D 09/03/07 changed to ZSD410, new issue telephone board. Distybase removed, Door Panel changed to ZSD411, ZXT121 MK2 Ethernet E 07/08/08 Interface added, V2.0 firmware mods, issue H intercom, issue E PA Amp. Normally closed Ceiling Pullcord added, ZSL045 Strobe Light added, Door F 14/09/09 Open Alarm changed to ZDA025, ZXT340 Network Data Repeater added. ...
Need help?
Do you have a question about the Advent xt and is the answer not in the manual?
Questions and answers