
Related Manuals for Superwinch Husky series


Summary of Contents for Superwinch Husky series
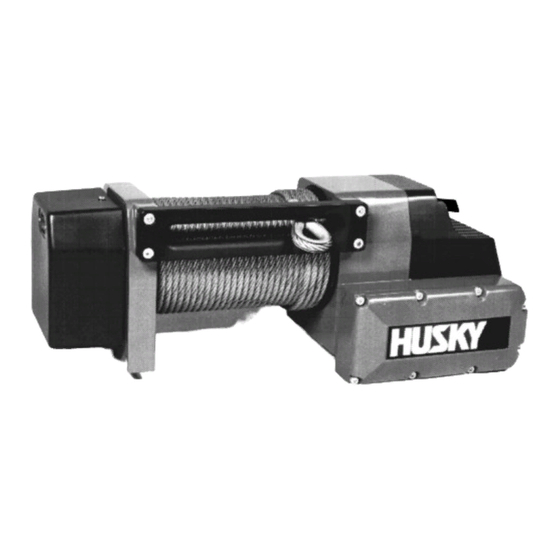
- Page 1 Owner’s Manual / Fitting Instructions Kit Nos. 8514 & 8515 ELECTRICALLY POWERED HUSKY WINCH...
- Page 2 INSTALLATION WINCH ELECTRICAL WIRE ROPE COMMISSIONING AND USE TIPS FOR EXTENDING THE LIFE OF YOUR WINCH FREESPOOL USE REMOTE CONTROL OPERATION MAINTENANCE RUNNING IN, MAINTENANCE AND REPAIRS LUBRICATION TROUBLESHOOTING MISCELLANEOUS ACCESSORIES For all your requirements please contact your Superwinch agent:...
- Page 3 Correct installation of your Husky winch is a requirement for proper operation. Please Note: The Superwinch Husky winch is designed for total reliability during vehicle recovery operations. This winch is not designed to be used in hoisting applications and Superwinch does not warrant it suitable for such use.
-
Page 4: General Specification Data
GENERAL SPECIFICATION DATA WINCH Type ..........Husky Gear Reduction ......Wormwheel Gear Ratio ........294:1 (12v) & 229:1 (24v) Drum ..........Fabricated steel running in copolymer maintenance free bearings with spring loaded brakes to prevent overrun when pulling out the rope. Braking .......... - Page 5 GENERAL SPECIFICATION DATA 8515 MOTOR CURRENT (Amps) MOTOR CURRENT (Amps) Thousands LINE PULL (kN) LINE PULL (lbf) Fig. 2 INTERMITTENT DUTY All electric winches of this size are rated for intermittent use because of the electric motor efficiency and the electric power available from the vehicle battery and alternator.
-
Page 6: Winch Installation
WINCH INSTALLATION WINCH INSTALLATION The kit must be used in conjunction with the included wiring kit. Before commencing installation identify the contents of the following: Contents, Cardboard Container Item PART No. Description Husky Winch Assembly 9134 / 207 Power Cable 0.7m Red 9134 / 307 Power Cable 0.7m Blue 9134 / 407... - Page 7 WINCH INSTALLATION Fig. 4 WINCH INSTALLATION 1. All dimensions are in mm. 2. Winch mounting can be via a winch mount plate (See SuperwinchAccessories). 3. The winch (together with it’s mounting plate if fitted) must be securely bolted onto a mounting surface that is flat within 0.5mm and sufficiently stiff to prevent flexing.
-
Page 8: Electrical Installation
ELECTRICAL INSTALLATION ELECTRICAL INSTALLATION Precautions: Leave all cable connections to the battery terminals unconnected until all wiring has been installed and checked thoroughly for correct connections, as damage to the vehicle wiring circuit could be caused by wrong connection once the battery is connected. All wiring should be bound and securely fastened to adjacent structure using the cable ties supplied where necessary. - Page 9 ELECTRICAL INSTALLATION Fig. 6 To determine the size wire required to operate your winch you must first calculate the resisitance from the following formula: Ω = 2000 = ohms / 1,000 ft D x I where: Ω = Total resistance in ohms / 1,000 ft Total distance the electric current must travel, i.e.
-
Page 10: Wire Rope Installation
Use the handsaver bar to guide the rope the last few feet onto the drum. Note; Where a wire rope is not supplied, or when replacing a wire rope, always use a Superwinch recommended wire rope. -
Page 11: Tips For Extending The Life Of Your Winch
TIPS FOR EXTENDING THE LIFE OF YOUR WINCH 1. Keep a tightly wound wire rope drum. Do not allow the wire rope to become loosely wound. A loosely-wound spool allows a wire rope under load to work its way down into the layers of wire rope on the drum. When this happens, the wire rope may become wedged within the body of the windings damaging the wire rope. -
Page 12: Winch Operation
WINCH OPERATION FREESPOOL OPERATION When wire rope is removed from the drum, as in bringing the hook to the load, the freespool featues of the winch should be used. To Engage: Turn the freespool handle to the ‘engage’ position. Pull the rope out (wearing a pair of gloves) until the freespool pin engages (the handle drops). -
Page 13: Maintenance And Repairs
Periodically check tightness of mounting bolts and electrical connections. Remove any dirt or corrosion that may have accumulated on the elec - trical connections. Repair should be carried out by Authorized Superwinch Repair Centres only. Do not attempt disassembly of the gearbox. Disassembly will void warranty. -
Page 14: Troubleshooting
Switch inoperative Replace switch Broken wire or bad connection Check for poor connections Damaged motor Return to Authorised Superwinch Repair Centre. Solenoids not grounded Check the ground path between battery negative and solenoid base. Winch will not shut off Solenoid stuck “on”... - Page 15 ACCESSORIES ACCESSORIES Accessories mentioned in this manual and recommended for use with your winch include: Isolator Switch Pulley Block with 20,000 lbs capacity Part No. 7750 Part No. 8370 Roller Fairlead Cable Tensioner Part No. 7730 Part No. 5605 Roller Fairlead (Heavy Duty) Battery Cables (pair) 2m length Part No.
- Page 17 This Manual’s Part No. is: 5-001-085 Issue No. Superwinch Ltd., Abbey Rise, Whitchurch Road, Tavistock, Devon. Great Britain. PL19 9DR Tel: +44 (0)1822 614101 Fax: +44 (0)1822 615204 Superwinch Inc., Winch Drive, Putnam, Connecticut 06260 U.S.A. Tel: (860) 928 7787...
Need help?
Do you have a question about the Husky series and is the answer not in the manual?
Questions and answers