Table of Contents

Related Manuals for soloprotect ID

Summary of Contents for soloprotect ID
- Page 1 DISTRIBUTION: INTERNAL + SOLOPROTECT CUSTOMERS User Guide SoloProtect ID US 16 August 2018 Document Version 2.0 Last Updated: 7 September 2018 SoloProtect Ltd Suzy Lamplugh House Vantage Drive Sheffield, S9 1RG United Kingdom Phone: +44 114 399 6000...
-
Page 2: Contributors
DISTRIBUTION: INTERNAL + SOLOPROTECT CUSTOMERS SoloProtect ID US: User Guide US SoloProtect ID User Guide v2.0 d1909189 Document Revision History Version Date Author Description New Document created – Draft in progress 16/August/2018 7/September/2018 Changes proposed by UL for certification Contributors... -
Page 3: Table Of Contents
TABLE OF CONTENTS ..................... III TABLE OF FIGURES ......................IV LIST OF TABLES ......................IV INTRODUCTION – ABOUT SOLOPROTECT ID .............. 5 ....................... 5 BOUT UIDE SOLOPROTECT ID LAYOUT AND KEY FUNCTIONS ............6 ID L ....................6 ROTECT AYOUT ......................6 UNCTIONS 2.2.1... - Page 4 Figure 6: Turning your SoloProtect ID On and Off ............. 12 Figure 7: SoloProtect ID Device Check ..............13 Figure 8: SoloProtect ID Amber Alert (Status Check in the USA and Canada) ....15 Figure 9: SoloProtect ID Red Alert Button Press ............17 Figure 10: SoloProtect ID Red Alert from Rip pin ............
-
Page 5: Introduction - About Soloprotect Id
24/7 link to a dedicated state of the art Alarm Receiving Centre in the event a worker requires assistance. At the push of a button, a trained SoloProtect ARC Operator is listening to an abusive or violent situation on your behalf, and recording audio for future use if necessary (admissible evidence in court proceedings etc). -
Page 6: Soloprotect Id Layout And Key Functions
Key Functions 2.2.1 Device Check This function allows you to check the Battery, Signal and GNSS on your SoloProtect ID and can be done at any time throughout your working day. 2.2.2 Amber Alert (Status Check in the USA and Canada)* This function allows you to leave a brief Voice message before you begin each visit or each time you move location by detailing where you are and for how long. -
Page 7: Red Alert
This function allows you to discreetly raise an Alarm to our dedicated Alarm Receiving Centre whenever you feel vulnerable or threatened. 2.2.4 Incapacitation (ManDown) This function can automatically initiate a Red Alert if your SoloProtect ID detects you have become incapacitated. 2.2.5 GNSS (Global Navigation Satellite System) This function can assist our Alarm Receiving Centre in the event of a Red Alert and is used in conjunction with your Amber Alert* Voice message to assist in determining your Location. -
Page 8: Initial Set Up And Care And Maintenance
ID card, or loops into the corner below for a portrait ID card. The attachment in the circled corner is by way of a plastic pin which fits tightly in its socket but will pull out if tugged firmly. -
Page 9: Initial Charge Of Your Soloprotect Id
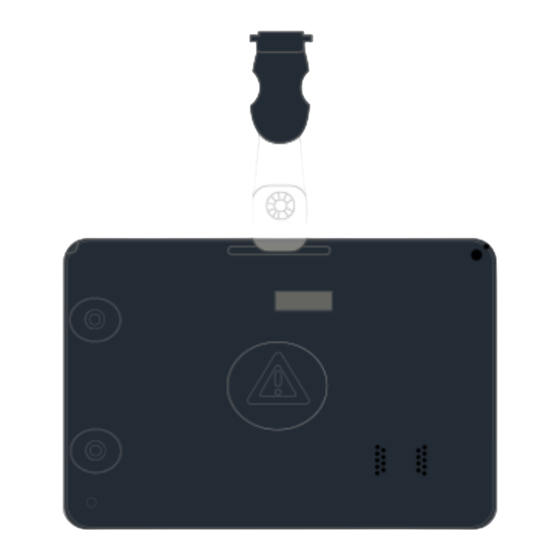
Inserting your ID Card Fit your ID card into the slot at the right side of your SoloProtect ID (as you look at the front) and slide it in until it is fully inserted. To remove your card, slide the ID card towards the exit slot. You may initially feel a slight resistance until the card starts to slide out. -
Page 10: Care And Maintenance
However, you should note the following points about cleaning and general care. 3.2.1 Cleaning Use a damp cloth (not wet) to remove any dirt from your SoloProtect ID. Be very careful not to allow water into the unit. Do not use any alcohol or chemical cleaning agents of any type. -
Page 11: How To Use Your Soloprotect Id
Switching your SoloProtect ID on and off To check your SoloProtect ID is on, look for the power symbol in the left of the display. You can also press the Device Check button for 2 seconds. If the LCD and LEDs do not start flashing, the device is off. -
Page 12: Device Check
SoloProtect ID US: User Guide US SoloProtect ID User Guide v2.0 d1909189 Figure 6: Turning your SoloProtect ID On and Off When your SoloProtect ID is on, it registers with the GSM network and is ready to communicate to our Alarm Receiving Centre. 4.1.3... -
Page 13: Figure 7: Soloprotect Id Device Check
DISTRIBUTION: INTERNAL + SOLOPROTECT CUSTOMERS SoloProtect ID US: User Guide US SoloProtect ID User Guide v2.0 d1909189 Figure 7: SoloProtect ID Device Check Battery Symbol Colour State Good 3 cells Green >75% Normal 2 cells Amber >35% 1 cell Amber <35%... -
Page 14: Table 2: Signal Indication Table
Customer Support Team. If your SoloProtect ID is in an Amber Alert* state or a Red Alert state when the Device check button is pressed, the LEDs change to amber or red for two seconds to give an indication of the state: •... -
Page 15: Amber Alert (Status Check In The Usa And Canada)
Red Alert. The more relevant information you leave in this message the more it will help the ARC Operator in the event of a subsequent Red Alert. Press the Amber Alert button for at least 1.5 seconds to start an Amber Alert. Your SoloProtect ID gives three short vibrations to confirm your action. -
Page 16: Amber Alert Timer (Status Check In The Usa And Canada)
At the end of the Amber Alert Timer period, the device gives five long bursts of vibration to remind you to take action. *Check with your Employer or your SoloProtect Account Manger as to whether you have this function enabled 4.1.6... -
Page 17: Figure 9: Soloprotect Id Red Alert Button Press
US SoloProtect ID User Guide v2.0 d1909189 There are 4 ways to activate your Red Alert: 1. Red Alert Button Press - Press and hold the Red Alert Button on your SoloProtect ID Figure 9: SoloProtect ID Red Alert Button Press 2. -
Page 18: Incapacitation Alert (Mandown)
US SoloProtect ID User Guide v2.0 d1909189 When any Red Alert is started, your SoloProtect ID gives three short bursts of vibration to confirm the state. Your SoloProtect ID opens a voice call to our Alarm Receiving Centre and enables the microphone, so that our ARC Operators can listen to and/or record the situation. -
Page 19: Closing Down Your Red Alert Or Incapacitation Alert (Mandown)
Figure 11: SoloProtect ID Loud Speaker during Incapacitation Alarm Incapacitation detection is always disabled when the unit is on its charger or switched off. *Check with your Employer or your SoloProtect Account Manger as to whether you have this function enabled 4.1.8 Closing down your Red Alert or Incapacitation Alert (ManDown) Once you feel that your situation no longer needs monitoring you can close your Alert down. -
Page 20: Gnss (Global Navigation Satellite System)
Figure 12: Closing a Red Alert Alarm 4.1.9 GNSS (Global Navigation Satellite System) Your SoloProtect ID can be configured so that a GNSS Location request is made in the following situations: • When you press any of your SoloProtect ID buttons •... -
Page 21: Multifunction Buttons - Uk
Multifunction Buttons – UK* The 3 multi-function buttons on the front of the device are usually covered by your ID Card. These buttons are not designed for discreet use or to be deployed as part of a situation where you require assistance due to your safety being compromised. -
Page 22: Ready2Talk (Us And Canada Only) - Multi-Function Buttons
Ready2Talk (US and Canada only) – Multi-Function Buttons* The 3 multi-function buttons on the front of the device are usually covered by your ID Card. These buttons are not designed for discreet use or to be deployed as part of a situation where you require assistance due to your safety being compromised. -
Page 23: Soloprotect Id Key Indicators
US SoloProtect ID User Guide v2.0 d1909189 Figure 15: Ready2Talk (US and Canada only) – Multi-Function Buttons *Check with your Employer or your SoloProtect Account Manger as to whether you have this function enabled. Only available in the US and Canada SoloProtect ID Key Indicators 4.3.1... -
Page 24: Figure 16: Lcd Symbols
DISTRIBUTION: INTERNAL + SOLOPROTECT CUSTOMERS SoloProtect ID US: User Guide US SoloProtect ID User Guide v2.0 d1909189 Device state Symbol Meaning 2 signal bars Amber Signal quality medium 1 signal bar Signal quality low 0 signal bars Signal quality – none or critical... -
Page 25: Vibration Patterns
US SoloProtect ID User Guide v2.0 d1909189 4.3.2 Vibration Patterns The following table summarises the vibration indications given by your SoloProtect ID. The Vibration patterns aid the use of SoloProtect ID for the visually impaired. SoloProtect ID Action Vibration pattern... -
Page 26: Soloprotect Id Technical Specification
DISTRIBUTION: INTERNAL + SOLOPROTECT CUSTOMERS SoloProtect ID US: User Guide US SoloProtect ID User Guide v2.0 d1909189 SoloProtect ID Technical Specification Technical Specification Table Data Item Dimensions 95 x 65 x 12 mm Overall weight 70g (not including lanyard) Operating temperature range -10C to +40C... -
Page 27: Compliance With Fcc And Ic Rules And Regulations
Compliance with FCC and IC Rules and Regulations FCC Compliance Statement and RF Exposure Statement The SOLO-ID-US device complies with Part 15 of the FCC Rules. Operation is subject to the following two conditions: (1) This device may not cause harmful interference, and (2) This device must accept any interference received, including interference that may cause undesired operation. -
Page 28: Risks Associated With Pregnancy
Referring to the previous statement above on Specific Absorption Rate (SAR). Due to the relatively low maximum SAR value, SoloProtect ID should not pose any risk to individuals whilst pregnant. Any user of SoloProtect ID who registers any concern about using SoloProtect ID whilst pregnant should seek advice from their GP.’... -
Page 29: Soloprotect Id Warranty
US SoloProtect ID User Guide v2.0 d1909189 SoloProtect ID Warranty Please refer to the Terms and Conditions in Section 13 - Warranties of your SoloProtect Client Service Agreement for more details or Contact your SoloProtect Account Manager. © SoloProtect Ltd, 2018... -
Page 30: Glossary Of Terms
Caller Line Identification often known as Caller ID This Server processes and transmits configuration data to a Config Server SoloProtect ID device so that it can be reprogrammed remotely. COTS Commercial Off The Shelf Enhanced Data rates for GSM Evolution – allows improved data EDGE transmission rates over the GSM network. -
Page 31: Table 6: Glossary Of Terms
Subscriber Identity Module – a secure store for the subscriber information (e.g. the IMSI) for mobile equipment (e.g. GSM modem or phone). Short Message Service – a text-based message facility for GSM phones. SoloProtect – A lone worker device manufacturer and monitoring SoloProtect services provider. SP,SPUK see SoloProtect Transmission Control Protocol/Internet Protocol –...
Need help?
Do you have a question about the ID and is the answer not in the manual?
Questions and answers
My solo protect device has a power button and 3 further buttons 1, 2, 3, down the left hand side and 3 display lights in the center top. I **** never sure how to switch my device off.
To turn off the SoloProtect ID device, press the Device Check and Amber buttons together for 2.5 seconds until the device vibrates twice.
This answer is automatically generated