Table of Contents
Advertisement
Quick Links
Advertisement
Table of Contents
Troubleshooting

Summary of Contents for Tissue-Tek VIP 6 AI
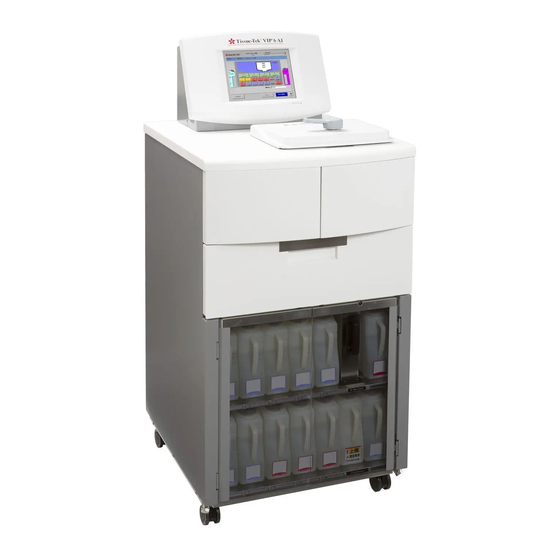
- Page 1 Tissue-Tek VIP 6 AI ® Vacuum Infiltration Processor...
- Page 4 The brand names of products that have been registered or trademarked by and are owned by Sakura Finetek USA, Inc., Sakura Finetek Japan Co., Ltd., and Sakura Finetek Europe B.V. appear here: Tissue-Tek VIP Sakura Tissue-Tek Tissue-Tek AutoTEC Uni-Cassette Tissue-Tek Paraform...
-
Page 5: Table Of Contents
TABLE OF CONTENTS Section Page INTRODUCTION 1.1 Intended Use ............................5 1.2 General Description ..........................5 1.3 Safety Instructions ..........................6 1.4 Safety Precautions ..........................6 1.5 Precautions ............................6 1.6 Physical Characteristics ........................7 1.7 User Interface ............................9 1.8 Specifications ............................ -
Page 6: Table Of Contents
7.3 Retort Fill Error ........................... 81 SERVICE AND REPLACEMENT PARTS 8.1 Service Information ..........................91 8.2 Replacement Accessory Items ......................91 8.3 Replacement Parts ..........................91 8.4 Tissue-Tek VIP AI Preservice Checklist ....................92 EXAMPLE PROCESSING 9.1 Sample Programs ..........................93 - 4 -... -
Page 7: Intended Use
300 tissue cassettes. manually or through the external drain and fill port. The Tissue-Tek VIP 6 AI has a 10.4-inch color LCD touch screen display for programming ease and process monitoring. It is programmable for up to fifty different tissue... -
Page 8: Safety Instructions
1.5.1 Safety Features The safety devices installed in this instrument by the The Tissue-Tek VIP 6 AI Vacuum Infiltration Processor is manufacturer only establish the basis for accident equipped with several safety features, which help to keep prevention. -
Page 9: Physical Characteristics
1. INTRODUCTION • displays end time, processing steps, and processing The Tissue-Tek VIP 6 AI is designed as a closed-system tissue processor to minimize the release of reagent methods, etc.). fumes into the environment. It also contains a fume control system. - Page 10 1.6.3 Retort paraffin. Station 14 can replenish stations 11 through 13, if needed. The retort (Figure 1-D) is the chamber where tissue processing occurs. One or two baskets, which hold the specimens, are placed into the retort. During processing the retort lid is held securely closed by a latch located on top of the retort.
-
Page 11: User Interface
1. INTRODUCTION 1.6.6 Leveling Feet/Casters USB Port There are four casters (Figure 1-G) for instrument mobility; positive locks on the front casters hold the instrument securely in place for stationary use. Power Switch Figure 1-G Figure 1-H 1.7 User Interface 1.7.1 Power Switch The power switch (Figure 1-H) is located on the right side of the control panel below the USB port. -
Page 12: External Interface
1.7.3 External Interface The external interface (Figure 1-I) is located on the back of the control panel and includes the following: • UPS - two signals (power outage signal, low battery signal) • External Signal Output • External Alarm Output •... -
Page 13: Specifications
Models Covered by this Manual Capacity: up to 300 Uni-Cassettes ® Product Code Name/Description P/V Cycle 6040 Tissue-Tek VIP 6 AI Vacuum Infiltration Processor ® 6041 Tissue-Tek VIP 6 AI Vacuum Infiltration Processor ® Pressure, ambient, and vacuum cycles are alternated in the... -
Page 14: Safety Standards
Up to 3 programs can be stored in memory. JIS C1806-2-6:2012 Risk Management: Reagent Compatibility EN ISO 14971:2012 • Complete: 10%-20% Formalin, Tissue-Tek VIP Fixative, ® For Model 6042 - up to 20% NBF, alcoholic formalin, Tissue Fix™, Complies with: Omnifix ®... -
Page 15: Installation 2.1 General Information
Follow all instructions carefully. Warranty Card (located inside the operating manual (USA only) The Tissue-Tek VIP 6 AI is a precision instrument and must USB Memory P/N A3-60-4499 be handled accordingly. Rough handling or dropping the Power Cord P/N A4-01-0542 instrument will disturb or damage internal components. -
Page 16: Positioning The Instrument
5. Push firmly to close the drawer. 2.4 Positioning the Instrument NOTE: It is recommended that the carbon filters be replaced monthly. Locate the instrument in a well-ventilated area, avoiding exposure to corrosive vapors and extreme variations in Installing the Reagent Bottles temperature or humidity. - Page 17 2. INSTALLATION 4. Place the bottle in the appropriate position and push it To fill the bottles using the external Drain/Fill port into the rear of the instrument until it snaps in place 1. Connect the drain/fill hose to the black external (Figure 2-D).
- Page 18 6. Touch the Process Menu tab. 7. Touch Exchange Solution button. 8. Touch the Single Solution tab. 9. Touch the solution to be filled. 10. Touch the External Fill button. 11. Touch the View as a List button to view the solution list and then touch Exit to continue.
- Page 19 2. INSTALLATION 5. Hold both ends and insert the liner into the waste 7. Fold both the front and back edges of the stiffened paraffin reservoir (Figure 2-J). portion of the liner (Figure 2-L). Figure 2-J Figure 2-L 6. Fold the edge of the liner along the edge of the waste 8.
-
Page 20: Precautions
Installing the Paraffin 2.5 Precautions Reservoirs There are several precautions that must be observed before The default temperature for the paraffin oven is 63ºC operating the instrument: (145.4ºF). If this temperature is not suitable for the paraffin 1. Check the fill level of each reagent bottle to ensure the being used, set the appropriate temperature, as described in specified volumes. -
Page 21: Customization Of Settings 3.1 General Information
For security reasons, the selected password will display on the screen, as entered, as a series of asterisks. The Tissue-Tek VIP 6 AI Menu consists of three tabbed pages • that provide access to the following submenus Utility Menu, If login is unsuccessful: Re-enter the selected Edit Menu, and Process Menu. -
Page 22: Configuring System Utilities
Utilities out, and move rotary valve. Error Log – allows the user to view the error The Utility Menu is used to configure and setup the Tissue-Tek log. VIP 6 AI system options. Part Status – allows user to monitor the... - Page 23 3. CUSTOMIZATION OF SETTINGS 2. Make changes following system settings/parameters, as desired: Date Format – sets the format for the date display shown at the top of the instrument display screens. Touch the modify button until the desired format displays. Available choices are Year/Month/Day, Month/Day/Year and Day/Month/Year.
- Page 24 • Touch the Clear button to clear the year being To change User ID displayed and then use the keypad to touch the 1. From the Administrator/User list on the left of the appropriate numbers to represent the current year. screen, select the user or administrator that a user ID If a mistake is made, use the Clear button to clear will be created for then touch the User’s ID button.
- Page 25 3. CUSTOMIZATION OF SETTINGS To add or change user passwords: 1. From the Administrator/User list on the left of the Password Setup screen, select the user or administrator for whom a password will be added or changed and then touch the Password Setup button. •...
- Page 26 Edit Tab (Figure 3-M) – sets permissions for Edit Solution To use fume filter management: Configurations, Solution Names, Edit Programs, and Delete • Toggle the button at the top-left of the screen until Data. The default setting for each function is “Allowed”. it reads In Use.
- Page 27 3. CUSTOMIZATION OF SETTINGS 2. Touch Yes to confirm that actual time is to be reset to 0 or No to abort the action. Creating or Changing Institution Name The name of the institution that appears on the top of each of the instrument display screens can be modified as follows: 1.
- Page 28 Input Temperature CAUTION: Oven temperature and paraffin temperature should not vary +/- 5° C. This The Input Temperature option from the Utility Menu allows allows paraffin to cool or heat as needed for a user to make temperature changes to the “user-selectable” processing.
- Page 29 3. CUSTOMIZATION OF SETTINGS Cleaning Xylene Bottle Temperature – 1. Touch the Modify button next to the Cleaning Xylene Bottle Temperature • The Xylene Input Temperature Window Screen displays (Figure 3-V). Figure 3-W The Processing Mode Selection screen allows users to adjust the start confirmation, start notice, bottle check, experiment number, cleaning cycle defaults, cassette count Figure 3-V...
- Page 30 Cassette Count Confirmation – Verifies how many cassettes are being processed in run. This option is only available when the solution control method is set to “cassettes”. • Touch Modify to toggle between In Use or Not In Use. Basket Removal Drain Option – Drains reagents upon completion of a processing program to solution safeguard levels.
- Page 31 3. CUSTOMIZATION OF SETTINGS 2. An export confirmation dialog box displays, touch the 3.3.2 Exporting System Setup Data Exit button to return to the Export Data screen. Once system setup procedures have been completed, data To export or view cleaning reports can be exported to a USB flash drive.
- Page 32 To export solution names To remove the USB flash memory 1. From the Export Data screen, touch the Solution Once the data has been placed on the USB drive: Names button. 1. Touch the USB disconnect button before removing the USB drive.
- Page 33 3. CUSTOMIZATION OF SETTINGS 6. Touch Signal Description or Output Signal is lost during tissue processing, the relay will stay in the T3 position until power is restored and tissue processing is Description to view the descriptions of the external complete.
- Page 34 3.3.4 Manual Operations oven temperature, rotary valve position and temperature, and gate valve status and temperature. The Manual Operations feature allows the user to manually When the operation is complete, another operation can be perform functions normally done automatically. It is not used selected by touching the appropriate key or repeat the during normal operation of the instrument;...
-
Page 35: Customizing System Operating Parameters
3. CUSTOMIZATION OF SETTINGS 3.3.6 Error Log This function allows the user to view the error log. 1. From the Utility Menu, touch the Error Log button. • The Error Log screen displays (Figure 3-HH). Figure 3-II The following options are available from the Edit Menu. Edit Solution Names –... - Page 36 • • The Edit Solution Name screen appears (Figure The Create Abbreviated Solution Name screen 3-JJ). displays (Figure 3-LL). Figure 3-JJ Figure 3-LL 2. Touch Add Solution Names. 5. Use the touch keyboard to enter an abbreviated name for the new solution up to eight characters long. This •...
- Page 37 3. CUSTOMIZATION OF SETTINGS To edit solution name: 3. Use the touch keyboard to modify the solution name using up to twenty-two characters. 1. From the main menu, touch the Edit Menu tab, and then 4. Touch Edit Solution to save the solution name and touch Edit Solution Name.
- Page 38 3.4.2 Creating or Changing Solution Configurations The Edit Solution Configuration option from the Edit Menu tab provides the means to add or edit solution configurations. The system can store up to 5 solution configurations. To add or edit a solution configuration: 1.
- Page 39 3. CUSTOMIZATION OF SETTINGS • 2. Touch a station button to assign solution names. The Number of Stations screen displays (Figure 3-RR). • The Edit Solution Configuration>Solution Station Screen displays (Figure 3-TT). Figure 3-RR Figure 3-TT 7. Touch the button for the appropriate number of stations in selected solution group.
- Page 40 Touch Cancel to return without saving new settings. NOTE: The Usage Limit Field is only editable Programs are used to instruct the Tissue-Tek VIP. Programs when a management method is chosen. can be added, copied, and exported. Up to 50 programs can be stored on the system.
- Page 41 3. CUSTOMIZATION OF SETTINGS Adding New Programs • Touch Edit Program to save the program name and return to the Edit Menu or 1. From the Edit Menu, touch the Edit Program button. • Touch Cancel to return without saving the new •...
- Page 42 2. From the Program List, select to highlight the program 2. Touch the Modify button. to be modified. • The Input Time dialog box displays (Figure 3-BBB). • The Edit Program “Program Name” screen displays (Figure 3-ZZ). Figure 3-BBB 3. Use the touch keypad to select hours and minutes and Figure 3-ZZ adjust accordingly.
- Page 43 3. CUSTOMIZATION OF SETTINGS solution volume to decrease, and the tissues may dry up/shrink as a result. 2. Touch the Modify button to modify the temperature The following options are selectable in the P/V cycle field. (Figure 3-DDD) or the No Heat button for no temperature OFF –...
- Page 44 Cont 3 – partial drain and fill from the bottom of the retort Setting Mix Mode to a level sensor providing continuous mixing for defatting at Mixing Mode allows users to customize the number of 12-minute intervals. agitations, amount of vacuum, and amount of pressure NOTE: To set Cont1, Cont2 or Cont3, set Solution applied during processing.
- Page 45 3. CUSTOMIZATION OF SETTINGS • • The Detailed Setting Window is displayed (Figure Touch the Today button if the program end time is 3-HHH): scheduled to end today. • Touch the Tomorrow button if the program end time is scheduled to end tomorrow. •...
- Page 46 • • Touch Cancel to exit without saving. The Input Hour Window is displayed (Figure 3-KKK): 7. Touch the AM/PM button to select either “am” or “pm”. When the 24-hour format is used, this button is not displayed. • Touch Save to save the predicted end time settings.
- Page 47 3. CUSTOMIZATION OF SETTINGS not linked, the solution manager feature is not operated during the retort cleaning. Substitute Processing – When the system detects an empty bottle or is unable to pump-in during the pump-in phase during processing, the solution from the previous station of the same group is substituted.
- Page 48 3. Touch Yes to confirm deletion or No to cancel the delete procedure. To delete tissue processing reports: 1. From the Delete Data screen, touch Tissue Processing Reports. 2. From the list, select the report to be deleted, or touch the All Data button.
-
Page 49: Process Menu
3. CUSTOMIZATION OF SETTINGS 3.5 Process Menu • The Cleaning screen displays (Figure 3-QQQ). The following options are available from the Process Menu. Cleaning – allows the user to access all cleaning operations. Exchange Solution – allows the user to access the solution exchange operations. - Page 50 • 8. Touch Clear to clear the current setting and then use Touch Cancel to return without saving new settings. the touch keypad to enter the new setting (45-60ºC) (Figure 3-UUU). 5. Touch the Cycle Interval field under Xylene and touch Modify.
- Page 51 3. CUSTOMIZATION OF SETTINGS NOTE: Warm water must be placed in the Automatic Transfer feature allows reagents to be rotated reagent container prior to starting a warm water automatically during a processing run or on request. flush. If a specific count was entered during Solution Configuration, the software will automatically notify the 1.
- Page 52 Setting up Exchange Solutions: Reagents This option allows the user to access the solution exchange operations. 1. From the Process Menu, touch the Exchange Solution button. • The Exchange Solution screen displays (Figure 3-VVV). Figure 3-WWW 6. Touch Exit to return the process menu. 7.
- Page 53 3. CUSTOMIZATION OF SETTINGS System status area - the current status of the system is displayed in this area. Solution Exchange Status area: - the current status of the station in progress is displayed: ● Station color - indicates the station color selected for that station.
- Page 54 • The Exchange Hold (Solution Group Exchange) screen 3. Select the desired type of exchange: External Drain, is displayed (Figure 3-AAAA). External Fill, Fill from Bulk Reservoir, and Drain & Fill from Bulk Reservoir. NOTE: Fill from Bulk Reservoir and Drain & Fill from Bulk Reservoir are not available for the solution groups where the bulk reservoir supply has not been selected.
- Page 55 3. CUSTOMIZATION OF SETTINGS To perform a Paraffin Drain: solution groups (external drain, external fill, fill from bulk reservoir). 1. Touch Station button to select the paraffin station to drain. WARNING: EMPTY PARAFFIN WASTE RESERVOIR AND REPLACE THE PARAFFIN WASTE INSERT (SEE SECTION 2 FOR INSTRUCTIONS).
- Page 56 Figure 3-EEEE 1. Touch Menu to display the Process Menu Screen. 1. Touch Detailed Monitor to view the Defatting Solution Preparation Detailed Monitor Screen (Figure 3-FFFF). Figure 3-DDDD 5. Touch Exit to return to the process menu. Defatting Solution Preparation Overview and Detailed Figure 3-FFFF Monitor The progress for the preparation of the mixed reagent station...
- Page 57 3. CUSTOMIZATION OF SETTINGS ● Volume (L) - indicates the solution volume of the • A confirmation dialog box appears. Touch Yes to level of any of level sensors that the solution reset the solution usage information. reached in the retort before draining to that station. 4.
- Page 58 To view the Exchange Solution Calendar Solution configuration selection is used to select the solution configuration to be used on the Tissue-Tek VIP. Up to 5 Touch the Solution Management button on the Process configurations can be saved on the system.
- Page 59 3.5.6 Paraffin Melt Process There are three paraffin states: Solid, Melting, and Molten. The VIP 6 AI is designed to assess which paraffin state it is in and evaluate how much heating is required to get to the Molten state. The oven is heated to 70°C during the melting process.
- Page 60 • Touch Cancel to return to the Process Menu. NOTE: When the VIP 6 AI is in a melting state a paraffin icon displays on the paraffin station that is in a melting state (Figure 3-MMMM). Figure 3-MMMM...
-
Page 61: Accessing The Start Tissue Processing Screen
Once the instrument software has been customized for NOTE: For security reasons, selected password requirements of the laboratory, the Tissue-Tek VIP 6 AI will display on the screen, as entered, as a series Vacuum Infiltration Processor is ready for use in routine of asterisks. -
Page 62: Understanding The Start Tissue Processing Screen
• Touch Modify to choose either Immediate or Delayed Start. Retort Capacity - allows the user to temporarily change the preset system workload for a processing run. • Touch Modify to choose either 150 Cassettes or 300 Cassettes. If the number of cassettes is changed from 150 to 300, a confirmation window appears to request whether or not to permit the change. - Page 63 4. OPERATING INSTRUCTIONS To adjust cassette count: • The Experiment Number screen is displayed (Figure 4-E). • Touch the Cassette Count button. The Input Cassette Count screen is displayed (Figure 4-D). Figure 4-E Figure 4-D 2. Use the touch keyboard to enter the experiment number Station Color indicates the color selected for that specific using up to eight characters.
- Page 64 • must come from the bulk reservoirs which should contain a The View Program screen is displayed (Figure 4-F). sufficient amount of solution. New solution is supplied from The screen includes the following details: the bulk solution reservoir to the last station of a particular solution group.
-
Page 65: Tissue Processing
1. Prepare the specimens for processing as follows: Properly fill and close the Tissue-Tek Cassettes, ensuring that there is a sufficient ratio between the size of the specimen and the volume of the cassettes. - Page 66 • Touch Overview Monitor to return to the Tissue Processing Overview screen. If “Delayed Start” was selected, the “Delayed Start Overview” screen will display (Figure 4-I). Figure 4-J The Tissue Processing Delayed Start Detailed screen displays the current status of the system. •...
- Page 67 4. OPERATING INSTRUCTIONS • 4. Touch the Resume button to continue processing. The Modify Cassette Count Screen displays (Figure 4-K) NOTE: If the solution manager is not set to count cassettes, then only follow steps 1-3 then touch Resume to continue processing. When tissue processing is completed a Notice window displays.
-
Page 68: Cleaning
4.4.4 Removing AutoTEC Magazines 4.5 Cleaning When removing the magazines from the retort, to prevent After a processing run the Clean Cycle Start Screen displays misalignment or dislodging of cassettes, gently grasp the (Figure 4-N). The Clean Cycle Start Screen consists of three magazines from the top and rotate to an upright position with tabs, Clean Retort, Warm Water Flush and Rinse Cycle. - Page 69 4. OPERATING INSTRUCTIONS To Start the Cleaning Cycle 1. Touch Start to begin the selected clean cycle. • The Clean Start Confirmation Screen displays. 2. Touch Yes to start. • The Clean Start Notice Window displays. • Touch No to return to Clean Cycle Start Screen. 3.
- Page 70 • The Clean Retort Hold screen is displayed (Figure 4-Q). Figure 4-S 1. Touch the station chosen to perform the warm water Figure 4-Q flush. The lamp icon will illuminate. 2. Touch the Drying Cycle button to enable or disable the •...
- Page 71 4. OPERATING INSTRUCTIONS 5. Touch the Yes button when warm water bottle(s) are in place. The Warm Water Flush Confirmation Screen Displays. • Touch No to exit back to the Cleaning Menu without starting the warm water flush. 6. Touch the Yes button when ready to start. The Warm Water Flush Start Notice displays.
- Page 72 • Touch Solution Manager to activate the Solution Manger during the rinse. Once the Solution Manger is selected the lamp icon illuminates and the Solution Manger icon displays. 2. Touch Drain/Fill Port Rinse if using alcohol from an external container to rinse the retort and lines after a solution exchange.
- Page 73 4. OPERATING INSTRUCTIONS Rinse Cycle Detailed Monitor The Rinse Cycle Detailed Monitor allows users to view the system status, cleaning status, and expected end time for a rinse cycle. 1. Touch Menu to display the Process Menu Screen. 2. Touch Detailed Monitor to switch the display to the Rinse Cycle Detailed Monitor Screen.
-
Page 75: Consumable And Accessories 5.1 Consumable Materials
5. CONSUMABLES AND ACCESSORIES 5.1 Consumable Materials Product Code Description 7093 AutoTEC a120 Product 20–Cassette Code Description Magazines 4170-01, white Tissue-Tek® 4120-01, aqua Uni-Cassette® 4157-01, blue 12 colors 4119-01, gold available 4156-01, green 4118-01, lime Product 4117-01, orange Code Description... - Page 76 Where to Call to Order Consumables and Accessories If located within the United States, contact the Order Management Department of Sakura Finetek USA, Inc., by calling toll-free: 1-800-725-8723. Alternately, or in countries other than the United States, contact the nearest authorized Sakura distributor.
-
Page 77: Care Of The Instrument 6.1 General Maintenance
Reinstall the filter. This section provides information on how to care for and maintain the Tissue-Tek VIP 6 AI. The instrument must be Exterior Surfaces maintained correctly to ensure proper operation. Keep the exterior of the cabinet free of dust and clutter. - Page 78 2. To perform the Warm Water Flush: a. Rinse, then fill formalin and first two alcohol bottles with clean warm water. b. Install into their appropriate stations. NOTE: Stations 1 through 5 can be selected for a warm water flush procedure. From the Process Menu, touch the Cleaning icon then the Warm Water Flush Tab.
- Page 79 6. CARE OF THE INSTRUMENT 1. Open the retort lid. If the retort is hot, wait until it cools down. 2. Moisten the tip of the level sensor cleaning brush with alcohol. Groove of the sensor probe Figure 6-G Figure 6-D 3.
- Page 80 5. While pushing the brush tip against the far face of the groove, move the brush to the right and left in small motions about 10 times. 6. Place the brush tip back in the groove as shown in Step 7.
- Page 81 6. CARE OF THE INSTRUMENT 6.1.3 Monthly Maintenance To replace the fume control system activated carbon filter: Retort Level Sensor Cleaning 1. Open the Fume Control Access Door. 2. Pull out the Fume Control access drawer. The retort contains 4 level sensors which ensure proper fluid levels within the retort.
- Page 82 6.1.4 Periodic Maintenance 6.1.5 Yearly Maintenance Sakura recommends scheduling an appointment for Condensation Bottle preventative maintenance once a year. The condensation bottle works in conjunction with the fume The preventative maintenance should be performed by a condenser system and activated carbon filters. To ensure Sakura representative or a qualified service technician.
-
Page 83: General Information
If additional assistance is required If the system detects a low fluid situation in the pump-in concerning a Tissue-Tek VIP 6 AI instrument problem, or if a phase during the processing, a processing run is interrupted problem cannot be corrected or is beyond the scope of this... - Page 84 The station where the fill error occurred is displayed in red. The station of which solution was used protect specimens displayed in blue. Figure 7-A If the Retort Fill Error screen appears with displaying only the station where the fill error occurred If the system detects a low fluid situation in the pump-in phase during the processing, a processing run is interrupted...
- Page 85 7. TROUBLESHOOTING 1. Touch the Alarm Off button (1) and then the Abort button 3. Once the password is accepted, the processing run is (2) in the Retort Fill Error screen. aborted and the Tissue Processing End with Error screen is displayed.
- Page 86 5. The System Idle and User Logged On screen is 7. Touch the Manual Operations icon in the Utility Menu. displayed. Touch the Menu button. Figure 7-G Figure 7-I 6. The Process Menu screen is displayed. Touch the Utility 8. Touch the Drain Retort button in the Manual Operations Menu tab.
- Page 87 7. TROUBLESHOOTING 9. After the retort drain is completed, open the retort lid Please contact the Sakura Finetek Technical Support and confirm that no solution is left in the retort. Representative for information or assistance. If it is not possible to add the solution or restart the processing soon, remove the specimens from the retort.
-
Page 88: Troubleshooting Chart
7. TROUBLESHOOTING TROUBLESHOOTING CHART Problem Probable Cause Remedy − Make sure power is available at the power Power indicator − Line cord is not plugged. Power failure. source. Make sure the line cord is properly illuminated. − Main power switch is off. connected to the electrical power source. -
Page 89: Error Codes
7. TROUBLESHOOTING ERROR CODES Error Message Possible Causes Action Code Since recovery of power cannot be recognized, when the The system power was turned on. power is turned on "Error 3" is registered as error information. This is not a problem. Provide a dedicated power outlet to prevent inadvertent Power Failure The power cable was disconnected. - Page 90 Error Message Possible Causes Action Code The retort lid handle was in the Move the retort lid handle to the unlocked position, then locked position while the retort lid close the retort lid. Move the handle back to the locked was open.
- Page 91 7. TROUBLESHOOTING Error Message Possible Causes Action Code If any solution not specified in "Usable Solutions" is to be Highly viscous solution was used. used, consult the dealer. Other than the above Contact the dealer. Pump-out was not completed after 2 Check the cause and action for Error 22.
- Page 92 Error Message Possible Causes Action Code If any solution not specified in "Usable Solutions" is to be Highly viscous solution was used. used, consult the dealer. Hose is not connected to the fill port Connect a hose to the fill port used for supplying to the left used for supplying to the left bulk bulk reservoir (station 19).
-
Page 93: Service And Replacement Parts 8.1 Service Information
Paraffin Scraper, small When a problem occurs during operation of the Tissue-Tek 6035 Reagent Bottle, complete VIP 6 AI Vacuum Infiltration Processor, refer to Section 7, Troubleshooting, to determine the most likely cause of the 6036 Reagent Bottle Labels malfunction and to obtain recommended corrective actions. - Page 94 8.4 Tissue-Tek VIP 6 AI Does the pump operate? Preservice Checklist What is the level of vacuum and/or pressure? Pressure:______kg/cm2 For reference, record the following information: Vacuum:______cmHg Product Code: ____________________________ Are the time and date being displayed? ...
-
Page 95: Example Processing 9.1 Sample Programs
9. EXAMPLE PROCESSING 9.1 Sample Programs Following are two examples of programs, one for a routine overnight run and the other for a rush or biopsy run. Example reagents and concentrates are shown also. The programs are intended to be used as a guide only; modify them to satisfy the individual needs of your laboratory. - Page 96 ROUTINE OVERNIGHT RUN Station Time (hr:min) Set Temp. Solution Conc. Neutral Buffered Formalin 2:00 40° Slow Neutral Buffered Formalin 2:00 40° Slow Ethanol 0:30 40° Slow Ethanol 0:30 40° Slow Ethanol 0:45 40° Slow Ethanol 0:45 40° Slow Ethanol 100% 0:45 40°...
- Page 97 9. EXAMPLE PROCESSING (USED AS A GUIDE ONLY) PROGRAM Station Time (hr:min) Set Temp. Solution Conc. Total Processing Time: PROGRAM Station Time (hr:min) Set Temp. Solution Conc. Total Processing Time:...
Need help?
Do you have a question about the VIP 6 AI and is the answer not in the manual?
Questions and answers