Tektronix AFG31000 Series User Manual
Arbitrary function generator
Hide thumbs
Also See for AFG31000 Series:
- Declassification and security instructions (13 pages) ,
- Specification and performance verification technical reference (66 pages) ,
- Service manual (85 pages)
Table of Contents
Advertisement
Quick Links
Advertisement
Table of Contents

Related Manuals for Tektronix AFG31000 Series


Summary of Contents for Tektronix AFG31000 Series
- Page 1 AFG31000 Series Arbitrary Function Generator User's Manual...
- Page 2 Copyright © Tektronix. All rights reserved. Licensed software products are owned by Tektronix or its subsidiaries or suppliers, and are protected by national copyright laws and international treaty provisions. Tektronix products are covered by U.S. and foreign patents, issued and pending. Information in this publication supersedes that in all previously published material.
- Page 3 Tektronix, shipping charges prepaid, and with a copy of customer proof of purchase. Tektronix shall pay for the return of the product to Customer if the shipment is to a location within the country in which the Tektronix service center is located. Customer shall be responsible for paying all shipping charges, duties, taxes, and any other charges for products returned to any other locations.
-
Page 5: Table Of Contents
Standard accessories ..........................24 Optional accessories ..........................25 AFG31000 Series documentation ....................... 25 Contact information ..........................26 Extended warranty ..........................26 Getting started ........................27 Before installation ..........................27 Operating requirements ........................27 AFG31000 Series Arbitrary Function Generator User's Manual... - Page 6 Tutorial: How to select a waveform and adjust settings ................84 Tutorial: How to create a sine waveform ....................85 InstaView overview ..........................86 Tutorial: InstaView ............................. 86 Changed settings ............................95 Advanced mode ..........................97 Advance output modes ..........................98 AFG31000 Series Arbitrary Function Generator User's Manual...
- Page 7 Application examples ......................159 Application examples ........................159 Lissajous patterns ..........................159 Measurement of filter characteristics ....................162 Motor speed control by pulse-width modulation ................164 Carrier null (frequency modulation) ....................166 Index ............................1 Index- AFG31000 Series Arbitrary Function Generator User's Manual...
-
Page 9: List Of Figures
List of Figures Figure 1: AFG31000 Series two-channel front panel ..........27 Figure 2: AFG31000 Series front-panel inputs and outputs ........28 Figure 3: AFG31000 Series floating ground ...............29 Figure 4: High and low voltage limits ................30 Figure 5: AFG output circuits ..................31 Figure 6: AFG31000 Series front-panel overview ............32... - Page 10 Figure 67: Set up InstaView on the AFG31000 instrument ........91 Figure 68: Select channel one ..................91 Figure 69: BNC trigger connect - InstaView .............92 Figure 70: Delay dialog ....................92 Figure 71: Swipe for waveform preview ..............93 AFG31000 Series Arbitrary Function Generator User's Manual...
- Page 11 Figure 104: Setting scope 2 sequence ..............114 Figure 105: Timing tab ....................114 Figure 106: Observe the change on the scope ............115 Figure 107: Wait Event - sequence ................115 Figure 108: Manual trigger ..................116 AFG31000 Series Arbitrary Function Generator User's Manual...
- Page 12 Figure 140: ArbBuilder edit toolbar ................145 Figure 141: ArbBuilder highlight waveform data to cut ..........145 Figure 142: ArbBuilder invert ..................146 Figure 143: ArbBuilder invert final ................146 Figure 144: ArbBuilder mirror ..................147 Figure 145: ArbBuilder mirror final ................147 AFG31000 Series Arbitrary Function Generator User's Manual...
- Page 13 Figure 163: Lissajous pattern change displayed ............160 Figure 164: Change the phase CH1 to -19 ...............161 Figure 165: Lissajous pattern changes ..............161 Figure 166: AFG31000 Series connected to an oscilloscope ........162 Figure 167: Measure frequency characteristics ............163 Figure 168: Duty rate changes motor speed.............164 Figure 169: PWM ......................165...
-
Page 15: Important Safety Information
To avoid electric shock, the grounding conductor must be connected to earth ground. Before making connections to the input or output terminals of the product, make sure that the product is properly grounded. AFG31000 Series Arbitrary Function Generator User's Manual... - Page 16 Connect and disconnect properly. Do not connect or disconnect instruments while they are connected to a voltage source. Use only connectors and adapters supplied with the product, or indicated by Tektronix to be suitable for the product. Observe all terminal ratings. To avoid fire or shock hazard, observe all ratings and markings on the product.
-
Page 17: Terms In This Manual
Use care when lifting and carrying the product. This product is provided with handles for lifting and carrying. Use only the Tektronix rack-mount hardware specified for this product. Keep product surfaces clean and dry. Remove the input signals before you clean the product. -
Page 18: Symbols And Terms On The Product
(This symbol may also be used to refer the user to ratings in the manual.) The following symbol(s) may appear on the product: xviii AFG31000 Series Arbitrary Function Generator User's Manual... -
Page 19: Compliance Information
Emissions which exceed the levels required by this standard may occur when this equipment is connected to a test object. For compliance with the EMC standards listed here, high quality shielded interface cables should be used. AFG31000 Series Arbitrary Function Generator User's Manual... -
Page 20: Australia / New Zealand Declaration Of Conformity - Emc
The area is protected from direct sunshine, rain, or direct wind. Pollution degree 4. Pollution that generates persistent conductivity through conductive dust, rain, or snow. Typical outdoor locations. AFG31000 Series Arbitrary Function Generator User's Manual... -
Page 21: Pollution Degree Rating
European Union requirements according to Directives 2012/19/EUand 2006/66/EC on waste electrical and electronic equipment (WEEE) and batteries. For information about recycling options, check the Support/Service section of the Tektronix Web site (www.tek.com (tek.com)). AFG31000 Series Arbitrary Function Generator User's Manual... - Page 22 III, Sub-section 38.3. Consult your carrier to determine which lithium battery transportation requirements are applicable to your configuration, including to its re-packaging and re-labeling, prior to reshipment of the product by any mode of transport xxii AFG31000 Series Arbitrary Function Generator User's Manual...
-
Page 23: Preface
Preface Getting started Thank you for choosing a Tektronix product. The Series 31000 Arbitrary Function Generator (AFG) instruments are high-performance instruments with built-in waveform generation applications, real-time waveform monitoring called InstaView , and an improved user interface for higher test efficiency. -
Page 24: General Model Information
Preface General model information This manual provides operation information for the following products. Unless otherwise noted, "AFG31000 Series" refers to the models in the following table. Table 1: AFG31000 models Model Bandwidth Sample rate Channel Waveform Optional memory size AFG31021... -
Page 25: Optional Accessories
Generator User's models of the AFG31000 Series Simplified Chinese 077147900 Arbitrary Function Generator. It Manual includes information about features, Traditional Chinese 077148000 functions, and accessories. German 077148100 French 077148200 Russian 077148600 Korean 077148700 AFG31000 Series Arbitrary Function Generator User's Manual... -
Page 26: Contact Information
Contact information If you have any questions after you review the information in this documentation, please contact your local Tektronix office, sales partner, or distributor. You can also call the corporate headquarters of Tektronix in North America at 1-800-833-9200. Visit tek.com... -
Page 27: Getting Started
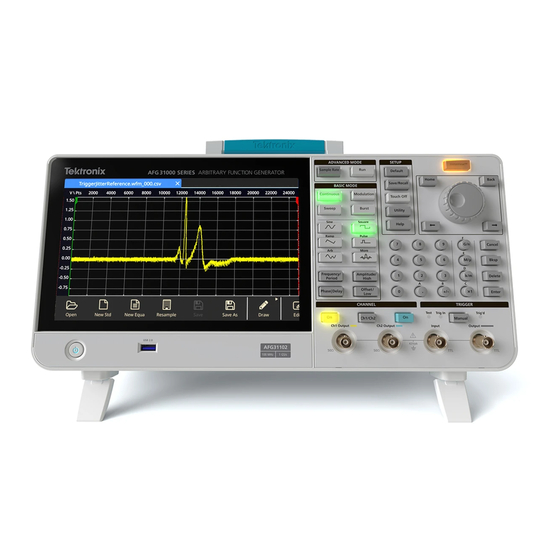
Rear: 50 mm (2 in) Before operating the instrument, make sure that the ambient temperature is between 0 °C to 50 °C. Figure 1: AFG31000 Series two-channel front panel CAUTION. To ensure proper cooling, keep both sides of the instrument clear of obstructions. -
Page 28: Check And Protect Connectors
NOTE. When connecting a cable, make sure to distinguish the input connector from the output connectors to avoid making the wrong connection. Figure 2: AFG31000 Series front-panel inputs and outputs The instrument input and output connectors are floating inputs and outputs (see Floating ground page 29) for more information). -
Page 29: Floating Ground
If the fuse opens, you need to contact your local Tektronix Service Support. When a potential voltage exists between the common ground and chassis ground, short-circuiting between them may lead to excessive current flow and the internal or external circuits may be damaged. -
Page 30: Protect Your Dut
2. Swipe the bottom area up and select Ch1 or Ch2. 3. Make sure that the limits are set appropriately for the device under test (DUT). Default high limit +500 mV Default low limit –500 mV Figure 4: High and low voltage limits AFG31000 Series Arbitrary Function Generator User's Manual... -
Page 31: Equivalent Output Circuits
Getting started Equivalent output circuits The following figure shows the equivalent output circuits for the AFG31000 Series Arbitrary Function Generator instruments: Figure 5: AFG output circuits The following table shows the output window (minimum and maximum levels) for a sine waveform when you change the load impedance (L). -
Page 32: Clean The Instrument
1. Power switch 2. Touch screen 3. Shortcut buttons: Frequency/Period, Amplitude/High, Phase/Delay, Offset/Low 4. Waveform function keys: Sine, Ramp, Arb, Square, Pulse, and More 5. Basic Mode buttons: Continuous, Sweep, Modulation, and Burst AFG31000 Series Arbitrary Function Generator User's Manual... -
Page 33: Shortcut Keys (Front Panel)
In the following example, use sine waveform. To use the Amplitude/High button: 1. Select Basic on the touch screen. 2. Press the Amplitude/High shortcut button (Ampl is active). 3. Press the Amplitude/High shortcut button again and high is active. AFG31000 Series Arbitrary Function Generator User's Manual... -
Page 34: Figure 7: Amplitude Button Active
Getting started Figure 7: Amplitude button active Figure 8: High button active AFG31000 Series Arbitrary Function Generator User's Manual... -
Page 35: Default Setup
To restore the default settings: 1. Press the Default button. A confirmation pop-up message appears on the screen. 2. Press OK to recall the default settings, or Cancel the recall. Figure 9: Default button message AFG31000 Series Arbitrary Function Generator User's Manual... -
Page 36: Adjust Waveform Settings
2.000 V 707 V +6.99 dBm 1.414 V 500 V +0.00 dBm 632 mV 224 mV –6.99 dBm 283 mV 100 mV –10.00 dBm 200 mV 70.7 mV –36.02 dBm 10.0 mV 3.54 mV AFG31000 Series Arbitrary Function Generator User's Manual... -
Page 37: Select Waveform
V value of normalized waveform data. When the instrument outputs Sin(x)/x, Gaussian, Lorentz, Exponential Rise, Exponential Decay, or Haversine, V is defined as twice the value of 0 to peak value. AFG31000 Series Arbitrary Function Generator User's Manual... -
Page 38: Figure 10: Touchscreen
1. Select the Basic button. You can directly select one of four standard waveforms on the touch screen drop-down menu or use the front-panel button. Figure 10: Touchscreen 2. Select the Continuous function using the touch screen drop-down menu or the front-panel button. Figure 11: Select continuous function AFG31000 Series Arbitrary Function Generator User's Manual... -
Page 39: Figure 12: Sine Waveform Select
4. To change the waveform, select the waveform drop-down menu and select Arb or use the front-panel button. To select one of the other waveforms available, such as Sin(x)/x, Noise, DC, or Gaussian, select the waveform drop-down menu and choose a waveform. Figure 13: Select Arb waveform AFG31000 Series Arbitrary Function Generator User's Manual... -
Page 40: Basic Function Modes
Continuous Modulation Sweep Burst You can use these buttons to select the instrument signal output method. See Select waveform page 37) and Front-panel overview (on page 32) for more information. AFG31000 Series Arbitrary Function Generator User's Manual... -
Page 41: Rear Panel Overview
3. Ext Ref Input: This is a BNC external reference input connector. When you want to synchronize multiple arbitrary function generators, or synchronize your AFG31000 Series and another instrument, use the external reference input connector. 4. Ext Ref Output: This is a BNC external reference output connector. When you want to synchronize multiple arbitrary function generators, or synchronize your AFG31000 Series and another instrument, use the external reference output connector. -
Page 42: Usb Interface
Only one interface can be used at a time. You can use the interface to send remote commands to the instrument. NOTE. You can find more information and a detailed description of the command list in the AFG31000 Series Arbitrary Function Generator Series Programmer's Manual. AFG31000 Series Arbitrary Function Generator User's Manual... -
Page 43: Figure 17: Tekvisa Instrument Selection, Talker Listener
The remote command to unlock the instrument: SYSTem:KUNLOCk[:STATe] To lock the instrument using a remote command: 1. Connect a USB or LAN cable between the AFG31000 Series Arbitrary Function Generator and the computer. 2. Install TekVISA on your computer (you can download it from www.tek.com/manuals). - Page 44 6. Input SYSTem:KLOCK:STATe ON in the command field. Click Write, this command is written to AFG31000 Series Arbitrary Function Generator. 7. Press any button on the front panel; you will find there is no effect. The keyboard on the front panel is locked. AFG31000 Series Arbitrary Function Generator User's Manual...
-
Page 45: Operating Basics
To power on the instrument 1. Press the front-panel power switch to turn on the instrument. Figure 18: AFG31000 Series two-channel front view NOTE. Wait until the front-panel display shows that the instrument has passed all power-on self-tests before using the instrument. -
Page 46: Touchscreen Interface
It also gives you access to network information for your instrument. For more information about this screen see Input and Output interface. Figure 20: I/O Interface options AFG31000 Series Arbitrary Function Generator User's Manual... -
Page 47: Basic Mode Default Screen
The AFG default screen allows you to change the following parameters: Waveform Basic function (continuous, modulation, sweep, or burst) Frequency Voltage limits Phase Units (V , or dBm) Figure 21: One-channel AFG home screen AFG31000 Series Arbitrary Function Generator User's Manual... -
Page 48: Advanced Mode Default Screen
The sequencer can include up to 256 steps, and up to 16 MB of waveforms for each channel (128 MB optional). Create a new waveform sequence and save. Figure 22: Two-channel advanced mode home screen Figure 23: One-channel sequence screen AFG31000 Series Arbitrary Function Generator User's Manual... -
Page 49: Arbbuilder Settings
Draw: Create freehand waveforms, draw horizontally and vertically. You can also draw by points. Edit: Edit a waveform. Send: Send to the channel that you want to use. Exit: Exit ArbBuilder. Figure 24: ArbBuilder home screen AFG31000 Series Arbitrary Function Generator User's Manual... -
Page 51: Function Introduction
Function introduction Basic mode The AFG31000 Series Arbitrary Function Generator provides both Basic and Advanced (Sequence) modes. Basic mode has a dedicated user interface similar to a traditional arbitrary function generator. The generating function and arbitrary waveforms are controlled with a minimum number of button clicks and a shallow menu hierarchy. -
Page 52: Figure 26: Bottom Swipe Area Tabs
Function introduction Figure 26: Bottom swipe area tabs Figure 27: Top swipe area AFG31000 Series Arbitrary Function Generator User's Manual... -
Page 53: Create A Pulse Waveform
7. Select Leading and Trailing and enter the settings for the leading and trailing edge. Pulse waveform formulas The following figure and formula help to explain the correlation between pulse period, duty cycle, pulse width, and the leading and trailing edge times. Figure 28: Pulse period width AFG31000 Series Arbitrary Function Generator User's Manual... - Page 54 If runMode is not Continuous: Temp1 = 0.8 * 2.0 * width – lEdge Temp2 = ( period – leadDelay – width ) * 0.8 * 2.0 – lEdge Temp3 = 0.625 * period AFG31000 Series Arbitrary Function Generator User's Manual...
-
Page 55: Open Or Save Arbitrary Waveforms
2. On the touchscreen, swipe the white arrow at the bottom of the screen up and go to the ArbBuilder tab (see touchscreen swipe areas (on page 51) for more information). Figure 29: Bottom swipe area 3. Select Open. Figure 30: ArbBuilder tab AFG31000 Series Arbitrary Function Generator User's Manual... -
Page 56: Create Noise Or Dc
Create a burst waveform The instrument can output a burst using standard waveforms such as sine, square, ramp, and pulse, or arbitrary waveforms. The instrument allows you to use the following types of burst modes. AFG31000 Series Arbitrary Function Generator User's Manual... -
Page 57: Figure 31: Burst Pulse Waveform
5. To create a double pulse, set the Cycle setting (N-Cycles) to 2. The following figure shows that this waveform is a trigger output signal. Figure 31: Burst pulse waveform AFG31000 Series Arbitrary Function Generator User's Manual... -
Page 58: Figure 32: Gated Burst Waveform
Figure 32: Gated burst waveform NOTE. The instrument provides the following trigger sources for burst mode: Internal or external trigger signal; manual trigger; or remote command. Once Gate is selected, burst count settings are ignored. AFG31000 Series Arbitrary Function Generator User's Manual... -
Page 59: Sweep A Waveform
You can set the following settings for Sweep (scroll down to reveal all of the options): Start frequency Stop frequency Amplitude Offset Units Sweep time Return time Center frequency Frequency span Hold time Figure 33: Sweep waveform settings AFG31000 Series Arbitrary Function Generator User's Manual... -
Page 60: Figure 34: Oscilloscope Sweep Waveform
If a start frequency is lower than a stop frequency, the instrument sweeps from the low frequency to the high frequency. If a start frequency is higher than a stop frequency, the instrument sweeps from the high frequency to the low frequency. AFG31000 Series Arbitrary Function Generator User's Manual... -
Page 61: Modulate A Waveform
7. Scroll down to find the AM Freq setting. 8. On the Depth setting, set the depth percentage. The following figure is an example amplitude modulation waveform displayed on an oscilloscope. Figure 35: Oscilloscope amplitude modulation waveform AFG31000 Series Arbitrary Function Generator User's Manual... -
Page 62: Figure 36: Waveform-Modulation Equations
The following table indicates the relationships between modulation depth and maximum amplitude for AM modulation waveform (internal modulation source is selected). Depth Maximum amplitude 120% A (V 100% A (V ) * 0.909 A (V ) * 0.682 A (V ) * 0.455 AFG31000 Series Arbitrary Function Generator User's Manual... -
Page 63: Figure 37: Modulation Type
7. Set the Hop Frequency setting. Note that the carrier waveform frequency shifts to the Hop Frequency with the specified FSK rate, and then returns to the original frequency. NOTE. The AFG31000 Series Arbitrary Function Generator instruments create a phase continuous FSK signal. -
Page 64: Figure 38: Select Pulse
2. Select Pulse on the CH1 drop-down menu on the touchscreen. Figure 38: Select pulse 3. Select Continuous mode on the CH1 drop-down menu on the touchscreen. 4. Select Modulation. Figure 39: Select modulation AFG31000 Series Arbitrary Function Generator User's Manual... -
Page 65: Figure 40: Pwm Source Settings
Function introduction 5. For the PWM Source settings, choose either Internal or External. Figure 40: PWM source settings 6. For deviation, set the deviation percentage (pulse-width deviation). Figure 41: Deviation settings AFG31000 Series Arbitrary Function Generator User's Manual... -
Page 66: Figure 42: Shape Settings
Function introduction 7. Set the modulation shape. Figure 42: Shape settings NOTE. For more specific information about this application example, see Motor speed control by pulse-width modulation (on page 164). AFG31000 Series Arbitrary Function Generator User's Manual... -
Page 67: Trigger Out
CH1. To set up trigger out: 1. Connect the AFG31000 Series front-panel Ch 1 TRIGGER output connector to the external TRIGGER input connector of the oscilloscopes. The TRIGGER output connector provides the trigger signal for oscilloscopes. -
Page 68: Align Two-Channel Signals
Align two-channel signals NOTE. This topic is only relevant for two-channel AFG31000 Series instruments. The AFG31000 Series Arbitrary Function Generator uses a phase continuous method to change frequency. When you change the frequency of a channel, it affects the phase relationship between the two channels. -
Page 69: Figure 44: Align Phase Ch1 And Ch2
To set the CH1 and CH2 amplitude to the same level, select the Level CH1=CH2 button. Frequency/Period To set the CH1 and CH2 frequency to the same level, select the Frequency CH1=CH2 button. AFG31000 Series Arbitrary Function Generator User's Manual... -
Page 70: Set Up Load Impedance
Function introduction Set up load impedance The output impedance of the AFG31000 Series Arbitrary Function Generator is 50 Ω. If you connect a load other than 50 Ω, the displayed Amplitude, Offset, and High/Low values are different from the output voltage. To make the displayed values the same as output voltage, you need to set load impedance. -
Page 71: Invert Waveform Polarity
5. On the InterChannel tab, select the Copy CH1 to CH2 button. When you see a message asking if you want to copy the settings, select OK. Figure 45: Copy channel 1 to channel 2 AFG31000 Series Arbitrary Function Generator User's Manual... -
Page 72: Figure 46: Invert Channel 1 And Channel 2 Wave Polarity
Notice that the image at the bottom of CH1 and CH2 shows inverted sine waves. You can accomplish this inversion with all of the waveforms depending on your requirements. Figure 47: Inverted sine wave AFG31000 Series Arbitrary Function Generator User's Manual... -
Page 73: Add Noise
5. On the CH1 tab, select the On option for Noise. 6. Select the value next to Noise to adjust the noise level. The following figure shows a waveform before adding noise. Figure 48: No noise AFG31000 Series Arbitrary Function Generator User's Manual... -
Page 74: Figure 49: Waveform After Noise Is Added
The output status is changed from Output Off to Noise when you press the front-panel Channel Output button to enable the output. When the Noise option is set to On, the amplitude of the output signal is reduced to 50%. AFG31000 Series Arbitrary Function Generator User's Manual... -
Page 75: Add An External Signal
Function introduction Add an external signal The AFG31000 Series Arbitrary Function Generator instruments have a rear-panel Add In connector that allows you to add an external signal to the CH1 output signal. To add an external signal: 1. Connect an external signal source to the rear-panel Add In connector. -
Page 76: Create A Differential Signal
Complement function. To create a differential signal: 1. Select Basic. 2. Set your CH1 settings using the touchscreen. 3. Swipe the menu up at the bottom of the touchscreen. Figure 52: Bottom swipe area AFG31000 Series Arbitrary Function Generator User's Manual... -
Page 77: External Reference Clock
External reference clock The external reference input (EXT REF INPUT) and the external reference output (EXT REF OUTPUT) connectors are on the AFG31000 Series Arbitrary Function Generator rear panel. The instrument can use the internal or external signal as a reference signal. -
Page 78: Synchronize Multiple Instruments
Function introduction Synchronize multiple instruments The AFG31000 Series Arbitrary Function Generator provides the ability to synchronize multiple arbitrary function generators. In many applications, more than two channels of waveforms are needed to stimulate the DUT’s. For example, to simulate the voltage of a 3-phase power line system, three channels are needed. If current on the lines are also needed at the same time, then there will be six channels in total. -
Page 79: Figure 55: Multisync Instruments Tab 2
Function introduction Figure 55: MultiSync instruments tab 2 6. Connect EXT REF OUT (master) and EXT REF IN (subordinate) with a BNC cable according to the following figure. Figure 56: MultiSnyc Units tab 3 AFG31000 Series Arbitrary Function Generator User's Manual... -
Page 80: Figure 57: Multisync Instruments Tab 4
8. Set the Trigger delay between master and subordinate. Figure 57: MultiSync instruments tab 4 9. Press the Right arrow enter to next page. 10. Press Synchronize. Figure 58: MultiSync instruments tab 5 AFG31000 Series Arbitrary Function Generator User's Manual... -
Page 81: Figure 59: Master Instrument Waveform
The following figures show waveform outputs before and after they have been synchronized. The top waveform is from the master instrument and the bottom waveform is from the subordinate instrument. Figure 60: Master and subordinate before sync AFG31000 Series Arbitrary Function Generator User's Manual... -
Page 82: Usb Flash Drive
If you want to restart the signal generation, change the trigger source of the master instrument to Internal. USB flash drive A USB port is included on the front panel of the AFG31000 Series Arbitrary Function Generator so that you can perform the following tasks: ... -
Page 83: Save Or Recall Instrument Setup
Tutorials The following quick tutorials introduce you to using an arbitrary waveform generator (AFG). AFG31000 Series Arbitrary Function Generator User's Manual... -
Page 84: Tutorial: How To Select A Waveform And Adjust Settings
To change a specific digit, select it by pressing the arrow keys, then change it by turning the navigation wheel. Set the value by pressing the navigation wheel. AFG31000 Series Arbitrary Function Generator User's Manual... -
Page 85: Tutorial: How To Create A Sine Waveform
NOTE. You can use the front-panel shortcut buttons to quickly select a waveform setting. When you specify a waveform setting using the shortcut buttons, the active setting is displayed in green in the graph area. AFG31000 Series Arbitrary Function Generator User's Manual... -
Page 86: Instaview Overview
Additionally, if there is parasitic capacitance or inductance, it will lead to distortion of the waveform; it is not a square waveform anymore. The challenge is the screen still shows a 3.3 V square waveform. AFG31000 Series Arbitrary Function Generator User's Manual... -
Page 87: Figure 62: Equipment For Instaview Tutorial
One oscilloscope (with 50 Ω and 1 MΩ switchable input impedance) One BNC to BNC cable One BNC T connector (JKJ) One demo board Figure 62: Equipment for InstaView tutorial AFG31000 Series Arbitrary Function Generator User's Manual... -
Page 88: Figure 63: Afg31000 Instaview Setup With Connections Overview
4. Turn on CH1 on the scope, adjust horizontal, vertical, and trigger level settings to see the waveform on the screen. 5. Toggle the scope CH1 input impedance between 50 Ω and 1 MΩ to see the changes of the amplitude. Figure 64: Scope 1 MΩ AFG31000 Series Arbitrary Function Generator User's Manual... - Page 89 Function introduction 6. Disconnect the BNC cable from the scope, and connect the T connector between the demo board, scope CH1 input, and the BNC connector. AFG31000 Series Arbitrary Function Generator User's Manual...
-
Page 90: Figure 65: Bnc Connectivity To Afg31000
(pure resistive load) and shape (capacitive-inductive load), but the waveform shape shown on the instrument is still a perfect square. Setup InstaView on the AFG31000 1. Press the InstaView button on the front panel to open the settings window. AFG31000 Series Arbitrary Function Generator User's Manual... -
Page 91: Figure 67: Set Up Instaview On The Afg31000 Instrument
2. Select CH1 and select Run button on the screen to automatically measure the cable propagation delay. Figure 68: Select channel one 3. Connect the BNC cable between CH1 output and Trigger In, then select OK. AFG31000 Series Arbitrary Function Generator User's Manual... -
Page 92: Figure 69: Bnc Trigger Connect - Instaview
4. When the measurement is done, the delay is reflected in the dialog box. Figure 70: Delay dialog 5. Select CH1 and select OK to close the window. 6. Connect the BNC cable directly to the oscilloscope CH1 input again. AFG31000 Series Arbitrary Function Generator User's Manual... -
Page 93: Figure 71: Swipe For Waveform Preview
You can see how the waveform shown on the instrument changes along with impedance of the DUT. Figure 72: CH1 oscilloscope 1 MΩ - InstaView AFG31000 Series Arbitrary Function Generator User's Manual... -
Page 94: Figure 73: Complex Loads, Initial View (L, C, And R) Using Instaview
Function introduction Figure 73: Complex loads, initial view (L, C, and R) using InstaView Figure 74: Complex load AFG31000 Series Arbitrary Function Generator User's Manual... -
Page 95: Changed Settings
1. Change the amplitude and frequency, either independently or together of CH1 to observe how the InstaView waveform changes in real time, and compare it with the oscilloscope-captured waveforms. Figure 75: Frequency 5 MHz - InstaView Figure 76: Frequency 5 MHz - scope AFG31000 Series Arbitrary Function Generator User's Manual... -
Page 96: Figure 77: Amplitude 2 Vpp - Scope Instaview
Function introduction Figure 77: Amplitude 2 VPP - Scope InstaView Figure 78: Amplitude 2 Vpp - InstaView AFG31000 Series Arbitrary Function Generator User's Manual... -
Page 97: Advanced Mode
The details in the waveform are maintained, jitter and phase noise performance is improved, and the number of samples in each cycle are consistent. Figure 79: Advanced mode default screen AFG31000 Series Arbitrary Function Generator User's Manual... -
Page 98: Advance Output Modes
The advanced output mode screen allows you to: Choose from available waveforms. Open a saved waveform sequence by selecting Sequence. Create and save a new waveform. AFG31000 Series Arbitrary Function Generator User's Manual... -
Page 99: Advanced Sequence List
Save: Save a waveform. Save As: You can save a waveform to a new file name. Figure 80: One-channel sequence screen AFG31000 Series Arbitrary Function Generator User's Manual... -
Page 100: Advance Waveform List
USB: Locates the waveform on an external USB drive. Predefined: Locates the waveform in a predefined memory location. Delete: Deletes one or more existing waveforms from the waveform list. Figure 81: Waveform list AFG31000 Series Arbitrary Function Generator User's Manual... -
Page 101: Advanced Setting Bar
NOTE: Advanced mode supports waveforms with amplitude and offset info. When waveforms are loaded into the table, CH1/CH2 offset may have an initial value. Scale and offset are work together; scale value is calculated based on the offset settings. Figure 83: Channel scale and offset AFG31000 Series Arbitrary Function Generator User's Manual... -
Page 102: Figure 84: Timing
Jump Addr: Sets the jump destination for a jump event. Go to: Moves to a specific step in the sequence after generating the waveform specified in a sequence element. Figure 85: Advanced table AFG31000 Series Arbitrary Function Generator User's Manual... -
Page 103: Sequence Table
Goto: Once the current waveform repetition is complete (without being interrupted), the sequencer goes to the Goto address. By default, the address is Next (current entry address + Figure 86: Advanced table AFG31000 Series Arbitrary Function Generator User's Manual... -
Page 104: Sequence Mode
Jump address immediately. Goto: Once the current waveform repetition is complete (without being interrupted), the sequencer goes to the Goto address. By default, the address is Next (current entry address + AFG31000 Series Arbitrary Function Generator User's Manual... -
Page 105: Figure 87: Continuous Mode
(1 cycle). Then the instrument returns to the starting point of the sequence, and waits for the next trigger event. Jump is disabled in this mode Figure 88: Triggered mode AFG31000 Series Arbitrary Function Generator User's Manual... -
Page 106: Figure 89: Gated Mode
Go To is disabled in this mode. Figure 89: Gated mode Advanced Thumbnail This is a small version of the waveform screen. Figure 90: Thumbnail AFG31000 Series Arbitrary Function Generator User's Manual... -
Page 107: Advanced Thumbnail
Figure 91: Thumbnail Tutorial: Advanced mode This example will show you how to use the AFG31000 Series Arbitrary Function Generator to generate long waveforms or waveforms with complex timing. Generating pulse trains or data packets in a serial bus are an example of this type of application. -
Page 108: Advanced Mode Tutorial, Connections
Figure 92: Equipment setup Advanced mode tutorial, process NOTE. If you are not seeing the Home page, press the Home button on the front panel. Figure 93: Advanced icon on the Home screen AFG31000 Series Arbitrary Function Generator User's Manual... -
Page 109: Figure 94: Empty Waveform List
3. Select Predefined to view the built-in waveforms. Select them all, then click the OK button to add them to the waveform list.The waveforms will be added to the waveform list. Figure 95: Predefined button AFG31000 Series Arbitrary Function Generator User's Manual... -
Page 110: Figure 96: Select From The Waveform List
Function introduction Figure 96: Select from the Waveform List 4. You can drag and drop waveforms from the list to the sequence entries. Figure 97: Drag and drop waveforms AFG31000 Series Arbitrary Function Generator User's Manual... -
Page 111: Figure 98: Go To Field, Change To 1
Leave the repeat number of entry one as one. In the next step you will need to set a marker for this entry that will trigger the scope. Figure 99: Change to results AFG31000 Series Arbitrary Function Generator User's Manual... -
Page 112: Figure 100: Set Repeat Function
7. Swipe entry one from left to right to reveal the selection box; select the box. This generates a 50% duty cycle pulse from the trigger out port on the instrument when that waveform is run. Figure 101: Swipe left-to-right to select the box AFG31000 Series Arbitrary Function Generator User's Manual... -
Page 113: Figure 102: Indicators Showing Set Channels And Running Sequence
Figure 102: Indicators showing set channels and running sequence 9. Adjust the scope to observe the output waveforms on CH1 and CH2. CH3 is the trigger source. Figure 103: Adjust the scope AFG31000 Series Arbitrary Function Generator User's Manual... -
Page 114: Figure 104: Setting Scope 2 Sequence
Figure 104: Setting scope 2 sequence 11. Select the Timing tab and change the sampling rate from 1 GHz to 500 MHz. This changes the output frequency to half of the original setting. Figure 105: Timing tab AFG31000 Series Arbitrary Function Generator User's Manual... -
Page 115: Figure 106: Observe The Change On The Scope
13. The oscilloscope shows the change on CH1 in frequency and the amplitude. Figure 106: Observe the change on the scope Figure 107: Wait Event - sequence AFG31000 Series Arbitrary Function Generator User's Manual... -
Page 116: Figure 108: Manual Trigger
16. Select the manual trigger button on the front panel. The whole sequence will be output once, then wait for the next trigger to come. Figure 109: Manual trigger button AFG31000 Series Arbitrary Function Generator User's Manual... -
Page 117: Utility Menu
Security Menu: Allows you to set Access Protection and Password Management. Firmware: Allows you to update the firmware if there is an update available. License: Allows you to update the license for increased memory and capability. AFG31000 Series Arbitrary Function Generator User's Manual... -
Page 118: Figure 111: Utility Home Screen
Function introduction Figure 111: Utility home screen AFG31000 Series Arbitrary Function Generator User's Manual... -
Page 119: System Menu Settings
If you select Off, you will not hear a beep. Factory Default: Resets the instrument to factory default settings. Brightness: Use the brightness slider to adjust the touchscreen brightness. ZONE: Set the required time zone. Figure 112: System settings AFG31000 Series Arbitrary Function Generator User's Manual... -
Page 120: Figure 113: Utility Button
Change the Clock Ref to External or Internal Enable or disable the screen saver by choosing On or Off Enable the beeper by choosing On or Off Adjust the brightness of the touchscreen with the slider bar AFG31000 Series Arbitrary Function Generator User's Manual... -
Page 121: Figure 114: System Reset
To erase instrument setup and waveforms from memory: 1. Press the front-panel Utility button (located in the SETUP area). 2. On the touchscreen, select System. 3. From the Factory Default option, select Reset. Figure 114: System reset AFG31000 Series Arbitrary Function Generator User's Manual... -
Page 122: Figure 115: Erase Instrument Setups And Waveforms
4. When you see the message asking if you want to execute this action, select OK (or Cancel if you decide not to erase the setup and waveforms). Figure 115: Erase instrument setups and waveforms AFG31000 Series Arbitrary Function Generator User's Manual... -
Page 123: Figure 116: Language Selection
1. In the SETUP area, press the front-panel Utility button. 2. On the touchscreen, select System. 3. For the Language option, select the appropriate language (English, French, German, Japanese, Korean, Simplified_Chinese, Traditional_Chinese, or Russian (see the following figure). Figure 116: Language selection AFG31000 Series Arbitrary Function Generator User's Manual... -
Page 124: Diagnostics And Calibration Functions
Figure 117: Diagnostics and calibration Before you run these tests: Power on the instrument and allow a 20-minute warm-up. Make sure the is operating at an ambient temperature between 0 °C and 50 °C. AFG31000 Series Arbitrary Function Generator User's Manual... -
Page 125: Figure 118: System, Diagnostics And Calibration
To perform diagnostics and calibration: CAUTION. Do not remove power from the instrument while performing calibration. If the power is turned off during calibration, data stored in the internal memory may be lost. AFG31000 Series Arbitrary Function Generator User's Manual... -
Page 126: Figure 119: Run System Diagnostics
Figure 120: Run self calibration 6. Wait until the test is completed (the calibration test takes eight minutes to complete). Once calibration or diagnostics is executed, a dialog box displays the results including any errors. AFG31000 Series Arbitrary Function Generator User's Manual... -
Page 127: Input And Output Interface
Default Gateway: Select the dialog box and enter the gateway address (your network administrator can provide this information). Subnet Mask: Enter the subnet mask (your network administrator can provide this information). IP Address: Enter the correct IP address. Figure 121: I/O Interface options AFG31000 Series Arbitrary Function Generator User's Manual... -
Page 128: Security Menu Settings
14, and numbers can be zero through 9. If you forget the password, please contact your local Tektronix office, sales partner, or distributor. You can also call the corporate headquarters of Tektronix in North America at 1-800-833-9200. Visit the... -
Page 129: Firmware Menu Settings
The update firmware function allows you to update the firmware if there is an update available. See Update instrument firmware (on page 130) for details about using this feature. Figure 123: Update firmware menu AFG31000 Series Arbitrary Function Generator User's Manual... -
Page 130: Figure 124: Update Firmware
2. Download the compressed .zip file to your computer. 3. Unzip the downloaded file and copy the .ftb file to the USB flash drive root directory. 4. Insert the USB in the AFG31000 Series instrument front panel. 5. Press the Utility button. -
Page 131: License
3. Press the Help icon on the touch screen to display the Help menu. Turn the navigation control to highlight a help topic in the index or to move from page-to-page within a topic. Press navigation control to display the topic from the index page. AFG31000 Series Arbitrary Function Generator User's Manual... -
Page 132: Arbbuilder
You can replicate waveforms or load data files directly into ArbBuilder using a USB flash drive. The completed waveform can be sent to hardware for replication; amplitude and offset will be set automatically, without normalization. AFG31000 Series Arbitrary Function Generator User's Manual... -
Page 133: Create An Arbitrary Waveform
Equation), or drawing a waveform (Draw a Waveform with ArbBuilder Figure 127: ArbBuilder home tab To create a standard waveform 1. Select New Std from the Waveform tab. Figure 128: ArbBuilder New Std AFG31000 Series Arbitrary Function Generator User's Manual... -
Page 134: Create A Waveform Using Equations
Compile the equation file to generate the described waveforms. An equation file is a text file that you create and edit in the Equation Editor. Select New Equa to open the equation editor. A soft keyboard containing equation components is displayed. AFG31000 Series Arbitrary Function Generator User's Manual... -
Page 135: Figure 130: Arbbuilder Equation File With Soft Keyboard
Function introduction Figure 130: ArbBuilder equation file with soft keyboard AFG31000 Series Arbitrary Function Generator User's Manual... -
Page 136: Figure 131: Arbbuilder Soft Keyboard
OK saves the Equation Editor window; Close exits the Equation Editor window. The ArbBuilder soft window contains the components used to set the time range, functions, operators, variables, constants, syntax items, and characters. Figure 131: ArbBuilder soft keyboard AFG31000 Series Arbitrary Function Generator User's Manual... - Page 137 If no constant is defined for k, this value will be automatically set to 0. Equals sign = is used with k constants. For example: k0=2*pi AFG31000 Series Arbitrary Function Generator User's Manual...
- Page 138 With the first range() specification, any number of lines of equation can be input. Text written after the range() on the same line is invalid. The format for the range( item. range( Equation starting time, Equation ending time )). AFG31000 Series Arbitrary Function Generator User's Manual...
- Page 139 The mark() statement comprises an entire line. For example, when mark(1) marker2) is input, nothing else can be input on that line. AFG31000 Series Arbitrary Function Generator User's Manual...
-
Page 140: Figure 132: Arbbuilder Equation Editor Ribbon
Figure 132: ArbBuilder equation editor ribbon 2. In the Equation Editor window, enter text to form a waveform equation. For example, type Sine(w) in the equation input box. Figure 133: ArbBuilder equation text editor AFG31000 Series Arbitrary Function Generator User's Manual... -
Page 141: Figure 134: Arbbuilder Compile Succesfully
Output box and a log waveform will display in the Preview box. If you enter an invalid equation, the Output box will show an error message and the line containing the error in the equation input box will turn red. Figure 134: ArbBuilder compile succesfully AFG31000 Series Arbitrary Function Generator User's Manual... -
Page 142: Figure 135: Arbbuilder Preview
Enter a filename and select OK to save. The equation file will be saved in the .eqa format file. Open an equation file 1. In the Equation Editor window, select the equation editor toolbar. 2. Select an existing waveform equation file and click Open. AFG31000 Series Arbitrary Function Generator User's Manual... -
Page 143: Open A Waveform With Arbbuilder
ArbBuilder supports several file formats: wfm, csv, tfw, and tfwx. 2. If you want to, select Open in New Tab. 3. Select OK; the file opens. Figure 137: ArbBuilder options AFG31000 Series Arbitrary Function Generator User's Manual... -
Page 144: Draw A Waveform With Arbbuilder
You can select from the interpolation menu and apply one of the three selections to the waveform. Linear: Points can be connected with straight line. Smooth: Points can be connected with smooth line. Staircase: Points can be connected with staircase. AFG31000 Series Arbitrary Function Generator User's Manual... -
Page 145: Edit A Waveform With Arbbuilder
2. Click ArbBuilder->Edit. You will see the edit toolbar. Figure 140: ArbBuilder edit toolbar 3. Cut. It is used to cut a piece of waveform data between the two cursors. Figure 141: ArbBuilder highlight waveform data to cut AFG31000 Series Arbitrary Function Generator User's Manual... -
Page 146: Figure 142: Arbbuilder Invert
Replace the waveform between the cursors by a waveform segment Cursors 6. Invert. It is used to overturn the waveform between the cursors in the vertical direction. Figure 142: ArbBuilder invert Figure 143: ArbBuilder invert final AFG31000 Series Arbitrary Function Generator User's Manual... -
Page 147: Figure 144: Arbbuilder Mirror
Function introduction 7. Mirror. It is used to overturn the waveform between the cursors in the horizontal direction. Figure 144: ArbBuilder mirror Figure 145: ArbBuilder mirror final AFG31000 Series Arbitrary Function Generator User's Manual... -
Page 148: Figure 146: Arbbuilder Waveform Display Zone
Function introduction 8. Shift/Rotate: When the user clicks the Shift/Rotate button, a panel is pop up in the right of main panel zone. Figure 146: ArbBuilder waveform display zone AFG31000 Series Arbitrary Function Generator User's Manual... -
Page 149: Figure 147: Arbbuilder Shift Rotate
Shift right is used to move the waveform right. Shift up is used to move the waveform up. Shift down is used to move the waveform down. Figure 147: ArbBuilder shift rotate AFG31000 Series Arbitrary Function Generator User's Manual... -
Page 150: Send A Waveform To Ch1/Ch2
1. Select Basic on the touchscreen. 2. On the touchscreen, swipe the arrow up at the bottom of the screen and go to the ArbBuilder tab. 3. Select Open. 4. Select the file that you want to modify. AFG31000 Series Arbitrary Function Generator User's Manual... -
Page 151: Arbexpress Information
ArbExpress information ArbExpress information ArbExpress is a Windows-based software for creating and editing waveforms for Tektronix arbitrary waveform generators (AWG) and arbitrary function generators (AFG) instruments. With ArbExpress, you can quickly and conveniently create the desired waveforms and send them to the instrument. The following table and list describes the system requirements and general features. -
Page 152: Arbexpress Software
Marker patterns appear in this area. You can toggle the display of markers by selecting Display > Marker from the menu bar. Figure 150: ArbExpress menu bar Figure 151: ArbExpress toolbar Figure 152: ArbExpress shortcut view AFG31000 Series Arbitrary Function Generator User's Manual... -
Page 153: Figure 153: Arbexpress Status Bar
ArbExpress information Figure 153: ArbExpress status bar Figure 154: ArbExpress waveform display Figure 155: ArbExpress marker area AFG31000 Series Arbitrary Function Generator User's Manual... -
Page 154: Basic Operations
To create a new waveform: 1. Use the File menu. 2. Select Blank sheet (a blank sheet with 1024 points waveform length opens; go to Properties to change the number of points). Figure 156: ArbExpress blank sheet AFG31000 Series Arbitrary Function Generator User's Manual... -
Page 155: Figure 157: Arbexpress Standard Waveform
2. Use Settings to select a waveform and instrument type. 3. Use Vertical to set the waveform vertical settings. 4. Use Horizontal to set the waveform horizontal settings. 5. Select Preview to view the waveform. Figure 157: ArbExpress standard waveform AFG31000 Series Arbitrary Function Generator User's Manual... -
Page 156: Figure 158: Arbexpress Equation Editor
1. Use the Command List to select the commands, functions, units, and operations. 2. View the waveform in the Preview area once the equation is compiled to verify your equation. Figure 158: ArbExpress equation editor AFG31000 Series Arbitrary Function Generator User's Manual... -
Page 157: Figure 159: Arbexpress Math Application
2. Select a math source from Waveform Library. Select Noise in this example. Calculation results are displayed in the Resultant Waveform pane. This is an example of adding noise to a square waveform. Figure 159: ArbExpress math application AFG31000 Series Arbitrary Function Generator User's Manual... -
Page 158: Figure 160: Arbexpress Transfer
NOTE. The Instrument Control pane appears only when an instrument is connected; otherwise it is hidden. 1. From the Communication menu, select AWG/AFG File Transfer & Control to display the dialog box. 2. Make settings changes for each connected instrument. Figure 160: ArbExpress Transfer AFG31000 Series Arbitrary Function Generator User's Manual... -
Page 159: Application Examples
2. Set the waveform parameters as follows: Function: Sine RunMode: Continuous Amplitude: 1 V CH1 Frequency: 400 kHz CH2 Frequency: 500 kHz Figure 161: Set the waveform pattern AFG31000 Series Arbitrary Function Generator User's Manual... -
Page 160: Figure 162: Lissajous Pattern Displayed
4. Adjust the amplitude so that the waveform is shown in the graticule. A Lissajous pattern is displayed. Figure 162: Lissajous Pattern Displayed 5. Change amplitude of AFG31K from 1 Vpp to 0.5 Vpp. Figure 163: Lissajous pattern change displayed AFG31000 Series Arbitrary Function Generator User's Manual... -
Page 161: Figure 164: Change The Phase Ch1 To -19
Application examples 6. Change the phase of CH1 to -19° Figure 164: Change the phase CH1 to -19 7. Observe the Lissajous pattern change shape. Figure 165: Lissajous pattern changes AFG31000 Series Arbitrary Function Generator User's Manual... -
Page 162: Measurement Of Filter Characteristics
2. Connect the Trigger Output of the instrument to an external trigger input connector of an oscilloscope. 3. Set the oscilloscope input impedance to 50 Ω. Figure 166: AFG31000 Series connected to an oscilloscope AFG31000 Series Arbitrary Function Generator User's Manual... -
Page 163: Figure 167: Measure Frequency Characteristics
4. Select Sweep from Run Mode area and set the start frequency, stop frequency, and sweep time so that the waveform is shown in the graticule. 5. You can measure the frequency characteristics of the filter by sweep time and the oscilloscope time base. Figure 167: Measure frequency characteristics AFG31000 Series Arbitrary Function Generator User's Manual... -
Page 164: Motor Speed Control By Pulse-Width Modulation
1. Connect the instrument output and a device under test (DUT) using a BNC-to-alligator clip adapter. 2. Select Pulse as an output waveform and then select PWM as a modulation type. 3. Set the frequency to 100 kHz. Figure 168: Duty rate changes motor speed AFG31000 Series Arbitrary Function Generator User's Manual... -
Page 165: Figure 169: Pwm
5. Confirm that a pulse-width modulation waveform is displayed on the oscilloscope screen. 6. Select Pulse Duty and change the duty rate. 7. Observe that the motor speed changes if you change the duty rate. Figure 169: PWM AFG31000 Series Arbitrary Function Generator User's Manual... -
Page 166: Carrier Null (Frequency Modulation)
1. Select Sine as the output waveform and FM as the modulation type. 2. Set the following waveform parameters: Carrier frequency: 1 MHz Modulation frequency: 2 kHz Figure 170: Carrier waveform frequencies AFG31000 Series Arbitrary Function Generator User's Manual... -
Page 167: Figure 171: Carrier Waveform Null
Application examples 3. Set the deviation to 4.8096 kHz (this will make the carrier waveform null). 4. Confirm the carrier waveform is null on the spectrum analyzer. Figure 171: Carrier waveform null AFG31000 Series Arbitrary Function Generator User's Manual... -
Page 169: Index
Create a gated burst waveform • 58 Create a pulse waveform • 53 Important safety information • 15 Create a standard waveform • 133 Input and output interface • 127 Create a triggered burst waveform • 57 AFG31000 Series Arbitrary Function Generator User's Manual Index-1... - Page 170 Protect your DUT • 30 Protection from overheating • 31 Pulse waveform formulas • 53 PWM waveform • 64 Rear panel overview • 41 Remote communications options • 42 Safety class • 20 Safety compliance • 20 AFG31000 Series Arbitrary Function Generator User's Manual...
Need help?
Do you have a question about the AFG31000 Series and is the answer not in the manual?
Questions and answers