Table of Contents

Related Manuals for Kohler RXT


Summary of Contents for Kohler RXT
- Page 1 Operation and Installation Automatic Transfer Switch Model: 100--400 Amp Automatic Transfer Switches For use with Kohlerr Model RESA, RESAL, or RCL generator sets equipped with RDC2 or DC2 generator/transfer switch controllers TP-6807 12/11...
-
Page 2: Product Identification Information
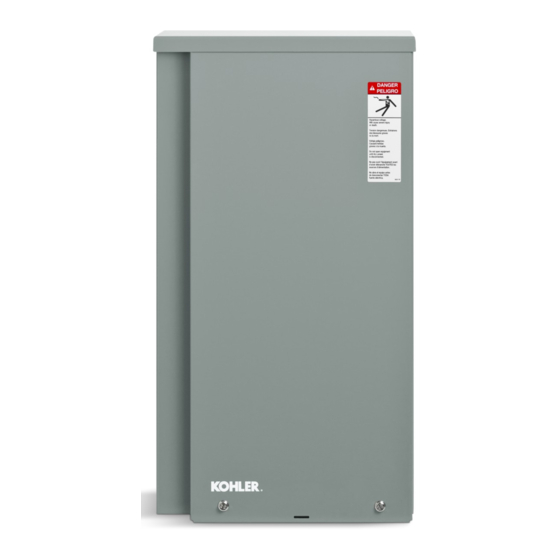
Product Identification Information Product identification numbers determine service parts. Transfer Switch Identification Numbers Record the product identification numbers in the spaces Record the product identification numbers from the below immediately after unpacking the products so that transfer switch nameplate. the numbers are readily available for future reference. Record field-installed kit numbers after installing the Model Designation kits. -
Page 3: Table Of Contents
............... Model RXT Transfer Switch Operation . -
Page 4: Table Of Contents
Table of Contents, continued Inspection and Service ..........5.3.1 General Inspection . -
Page 5: Safety Precautions And Instructions
Safety Precautions and Instructions IMPORTANT SAFETY INSTRUCTIONS. Accidental Starting DANGER Electromechanical equipment, including generator sets, transfer WARNING switches, switchgear, and accessories, can cause bodily harm and pose life-threatening danger when improperly installed, operated, or Hazardous voltage. maintained. To prevent accidents be Will cause severe injury or death. - Page 6 Servicing transfer switch. Heavy Equipment Notice Hazardous voltage cause severe injury or death. Deenergize all NOTICE WARNING power sources before servicing. Turn Foreign material contamination. off the main circuit breakers of all Cover the transfer switch during transfer switch power sources and installation to keep dirt, grit, metal drill disable all generator sets as follows: chips, and other debris out of the...
-
Page 7: Introduction
Model RXT transfer switches operate only with Kohlerr Model generator sets equipped with the RDC2 or DC2 generator/transfer switch controller. See Figure 2 for controller identification. The following Kohlerr model generator sets can be used with the Model RXT transfer switch: 14RESA 14RESAL... -
Page 8: Nameplate
Record the transfer switch model designation in the boxes. The transfer switch model designation defines ratings an characteristics as explained below. RXT-JFNC-0200A Sample Model Designation: Model RXT: Kohler Automatic Transfer Switch Enclosure C: NEMA 3R Controls J: Interface for RDC2/DC2 Controller... -
Page 9: Service Assistance
Visit the Kohler Power Systems website at Phone: (86) 21 6288 0500 KohlerPower.com. Fax: (86) 21 6288 0550 Look at the labels and stickers on your Kohler product India, Bangladesh, Sri Lanka or review the appropriate literature or documents India Regional Office included with the product. - Page 10 Notes Service Assistance TP-6807 12/11...
-
Page 11: Section 1 Description
The normal source is typically utility power. The emergency source is usually a generator set. Model RXT transfer switches must be connected to a generator set equipped with the Kohlerr RDC2 or DC2 generator/transfer switch controller. -
Page 12: Controller Interface Board
Loads. The transfer switch can be connected to supply 1.5 Optional LED Indicator Panel all of the electrical loads in the home, or only the essential loads such as the furnace, refrigerator, well A user interface panel that contains status-indicating pump, and selected light circuits. -
Page 13: Section 2 Installation
Section 2 Installation 2.1 Introduction accumulated in the transfer switch or any of its components. Kohlerr transfer switches are shipped factory-wired, Note: Do not use compressed air to clean the switch. factory-tested, and ready for installation. Have the Cleaning with compressed air can cause debris equipment installed only by trained and qualified to lodge in the components and damage the personnel, and verify that the installation complies with... -
Page 14: Installation
2.3 Installation Pull the bottom of the panel out and down until the top clears the enclosure. Remove the inner panel to access NOTICE the transfer switch components. Foreign material contamination. Cover the transfer switch NEMA 3R enclosures have locking tabs at the bottom of during installation to keep dirt, grit, metal drill chips, and other the enclosure and the door. -
Page 15: Manual Operation Check
2.4 Manual Operation Check DANGER Hazardous voltage. Will cause severe injury or death. Disconnect all power sources before opening the enclosure. Check the manual operation before energizing the transfer switch. Verify that the contactor operates smoothly without binding. Do not place the transfer 1. -
Page 16: Electrical Wiring
3-Phase Switches 2.5.1 Load Center Circuit Breakers The 100 amp Model RXT transfer switch is available with a built-in load center with room for up to 16 single-pole circuit breakers. Up to 8 tandem breakers can be used for a maximum of 24 circuits. -
Page 17: Ac Power Connections
2.5.2 AC Power Connections Single phase. For single-phase models, connect to A and C. Determine the cable size. Refer to Figure 2-8 or the Three phase. For three-phase models, be sure to ADV drawings in Section 6 to determine the cable size follow the phase markings (A, B, C, and N). -
Page 18: Neutral Connection
The engine start function is controlled by the RDC2/DC2 lug in the ATS enclosure. controller on the generator set. There are no engine start terminals on the Model RXT ATS. Ground the system according to NEC and local codes. 2.5.4... -
Page 19: Interface Module Connection
PWR and COM connections, the maximum cable generator set equipped with an RDC2 or DC2 length is 152 m (500 ft.) if one Model RXT transfer controller. If additional accessory modules such switch and no accessory modules are connected to the as a programmable interface module (PIM) or a generator set. -
Page 20: Optional Load Control Connection
HVAC thermostat connections and four other Complete the Startup Notification Form and register the non-essential loads). See TT-1574, Load Control equipment in the Kohler online warranty system within Module Instructions. 60 days of the initial startup date. Standby systems not registered within 60 days of startup are automatically registered using the manufacturer’s ship date as the... -
Page 21: Section 3 Operation
3.1 Model RXT Transfer Switch 3.3 ATS Control Sequence of Operation Operation The Model RXT transfer switch must be connected to a See Figure 3-2 for time delay settings. generator set equipped with the RDC2 or DC2 controller. The RDC2/DC2 generator set/transfer... -
Page 22: Time Delays
The load must be connected to the load control output to a Kohlerr Model RXT transfer switch. on the interface board of the Model RXT transfer switch. See the transfer switch operation and installation The engine start and load transfer time delays prevent manual for connection instructions. -
Page 23: Section 4 Service Disconnect, Se Model
Section 4 Service Disconnect, SE Model Note: This section applies only to service entrance 4.2 Source Circuit Breaker Reset model transfer switches, which are identified with the letters ASE at the end of the model The utility source circuit breaker can trip due to an designation. - Page 24 Notes Section 4 Service Disconnect, SE Model TP-6807 12/11...
-
Page 25: Section 5 Scheduled Maintenance
Section 5 Scheduled Maintenance 5.1 Introduction DANGER Regular preventive maintenance ensures safe and reliable operation and extends the life of the transfer switch. Preventive maintenance includes periodic testing, cleaning, inspection, and replacement of worn Hazardous voltage. or missing components. Section 5.4 contains a service Will cause severe injury or death. -
Page 26: Testing
Servicing the transfer switch. Hazardous voltage can Watch and listen for signs of excessive noise or cause severe injury or death. Deenergize all power sources vibration during operation. before servicing. Turn off the main circuit breakers of all transfer switch power sources and disable all generator sets After the switch transfers the load to the standby as follows: (1) Move all generator set master controller source, end the test and verify that the expected... -
Page 27: Other Inspections And Service
Signs overheating loose connections: operation of the transfer switch. See Section 5.4, discoloration of metal, melted plastic, or a burning Service Schedule, for the recommended maintenance odor. items and service intervals. Other evidence of wear, damage, deterioration, or Have an authorized distributor/dealer repair or replace malfunction of the transfer switch or its components. - Page 28 Notes Section 5 Scheduled Maintenance TP-6807 12/11...
-
Page 29: Section 6 Diagrams And Drawings
Section 6 Diagrams and Drawings Diagram or Drawing Drawing Number Page Single-Phase Enclosure Dimension Drawings 100--200 Amp Single-Phase Sheet 1 ............ADV-8190 1 of 2 Sheet 2 . - Page 30 Figure 6-1 Enclosure Dimensions, 100--200 Amp Single-Phase, ADV-8190, Sheet 1 of 2 Section 5 Diagrams and Drawings TP-6807 12/11...
- Page 31 Figure 6-2 Enclosure Dimensions, 100--200 Amp Single-Phase, ADV-8190, Sheet 2 of 2 TP-6807 12/11 Section 5 Diagrams and Drawings...
- Page 32 Figure 6-3 Enclosure Dimensions, 100--200 Amp Three-Phase, 3- and 4-Pole, ADV-8191 Section 5 Diagrams and Drawings TP-6807 12/11...
- Page 33 Figure 6-4 Enclosure Dimensions, 100--200 Amp Single-Phase, Service Entrance, ADV-8192, Sheet 1 of 3 TP-6807 12/11 Section 5 Diagrams and Drawings...
- Page 34 Figure 6-5 Enclosure Dimensions, 100--200 Amp Single-Phase, Service Entrance, ADV-8192, Sheet 2 of 3 Section 5 Diagrams and Drawings TP-6807 12/11...
- Page 35 Figure 6-6 Enclosure Dimensions, 100--200 Amp Single-Phase, Service Entrance, ADV-8192, Sheet 3 of 3 TP-6807 12/11 Section 5 Diagrams and Drawings...
- Page 36 Figure 6-7 Enclosure Dimensions, 400 Amp Single-Phase, ADV-8193 Section 5 Diagrams and Drawings TP-6807 12/11...
- Page 37 Figure 6-8 Enclosure Dimensions, 400 Amp Three-Phase, 3-Pole/208--240 Volts, ADV-8194 TP-6807 12/11 Section 5 Diagrams and Drawings...
- Page 38 Figure 6-9 Enclosure Dimensions, 400 Amp Three-Phase, 3-Pole/480 Volt and 4-Pole, ADV-8195 Section 5 Diagrams and Drawings TP-6807 12/11...
- Page 39 Figure 6-10 Enclosure Dimensions, 400 Amp Single-Phase, Service Entrance, ADV-8196, Sheet 1 of 2 TP-6807 12/11 Section 5 Diagrams and Drawings...
- Page 40 Figure 6-11 Enclosure Dimensions, 400 Amp Single-Phase, Service Entrance, ADV-8196, Sheet 2 of 2 Section 5 Diagrams and Drawings TP-6807 12/11...
- Page 41 Figure 6-12 Enclosure Dimensions, 100 Amp Single-Phase with Load Center, ADV-8197 TP-6807 12/11 Section 5 Diagrams and Drawings...
- Page 42 Figure 6-13 Wiring Diagram, 100--400 Amp Single-Phase, GM80663 Section 5 Diagrams and Drawings TP-6807 12/11...
- Page 43 Figure 6-14 Schematic Diagram, 100--400 Amp Single-Phase, GM80664 TP-6807 12/11 Section 5 Diagrams and Drawings...
- Page 44 Figure 6-15 Wiring Diagram, 100--400 Amp Service Entrance, GM80665 Section 5 Diagrams and Drawings TP-6807 12/11...
- Page 45 Figure 6-16 Schematic Diagram, 100--400 Amp Service Entrance, GM80666 TP-6807 12/11 Section 5 Diagrams and Drawings...
- Page 46 Figure 6-17 Wiring Diagram, 100--200 Amp Three-Phase, 3- and 4-Pole, GM80667 Section 5 Diagrams and Drawings TP-6807 12/11...
- Page 47 Figure 6-18 Schematic Diagram, 100--200 Amp Three-Phase, 3- and 4-Pole, GM80668 TP-6807 12/11 Section 5 Diagrams and Drawings...
- Page 48 Figure 6-19 Wiring Diagram, 400 Amp Three-Phase, 3-Pole/208--240 Volts, GM80669 Section 5 Diagrams and Drawings TP-6807 12/11...
- Page 49 Figure 6-20 Schematic Diagram, 400 Amp Three-Phase, 3-Pole/208--240 Volts, GM80670 TP-6807 12/11 Section 5 Diagrams and Drawings...
- Page 50 Figure 6-21 Wiring Diagram, 400 Amp Three-Phase, 3-Pole/480 Volts and 4-Pole, GM80671 Section 5 Diagrams and Drawings TP-6807 12/11...
- Page 51 Figure 6-22 Schematic Diagram, 400 Amp Three-Phase, 3-Pole/480 Volts and 4-Pole, GM80672 TP-6807 12/11 Section 5 Diagrams and Drawings...
- Page 52 Figure 6-23 Wiring Diagram, 100 Amp Single-Phase with Load Center, GM80675 Section 5 Diagrams and Drawings TP-6807 12/11...
- Page 53 Figure 6-24 Schematic Diagram, 100 Amp Single-Phase with Load Center, GM80676 TP-6807 12/11 Section 5 Diagrams and Drawings...
- Page 54 Notes Section 5 Diagrams and Drawings TP-6807 12/11...
-
Page 55: Appendix A Abbreviations
Appendix A Abbreviations The following list contains abbreviations that may appear in this publication. A, amp ampere cubic feet per minute est. estimated ABDC after bottom dead center center of gravity E-Stop emergency stop alternating current cubic inch displacement etc. et cetera (and so forth) analog to digital centerline... - Page 56 Motoren-und Turbinen-Union read only memory kilobyte (2 bytes) megawatt rot. rotate, rotating KBus Kohler communication protocol milliwatt revolutions per minute μF kilogram microfarad right side kg/cm kilograms per square N, norm. normal (power source) remote terminal unit...
- Page 57 Notes TP-6807 12/11...
- Page 58 Notes TP-6807 12/11...
- Page 60 For the nearest sales/service outlet in the US and Canada, phone 1-800-544-2444 KohlerPower.com Kohler Power Systems Asia Pacific Headquarters TP-6807 12/11 7 Jurong Pier Road Singapore 619159 E 2011 by Kohler Co. All rights reserved. Phone (65) 6264-6422, Fax (65) 6264-6455...
Need help?
Do you have a question about the RXT and is the answer not in the manual?
Questions and answers