R82 X:panda Manual
Hide thumbs
Also See for X:panda:
- User manual (36 pages) ,
- Mounting instruction (11 pages) ,
- Mounting instruction (8 pages)

Related Manuals for R82 X:panda


Summary of Contents for R82 X:panda
- Page 1 English manual © 2012 R82 A/S. All rights reserved. The R82 logo and the x:panda chairs are trademarks of R82 A/S. 07.2016 - rev. 015...
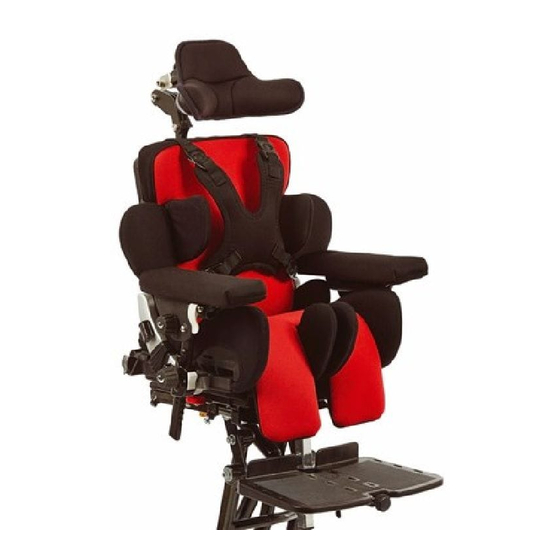
- Page 2 The many adjustment possibilities and wide range of accessories makes it possible to adjust the seat to an individual child’s need for comfort and support. The seat fits on a variety of seat bases from R82, making it suitable for both indoor and outdoor use.
-
Page 3: Table Of Contents
Growth from one size to another - depth adjustment ........21 Replacement of back - one size to another ............22 The x:panda seat on High-low:x frames ............23 The x:panda seat on Panda Fututra High-low frames ........24 The x:panda seat on Combi Frame:x ..............25 The x:panda seat on buggy frame ..............26 Transportation in motor vehicles ...............27... -
Page 4: Safety
Remove the CE-mark, when rebuilding the product or when using other than original R82 spare parts and fittings. The x:panda is constructed for one user only. Do not place more than one user in the x:panda. Never leave your child unattended in this product. Ensure constant supervision by an adult. -
Page 5: Ready For Use
* Adjust the back height (B) * Adjust the seat depth (C) * Adjust the leg angle (D) Further instructions can be found on page 6+7. The x:panda is now ready for use once you have fully read this manual. -
Page 6: Back Recline
(B). Turn the lock to the left and it is acti- vated, turn it to the right and it is deactivated. Always activate the lock after adjustment. The back on x:panda has dynamic movement. Move the small ring (C) up or down to adjust the range of movement. -
Page 7: Hip Supports - Individual Adjustment
HIP SUPPORTS - INDIVIDUAL ADJUSTMENT Angle, depth and width adjustment: Loosen the bolts (A) to adjust. Fasten at the desired position. Do not remove any of the bolts - only loosen to adjust. LEG SUPPORTS - INDIVIDUAL ADJUSTMENT Angle and depth adjustment: Loosen the bolt (A) to adjust. -
Page 8: Head Supports
HEAD SUPPORTS Mounting and height adjustment: Loosen the handle (A). Angle adjustment: Loosen the screws (B) and (C) with a spanner. Sideways adjustment: Loosen the screw (D). Fasten all screws at the desired position. When adjusting the head support, please be carefull not to get fingers caught bet- ween the back of the chair and the head support fiitting. -
Page 9: Fixed Side Supports
FIXED SIDE SUPPORTS Height adjustment: Remove the bolts (A). Place the supports in the desired position and remount the bolts. Width adjustment: Loosen the bolts (A). Fasten at the desired position. QUICK LOCKS FOR FIXED SIDE SUPPORTS Height adjustment: Remove the bolts (A). Place the side supports with quick locks in the desired position and remount the bolts. -
Page 10: Swing-Away Side Supports
SWING-AWAY SIDE SUPPORTS Height adjustment: Remove the bolts (A). Place the supports and remount the bolts. Width adjustment: Loosen the bolts (A). Fasten at the desired position. Swing-away function: Press the red button (B) to release. The carer should check and oil (synthetic oil) the swing away parts occationally - at least every 3 months. -
Page 11: Arm Rest
ARM REST Size 1+2+3 Height adjustment: Loosen the screw (A) and move it into desired height position. Fasten the screw. Loosen handle/screw (C) to move the arm rest into position. Fasten the handle/screw (hand- tight). Angling the arm rest cushion: Loosen the handle (B). -
Page 12: Tray, Swing-Away
ONLY FOR SIZE 1+2+3 A) Mounting and depth adjustment B) Width adjustment C) Angling the tray, by angling the arm rests. The tray can only be mounted on a x:panda equipped with arm rests. TRAY, TWO-ROD SYSTEM ONLY FOR SIZE 1+2+3... -
Page 13: Arm Rest For Tray
ONLY FOR SIZE 1+2+3 A) Angle ajdustment The toybar can only be mounted on a x:panda equipped with tray. GRIP HANDLE FOR TRAY ONLY FOR SIZE 1+2+3 A) Angle adjustment The grip handle can only be mounted on a x:panda equipped with tray. -
Page 14: Vests & Belts
VESTS & BELTS All vests and belts with 25 mm strap can be mounted on the seat. We recommend to use the fixlocks or belt guidances on the chair. Fixlocks: Use the fixlock (A) mounted on the chair to fa- sten and adjust all vests and belts. -
Page 15: Seat Wedges
SEAT WEDGES Depth adjustment: Remove the seat cushion and release the wed- ges from the velcro in the seat. Flip up the velcro (A) and place the wedges at the desired depth position. Replace the seat cushion. SEAT STRAP Depending on the desired leg abduction the seat strap is mounted in one of the three holes in the seat. -
Page 16: Foam Back Plate
FOAM BACK PLATE The foam back plate can be adjusted to fit the gap beneath the back. * If necessary, cut the foam plate with a knife to make it fit the gap. * Place the foam plate on the back. COVER PLATE ONLY FOR SIZE 4 The cover plate fits the gap beneath the back. -
Page 17: Non-Dynamic Gas Spring
NON-DYNAMIC GAS SPRING ONLY FOR SIZE 1+2+3 The standard gas spring can be replaced with a non-dynamic gas spring. Loosen the handle (A) to angle the back. Please be aware not to get your fingers caught betweeen the gas spring and the seat when angling (B). -
Page 18: X:panda Mounted On High-Low:x
X:PANDA MOUNTED ON HIGH-LOW:X To mount the seat: The interface and the footrest bar must be replaced on the old High-low frames. Place the seat adapter in the interface and push it all the way back, until it "clicks" into place. -
Page 19: Mounting The Seat On The High-Low:x Size 3
MOUNTING THE SEAT ON THE HIGH- LOW:X SIZE 3 ONLY SIZE 3+4 Mount the x:panda seat directly on the High- low:x size 3 frame. * Lead the enclosed screws though the seat frame (A) from below. Make sure the seat is securely fastened before use. -
Page 20: Growth From One Size To Another - Width Adjustment
GROWTH FROM ONE SIZE TO ANOTHER - WIDTH ADJUSTMENT Follow this description to perform a smooth adjustment of the seat width. Also read the in- structions on the next page concerning depth adjustment. Dismount the hip supports (A) at both sides. Dismount the metalplate (B). -
Page 21: Growth From One Size To Another - Depth Adjustment
GROWTH FROM ONE SIZE TO ANOTHER - DEPTH ADJUSTMENT Follow this description to perform a smoothly adjustment of the seat depth. Also read the in- struction on the previous page concerning width adjustment. Remove the two bolts (A) at both sides of the chair. -
Page 22: Replacement Of Back - One Size To Another
REPLACEMENT OF BACK - ONE SIZE TO ANOTHER Loosen the two bolts (A) Remove the two cross-point screws (B) Remove the six bolts (C) Remove the cover plate Remove the back stop device (D) (only size 1+2+3). Pull up the back plate (E) and remove. Replace the desired back plate (E) and push it all the way down. -
Page 23: The X:panda Seat On High-Low:x Frames
THE X:PANDA SEAT ON HIGH-LOW:X FRAMES The x:panda seat adjusts in 3 different widths. Each seat in each width can be mounted on different sizes of High-low:x frames. Please see the chart below to find the right size frame for your seat. -
Page 24: The X:panda Seat On Panda Fututra High-Low Frames
THE X:PANDA SEAT ON PANDA FUTUTRA HIGH- LOW FRAMES Mount a new interface on the High-low frames to mount the x:panda seats. Follow the instruction which follow the interface. Panda Futura Panda Futura High-low indoor High-low outdoor size 1 size 1 ●... -
Page 25: The X:panda Seat On Combi Frame:x
THE X:PANDA SEAT ON COMBI FRAME:X The x:panda seat adjusts in 3 different widths. Each seat in each width can be mounted on different sizes of Combi frames. Please see the chart below to find the right size frame for your seat. -
Page 26: The X:panda Seat On Buggy Frame
THE X:PANDA SEAT ON BUGGY FRAME The x:panda seat adjusts in 3 different widths. Each seat in each width can be mounted on different sizes of buggy frames. Please see the chart below to find the right size frame for your seat. -
Page 27: Transportation In Motor Vehicles
Please look at MEASURES in the back of this manual for the max load. indication. The x:panda seat on a R82 frame, is approved for transporting users in motor vehicles, when The approval is not valid on specially made the chair and frame are placed in forward-facing chairs and frames. -
Page 28: Position The Back Before Transportation
(A) MUST be hand- tightened before transportation. TRANSPORT FITTINGS ON A BUGGY FRAME Secure the x:panda seat on a buggy frame in a vehicle: * Mount the 4-point strap-type tiedown system in the vehicle. (Follow the manufactures instructions) * Mount the two fittings (A) with the symbol (B) on both sides of the pushchair frame. -
Page 29: Transport Fittings On The Combi Frame:x
TRANSPORT FITTINGS ON THE COMBI FRAME Placing the Combi Frame in the vehicle: 1. By use of a 4-point strap system, the frame is secured in the vehicle. (Follow instructions from the manufacturer of the vehicle). A 4-point strap-system, approved accor- Size 1+2 Size 3+4 ding to ISO 10542-2 or SAEJ2249, must... -
Page 30: Secure The Product In The Vehicle
SECURE THE PRODUCT IN THE VEHICLE * Mount the 4-point strap-type tiedown sy- stem in the vehicle. (Follow the manufacture instructions) 30° * Secure the pushchair to the vehicle, using the 4-point strap-type tiedown system. Use either a hook or a strap in the fitting. 15°... -
Page 31: Secure The Child In The Product
SECURE THE CHILD IN THE PRODUCT * Mount a hip-belt in the belt fittings in the seat and fasten the user. * Use the 3-point belt as shown on drawing to secure the user. The belt restraints should be adjusted as tightly as possible, consistent with user comfort. -
Page 32: Product Identification
PRODUCT IDENTIFICATION x:panda seat A) Serial number The label is placed in the seat under the cushion to the left. B) Manufacturer The label is places in the seat under the cushion to the right. High-low:x indoor and outdoor frame... -
Page 33: Product Identification
PRODUCT XXXXXX Max load: xxx kg IDENTIFICATION DMR ver.: XXXX Max load: xxx kg Art. no.: XXXXXXX Product: XXXXXXX - Size X (XX)XXXXXXXXXXXXXX(XX)XXXXXX(XX)XXXXXX Multi Frame A) Serial number The label is placed left on the front cross bar beneath the seat. B) Manufacturer The label is placed far left on the front cross bar beneath the seat. -
Page 34: Measurements
MEASUREMENTS x:panda x:panda x:panda x:panda Size 1 Size 2 Size 3 Size 4 mm (inch) mm (inch) mm (inch) mm (inch) Seat width (A) 160, 200, 240 200, 240, 280 260, 310, 360 340, 400, 460 (6¼,7¼,9¼") (7¼,9¼,11") (10¼,12,14") (13¼, 15½, 18") -
Page 35: Technical Data
PRODUCER TECHNICAL DATA Seat: PA6 - recyclable R82 A/S Foam: Flameproof Parallelvej 3 Cover: Gemma 8751 Gedved Denmark Frame: Powderpainted aluminium DISTRIBUTOR Please find your distributor on www.R82.com... -
Page 36: Maintenance
MAINTENANCE The x:panda cushion is removable and the cover can be washed at max. 40°. The condition of the foam cushion should be checked at least every six months and replaced if necessary. It is important to keep the frame clean to maintain the validity of the chair.
Need help?
Do you have a question about the X:panda and is the answer not in the manual?
Questions and answers