Table of Contents
Advertisement
Available languages
Available languages
Advertisement
Table of Contents

Related Manuals for Sanyo EM-S5002W


Summary of Contents for Sanyo EM-S5002W
-
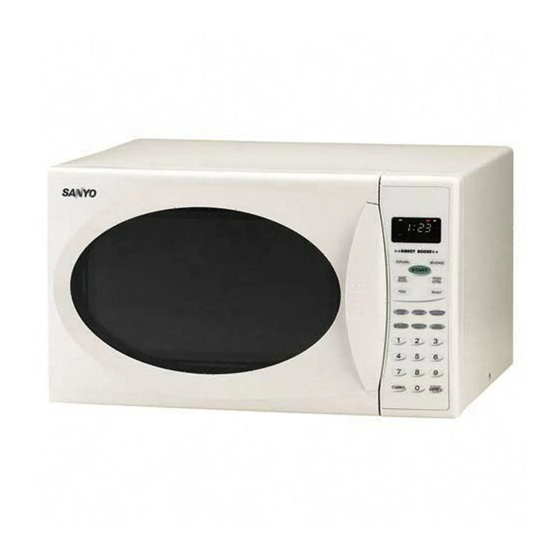
Page 1: Microwave Oven
INSTRUCTION MANUAL AND COOKING GUIDE EM-S5002W Microwave Oven Read these instructions carefully before using your microwave oven. If you follow the instructions, your oven will provide you with many years of good service. SAVE THESE INSTRUCTIONS... -
Page 2: Precautions To Avoid Possible Exposure To
State of California to cause cancer, and birth defects or other reproductive harm. Wash hands after handling. ENERGY EM-S5002W AC 120 V, 60 Hz 1450W 1000W 1.1 cu. -
Page 3: Table Of Contents
TABLE OF CONTENTS SAFETY Proper and Safe Use of Your Oven...4 Important Safety Instructions...5 Grounding Instructions ...6 Utensils...6-7 SETTING UP YOUR OVEN Names of Oven Parts and Accessories...8 Turntable Installation...8 Installation...9 OPERATION Control Panel and Features ...10 Setting Clock ...11 Child Lock-Out...11 Kitchen Timer ...12 Time Cooking ...12... -
Page 4: Safety
• Incorrect use of browning dish may cause the turntable to break. • Use carefully when cooking food in the microwave oven to avoid burning due to excessive cooking. • Use only the specified bag size when using Direct Access Popcorn. -
Page 5: Important Safety Instructions
Visible bubbling or boiling when the container is removed from the microwave oven is not always present. This could result in very hot liquids suddenly boiling over when the container is disturbed or a spoon or other utensil is inserted into the liquid. -
Page 6: Grounding Instructions
See following page for further instructions “Materials you can use in microwave oven or to be avoided in microwave oven.” Utensil Test: 1. Fill a microwave-safe container with 1 cup of cold water (250 mL) along with the utensil in question. -
Page 7: Utensils
May cause a fire in the oven. Plastic foam cups Plastic foam may melt or contaminate the liquid inside when exposed to high temperature. Wood Wood will dry out when used in the microwave oven and may split or crack. -
Page 8: Names Of Oven Parts And Accessories
NAMES OF OVEN PARTS AND ACCESSORIES Remove the oven and all materials from the carton. Your oven comes with the following accessories: 1 Turntable 1 Turntable roller rest 1 Instruction Manual Door Handle • Pull handle gently to open door. •... -
Page 9: Installation
2. Plug your oven into a standard 120-volt / 60-Hz household outlet. Be sure the electrical circuit is at least 15 amperes and that your microwave oven is the only appliance on the circuit. WARNING: Do not install oven over a range cooktop or other heat-producing appliance. -
Page 10: Operation
CONTROL PANEL AND FEATURES OPERATION (1) DISPLAY WINDOW Shows cooking time in minutes and seconds during cooking. Shows clock time when oven is not in use. (2) DIRECT ACCESS KEYPADS Preprogrammed to cook or reheat popular foods with minimal number of steps. -
Page 11: Setting Clock
OVEN SETTINGS One Beep: Oven accepts the entry. Two Beeps: Oven does not accept the entry. Check and re-enter. SETTING CLOCK To set the correct time of day, follow the steps below. Example: To set 3:15: Step Procedure Press CLOCK. Press 3, 1 and 5 to enter time of day. -
Page 12: Kitchen Timer
KITCHEN TIMER You can use the Kitchen Timer function independently, even while a cooking program is in progress. Example: To set timer for 3 minutes: Step Procedure Press KITCHEN TIMER. Press 3 0 0 for 3 minutes. Enter the amount of time that you want to count down using the number keys. -
Page 13: Multistage Cooking
MULTISTAGE COOKING Some recipes require different stages of cooking at different power levels to get better results. You can program oven for 2 cooking stages. Each stage can be programmed with a different power level and time. Step Procedure Follow steps 1 and 2 for TIME COOKING for the first stage. -
Page 14: Direct Access Cooking
DIRECT ACCESS COOKING The six Direct Access keys are preprogrammed to cook or reheat a variety of popular foods with a minimum number of steps. BAKED POTATO, FROZEN DINNER, and BEVERAGE allow you to cook several quantities of the same food. After you touch these keys, ENTER AMT appears in the display. - Page 15 One large or two (10-12 ounce) frozen entrees. 1. Press FROZEN ENTRÉE keypad twice. 2. For one entrée, just press START. For two entrees, press the number key 2. The preprogrammed cooking time appears: 1 entrée: 6 min. 00 sec. 2 entrees: 11 min.
-
Page 16: Defrost By Weight
DEFROST BY WEIGHT DEFROST BY WEIGHT allows you to easily defrost food. Use for more thorough defrosting of larger, dense frozen foods. You enter the weight and the oven selects the time and power levels. Example: To defrost 2.5 lbs. of ground beef: Step Procedure Press DEFROST BY WEIGHT... -
Page 17: Timed Defrost
TIMED DEFROST TIMED DEFROST allows you to quickly defrost food. Use for quickly defrosting smaller frozen foods. You enter the time and the oven selects the power level automatically. Example: To defrost for 6 minutes 30 seconds: Step Procedure Press TIMED DEFROST. Enter desired defrosting time by pressing number keys. -
Page 18: Defrosting Chart
DEFROSTING CHART Item Beef Ground Beef Turn over. Remove defrosted portion. Liver Drain Liquid. Separate pieces. Roasts Turn over. Cover ends with foil. Sirloin Steak Turn over. Rib or T-bone Turn over. Flank Steak Turn over. Stewing Meat Break apart. Pork Ground Pork Turn over. -
Page 19: Cook Meat By Weight
COOK MEAT BY WEIGHT Use this feature to cook meat items. You enter the type and weight of meat and the oven automatically sets the cooking time and power level. Example: To cook a 3.5 lbs. beef roast: Step Procedure Press COOK MEAT BY WEIGHT. -
Page 20: Cooking Guide
COOKING PRINCIPLES AND TECHNIQUES Advantages of microwave cooking are speed and efficiency. For warming, heating, and defrosting, nothing compares. Here are a few tips that will make microwaving easier and more enjoyable. Microwave Cooking Principles Because microwave cooking requires only one-quarter to one-third the time of conventional cooking, cooking principles become even more important. -
Page 21: Maintenance
TROUBLESHOOTING Check your problem by using the chart below and try the solutions for each problem. If the microwave oven still does not work properly, contact the nearest authorized service center. TROUBLE Oven will not start. • Electrical cord for oven is not plugged in. -
Page 22: Questions And Answers
This is normal. Q. Why is there steam coming out of the air exhaust vent? A. Steam is produced during cooking. The microwave oven has been made to vent this steam. Q. What is wrong when the oven light will not glow? A. -
Page 23: Warranty
SANYO MICROWAVE OVEN LIMITED WARRANTY In order to obtain warranty service, the product must be delivered to and picked up from an Authorized Sanyo Factory Service Center at the user’s expense, unless specifically stated otherwise in this warranty. The names and addresses of Authorized Sanyo Service Centers may be obtained by calling the toll-free number listed below. -
Page 24: Warranty
SANYO MICROWAVE OVEN LIMITED WARRANTY (cont.) EXCLUSIONS This warranty does not cover (A) the adjustment of customer-operated controls as explained in the appropriate model’s instruction manual, or (B) the repair of any product whose serial number has been altered, defaced or removed. -
Page 25: Operacion
PANEL DE CONTROLES Y CARACTERÍSTICAS OPERACIÓN (1) VENTANILLA DE INDICACIONES Muestra el tiempo de cocina en minutos y segundos durante la cocina. Muestra la hora del reloj cuando el horno no se está usando. (2) TECLAS DE ACCESO DIRECTO Preprogramadas para cocinar o recalentar en un mínimo número de etapas una diversidad de comidas populares. -
Page 26: Ajuste Del Reloj
SONIDO DE PITIDO Un pitido: El equipo acepta el valor ingresado. Dos pitidos: El equipo no acepta el valor ingresado. Verifique y vuélvalo a ingresar. AJUSTE DEL RELOJ Para ajustar la hora correcta del día, siga los pasos siguientes. Ejemplo: Para ajustar las 3:15: Paso Procedimiento CLOCK... -
Page 27: Temporizador De Cocina
TEMPORIZADOR DE COCINA El temporizador de cocina puede usarse independientemente, aun mientras un programa de cocina se encuentra en progreso. Ejemplo: Para ajustar el temporizador para 3 minutos: Paso Procedimiento KITCHEN TIMER. Presione Presione 3, 0, y 0 para ajustar 3 minutos. Ingrese la cantidad de tiempo restante que quiere utilizando las teclas numéricas. -
Page 28: Power Level
COCCIÓN EN MÚLTIPLES ETAPAS Algunas recetas requieren diferentes etapas de cocción a distintos niveles de potencia para obtener mejores resultados. Se puede programar el equipo para 2 etapas de cocción. Cada etapa puede ser programada con diferente nivel de potencia y tiempo de cocción. Paso Procedimiento Siga los pasos 1 y 2 de TIME COOKING... - Page 29 COCCIÓN POR ACCESO DIRECTO Las seis teclas de Acceso Directo vienen preprogramadas para cocinar o recalentar en un mínimo número de etapas una diversidad de comidas de consumo habitual. BAKED POTATO, FROZEN DINNER, y BEVERAGE le permite al usuario cocinar varias cantidades de la misma comida.
- Page 30 Una grande o dos (10 a 12 onzas) entrada congelada. 1. Presione la tecla FROZEN ENTRÉE dos vezes. 2. Para una entrada, solo oprima START. Para dos entradas, oprima la tecla numérica 2. Aparecerá el correspondiente tiempo preprogramado de cocción: 1 entrada: 10 min.
- Page 31 DESCONGELACIÓN POR PESO La descongelación por peso le permite descongelar la comida congelada con facilidad. Emplear para un descongelamiento más completo de alimentos congelados más grandes o densos. Los niveles de potencia y los tiempos se determinan automáticamente cuando se introduce el peso de la comida. Ejemplo: Para la descongelación de 2,5 lbs.
- Page 32 DESCONGELACIÓN POR TIEMPO TIMED DEFROST le permite descongelar alimentos rápidamente. Utilícelo para descongelar rápidamente cantidades pequeñas de comida. El usuario ingresa el tiempo requerido y el equipo selecciona automáticamente la potencia. Ejemplo: Para descongelar por 6 minutos y 30 segundos: Paso Procedimiento Presione TIMED DEFROST...
- Page 33 GRÁFICA DESCONGELACIÓN Producto Durante la descongelación Carne Carne Molida Dé la vuelta. Saque las partes descongeladas. Hígado Escurrir el liquido. Separe las partes. Asados Dé la vuelta. Cubra los extremos con laminilla. Bistecs Dé la vuelta. Costilla Dé la vuelta. Bistec del Ijar Dé...
- Page 34 COCCIÓN DE CARNE POR PESO Use esta prestación para cocinar productos cárnicos. El tiempo de cocción y el nivel de potencia quedan establecidos automáticamente cuando el usuario ingresa el tipo y peso del alimento a cocinar. Ejemplo: Para cocinar una carne asada de 3.5 lbs.: Paso Procedimiento Presione COOK MEAT BY WEIGHT.
- Page 35 PRINCIPIOS Y TÉCNICAS DE COCCIÓN Las ventajas de cocinar con un horno de microondas son la velocidad y la eficiencia. Para entibiar, calentar y descongelar no admite comparación. He aquí algunos consejos que harán el proceso de cocción con microondas más sencillo y placentero. Principios de la cocción con microondas Dado que la cocción con microondas requiere sólo entre un cuarto y un tercio del tiempo de la...
- Page 36 LOCALIZACIÓN DE FALLAS Consulte su problema utilizando el cuadro mostrado más abajo y pruebe las soluciones sugeridas para cada uno. Si el horno de microondas continuara funcionando mal, comuníquese con el centro de reparaciones autorizado más cercano a su domicilio. PROBLEMA CAUSA PROBABLE El horno no arranca.
-
Page 37: Preguntas Y Respuestas
PREGUNTAS Y RESPUESTAS P. Cuando el horno se enchufa por primera vez a un toma corriente de pared, no opera correctamente. ¿Qué es lo que funciona mal? R. El microprocesador utilizado para controlar el equipo puede encontrarse temporariamente bloqueado y no funcionar como ha sido programado. Desenchufe el horno del tomacorriente de pared y luego vuélvalo a enchufar. -
Page 38: Garantía
Con el fin de obtener el servicio de garantía, deberá enviarse e ir a buscar el producto a un Centro de Servicio de Fábrica Autorizado por Sanyo a cargo del usuario, a menos que se mencione lo contrario en esta garantía. - Page 39 GARANTÍA LIMITADA DEL HORNO DE MICRONDAS SANYO EXCLUSIONES Esta garantía no cubre (A) el ajuste de los controles operados por el usuario como se explica en el manual de instrucciones del modelo apropiado, ni (B) la reparación de ningún producto cuyo número de serie haya sido alterado, deformado o extraído.
-
Page 40: Quick Reference
QUICK REFERENCE CLOCK 1. Press CLOCK. 2. Press numbers to set time. 3. Press CLOCK. CHILD LOCK-OUT To set: 1. Press and hold STOP/RESET for 3 seconds. Indicator Lock lights. To cancel: 1. Press and hold STOP/RESET for 3 seconds. Indicator Lock disappears.