Table of Contents
Advertisement
Quick Links
Advertisement
Table of Contents

Summary of Contents for Adaltis NEXgen
- Page 1 ANUAL Read this operator’s manual carefully before using NEXgen...
-
Page 2: Table Of Contents
NEXgen – User’s Manual ABLE OF CONTENTS Introduction ................................5 Identification data ............................. 5 Copyright ................................6 Conformity to International and European regulations ..................6 Using the manual .............................. 6 Symbols ................................6 Intended use and general description ......................7 1.6.1... - Page 3 NEXgen – User’s Manual 2.1.22 Connections ............................29 Precautions and operating limitations ......................29 2.2.1 General precautions............................ 29 2.2.2 Health precautions ............................29 2.2.3 Electric safety .............................. 30 2.2.4 Environmental requirements ........................31 2.2.5 Waste disposal ............................31 Main information for installation by the operator ..................31 Operating procedure ..............................
- Page 4 NEXgen – User’s Manual 3.8.3 Report layout page ........................... 108 3.8.4 Run page ..............................109 3.8.5 Service page .............................. 111 Maintenance ................................112 General rules ..............................112 Responsibilities .............................. 113 Daily maintenance procedure ........................113 Weekly maintenance procedure ........................113 4.4.1...
-
Page 5: Introduction
This is the Operator’s Manual for the NEXgen instrument, an automatic analyzer for enzyme immunoassay kits on microplates and IFA kits on slides. This document must be considered as an integral part of the NEXgen instrument and the information herein must carefully be read by the operator before using the instrument. -
Page 6: Copyright
NEXgen – User’s Manual OPYRIGHT The Operator’s Manual is an integral part of the NEXgen instrument, its content is the exclusive property of Adaltis Srl, all rights reserved. Any disclosure, unauthorized copy of its contents or transfer to third-party is forbidden without having a previous license by Adaltis Srl. -
Page 7: Intended Use And General Description
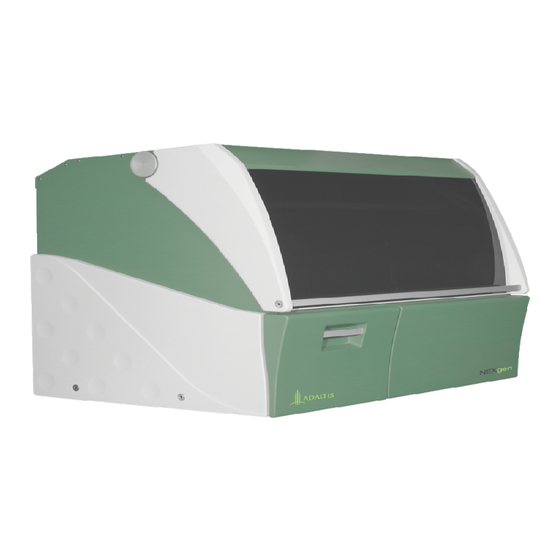
1.6.2 G ENERAL DESCRIPTION The NEXgen is an open system able to process both ELISA microplate and IFA slide tests designed for high volume throughput and multiple assay applications. - Page 8 Image 1- NEXgen The NEXgen is equipped with 3 robotic arms. Two of them are located in the working area, one is used for pipetting and liquid management, and the other for the wash manifold. The third robotic arm is located under the working area and devoted to moving the microplates holder and the IFA slides racks both in the working area and in the reading area.
- Page 9 The NEXgen is also able to process up to 20 IFA slides per run. In this case, the maximum number of samples is related to the IFA slides configuration in terms of number of wells, considering the capacity of 5 racks, each can hold 4 IFA slides.
-
Page 10: Environmental Protection Instructions
NEXgen instrument an easy to use instrument. NVIRONMENTAL PROTECTION INSTRUCTIONS 1.7.1 D ISPOSAL PRECAUTIONS NEXgen must be considered as a non household waste and its waste must be disposed of in conformity to the end-user’s national laws on electric and electronics waste. -
Page 11: Decontamination
1.7.2 D ECONTAMINATION Decontamination of NEXgen must be carried out by wearing a lab coat in order to shelter your clothes from contaminating agents and protect the skin from the contaminating agents exposure, disposable latex or vinyl gloves, to prevent the direct contact with the potentially contaminated NEXgen parts and a facial mask, to protect the mucosae, eyes, nose and mouth from any potential contaminating agents. -
Page 12: Package Contents
NEXgen – User’s Manual SED TIPS CASE DECONTAMINATION Remove the used tips case from its position and make sure any left tips are removed from the inside; dispose of the tips in the supplied special containers. Clean the case by using an absorbent towel soaked in B solution. - Page 13 NEXgen – User’s Manual Code Description Quantity 21890040 EU Power cord 21890370 USA Power cord 30214380 Valve drain pipe 30214390 External waste tank 30502560 NEXgen transportation handles kit 19901070 Pipettors calibration tool 19901080 Manifold calibration tool 19901090 Aspiration needle cleaning tool...
-
Page 14: General Information
Image 4 - Samples rack NEXgen is supplied with 6 sample racks that can be removed and loaded on the instrument allowing them to slide on the working area slots. The insertion of test-tubes with different diameters into the rack and their support are facilitated by springs that ensure the stability. -
Page 15: Disposables Rack
Image 5 - Dilution plate rack NEXgen is supplied with 2 removable racks where both dilution strips and disposable tips can be loaded. Each rack consists of 5 positions; it can be loaded on the instrument by sliding it on the working area slots. -
Page 16: Used Tips Case
Image 7 - Used tips case The used tips case is in a raised position on the working area, on the right side of NEXgen. The software manages the release of the tips to happen randomly throughout the case length, avoiding the tips to accumulate in a single area of the case. -
Page 17: Reagents Rack
Image 8 - Reagents rack NEXgen is supplied with 6 reagents racks that can be removed and loaded on the instrument allowing them to slide on the working area slots. Each single rack is identified by a unique barcode. Inside the rack, each... -
Page 18: Microplates Holder
NEXgen is supplied with 6 microplate holders, each for a 96 well microplate. 2.1.6 IFA SLIDES RACK Image 10 - IFA slides rack NEXgen is supplied with 2 IFA slide racks, 4 slides each. NEXgen can contain up to 7 IFA slide racks. -
Page 19: Reading System
2.1.7 R EADING SYSTEM Image 11 - Reading system The reading system is located in the lower part of NEXgen. The microplate robotic arm moves the microplate from the working area to the retractable cart of the reader. Reading system specifications Dynamic 0 - 3.3 OD... -
Page 20: Barcode Reader
NEXgen – User’s Manual 2.1.8 B ARCODE READER Image 12 - Barcode reader The barcode reader is on the external upright of the y-axis. Any resource loaded on NEXgen is identified by the barcode reader. Barcode reader specifications Type High Speed Laser Scan... -
Page 21: Barrier Sensors
Image 13 - Barrier sensors NEXgen is equipped with 4 safety barrier sensors. 2 of them are placed horizontally along the whole run of the robotic arm; the other 2 are placed vertically, on the block of the external upright of the y-axis, one on the left and one on the right. -
Page 22: Microplate Robotic Arm
NEXgen – User’s Manual 2.1.10 M ICROPLATE ROBOTIC ARM Image 14 - Microplate robotic arm The microplate robotic arm has independent movements on the x-, y- and z-axes; it allows moving the microplate both from the loading to the working position and from the working position to the reader (placed under the working area). -
Page 23: Shaker-Incubator Group - Optional
NEXgen – User’s Manual The incubation of the microplates and IFA slides occurs in the same position where they are loaded. The temperature of the heating device is controlled by a NTC type sensor. The firmware of the incubator control board works by applying a proper power to the heating device. The maximum error of + / - 0.5 C° is guaranteed by the performances of this closed loop control system. -
Page 24: Pipetting System
IPETTING SYSTEM Image 17 - Double pipetting system The NEXgen double pipetting system assembled on one of the robotic arms, uses both the 1000 µL disposable tips (for the reagents dispensing), and the 200 µL disposable tips (for the samples dilution/dispensing). -
Page 25: Washing System
Image 18 - Tanks drawer NEXgen is equipped with 5 tanks, arranged in a specific drawer, for 5 different wash buffers; an additional tank is available for distilled water used for the cleaning of the washing system at the end of each session. - Page 26 NEXgen – User’s Manual Image 19 - Waste liquids tank Waste liquids are collected in an 8 liters tank equipped with a gravimetric sensor for the liquid level check that is performed at the start of each new run. If the waste tank is full or it does not allow to collect the waste liquids deriving from the current session, the operator is required to empty the waste tank from the load tanks screen prior to starting a new run.
- Page 27 NEXgen – User’s Manual Image 20 - Manifold The microplates washing is carried out by a 16-needle manifold, 8 long needles for the aspiration and 8 short needles for the dispensing. Washing cycles, volume and soak time can be programmed per each test.
-
Page 28: Workstation Minimum Requirements
Operating System Windows 7, Windows 8, Windows 8.1 Microsoft.NET Framework 2.1.17 A PPLICATION SOFTWARE SPECIFICATIONS OpenLAB For the operator to run the tests on NEXgen LabFLOW For the product specialist to create the methods 2.1.18 S IZES Length 1300mm / 51.181in Height 980mm / 38.582in... -
Page 29: Power Requirements
RECAUTIONS AND OPERATING LIMITATIONS 2.2.1 G ENERAL PRECAUTIONS In order to ensure a proper use of the NEXgen instrument, it is recommended that the general precautions listed below are followed: • The installation must be carried out by NEXgen Personnel or by properly trained staff;... -
Page 30: Electric Safety
2.2.3 E LECTRIC SAFETY NEXgen declares that all the internal parts of the NEXgen instrument have been designed and implemented in order to prevent any possible electric risk for the operator. Shock hazard exists if the grounding terminal is damaged or disconnected. In case this... -
Page 31: Environmental Requirements
2.2.4 E NVIRONMENTAL REQUIREMENTS Install NEXgen on a level surface in a place where a constant temperature and a proper humidity level are guaranteed. Avoid direct exposure to sunlight. Only connect the NEXgen plugs to the properly grounded power outlets. - Page 32 • Remove the two grey-colored side carters by unscrewing the screws with an Allen wrench; • Screw the transportation handles in their seats; • Place the NEXgen instrument on a flat level surface capable of supporting a 220 Kg weight;...
- Page 33 NEXgen – User’s Manual Image 22 - Outlets board • Connect the power cord to the NEXgen power outlet, on the right side of the instrument, then to a grounded electric outlet; • Connect the LAN cord to the NEXgen LAN outlet and to the Computer LAN outlet;...
-
Page 34: Operating Procedure
The calibration and regulation procedures must be performed by technical staff authorized and trained by NEXgen. Operators working on NEXgen must have a good working knowledge of in vitro diagnostics tests (IVD). While the instrument is in use the normal precautions for good laboratory practice have to be followed in order to achieve a proper safety level. -
Page 35: Reagents And Consumables
Urine: prepare sufficient volumes of sample in special test-tubes and store them in a refrigerator until the session is launched. DENTIFICATION OF SAMPLES The NEXgen instrument is equipped with a barcode reader on the external of y-axis. The barcoded samples are identified through the barcode reader. INIMUM VOLUME OF SAMPLE The minimum volume of sample is the dead volume plus the sample volume necessary to run the assay. -
Page 36: Before Programming An Assay
Make sure the drainpipe is placed into the specific tank or into the centralized drain if available. ESSION PROGRAMMING RUNNING AND RESULTS The following instructions must be performed in order to run a complete session on NEXgen. The programming instructions are common to all tests. NOTE: The tests mentioned in this Manual are used only as examples. -
Page 37: Startup Screen
Once clicked on connect new or connect selected, if the access door to the working area is closed, the NEXgen instrument performs a self-test. If the access door is opened, a Message Box warning the operator to close the door is displayed. -
Page 38: Self-Test Report
NEXgen – User’s Manual Image 24 - Message Box - racks unloading After performing the self-test, if any rack has been left on the working area, a Message Box will show up warning the operator to remove the racks. Once removed, click OK to access the selftest report screen. - Page 39 NEXgen – User’s Manual • overall outcome of the self-test. The self-test report contains the following information: • instrument name; • serial number; • controller version; • list of single subsystems on which the self-test has been performed. • Date and time of the self-test precede each subsystem and Started passed option follows. If the self-test, related to a single subsystem, failed the Started passed option is followed by False.
-
Page 40: Main Menu
NEXgen – User’s Manual 3.3.3 M Image 26 - Main menu - load session From the main menu screen click on load session. 3.3.4 L ESSION From the load session screen, the software displays the tests command as the only available operation. The... - Page 41 NEXgen – User’s Manual Image 27 - Load session - tests Tests selection is the first operation to be done in order to load a session. From the load session screen click on tests to access the select tests screen.
-
Page 42: Select Tests
Image 28 - Select tests A scroll bar divides the select tests screen into two sections. A list of all tests installed on NEXgen is displayed on the left; on the right, under the SELECTED option, all tests selected from the installed tests list and to be run in the current session will be displayed. -
Page 43: Load Samples
NEXgen – User’s Manual From the select tests screen, in case an IFA test is selected, it is possible to choose if the controls (Positive and Negative) have to be dispensed on every slide or only on the first one, or if the controls do not have to be dispensed. - Page 44 NEXgen – User’s Manual • graphical representation of samples rack; • area for samples tubes programming. ELECTING SAMPLES TUBES TYPE Image 31 Load samples - samples tube-type The OpenLAB software proposes the 13x75 mm samples tube type as default. The drop down menu, next to the samples tube type option, contains a series of samples tubes with different sizes.
- Page 45 NEXgen – User’s Manual In case samples are barcoded, click on load from barcode in the load samples screen. A Message Box with information about the rack positioning on the instrument appears on the monitor. The flashing green LEDs located in the working area on the slots where on which the rack has to be loaded alerts the operator on where the rack has to be positioned.
- Page 46 NEXgen – User’s Manual O BARCODED SAMPLES Image 34 - Load samples with no barcode In case the samples have no barcode, click on the first test-tube on the right and start programming the samples by following the instructions available at the Loading the samples in the rack paragraph.
- Page 47 NEXgen – User’s Manual The blue triangle symbol is displayed under the clicked position if no test is ordered to that sample. The same blue triangle symbol is displayed under the rack number if no test is ordered to one or more clicked samples.
- Page 48 NEXgen – User’s Manual If no code is entered by the operator in the sample code field, the software automatically and progressively generates numerical codes related to each sample starting with 1. If the operator enters a numerical code related to a sample then the next one, if not entered manually , is automatically generated by the software as a progressive to the one previously entered by the operator.
- Page 49 The settings in the methods programming software LabFLOW can be made by the NOTE: personnel duly trained by NEXgen. It is possible to run different tests in the same session, both in duplicate and in single. NOTE: Samples run on the same test must have the same number of replicates.
- Page 50 NEXgen – User’s Manual UT SAMPLES IN THE RACK Image 39 - Load samples - loading the samples in the rack Put the test-tube containing the samples into the previously clicked position on the rack. To load the next sample, click on the next position on the samples rack and repeat the Enter samples data, if needed, and Order tests on samples procedures.
- Page 51 NEXgen – User’s Manual Image 41 - Load samples - clean all To delete the whole programming of samples, click on clean all. AST LOADING OF SAMPLES Entire rack Image 42 - Load samples - add samples If entering the sample data is not necessary and all samples in a rack have to be run against the same tests, it is possible to quickly load the entire rack - 24 samples –...
- Page 52 NEXgen – User’s Manual Image 43 - Load samples - add samples in the whole rack Once all samples are loaded, the add samples command is no longer available and the nearby box displays the number 0, indicating that the whole rack has been loaded.
- Page 53 NEXgen – User’s Manual 9 positions on the rack are automatically loaded. Put the 9 test-tubes containing the samples in the positions right next to the first. Next to the add samples command, the number 14 is displayed indicating the remaining positions in the rack where the operator can load further samples.
- Page 54 NEXgen – User’s Manual depends on the hardware configuration of each single NEXgen and particularly on the presence of at least 1 shaker. Image 46 - Message Box - insufficient resources to execute the run AMPLES RACK LOADING ON INSTRUMENT AND RACK READING BY BARCODE READER Once the samples are placed in the rack, click on load.
- Page 55 NEXgen – User’s Manual Image 48 - Flashing LED working area The flashing green LEDs located on the working area at the slots on which the rack has to be loaded, alert the operator on where the racks must be positioned. The y-axis, equipped with the barcode reader, takes position from the rack at a distance set by the manufacturer to identify the rack content.
- Page 56 NEXgen – User’s Manual Image 49 - Message Box - samples loaded correctly If the rack is correctly loaded and the information given by the barcode reader correspond to what entered by the operator, a Message Box indicating the correct rack loading shows up for a few seconds. Click on the timer on the left to keep the Message Box on the monitor.
- Page 57 NEXgen – User’s Manual Image 51 - Message Box - remove samples rack to fix identification issues If anomalies are not ignored, by clicking on No, another Message Box asking the operator to remove the samples rack to fix the identification issues shows up.
- Page 58 NEXgen – User’s Manual Image 53 - Load samples - rack position information The following symbols indicate what the barcode reader has identified: X = missing test-tube = test-tube loaded correctly ? = test-tube put in a different position than the one programmed during the programming Place the correct number of test-tube(s) in the position identified with “X”...
- Page 59 NEXgen – User’s Manual RAPHIC INDICATION OF LOADED RACKS NUMBER Image 55 - Load samples - graphic indication of racks number The squared symbols on the right of the screen, under the samples rack, indicate the number of samples racks loaded on the instrument.
- Page 60 (96-4)*7 = 644 samples can be scheduled and processed within a single session. In this situation, the NEXgen instrument doesn’t have enough room on the working area, at the beginning of the working session, to accommodate all the necessary resources (i.e. samples tips) to fully process all the programmed samples.
- Page 61 NEXgen – User’s Manual subsequent loading of reagents racks and supply the resources on disposables racks necessary to complete the samples processing. Once clicked ok from the Message Box (Image 57 - Message Box - confirmation of samples loading ending) the load reagents screen shows up.
- Page 62 NEXgen – User’s Manual Image 59 - Message Box - unloading samples racks instructions Click ok from the Message Box. Once clicked ok, a series of Message Boxes, equal to the number of samples racks that have to be removed, shows up indicating the rack number and position.
- Page 63 NEXgen – User’s Manual Image 61 – Message Box - samples rack correctly unloaded Unload all the samples racks from the working area by following the above instructions. Proceed to loading reagents and disposables racks on the instrument as usual, then start the session.
- Page 64 NEXgen – User’s Manual Once this operation has been completed, the operator is asked to reload the already identified samples racks. Image 63 - Message Box – reload samples rack by S/N At the same time, the LED corresponding to the rack to be reloaded starts flashing green.
- Page 65 NEXgen – User’s Manual Image 64 - Samples rack S/N Reload the rack on the instrument and click ok from the Message Box. The OpenLAB software will re- identify positively both the samples rack and the samples it contains. In case either the samples rack or the samples do not match to what required by the software, a specific Message Box displays the anomalies and helps the operator to properly fix the issues.
-
Page 66: Load Reagents
NEXgen – User’s Manual Image 65 - Tips holder refilling 3.3.7 L OAD REAGENTS Image 66 - Load reagents screen The load reagents screen contains the following options: • information on reagents vials to be loaded on the rack (VIAL INFORMATION box);... - Page 67 NEXgen – User’s Manual OAD REAGENTS IN THE RACK Image 67 - Load reagents - reagents position In the reagents rack that is displayed in the load reagents screen, the circled positions defined by the software where the reagents have to be loaded are highlighted in grey.
- Page 68 NEXgen – User’s Manual • position; • required reagent volume; • vial type; • reagent type. Image 69 - Load reagents - show rack information Click on show rack information to display short fixed information about the single reagents that have to be placed on the rack.
- Page 69 NEXgen – User’s Manual When a so programmed test is executed in OpenLAB, the fields vial lot code and vial expiry date in the LOT FOR REAGENT box are available in the load reagents screen and it is possible to enter specific values for each single reagent.
- Page 70 NEXgen – User’s Manual EAGENTS RACK LOADING ON INSTRUMENT AND RACK READING BY BARCODE READER Image 71 - Message Box - reagents rack loading A Message Box providing information about the rack positioning on the instrument shows up. Image 72 - Flashing LED - working area The flashing green LEDs, that are at the slots on which the rack is to be loaded on the working area, alert the operator where to position the rack.
- Page 71 NEXgen – User’s Manual • identification of the rack by reading the barcode in front of the rack; • identification of the reagents by reading the barcode on the vial, if it is equipped with; • identification of the empty positions reading the barcode inside each single rack position.
- Page 72 NEXgen – User’s Manual = reagent loaded correctly Remove the rack, load the missing reagents in the positions with x symbols. Image 76 - Message Box - reagents rack removed A Message Box warning the operator that the reagents rack has been removed and that it is necessary to reload it before proceeding with the session programming shows up.
-
Page 73: Load Disposables
NEXgen – User’s Manual Inside each squared symbol the rack number is also displayed. The accent color squared symbol indicates the rack that appears on the monitor on which the operator is working while the black ones indicate the reagents racks that have been previously loaded. In case the operator needs to retrieve a rack previously loaded, click the corresponding accent color squared symbol. - Page 74 NEXgen – User’s Manual • graphic indication of the racks number needed for the session. Dilution plates and samples/reagents disposables tips are indicated by the generic term “disposables”. From the load disposables screen the loading of dilution plates and tips in the racks are performed.
- Page 75 NEXgen – User’s Manual ILUTION STRIPS RACK LOADING ON INSTRUMENT Image 81 - Message Box - dilution plates rack loading A Message Box indicating where the rack has to be loaded on the instrument appears on the monitor. Image 82 - Flashing LED - working area The flashing green LEDs located in the working are at the slots on which the rack must be loaded alert the operator where to position the rack.
- Page 76 NEXgen – User’s Manual • identification of the rack by reading the barcode on the end of the rack; The change of LEDs from a flashing green to a fixed red color indicates the rack was correctly loaded. Once the dilution plates rack are loaded on the instrument, click ok from the Message Box displayed on the monitor.
-
Page 77: Load Plates
NEXgen – User’s Manual RAPHIC INDICATION OF RACKS NUMBER REQUIRED FOR SESSION Image 84 - Load disposables – graphic indication of racks number The squared symbols on the right of the screen indicate the number of disposables rack loaded on the instrument. - Page 78 NEXgen – User’s Manual Image 85 - Load plates screen OAD MICROPLATES Image 86 - Load plates - mouse hover on microplate wells The light blue colored wells contain the calibrators/controls while the samples are contained in the darker ones.
- Page 79 NEXgen – User’s Manual UT STRIPS IN THE MICROPLATE FRAME Image 87 - Load plates - loading putting the strips in the microplate frame Place the requested strips into the microplate frame and load the microplate in the microplates holder, then click on load.
- Page 80 NEXgen – User’s Manual Image 89 - Message Box - loading position empty In case the loading position is empty, a Message Box highlights this anomaly. Place the holder in the E position and click ok from the Message Box.
- Page 81 NEXgen – User’s Manual SLIDES Image 90 - Load plates - IFA slides The name of the IFA slide is displayed in the upper part of the slide itself. As for the microplates, the light blue colored wells contain the controls while the samples are contained in the darker ones.
- Page 82 NEXgen – User’s Manual IFA slides have to be loaded by following the order proposed by the OpenLAB software. Make sure they are slid through the proper rails and pay attention they properly reach the back of the spring. Image 93 - IFA slide stop...
-
Page 83: Load Tanks
NEXgen – User’s Manual RAPHIC INDICATION OF LOADED HOLDERS NUMBER Image 94 - Load plates - graphic indication of racks number The squared symbols on the right of the screen indicate the number of microplates and IFA slides holders loaded on the instrument. Also, the rack number appears inside each squared symbol. The accent squared symbol indicates the holder that appears on the monitor on which the operator is working. - Page 84 NEXgen – User’s Manual Positions for the tanks containing the wash buffers to be filled and loaded for the program execution are shown as rectangular symbols. An “!” symbol showing up informs that the volume detected in the tank is not sufficient for concluding the session.
- Page 85 NEXgen – User’s Manual If the waste liquids level in the tank is such not to allow the running of the programmed session, the start empty waste command is clickable ①. A red squared symbol flanked by the waste liquids volume strengthens the need to empty the tank.
-
Page 86: Run Session
NEXgen – User’s Manual 3.3.11 R UN SESSION Image 100 - Run session - session start Under the command bar, the estimated time to run the session is displayed. In case the session is in samples continuous loading mode (refer to Samples continuous... - Page 87 NEXgen – User’s Manual ISPLAY THE SESSION STATUS Image 102 - Run session - session status display Run status box, representing the status of the current session and the time needed to execute each single step, can eventually be displayed in the run session screen.
- Page 88 NEXgen – User’s Manual Blue Reagent dispensing Green Reading Light coral Shaking By scrolling the bar at the bottom of the screen, it is possible to zoom in and out so that the operator can display either the details or the whole scheduling of the current session.
- Page 89 From the run session screen, if necessary, it is possible to pause the instrument by clicking on pause. The current session is then stopped, the access door safety devices inactivated so that the operator can open the NEXgen and the internal light of the instrument turns on. Click on resume to resume the current session.
- Page 90 NEXgen – User’s Manual Image 108 - Run session - light off EPORT From the run session screen, click on Report to display and print the session report. The session report provides information about the samples positioning both in the microplate and in the IFA slides.
- Page 91 NEXgen – User’s Manual Image 111 – Message Box – Session completed From the run session screen click on results to display and/or print the results of the just completed session. Image 112 - Run session - session results...
- Page 92 NEXgen – User’s Manual Image 113 - Run session - results preview Once clicked, the Results preview window is displayed, providing a short list of the optical density (OD) values of the calibrators, controls and samples. If two or more tests were run in the same session, click on the drop down menu next to the selected test and chose the test whose preview has to be displayed.
- Page 93 NEXgen – User’s Manual Once the Results report is displayed, click on print to print it ESULTS REPORT STRUCTURE Image 115 - Results report – session data and microplate absorbance The Results report consists of the following data: Session data •...
- Page 94 NEXgen – User’s Manual Image 116 - Results report - interpolation curve • Results processing and interpretation • Information related to calibration curve calculus • Graphic representation of the curve for those tests requiring a standard curve for results interpretation •...
- Page 95 NEXgen – User’s Manual • Range: acceptable range • Obtained values: values actually obtained in the session • Passed: Yes, for the values that fall in the acceptable range, No for those values outside the acceptable range Controls and calibrators data •...
-
Page 96: End Of Work
NEXgen – User’s Manual • Position: position in the microplate • O.D.: measured OD values • Concentration: sample concentration value • Result: interpretation If the test is run in duplicate, both values, mean and CV%, are listed in the Results report. -
Page 97: Clean The Washing System
NEXgen – User’s Manual 3.4.1 C LEAN THE WASHING SYSTEM Image 120 - End of work - clean washing system From the end of work screen, click on clean washing system ① to clean the washing system by using the distilled water contained in the tank number 6, identified by the red label, and wait for the end of the process. - Page 98 NEXgen – User’s Manual Image 122 - End of work - stop emptying waste liquid tank To stop the tank emptying, click on end empty waste ③. Make sure the drainpipe connected to the waste liquids tank is properly placed into a NOTE: specific tank or, if present, into the centralized drain of the laboratory.
- Page 99 NEXgen – User’s Manual Image 124 - Message Box - disconnect the current session A series of Message Boxes is displayed in order to indicate to the operator which racks have to be removed. At the same time, the y-axis equipped with the barcode reader moves to the position where the rack has to be unloaded and the corresponding LED starts flashing orange.
-
Page 100: Archive
NEXgen – User’s Manual By clicking on exit, a Message Box is displayed asking for a confirmation to close the OpenLAB software. Click yes to exit and close the OpenLAB application, otherwise click no. Image 126 - Message Box – exit and close the OpenLAB application... -
Page 101: Results To Be Printed
NEXgen – User’s Manual 3.5.1 R ESULTS TO BE PRINTED Image 128 - Archive - results to be printed In the RESULTS TO BE PRINTED section, the user is able to access the list of session/sessions whose results have never been printed. By clicking on the name of the session of interest, a short description shows up below. -
Page 102: Archived Results
NEXgen – User’s Manual 3.5.2 A RCHIVED RESULTS Image 130 - Archive - archived sessions From the archive screen, click on archive to display and/or print the archived sessions reports. From the list of the archived sessions click on the session name and a short description is displayed below. Click the symbol to display and/or print the report. -
Page 103: Maintenance
NEXgen – User’s Manual The content of the self-test report is displayed in the Self-test report on page 38. To print the self-test report click on print from the self-test report screen. AINTENANCE Image 132 - Main menu – Maintenance From the main menu screen, click on maintenance to display the maintenance screen. - Page 104 NEXgen – User’s Manual From the log date box, select the date whose log file needs to be downloaded. From the folder box, select the destination folder where the log file has to be saved. Once the destination folder has been selected, click on download to download the selected log file only;...
-
Page 105: System Setup
NEXgen – User’s Manual YSTEM SETUP Image 135 - Main menu - system setup To display the system setup screen and modify the default system settings that have been selected at the instrument installation, click on system setup from the main menu screen. -
Page 106: Operation Page
The list of descriptors codes that can be entered in the RESOURCE page is defined in the NOTE: “NEXgen - TSD SKL DSC - Resource Descriptor Codes_Ver. 1.2” document that is attached to this present Operator's Manual. Click save to save the required changes to the data listed above. - Page 107 NEXgen – User’s Manual check unprogrammed sample before load rack: check this option to prevent the OpenLAB software from loading a samples rack containing at least a non-programmed sample. If this option is unchecked, the software enables to load samples racks even if there are non-programmed samples. In this case, the test- sample association can be done once the samples racks loading on the instrument is completed.
-
Page 108: Report Layout Page
NEXgen – User’s Manual 3.8.3 R EPORT LAYOUT PAGE Image 138 - System setup - REPORT LAYOUT The REPORT LAYOUT page consists of two columns. In the left column the operator can enter the following data : laboratory name: enter the name of the laboratory where the instrument is installed. -
Page 109: Run Page
NEXgen – User’s Manual show results definition: click this option to display, in all Results report documents, the results programming data mode. If a curve is defined, the Results report will show the graph and the related precision parameters. show controls validation: check this option to display, in the Results report documents, the controls validation (constraints). - Page 110 NEXgen – User’s Manual 0.5 (default value) is the case when the samples dispensing on 2 microplates is aggregated if at least 50% of samples is in common between the 2 microplates. enable continuous loading of sample racks: this option is checked as default. Uncheck this option in case the samples continuous loading mode has to be inactivated.
-
Page 111: Service Page
NEXgen – User’s Manual 3.8.5 S ERVICE PAGE Image 140 - System setup – SERVICE Check the service mode option in case it is necessary to activate the software service functions. Select this option only if instructed by authorized Service Personnel. -
Page 112: Maintenance
In case of normal use of the instrument, it is recommended that all activities are performed at the intervals listed in the table and, in any case, before using the NEXgen after a long time of inactivity. In case the instrument operates in such particularly harsh conditions, it is appropriate to assess the intervals of activities from time to time. -
Page 113: Responsibilities
Precautions and operating limitations on page 29 (particularly Health precautions on page 29). ESPONSIBILITIES In case of a system malfunction or breakage of any parts, the NEXgen technical staff must properly intervene. The daily, weekly and monthly maintenance procedures must be carried out by the operator. -
Page 114: Monthly Maintenance Procedure
NEXgen – User’s Manual Image 141 - How to remove the washer manifold In order to reach the washer manifold needles, move the Washing system from the back to the front of the instrument. Unscrew the 2 knobs, as shown in the above image, and proceed to the cleaning as follow: •... - Page 115 NEXgen – User’s Manual All the resources handled during the maintenance procedures must be considered as WARNING: potentially contaminated (biohazard) so the safety precautions must be followed.
-
Page 116: Troubleshooting Guide
5. T ROUBLESHOOTING GUIDE ENERAL CRITERIA The main operations of NEXgen are checked through the self-test system that monitors the proper functioning of the instrument. The devices on the single motor guarantee the precise movements of the axis on NEXgen. -
Page 117: Program Run
NEXgen – User’s Manual If the problem persists, contact the NEXgen Technical Assistance The instrument does not turn on Check: • power cord • internal and external fuses If the problem persists, contact the NEXgen Technical Assistance The printer does not turn on Check: •... -
Page 118: Error Messages Due To Pipetting System
• from the startup screen, repeat the connection by clicking on connect new If the problem persists, contact the NEXgen Technical Assistance 5.3.4 E RROR MESSAGES DUE TO PIPETTING SYSTEM Code... -
Page 119: Moving Parts Malfunctions
Malfunction Checks and suggested actions The aspiration does not work Check: • the tanks tubes connection If the problem persists, contact the NEXgen Technical Assistance The dispensing does not occur or is not fluid Check: • the tanks tubes connection... -
Page 120: Error Messages And Actions To Be Taken By The Operator
When an error message shows up, the system is in pause mode resulting in a delay of the session that, if prolonged, can invalidate the test results. If the error message persists, contact the NEXgen Technical Assistance. In order to fix the problems which generate any messages and error codes not mentioned in this Operator’s Manual, please contact the NEXgen Technical Assistance.
Need help?
Do you have a question about the NEXgen and is the answer not in the manual?
Questions and answers