Powermatic 719T Operating Instructions And Parts Manual
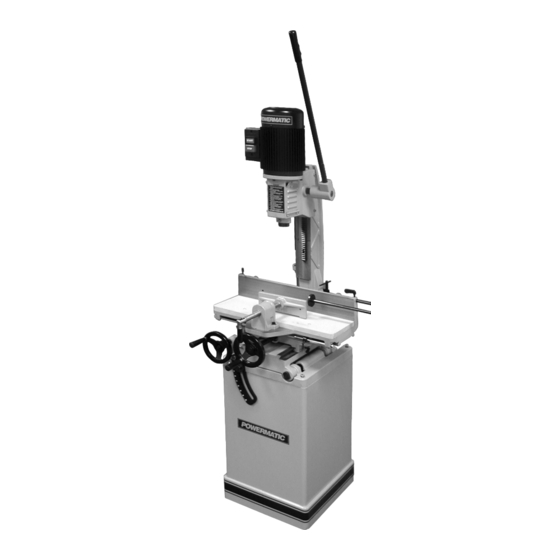
Tilting table hollow chisel mortiser
Hide thumbs
Also See for 719T:
- Operating and parts manual (20 pages) ,
- Operating instruction (24 pages)
Table of Contents
Advertisement
Quick Links
Download this manual
See also:
Operating Instructions
Advertisement
Table of Contents

Related Manuals for Powermatic 719T


Summary of Contents for Powermatic 719T
- Page 1 This .pdf document is bookmarked Operating Instructions and Parts Manual Tilting Table Hollow Chisel Mortiser Model: 719T Powermatic 427 New Sanford Road LaVergne, Tennessee 37086 Part No. M-2474002 Ph.: 800-274-6848 Revision B3 11/2018 www.powermatic.com Copyright © 2014 Powermatic...
-
Page 2: Warranty And Service
Powermatic sells through distributors only. The specifications listed in Powermatic printed materials and on the official Powermatic website are given as general information and are not binding. Powermatic reserves the right to effect at any time, without prior notice, those alterations to parts, fittings, and accessory equipment which they may deem necessary for any reason whatsoever. -
Page 3: Table Of Contents
719T Mortiser Assembly .......................... 18 719T Mortiser Parts List .......................... 19 719T Mortiser Stand Parts List ........................ 22 719T Mortiser Stand Assembly ....................... 22 Optional Accessories ..........................23 Dimensions for 719T with premium chisels mounted ................. 24 ... -
Page 4: Warnings
5. Do not use this mortiser for other than its intended use. If used for other purposes, Powermatic disclaims any real or implied warranty and holds itself harmless from any injury that may result from that use. - Page 5 26. Maintain tools with care. Keep chisel and drill bits sharp and clean for the best and safest performance. Follow instructions for lubricating and changing accessories. 27. Make sure the work piece is securely attached or clamped to the table. Do not cut mortises freehand. 28.
-
Page 6: Introduction
This machine has been designed and constructed to provide consistent, long-term operation if used in accordance to instructions set forth in this manual. If there are any questions or comments, please contact either your local supplier or Powermatic. Powermatic can also be reached at our web site: www.powermatic.com. -
Page 7: Unpacking
Unpacking Remove mortiser and stand from the shipping cartons. Report any damage immediately to your distributor and shipping agent. Do not discard any shipping material until the mortiser is assembled and running properly. Compare the contents of your container with the following parts list and Figure 1 to make sure all parts are intact. -
Page 8: Electrical Connections
Electrical Connections A separate electrical circuit should be used for your machines. This circuit should not be less than #12 wire and should be protected with a 20 Amp time lag fuse. If an extension cord is used, use only 3-wire extension cords which have 3-prong grounding type plugs and matching receptacle, which will accept the machine’s plug. -
Page 9: Converting From 115 To 230 Volt
Grounded, cord- connected tools intended for use on a supply circuit having a nominal rating between 150 - 250 volts, inclusive. This tool is intended for use on a circuit that has an outlet that looks like the one illustrated in Sketch D in Figure 1. The tool has a grounding plug that looks like the plug illustrated in Sketch D in Figure 1. -
Page 10: Assembly
Assembly Do not connect the machine power source until completely assembled. Read and understand the entire manual. Securing Machine to Stand The mortiser should be secured to the stand with four M8 x 45 hex cap screws and M8 lock washers (provided) using the holes in the base. -
Page 11: Installing Chisel And Bit
Installing Chisel and Bit Referring to Figure8: 1. Loosen the lock screw. 2. Insert the chisel bushing into the head with the hole facing forward to line up with the lock screw. Screw in the lock screw just enough so the screw extends into the hole of the bushing, holding it in place. -
Page 12: Operating Controls
Operating Controls Start/Stop Switch Referring to Figure 10: The Start/Stop Switch is located to the left of the motor on the side of the mortiser. To turn the mortiser on press the green START (A) button. To stop the mortiser, push the red STOP (B) button. -
Page 13: Adjustments
The provided Chuck Extension Adaptor (C) is intended to lower the chuck for use with after-market chisels (chisels other than the POWERMATIC brand) that may require a spacer due to varying lengths in shanks. To install the adaptor, first remove the chisel and bit (see the Installing Chisel and Bit section). -
Page 14: Depth Stop Rod Adjustment
(C). Tighten the lock lever (B). Table Position The 719T Mortiser is equipped with two handwheels for table (E, Fig. 15) positioning. In addition, the table can be tilted up to 35 for angle mortising. -
Page 15: Chisel Parallel To Workpiece
Chisel Parallel to Workpiece Referring to Figure 16: The chisel can be adjusted parallel to the workpiece as follows: 1. With the left handwheel (A), move the table back far enough to insert the workpiece (B) between the chisel (D) and fence. 2. -
Page 16: Maintenance
Do not have the chisel slot against the blind end of the mortise, as the chips will not be able to clear the chisel. This can cause overheating and possible breakage of chisel or bit. When cutting deep mortises, make the cut in several stages of approximately 1"... -
Page 17: Chisel
Serial Number of your machine available when you call will allow us to serve you quickly and accurately. Non-proprietary parts, such as fasteners, can be found at local hardware stores, or may be ordered from Powermatic. Some parts are shown for reference only, and may not be available individually. -
Page 18: 719T Mortiser Assembly
719T Mortiser Assembly... -
Page 19: 719T Mortiser Parts List
Index No. Part No. Description Size ....2474002T ....719T Mortiser Assy (Index No. 1 thru 120) ..........1 1 ....719T-101 ....Fixed Base ....................1 2 ....6294125 ....Base, Middle .................... 1 3 ....6294126 ....Gib ......................1 4 .... - Page 20 57 ..... 6294180 ....C-Clip ....................... 2 58 ..... 6294181 ....Depth Setting Block ................. 1 59 ..... 719T-159 ....Depth Setting Rod ..................1 60 ..... 6294183 ....Universal Handle ..................1 61 ..... TS-1505041 ..... Socket Head Cap Screw ........M10×30 ....... 4 62 .....
- Page 21 113 ... TS-1540061 ..... Hex Nut ..............M8 ....... 2 114 ... TS-1491021 ..... Hex Cap Screw ............ M10 x 20 ..... 4 115 ... 719T-1115 ....Tilting Bracket ..................1 116 ... TS-2342161 ..... Hex Nut, Nylon Lock ..........M16 ......2 117 ...
-
Page 22: 719T Mortiser Stand Parts List
....6294235T ....Stand Assembly (Items 1 thru 8).............. 1 1 ....719T-201 ....Stand ......................1 2 ....719T-202 ....Shelf Cushion ................... 1 ....6294236 ....Door Assembly (Index No. 3 thru 6) ............1 3 .... -
Page 23: Optional Accessories
1 ....6294210 ....Drill Adaptor Shaft ..................2 ....6294208 ....Chuck Release Nut ..................3 ....6294209 ....Wave Washer..................... Powermatic ® 719T Mortiser (1791264K) Specifications in conjunction with Powermatic’s Premium Chisel and Bit Sets... -
Page 24: Dimensions For 719T With Premium Chisels Mounted
Dimensions for 719T with premium chisels mounted (Chisels and bits purchased separately) Powermatic 719T Mortiser and Chisel Dimensions 1791091 1791092 1791093 1791094 1791095 1/4” 5/16” 3/8” 1/2” 3/4” chisel chisel chisel chisel chisel Total Chisel Length (installed) 3-21/32” 3-7/8 3-7/8”...
Need help?
Do you have a question about the 719T and is the answer not in the manual?
Questions and answers