Table of Contents
Advertisement
Advertisement
Table of Contents

Related Manuals for Eminent EM6330


Summary of Contents for Eminent EM6330
- Page 1 EM6330 CamLine Pro Pan/Tilt Full HD IP camera...
-
Page 2: Table Of Contents
ENGLISH EM6330 – CamLine Pro Pan/Tilt Full HD IP camera Table of contents 1.0 Introduction ......................3 1.1 Packing contents ....................4 1.2 Requirements to access the camera..............4 1.3 Hardware components..................4 2.0 Installing the camera ..................... 6 2.1 micro SD-Card installation ................. -
Page 3: Introduction
11.0 Warning and points of attention ................. 43 12.0 Warranty conditions ................... 45 1.0 Introduction Congratulations with the purchase of this high-quality Eminent product! This product has undergone extensive testing by Eminent’s technical experts. Should you experience any problems with this product, you are covered by Eminent warranty. -
Page 4: Packing Contents
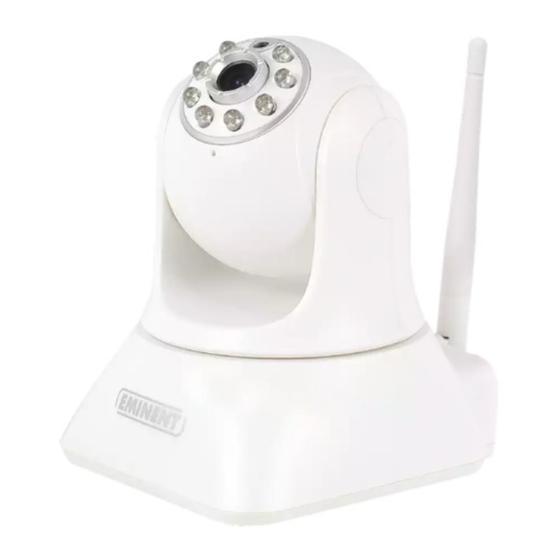
1.2 Requirements to access the camera. It is very easy to access the video images of the EM6330 on your smartphone, tablet or PC. You only need the ID or QR code that is displayed on your bottom label and download the application for your device. - Page 5 7. Internal Speaker The major components on the bottom of the EM6330 are: 1. Bracket screw – this is the position to screw in the bracket of the EM6330. With the bracket, you can install the EM6330 on the wall.
-
Page 6: Installing The Camera
ENGLISH 2.0 Installing the camera A few short and simple steps are necessary to connect and assign the camera, and to enjoy the use of the camera. Use the following steps to connect the camera. 2.1 micro SD-Card installation The video streams can be recorded and be stored onto an internal micro SD-Card. To install the micro SD-Card insert the micro SD-card into the Micro SD-card reader at the back of the camera. -
Page 7: Connecting The Camera To Your Network Using A Network Cable
2.4 Installing the CamLine Pro App on an Apple/Android device The EM6330 can be controlled and configured by using the “CamLine Pro” APP. Search for the CamLine Pro APP in the Apple App-store or in the Google Play Store. Download and install the APP on your phone/tablet. -
Page 8: Installing/Removing The Camera In The App On Apple/Android Device
ENGLISH 2.5 Installing/removing the camera in the APP on Apple/Android device 1. Open “CamLine Pro”. 2. Select the “+” (A). 3. Choose for option 1,2 or 3 (B) the option that matches the best with your setup situation and press “Add camera”. 4. -
Page 9: Remove The Video Stream From The Camera Overview In The Main Screen
10. To add the camera manually enter the camera ID located on the ID/password card (proceed with step 13). 11. If the computer and the EM6330 is connected to the same network, the Camera can be added by clicking “LAN search”. -
Page 10: Adding The Camera To A Wireless Network
ENGLISH 2.7 Adding the camera to a wireless network There are 3 options to connect the EM6330 to your wireless network. First option is to configure the settings by using the WiFi smart configuration, the APP settings and the third option with the PC (Windows) software settings. -
Page 11: Connecting To Wi-Fi Using The App
11 | ENGLISH 2.7.2 Connecting to Wi-Fi using the App. 1. Ensure the camera is connected to the network with an Ethernet cable. 2. Start the App “CamLine Pro”. 3. Make sure the camera you wish to configure to connect to the WiFi is already added to the camera list and is already listed in the camera overview. - Page 12 12 | ENGLISH 3. Select the camera in the camera list 4. Press from the camera view of the camera you wish to connect to the WiFi connection. 5. The settings menu will be displayed 6. Go to the Menu option “Wi-Fi setting”...
- Page 13 13 | ENGLISH 7. Click “Search” to search for available wireless networks. 8. Select the WiFi connection you wish to connect your camera to (if the camera is recently restarted please be patient and wait for the Wireless connection to be displayed by repeatedly pressing “Search”).
-
Page 14: Viewing Images
14 | ENGLISH 3.0 Viewing images You can view the images both on your computer and on your smartphone screen, as we explain in the sections below. Optionally, you can install the supplied software, so you can find the camera directly with your computer and make recordings with your computer. -
Page 15: Menu Of The App
15 | ENGLISH 4.2 Menu of the app 4 camera views APP information WiFi Smart config instruction video... -
Page 16: Overview And Control Of The Camera
16 | ENGLISH Android 4.3 Overview and control of the camera Portrait view... - Page 17 17 | ENGLISH Landscape view Press the currently displayed stream to get more options Option overview (swipe to the left to view all available options) Mute Record video (locally) Take snapshot (locally) Change video quality Manage camera pre-sets Mirror horizontally Mirror vertically Change the environments frequency Optical zoom + (only available for certain models)
-
Page 18: Settings Of The Camera
18 | ENGLISH 4.4 Settings of the camera 1. Move camera to the top of the camera list 2. View recordings stored on the SD-card 3. View recordings stored locally 4. Camera settings 5. Remove camera from overview 4.4.1 Move camera to the top of the camera list Using this option, you can move the selected camera to the top of the camera list. -
Page 19: View Recordings Stored On The Sd-Card
19 | ENGLISH 4.4.2 View recordings stored on the SD-card 4.4.3 View recordings stored on the locally 4.4.4 Remove camera from overview... -
Page 20: Camera Settings
20 | ENGLISH 4.4.5 Camera settings 4.5 Camera settings 4.5.1 Reconnect 4.5.2 Remove this device... -
Page 21: Reboot This Device
21 | ENGLISH 4.5.3 Reboot this device 4.6 Advanced settings The settings of the camera are available in the menu option “Advanced settings”. 4.6.1 Camera password Here you can change the password of the camera. Set new password... -
Page 22: Time Zone Settings
22 | ENGLISH 4.6.2 Time zone settings Here you can change the time zone settings and DST (summertime). Select time zone Select time server Enable DST (summertime) -
Page 23: Wifi
23 | ENGLISH 4.6.3 WiFi Here you can set the WiFi settings for your CamLine Pro camera to connect to your WiFi Router/AP. Select WiFi network Enter WiFi password 4.6.4 Alarm settings Manage the Alarm settings. Enable/disable the motion detector. Select the event after an event has been triggered. - Page 24 24 | ENGLISH Change the sensitivity of the Change the sensitivity of the sound Select a Camera preset to point the motion detection. detection. camera at after an event. Android Set the sound detect sensitivity Set the motion detect sensitivity Configure the phones notification to silent, ringtone, vibrate or Ringtone and vibrate.
-
Page 25: Ftp Settings
Set the server settings for your e-mail server for the camera to be able to send an e- mail on an alarm event. Eminent has added popular e-mail servers to the predefined SMTP server list. If you wish to use one of the following email providers, you can use the “>” at the server option and select the corresponding mail provider from the list. -
Page 26: Sd Card Settings
26 | ENGLISH The server settings will be entered you still need to enter the displayed sender address, your e-mail user account, password and the recipient e-mail address and press “OK” If the e-mail provider is not listed, you will need to set the server settings manually. Enter the e-mail providers SMTP Select the corresponding e-mail settings. -
Page 27: Ptz Settings
27 | ENGLISH The following recording settings are available: 1. Format SD card: The SD card will be formatted (all data and recordings will be erased). 2. Alarm: The camera will start recording to the SD-card on an alarm event (Motion detection needs to be enabled). -
Page 28: Camline Pro Pc Software
28 | ENGLISH 5.0 CamLine Pro PC software 5.1 The overview of the CamLine Pro PC software 10 11 12 13 14 15 18 19 22 23 24 25 4 16 17 20 21 1. Camera list 18. Horizontal mirroring 2. -
Page 29: Software Settings
29 | ENGLISH 5.2 Software settings 5.2.1 Software settings • Run at start up (Software will start automatically after Windows is started). • Use last viewed streams at start up (Show the last viewed streams at start • Exit to verify identity •... -
Page 30: Recording
30 | ENGLISH 5.3.2 Recording Manage the cameras recording schedule, the storage drive(s) for the recordings and the duration of the recordings. -
Page 31: Alarm
31 | ENGLISH 5.3.3 Alarm Change the settings and events on an alarm event and press “Apply” FTP settings Set the settings for a FTP server for the camera to be able to save the snapshots and video recordings (for video recording micro SD card should be installed) to the FTP server on an alarm event. -
Page 32: Wifi Setting
32 | ENGLISH 5.3.4 WiFi setting 5.3.5 Date/Time Set the time and time zone or sync the time with your PC. -
Page 33: Device Settings
33 | ENGLISH 5.3.6 Device settings Pan/Tilt: Change the settings for the Pan/Tilt feature Network: Here you can set the network settings of the camera manually. - Page 34 34 | ENGLISH SD card: Set the recording settings for the SD card. Playback recordings on the SD card and format the SD card. The following options are available: Alarm recording: Starts recording if movement is detected Full time recording: Will record continuously No recording: No recording Format SD: The SD card will be formatted (all data and recordings will be deleted from the SD card).
- Page 35 35 | ENGLISH Power: Change the environments power frequency ONVIF: Change the Onvif settings (Open Network Video Integration Forum)
-
Page 36: Playback Local Recordings
36 | ENGLISH The ONVIF specification defines a common protocol for the exchange of information between network video devices including automatic device discovery, video streaming and intelligence metadata. Video quality: Change video settings 5.4 Playback local recordings Open the Playback feature by pressing the button. - Page 37 37 | ENGLISH 5. Select the day you wish to playback. 6. Below the camera overview you will see different markings in the time bar, these are markings of the time periods the CamLine Pro software has found local recordings. 7.
-
Page 38: Pan/Tilt
38 | ENGLISH Playback function bar: 7 8 9 10 11 12 13 14 1. Play 2. Stop 3. Next 4. Stop all 5. Mute 6. Volume 7. Snapshot 8. Clear selection 9. Synchronize time 10. Backup 11. Open a file 12. -
Page 39: The Webpage Of The Camera
ENGLISH 6.0 The webpage of the camera The Eminent camera is also an IP camera with its own webpage. This means you can login to the webpage by using the camera’s IP Address. Use the following steps to login to the webpage and change any of the camera settings. -
Page 40: The Layout Of Camline Pro
40 | ENGLISH 6.2 The layout of CamLine Pro Change video resolution Pan/Tilt control Hor. & vert. Patrol Go to preset Save preset Settings menu The menu options are the same as the settings menu of the PC software except for FTP service settings and Maintenance. -
Page 41: Alarm Settings
41 | ENGLISH 6.4 Alarm settings In this setup menu you can determine what should happen if an alarm event is triggered. You can choose from the following options: • E-mail alarm: An e-mail will be send to an e-mail recipient on an alarm event. •... -
Page 42: Restore Factory Settings
For some reason, for example you forgot the web login password, you may want to set the EM6330 to the factory default settings. The only thing you need to do is using a stick to press the “reset” button on the back of the EM6330 body for more than 15 seconds and release it, do this when the EM6330 is powered on. -
Page 43: Upgrade Device Firmware
ENGLISH 8.0 Upgrade Device Firmware If there is a new firmware available for the EM6330, you can upgrade the firmware via the WebGUI Maintenance page. A status message about the percentage done in the upgrade procedure is displayed. Please note: do not power off the EM6330 during the upgrade procedure. - Page 44 A power socket is needed which should be close and easy accessible from the device. Repairing of the device should be done by qualified Eminent staff. Never try to repair the device yourself. The warranty immediately voids when products have undergone self-repair and/or by misuse.
-
Page 45: Warranty Conditions
Eminent warranty. Products are not covered by the Eminent warranty when exposed to incorrect/improper use, external influences or when opening the service parts of the product by parties other than Eminent.
Need help?
Do you have a question about the EM6330 and is the answer not in the manual?
Questions and answers