Table of Contents
Advertisement
Advertisement
Table of Contents

Related Manuals for EverSewn Sparrow QE


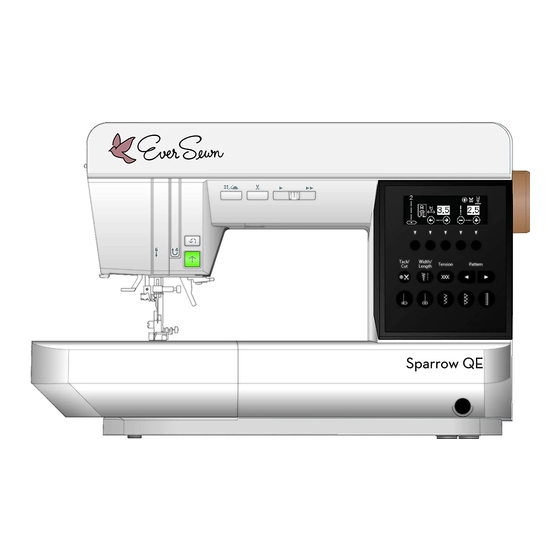
Summary of Contents for EverSewn Sparrow QE
- Page 3 INSTRUCTION MANUAL This sewing machine is intended for household use. IMPORTANT SAFETY INSTRUCTIONS When using a sewing machine, basic safety precautions should always be followed, including the following. Read all instructions before using. DANGER - To reduce the risk of electric shock: Never leave unattended when plugged in.
-
Page 4: Table Of Contents
CONTENTS MAIN PARTS ..............3 STARTING TO SEW ...........23 EXTENSION TABLE .............5 A. START AND END OF SEAM ........ACCESSORIES............5 B. REVERSE STITCHING ........... CONNECTING THE MACHINE ........6 C. AUTO TACK, AUTO TACK & CUT ......FOOT CONTROLLER ..........6 D. TURNING CORNERS ..........FUNCTION OF EACH PART ........7 E. -
Page 5: Main Parts
MAIN PARTS 1. Needle Up-Down/Slow Button 2. Thread Cutter Button 3. Speed Control Button 4. Top Cover 5. Hand Wheel 6. Pressure Regulator 7. Light Cover 8. Reverse Button 9. Start/Stop Button 10. LCD Tack/ Width/ Tension Pattern Length 11. Function Buttons 12. - Page 6 35. Inside of Top Cover* 36. Pattern Chart 37. Bobbin Winder Thread Guide 38. Thread Guide 39. Thread Guide 40. Thread Take-up lever (Inside) 41. Thread Tension Regulator (Inside) 42. Spool Cap 43. Spool Pin 44. Felt Washer 45. Bobbin Winder Thread Guide 46.
-
Page 7: Extension Table
EXTENSION TABLE A. OPENING THE ACCESSORY CASE Grasp the front/rear case and pull outwards. : Front Case : Rear Case B. REMOVING THE EXTENSION TABLE Hook your finger to the left bottom side of extension table and slide it to the left. To attach, insert to the right. -
Page 8: Connecting The Machine
CONNECTING THE MACHINE 1. Place machine on stable table. 2. Connect the power line cord to the machine by inserting the 2-hole plug into the terminal box. 3. Connect the power line plug to the electric outlet. 4. Turn on the power switch. DANGER: To reduce the risk of electric shock. -
Page 9: Function Of Each Part
FUNCTION OF EACH PART Tack/ Width/ Tension Pattern Length Thread Cutter A. START/STOP BUTTON The machine will start running when start/stop button is pressed and will stop when pressed the second time. The machine will rotate slowly at start of sewing. MONITOR LAMP Green Light “ON”: Ready to sew or to wind bobbin. -
Page 10: Presser Foot Lifter
F. PRESSER FOOT LIFTER The presser foot is lifted up or down by this lever. NOTE: Machine will not start when the presser foot is lifted. (Except for bobbin winding) G. DROP FEED LEVER NOTE: The Drop Feed Lever is only accessible after the Front extension table is removed. -
Page 11: How To Use The Needle Plate For Straight Stitch
HOW TO USE THE NEEDLE PLATE FOR STRAIGHT STITCH When sewing light-weight fabric you can get beautiful straight stitches without puckering by using the needle plate for straight stitch. This is because the needle plate for straight stitch has a smaller needle hole than the regular needle plate. -
Page 12: Knee Lifter Lever
KNEE LIFTER LEVER By attaching the knee lifter lever to the machine, you can lift or down the presser foot by your knee. Slits 1. Insert the knee lifter lever into the socket of machine Convexes so that the convexes of the lever fit into the slits of the socket. -
Page 13: To Select A Pattern / Adjust A Pattern
TO SELECT A PATTERN / ADJUST A PATTERN This machine has 70 patterns. (See the pattern chart located inside of the top cover.) When you turn on the machine, straight stitch ( ) will be selected and indicated on the LCD. When you select a pattern, the following are indicated on the LCD: Control Panel... -
Page 14: To Select Other Pattern
B. TO SELECT OTHER PATTERN 1. Touch the right or left pattern button. The 5 patterns including currently selected will be displayed on the LCD. Tack/ Width/ Tension Pattern Length 2. By touching the left pattern button, the previous 5 patterns will be displayed. -
Page 15: Tack/Cut Button
C. TACK/CUT BUTTON You can sew tack stitch at the beginning and end of the stitch by touching the tack/cut button. Also, you can cut threads automatically after end tacking. See page 24. D. ADJUSTING THE STITCH WIDTH AND LENGTH Touching the width/length button, the display changes as illustration (D). -
Page 16: Stitch Pattern
G. STITCH PATTERN * Highlighted pattern numbers indicate the basic stitch patterns. -
Page 17: Thread Tension
THREAD TENSION This machine adjusts the thread tension automatically when you select a pattern. However, you can change the thread tension as follows. 1. Touch the thread tension button. The state of thread tension is displayed with numerical value and scale. (Thread tension screen) 2. -
Page 18: Bobbin Setting
BOBBIN SETTING A. REMOVING THE BOBBIN 1. Raise the presser foot lifter. 2. Pull the bobbin cover latch to the right and remove the bobbin cover. 3. Lift up the bobbin from the machine. NOTE: Use the bobbin dedicated to this model. 11.5 mm Actual Size B. -
Page 19: Inserting The Bobbin
7. Hold the thread by your left hand and wind the thread to the bobbin 4-5 times clockwise. 8. Hook the thread under the front wing of the bobbin winder thread guide ( ) from left to right and cut the thread. 9. -
Page 20: Threading The Machine
THREADING THE MACHINE A. PREPARING TO THREAD MACHINE 1. Raise the presser foot lifter. 2. Raise the needle to its highest position by turning the hand wheel toward you. The mark ( ) of hand wheel comes to the top. (Keep this position until needle eye threading.) B. -
Page 21: Threading The Upper Thread
C. THREADING THE UPPER THREAD 4. Hold thread in both hands and pass thread to the guide from rear opening and pass through front opening from right to left. 5. Bring thread backward and pass through from right to left. 6. -
Page 22: Threading The Needle Eye
D. THREADING THE NEEDLE EYE NOTE: The needle threader is used for needle sizes 11/80 - 16/100 and thread sizes 50- 100. CAUTION: To prevent accidents. - Do not put your fingers under the needle. - Do not rotate the hand wheel when threader lever is lowered. -
Page 23: Changing The Presser Foot
CHANGING THE PRESSER FOOT The presser foot must be changed according to the stitch you sew, or work you do. CAUTION: To prevent accidents. Turn off the power switch before you change the presser foot. A. CHANGING THE PRESSER FOOT Use the appropriate presser foot for each sewing Tack/ Width/... -
Page 24: Fabric, Thread And Needle Table
FABRIC, THREAD AND NEEDLE TABLE Select thread size and needle size according to the type of fabric and thickness. Thread Size Needle Size Type of Fabric Ctn #80 - 100 Light Weight thin georgette, organdy, voile, taffeta, silk, etc. Silk 60 - 80 9/70-11/80 Syn 80 - 100 Ctn 50 - 80... -
Page 25: Starting To Sew
STARTING TO SEW Turning on the machine, the straight stitch (center) is selected. A. START AND END OF SEAM 1. Check the presser foot [Regular Foot (A)]. Refer to page 21 for changing the presser foot. 2. Raise up the needle by pressing the needle up- down button or turning the hand wheel toward you. -
Page 26: Reverse Stitching
B. REVERSE STITCHING Reverse stitching is used for reinforcing the beginning and ends of the stitch. You can sew reverse stitch with the reverse button. (The machine will continue sewing reverse stitching while you are pressing the button. When you release the button, reverse stitching will stop.) 1. -
Page 27: Turning Corners
D. TURNING CORNERS 1. Stop the machine when you reach a corner. 2. Lower the needle into the fabric by: Pressing the needle up/down button or turning hand wheel toward you. If you lower the needle by pressing the button, the needle stop position will be downward after that. -
Page 28: Sewing Over Overlapped Areas
F. SEWING OVER OVERLAPPED AREAS Guide the fabric with your hand when sewing over overlapped areas. G. THREAD CUTTER After sewing, if you do not use the thread cutter button, you can cut threads using the thread cutter. 1. Raise the presser foot and bring fabric and threads backward after sewing. -
Page 29: Straight Stitch Sewing
STRAIGHT STITCH SEWING Straight stitch patterns should be selected to suit the type of fabric being sewn. Stitch Presser Foot Straight stitch (Left needle position) Regular Foot (A) Straight stitch (Center needle position) Tack/ Width/ Tension Pattern Length 1. Position the fabric under the presser foot. Lower the presser foot. -
Page 30: Elastic Stitch Sewing
ELASTIC STITCH SEWING It assures you of a stitch that is strong and flexible and will give with the fabric without breaking. Good for easy to ravel and knit fabrics. It is good for joining durable fabrics such as denims. Stitch Presser Foot Stem stitch for stretch fabrics... -
Page 31: Zigzag Stitch Sewing
ZIGZAG STITCH SEWING This machine can sew zigzag stitches of various widths and lengths by changing the settings of the stitch width and stitch length. Stitch Presser Foot Zigzag Stitch Regular Foot (A) Satin Stitch Satin Foot (B) Tack/ Width/ Tension Pattern Length... -
Page 32: Multi-Stitch Zigzag
MULTI-STITCH ZIGZAG This stitch pattern is used to mend a broken fabric or to sew elastic bands. Stitch Presser Foot Multi-Stitch Zigzag Regular Foot (A) Tack/ Width/ Length Tension Pattern A. MENDING Shorten the length of the stitch and sew. B. -
Page 33: Overcasting-Overlocking
OVERCASTING-OVERLOCKING Prevents fraying of the raw edge of all fabrics. Stitch Presser Foot width: Overcasting 5, 9 - 13 the default width: (width: or over the default settings) Foot (C) settings or narrow over 5(width: narrow), 7 Regular Foot (A) Tack/ Width/ Tension... -
Page 34: Blind Hem Stitching
BLIND HEM STITCHING We use this pattern for hemming the skirts and pants. Stitch Presser Foot 14 Blind hem for regular fabric Blind Foot (D) Blind hem for regular or stretch fabric Tack/ Width/ Tension Pattern Length 1. Fold the fabric as shown on the right. : Medium, Heavy weight fabric : Light weight fabric : Wrong side of fabric... -
Page 35: Buttonhole Sewing
BUTTONHOLE SEWING You can sew 4 types of buttonholes. You can change the width of each buttonhole in 3 steps. The buttonhole foot is stored on the back side of the extension table. Stitch Presser Foot Bar-tack Buttonhole for light to Tack/ Width/ Length... - Page 36 7. The machine will sew the buttonhole in the order as shown and stop automatically after sewing. 8. Press the thread cutter button and raise the presser foot to remove the fabric. To sew over the same buttonhole, raise presser foot to return to original position.
-
Page 37: Automatic Bar-Tack
AUTOMATIC BAR-TACK Stitch Presser Foot Bar-tack, to reinforce areas that will be subject to strain, such as Buttonhole Foot pocket corners. Tack/ Width/ Length Tension Pattern 1. Adjust slide on base according to the length of bar-tack. = Length of bar-tack 2. -
Page 38: Inserting Zippers (Centered Insertion / Lapped Insertion)
INSERTING ZIPPERS (CENTERED INSERTION / LAPPED INSERTION) Stitch Presser Foot Straight stitch (center Zipper Foot (E) needle position) NOTE: What is “baste”? Before sewing the fabric with a sewing machine, temporarily sew it with long and loose stitches so that the fabric does not Tack/ Width/ Length... -
Page 39: Lapped Insertion
B. LAPPED INSERTION 1. Baste the front sides of the fabrics face so they each other. Sew until end of opening. 2. Fold back to the left seam allowance. Turn under the right seam allowance to form a 3 mm fold. 3. -
Page 40: Scallop Stitch
SCALLOP STITCH This stitch is used to sew edges on blouse collars and table cloths. Stitch Presser Foot 17 Scallop hem Regular Foot (A) Satin Foot (B) 27 Scallop edging Tack/ Width/ Length Tension Pattern A. SCALLOP HEM 1. Fold the fabric so that the right side is inward and sew the fabric along folded edge. -
Page 41: Patch Work
PATCH WORK Patch work is used to seam various fabrics and decorate them. Stitch Presser Foot 20, 22 Regular Foot (A) Tack/ Width/ Length Tension Pattern 1. Face the two fabrics with their right sides facing each other and sew them. 2. -
Page 42: Pin Tuck
PIN TUCK This pattern is used for decorate blouses etc. Stitch Presser Foot Straight stitch (Left needle position) Regular Foot (A) Straight stitch (Center needle position) Tack/ Width/ Length Tension Pattern 1. Arrange the fold of pin tuck by ironing. 2. -
Page 43: Maintenance
MAINTENANCE DANGER: To reduce the risk of electric shock. Disconnect the power line plug from electric outlet before carrying out any maintenance. NOTE: * This machine is using LED light to light up stitching area. If it is not light up, call your dealer. * There is no need to lubricate this machine. -
Page 44: Message
MESSAGE 1. Winding the bobbin. 2. Lower the buttonhole lever. 3. After sewing buttonhole, raise the presser foot lifter and set the frame of buttonhole foot to starting position. 4. Release the foot controller pedal. 5. Lower the presser foot. 6. -
Page 45: Helpful Hints
HELPFUL HINTS Before calling for Service or returning the machine, check the following items. If the problem still persists, contact the EverSewn customer support at: service@eversewn.com or call 1-844-EVERSEW (1-844-383-7739) PROBLEM CAUSE CORRECTION PAGE Machine not properly threaded. Re-thread machine. -
Page 46: Setting Of Lcd, Led Light, And Beep
SETTING OF LCD, LED LIGHT, and BEEP You can adjust the brightness of the LCD screen when it is hard to see. Also, you can switch LED light on and off. By setting off of the beep, you can operate the machine without beep. 1.
Need help?
Do you have a question about the Sparrow QE and is the answer not in the manual?
Questions and answers