Advertisement
Available languages
Available languages
Quick Links
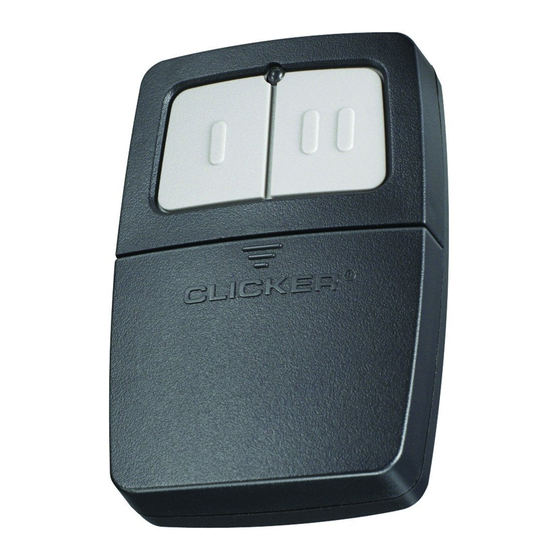
CLICKER
®
UNIVERSAL GARAGE DOOR OPENER REMOTE CONTROL
Read instructions thoroughly BEFORE beginning.
Start with garage door closed. Identify garage door opener type - Smart/Learn button or
STOP
DIP Switch. Smart/Learn button or DIP Switches are located on motor unit or external
receiver. Refer to owner's manual if necessary.
Clicker products are intended to be used only with garage door openers manufactured
after 1993 that utilize photo-eyes safety sensors. These are always located on or near
the bottom of the door track. If your garage door does not have the sensors attached
and working, the opener is not compliant with current federal safety regulations and
should be replaced.
Proceed with instructions according to your type of garage door opener.
SMART/LEARN BUTTON
1
See Chart A to determine #
of times to press button
and write in blank on
Step 5.
2
2
3
Press program button until LED
lights.
4
Motor Unit
Press and release the Smart/
Learn button.
5
Select a button to program.
Press button
times ensuring
LED stops flashing after each
press. Code is accepted when one
of the following occurs:
Click
OR
NOTE: If there are problems
programming to button 1,
program to button 2.
6
Press program button.
7
Programming complete. Press
selected button to test. If unit does
not work, return to Step 3.
Product Registration and Troubleshooting
www.clickerproducts.com • 1-800-442-1255
Chamberlain, LiftMaster and Moore-O-Matic are Trademarks of Chamberlain Group.
Genie and Intellicode are trademarks of GMI Holdings, Inc. Overhead Door is a
Trademark of Overhead Door Corporation. Linear is a Trademark of Linear Corporation.
Master Mechanic is a Trademark of TruServ. Sears is a Trademark of Sears &
Roebuck. Stanley is a Trademark of The Stanley Works. Wayne Dalton is a trademark
of Wayne Dalton Corporation. Do It is a trademark of Do It Best Corporation.
MODEL KLIK1U
CHART A
# of times to
Type/Color of
press button
Brand
Smart/Learn
1
Linear
Mega-Code
®
2
Chamberlain
*
Orange/Red
®
3
Chamberlain
*
Purple
®
4
Chamberlain
*
Green
®
Genie
®
5
Intellicode
Overhead Door
®
Genie
®
**
6
Intellicode
Overhead Door
®
7
Stanley
®
Secure Code
8
Chamberlain
*
Yellow
®
9
Wayne Dalton
Rolling Code
®
11
Chamberlain
®
9 Position
* NOTE: LiftMaster, Do-It, Master Mechanic, Raynor, True Value and Sears Craftsman are compatible with Chamberlain
technology.
**NOTE: Visit www.clickerproducts.com for Genie Intellicode II instructions.
SMART/LEARN BUTTON
1
NOTE: Your opener may appear
different and you may have to
remove the light lens to access
the learn button.
LED Indicator
Button 1
OR
Program Button
Battery
REMOTE CONTROL BATTERY
To prevent possible SERIOUS INJURY or DEATH:
• NEVER allow small children near batteries.
• If battery is swallowed, immediately notify doctor.
To reduce risk of fire, explosion or chemical burn:
• Replace ONLY with 3V2032 coin batteries.
• DO NOT recharge, disassemble, heat above 100° C (212° F) or incinerate.
Dispose of batteries properly. Replace ONLY with 3V2032 coin batteries.
NOTICE: To comply with FCC and or Industry Canada (IC) rules, adjustment or modifications of this receiver
and/or transmitter are prohibited, except for changing the code setting or replacing the battery. THERE ARE
NO OTHER USER SERVICEABLE PARTS.
Tested to Comply with FCC Standards FOR HOME OR OFFICE USE. Operation is subject to the following two
conditions: (1) this device may not cause harmful interference, and (2) this device must accept any
interference received, including interference that may cause undesired operation.
To prevent possible SERIOUS INJURY or DEATH from a moving gate or garage door:
• ALWAYS keep remote controls out of reach of children. NEVER permit children to
operate, or play with remote control transmitters.
• Activate gate or door ONLY when it can be seen clearly, is properly adjusted and there
are no obstructions to door travel.
• ALWAYS keep gate or garage door in sight until completely closed. NEVER permit
anyone to cross path of moving gate or door.
WARNING: This product can expose you to chemicals including lead, which are known to
the State of California to cause cancer or birth defects or other reproductive harm. For more
information go to www.P65Warnings.ca.gov
# of times to
Year
press button
Brand
'97-Current
11
Chamberlain
'97-'03
12
Chamberlain
'05-Current
13
Genie
'93-'96
14
Linear Multicode
'95-Current
15
Chamberlain
Stanley/
'93-Current
16
Multicode
'98
17
Genie
'11-Current
Linear
18
Moore-O-Matic
'99
19
Chamberlain
'90-'92
OR
DIP SWITCH
ON
2
3
KG
KG
Button 2
DIP Switches
Battery Cover
CHART B
Description
Year
*
9 Position
'90-'92
®
9 Position
*
'83-'89
®
Canada
®
12 Position
'85
10 Position
'76
®
®
8 Position
'83-'89
10 Position
'76
®
9 Position
'85
®
®
8 Position
'76
®
7 Position
'83-'89
®
NOTE:
2 Position DIP Switch:
If programming fails reverse
DIP switches (OFF to ON and
ON to OFF).
** 3 Position DIP Switch:
For Chamberlain remotes DO NOT use
the "0" position, use "+" or "-". If you
already have a 3-button remote, DIP switch #1 must be set
to "-" if the large button is to open the door. It may be
necessary to reprogram original remote controls.
DIP SWITCH
1
See Chart B to determine #
of times to press button
and write in blank on
Step 5.
2
3
Motor
Unit
Existing
Clicker
Remote
Remote
Match DIP switches. Turn
extra switches OFF.**
4
Press program button until
LED lights.
5
Select a button to program.
Press button
times ensuring
LED stops flashing after each
press. Code is accepted
when door activates.
6
Press program button.
7
Programming complete. Press
selected button to test. If unit does
not work, return to Step 3.
Advertisement

Related Manuals for Clicker KLIK1U


Summary of Contents for Clicker KLIK1U
- Page 1 Refer to owner’s manual if necessary. • ALWAYS keep gate or garage door in sight until completely closed. NEVER permit Clicker products are intended to be used only with garage door openers manufactured anyone to cross path of moving gate or door.
- Page 2 • TOUJOURS garder la clôture ou la porte de garage en vue jusqu’à sa fermeture complète. NE JAMAIS permettre à quiconque de passer lorsqu’une clôture ou une porte est en mouvement. Les produits Clicker sont destinés à une utilisation exclusive sur des systèmes d'ouverture de porte de garage fabriqués après 1993 et qui utilisent des capteurs de sécurité...
- Page 3 • Mantenga SIEMPRE la compuerta o la puerta del garaje a la vista hasta que esté completamente cerrada. No deje NUNCA que nadie cruce la trayectoria de la compuerta Los productos de Clicker son pensados ser utilizados sólo con abre-puertas de garaje fabricó o puerta en movimiento.
- Page 4 © 2017, Clicker Corporation All Rights Reserved Tous droits réservés 114A3485I Todos los derechos reservados...
Need help?
Do you have a question about the KLIK1U and is the answer not in the manual?
Questions and answers