
Related Manuals for ZyXEL Communications LTE3202-M430


Summary of Contents for ZyXEL Communications LTE3202-M430
- Page 1 User’s Guide LTE3202-M430 4G LTE Indoor Router Default Login Details Version 1.00 Edition 1, 08/2018 LAN IP Address http://192.168.1.1 User Name admin Password 1234 Copyright © 2018 Zyxel Communications Corporation...
- Page 2 Every effort has been made to ensure that the information in this manual is accurate. Related Documentation • Quick Start Guide The Quick Start Guide shows how to connect the managed device. • More Information Go to support.zyxel.com to find other information on the LTE3202-M430 LTE3202-M430 User’s Guide...
-
Page 3: Table Of Contents
Status ..............................24 Monitor ..............................27 WAN Network ............................34 LAN ................................. 41 WLAN ..............................46 Firewall ..............................64 NAT ................................. 72 DDNS ..............................77 Remote Management ......................... 79 Short Message ............................85 System ..............................89 Troubleshooting ............................ 95 LTE3202-M430 User’s Guide... -
Page 4: Table Of Contents
1.2 Applications ............................ 10 1.2.1 Wireless LAN (WiFi) Connection ................... 10 1.3 Ways to Manage the LTE3202-M430 .................... 10 1.4 Good Habits for Managing the LTE3202-M430 ................10 1.5 Hardware Connections ......................... 10 1.5.1 LEDs ............................11 1.5.2 Rear Panel ..........................12 Chapter 2 The Web Configurator........................14... - Page 5 8.1 Overview ............................46 8.1.1 What You Can Do in this Chapter ..................46 8.1.2 What You Need to Know ..................... 46 8.2 WiFi Settings Screen ........................47 8.3 MAC Filter Screen .......................... 50 8.4 WPS Screen ............................. 51 LTE3202-M430 User’s Guide...
- Page 6 12.2 The Web Interface Screen ......................79 12.3 The TR069 Screen .......................... 80 12.4 The Telnet Screen ......................... 81 12.5 The UPnP Screen ........................... 82 12.5.1 Cautions with UPnP ......................82 12.6 The Bandwidth Management Screen ..................83 LTE3202-M430 User’s Guide...
- Page 7 Chapter 15 Troubleshooting..........................95 15.1 Overview ............................95 15.2 Power, and Hardware Installation ....................95 15.3 LTE3202-M430 Access and Login ....................95 15.4 Internet Access ..........................97 15.5 Wireless Connections ........................98 15.6 Getting More Troubleshooting Help ................... 98 Appendix A Customer Support ....................... 99 Appendix B Common Services ......................
-
Page 8: User's Guide
User’s Guide... -
Page 9: Introduction
This chapter introduces the main features and applications of the LTE3202-M430. The LTE3202-M430 is a 4G LTE indoor wireless router, which can connect to a mobile network and the Internet through a wireless WAN connection and provide easy network access to mobile users without additional wiring. -
Page 10: Applications
1.2 Applications Your can have the following networks with the LTE3202-M430: • Wired LAN. You can connect network devices via the Ethernet ports of the LTE3202-M430 so that they can communicate with each other and access the Internet. • Wireless LAN. Wireless clients can wirelessly connect to the LTE3202-M430 to access network resources. -
Page 11: Leds
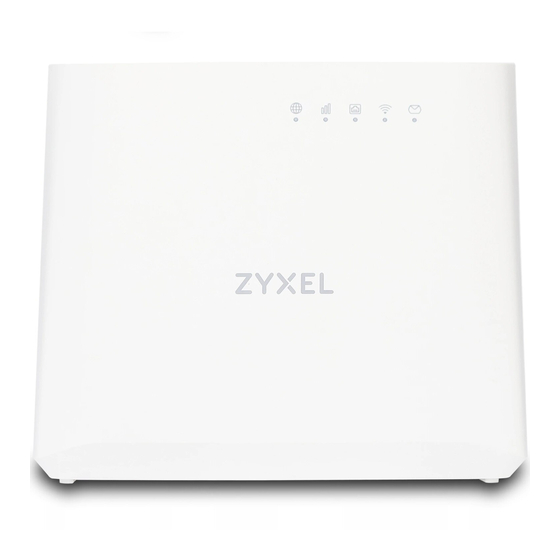
Chapter 1 Introduction 1.5.1 LEDs The following graphics display the front panel of the LTE3202-M430. You can check the LED lights to see the 2G/3G/4G connection status, signal strength, and the wireless connection status. Figure 1 LTE3202-M430 Front Panel Figure 2 LEDs... -
Page 12: Rear Panel
Note: You must insert the SIM card into the card slot before turning on the LTE3202-M430. 1.5.2.2 The WPS Button Your LTE3202-M430 supports WiFi Protected Setup (WPS), which is an easy way to set up a secure wireless network. WPS is an industry standard specification, defined by the WiFi Alliance. - Page 13 WPS activated. Then, the two devices connect and set up a secure network by themselves. You can use the WPS button on the rear panel of the LTE3202-M430 to activate WPS in order to quickly set up a wireless network with strong security.
-
Page 14: The Web Configurator
Internet Explorer. 2.2 Login Accounts There is one system account that you can use to log in to the LTE3202-M430: “admin”. The admin account allows you full access to all system configurations. The default admin user name is “admin” and password is “1234”. - Page 15 Section 2.2 on page 14 more information about login accounts. Click Login. The following screen displays if you have not yet changed your password. Enter a new password, retype it to confirm and click OK. The Home screen appears. LTE3202-M430 User’s Guide...
-
Page 16: Navigating The Web Configurator
Chapter 2 The Web Configurator 2.4 Navigating the Web Configurator The following summarizes how to navigate the web configurator from the Home screen. Figure 4 The Web Configurator’s Main Screen LTE3202-M430 User’s Guide... -
Page 17: Title Bar
This shows whether the LTE3202-M430’s WiFi LAN network is enabled. The following icons displays when the WiFi LAN network is disabled. WAN Connection This displays the type of mobile data connection the LTE3202-M430 has to the ISP. LTE3202-M430 User’s Guide... -
Page 18: Navigation Panel
Choose your language from the drop-down list on the upper right corner of the title bar. 2.4.2 Navigation Panel Use the menu items on the navigation panel to open screens to configure LTE3202-M430 features. The following sections introduce the LTE3202-M430’s navigation panel menus and their screens. - Page 19 Use this screen to specify limiting amount of package data consumed Statistics and view its statistics. Operating Mode Use this screen to select whether the LTE3202-M430 operates in router or bridge mode. Antenna Use this screen to specify which antennas the LTE3202-M430 uses for Selection signal transmission.
- Page 20 Web interface Use this screen to modify the server port for the HTTPS service. Management TR069 Use this screen to configure your LTE3202-M430 to be managed by an ACS. Telnet Use this screen to specify which interfaces allow Telnet access.
-
Page 21: Technical Reference
Technical Reference... -
Page 22: Setup Wizard
Name) Profile provided by your service provider. Select the Auto option if you did not configure an APN connection profile. If you have a limited data plan, you can specify the limited amount of the package data, and a reminder for when the percentage of the package data usage. Click Next to continue. LTE3202-M430 User’s Guide... - Page 23 This screen shows the default SSID Name and WiFi Key for the LTE3202-M430’s wireless network. Use this screen to configure the LTE3202-M430 wireless network settings. If you set up a new WiFi Key and SSID Name, the wireless clients will lose their wireless connection and will need to use the new wireless settings.
-
Page 24: Status
Use the Status screen to check status information about the LTE3202-M430. 4.2 Status This screen is the first thing you see when you log into the LTE3202-M430. It also appears every time you click the Status icon in the navigation panel. The Status screen displays the LTE3202-M430’s connection mode, wireless LAN information and traffic statistics. - Page 25 Download This indicated the amount of received data (in KB) on the LTE3202-M430. Operating Mode This is the device mode to which the LTE3202-M430’s wireless LAN is set - Router Mode or Bridge Mode. Summary Packet Statistics Click Details... to go to the Monitor > Packet statistics screen (Section 5.6 on page...
- Page 26 Click Details... to go to the Monitor > LTE modem status screen (Section 5.8 on page 31). Use this screen to view the detailed information about the LTE module, cellular interface, and SIM card. You can also view the LTE connection status. LTE3202-M430 User’s Guide...
-
Page 27: Monitor
SIM card. You can also check the LTE connection status (Section 5.8 on page 31). 5.3 The Log Screen The Web Configurator allows you to look at all of the LTE3202-M430’s logs in one location. LTE3202-M430 User’s Guide... -
Page 28: The Dhcp Table Screen
DHCP (Dynamic Host Configuration Protocol, RFC 2131 and RFC 2132) allows individual clients to obtain TCP/IP configuration at start-up from a server. You can configure the LTE3202-M430’s LAN as a DHCP server or disable it. When configured as a server, the LTE3202-M430 provides the TCP/IP configuration for the clients. -
Page 29: The Arp Table Screen
Reserve Select this if you want to reserve the IP address for this specific MAC address. Apply Click Apply to save your changes back to the LTE3202-M430. Cancel Click Cancel to reload the previous configuration for this screen. 5.5 The ARP Table Screen... -
Page 30: The Packet Statistics Screen
For the WAN port, it displays Up when the mobile data connection is up, Connecting when the LTE3202-M430 is trying to bring the mobile data connection up, and displays Down when the 3G/4G connection is down or not activated. -
Page 31: The Wlan Station Status Screen
Click Monitor > WLAN station status or the WLAN Station Status (Details...) hyperlink in the Status screen. View the wireless stations that are currently associated to the LTE3202-M430’s 2.4GHz wireless network in the Association List. Association means that a wireless client (for example, your network or computer with a wireless network card) has connected successfully to the AP (or wireless router) using the same SSID, channel and security settings. - Page 32 This displays the Mobile Country Code (MCC), which is used to identify the country of a mobile subscriber. This displays the Mobile Network Code (MNC), which is used in combination with MCC to identify the public land mobile network (PLMN) of a mobile subscriber. LTE3202-M430 User’s Guide...
- Page 33 Cell ID This displays the ID of a cell at the physical layer. Service Type This displays the type of the mobile network to which the LTE3202-M430 is connecting. Operation Band This displays the network type and the frequency band used by the mobile network to which the LTE3202-M430 is connecting.
-
Page 34: Wan Network
Figure 17 LAN/Wireless LAN and Wireless WAN 6.1.1 What You Can Do in this Chapter • Use the Cellular Network screen to configure the WAN settings on the LTE3202-M430 for Internet access (Section 6.2 on page 35). -
Page 35: The Cellular Network Screen
Cellular Network Network Type Select the type of the network (4G, 3G, or 2G) to which you want the LTE3202-M430 to connect and click Apply to save your settings. Otherwise, select Auto to have the LTE3202-M430 connect to an available network using the default settings on the SIM card. -
Page 36: The Apn Configuration Screen
PIN Code Enter the default or existing PIN code for the inserted SIM card. Apply Click Apply to save your changes back to the LTE3202-M430. Cancel Click Cancel to reload the previous configuration for this screen. 6.4 The APN Configuration Screen Use this screen to view or configure a connection profile. -
Page 37: The Network Selection Screen
• Select IP if you want the LTE3202-M430 to run IPv4 only. • Select IPv4v6 to allow the LTE3202-M430 to run IPv4 and IPv6 at the same time. • Select IPv6 if you want the LTE3202-M430 to run IPv6 only. -
Page 38: Data Usage/Statistic Screen
Table 16 Configuration > WAN network > Network Selection LABEL DESCRIPTION Select PLMN Select Auto to have the LTE3202-M430 automatically connect to the first available mobile Mode network using roaming when it is outside the coverage area of the original service provider’s network. -
Page 39: The Operation Mode Screen
The LTE3202-M430 supports two operation modes: Router Mode and Bridge Mode. • Router mode: This is the default operating mode of the LTE3202-M430. Use the router mode if you want to use routing functions, such as firewall, DHCP, NAT, and so on. The following figure shows an example of the LTE3202-M430 in router mode. -
Page 40: The Antenna Selection Screen
Click Configuration > WAN network > Antenna Selection to open the following screen. The LTE3202-M430 has two internal antennas, you can also install two external antennas to improve your wireless WAN signal strength. The LTE3202-M430 uses the internal antennas by default. If you installed external antennas, select External for the LTE3202-M430 to use these to detect the WAN network. -
Page 41: Lan
• Use the LAN IP screen to configure the LTE3202-M430’s LAN IP address (Section 7.4 on page 42). • Use the DHCP Server screen to enable the DHCP server on the LTE3202-M430 (Section 7.5 on page 43). • Use the DNS Settings screen to configure the LTE3202-M430’s DNS settings (Section 7.6 on page... -
Page 42: The Lan Ip Screen
IP address for your LTE3202-M430. Click Apply to save your changes back to the LTE3202- M430, or click Cancel to reload the previous configuration for this screen. Note: If you change the LTE3202-M430’s IP address, you need to use the new IP address to access the LTE3202-M430’s web configurator. -
Page 43: The Dhcp Server Screen
DESCRIPTION IP Address This shows the default LAN IP address. Enter the new IP address for the LTE3202-M430’s LAN interface if you want to change it. Subnet Mask This shows the default subnet mask. Enter the subnet mask of this interface in dot decimal notation. The subnet mask indicates what part of the IP address is the same for all computers in the network. -
Page 44: Dns Settings Screen
Click Delete All to remove all entries. This field displays the index number of the static IP address entry. IP Address This field displays the IP address that the LTE3202-M430 assigns to a device with the entry’s MAC address. MAC Address This field displays the MAC address of the device to which the LTE3202-M430 assigns the entry’s IP address. - Page 45 LABEL DESCRIPTION DNS Mode Select Auto if your ISP dynamically assigns DNS server information (and the LTE3202-M430's WAN IP address). Otherwise, select Manual if you have the IP address of a DNS server. Primary DNS Select Manual if you have the IP address of a DNS server.
-
Page 46: Wlan
H A P T E R WLAN 8.1 Overview This chapter describes the LTE3202-M430’s WLAN screens. Use these screens to set up your LTE3202- M430’s wireless LAN connection. 8.1.1 What You Can Do in this Chapter • Use the WiFi Settings screen to enable the wireless LAN, enter the SSID and select the wireless security mode (Section 8.2 on page... -
Page 47: Wifi Settings Screen
Use this screen to enable the wireless LAN, enter the SSID and select the wireless security mode. Note: If you are configuring the LTE3202-M430 from a computer connected to the wireless LAN and you change the LTE3202-M430’s SSID, channel or security settings, you will lose your wireless connection when you press Apply to confirm. - Page 48 Figure 32 Configuration > WLAN > WiFi Settings The following table describes the labels in this screen. Table 21 Configuration > WLAN > WiFi Settings LABEL DESCRIPTION Basic / Guest AP Enable Select the check box to enable the wireless LAN of the LTE3202-M430. LTE3202-M430 User’s Guide...
- Page 49 A standard 20MHz channel offers transfer speeds of up to 144Mbps (2.4GHz) whereas a 40MHz channel uses two standard channels and offers speeds of up to 300Mbps (2.4GHz). Because not all devices support 40 MHz channels, select wifi 2040 to allow the LTE3202-M430 to adjust the channel bandwidth automatically.
-
Page 50: Mac Filter Screen
00:A0:C5:00:00:02. You need to know the MAC addresses of the devices to configure this screen. Use this screen to view your LTE3202-M430’s MAC filter settings and add new MAC filter rules. Click Configuration > WLAN > MAC Filter. The screen appears as shown. -
Page 51: Wps Screen
Click Add New or Edit to enter or change the MAC address of the wireless devices that are allowed or denied access to the LTE3202-M430 in this field. Enter the MAC addresses in a valid MAC address format, that is, six hexadecimal character pairs, for example, 12:34:56:78:9a:bc. -
Page 52: Technical Reference
Method If you select PBC, click Activate to add another WPS-enabled wireless device (within wireless range of the LTE3202-M430) to your wireless network. You may either click Activate or press physical button on the LTE3202-M430 rear panel. Note: You must press the other wireless device’s WPS button within two minutes of pressing this button. - Page 53 The wireless network is the part in the blue circle. In this wireless network, devices A and B use the access point (AP) to interact with the other devices (such as the printer) or with the Internet. Your LTE3202-M430 is the AP.
-
Page 54: Additional Wireless Terms
LTE3202-M430. Preamble A preamble affects the timing in your wireless network. There are two preamble modes: long and short. If a device uses a different preamble mode than the LTE3202-M430 does, it cannot communicate with the LTE3202-M430. Authentication The process of verifying whether a wireless device is allowed to use the wireless network. - Page 55 User’s Guide or other documentation. You can use the MAC address filter to tell the LTE3202-M430 which devices are allowed or not allowed to use the wireless network. If a device is allowed to use the wireless network, it still has to have the correct information (SSID, channel, and security).
-
Page 56: Signal Problems
Usually, you should set up the strongest encryption that every device in the wireless network supports. For example, suppose you have a wireless network with the LTE3202-M430 and you do not have a RADIUS server. Therefore, there is no authentication. Suppose the wireless network has two devices. Device A only supports WEP, and device B supports WEP and WPA. -
Page 57: Wifi Protected Setup (Wps)
Look for a WPS button on each device. If the device does not have one, log into its configuration utility and locate the button (see the device’s User’s Guide for how to do this - for the LTE3202-M430, see Section 8.4 on page 51). - Page 58 Look for the client’s WPS PIN; it will be displayed either on the device, or in the WPS section of the client’s configuration interface (see the device’s User’s Guide for how to find the WPS PIN - for the LTE3202-M430, Section 8.4 on page...
- Page 59 WPA2-PSK pre-shared key to the enrollee. Whether WPA-PSK or WPA2-PSK is used depends on the standards supported by the devices. If the registrar is already part of a network, it sends the existing information. If not, it generates the SSID and WPA(2)-PSK randomly. LTE3202-M430 User’s Guide...
- Page 60 When WPS is activated on both, they perform the handshake. In this example, AP1 is the registrar, and Client 1 is the enrollee. The registrar randomly generates the security information to set up the network, since it is unconfigured and has no existing information. LTE3202-M430 User’s Guide...
- Page 61 In step 3, you add another access point (AP2) to your network. AP2 is out of range of AP1, so you cannot use AP1 for the WPS handshake with the new access point. However, you know that Client 2 supports the registrar function, so you use it to perform the WPS handshake instead. LTE3202-M430 User’s Guide...
- Page 62 If this happens, open the access point’s configuration interface and look at the list of associated clients (usually displayed by MAC address). It does not matter if the access LTE3202-M430 User’s Guide...
- Page 63 Check the MAC addresses of your wireless clients (usually printed on a label on the bottom of the device). If there is an unknown MAC address you can remove it or reset the AP. LTE3202-M430 User’s Guide...
-
Page 64: Firewall
Firewall 9.1 Overview Use these screens to enable and configure the firewall that protects your LTE3202-M430 and your LAN from unwanted or malicious traffic. Enable the firewall to protect your LAN computers from attacks by hackers on the Internet and control access between the LAN and WAN. -
Page 65: What You Need To Know
(click the General tab under Firewall and then click the Enable Firewall check box). The LTE3202-M430's purpose is to allow a private Local Area Network (LAN) to be securely connected to the Internet. The LTE3202-M430 can be used to prevent theft, destruction and modification of data, as well as log events, which may be important to the security of your network. -
Page 66: The Dos Protection Screen
Chapter 9 Firewall 9.2 The DoS Protection Screen Use this screen to enable DoS (Denial of Service) protection on the LTE3202-M430. Denial of Service (DoS) attacks are aimed at devices and networks with a connection to the Internet. Their goal is not to steal information, but to disable a device or network so users no longer have access to network resources. -
Page 67: The Icmp Protection Screen
Chapter 9 Firewall 9.3 The ICMP Protection Screen If an outside user attempts to probe an unsupported port on your LTE3202-M430, an ICMP response packet is automatically returned. This allows the outside user to know the LTE3202-M430 exists. Use this screen to prevent the ICMP response packet from being sent. -
Page 68: Url Filter Screen
Click Delete All to remove all rules from the LAN IP/MAC Binding List. This field displays the rule index number. IP address Enter the IP address with which the LTE3202-M430 uses the IP/MAC binding to verify the ARP packets. MAC address Enter the MAC address with which the LTE3202-M430 uses the IP/MAC binding to verify the ARP packets. -
Page 69: Ipv4/Port Filter Screen
Click Add New to create a new rule. This field displays the rule index number. Keywords of URL This field displays the keywords of URL or domain to which the LTE3202-M430 block or allow. or Domain Action Click Edit to go to the screen where you can edit the filtering rule. - Page 70 Click Edit to go to the screen where you can edit the filtering rule. Click Delete to remove the filtering rule. Apply Click Apply to save your changes back to the LTE3202-M430. Cancel Click Cancel to reload the previous configuration for this screen.
-
Page 71: Ipv6/Port Filter Screen
Chapter 9 Firewall 9.7 IPv6/Port Filter Screen The LTE3202-M430 firewall is a packet filtering firewall and restricts access based on the source/ destination computer network address of a packet and the type of application. Use this screen to configure IP filtering rules. To access this screen, click Configuration > Firewall > IPv6/Port Filter. -
Page 72: Nat
192.168.1.35 to a third (C in the example). You assign the LAN IP addresses to the devices (A to D) connected to your LTE3202-M430. The ISP assigns the WAN IP address. The NAT network appears as a single host on the Internet. All traffic coming from A to D going out to the Internet use the IP address of the LTE3202-M430, which is 192.168.1.1. -
Page 73: The Ip/Port Forwarding Screen
Enter the inside IP address of the virtual server here. LAN Port A private port is a port that causes (or triggers) the LTE3202-M430 to record the IP address of the LAN computer that sent the traffic to a server on the WAN. -
Page 74: The Dmz Screen
Select this to enable DMZ on the LTE3202-M430. DMZ IP address Type the IP address of your LTE3202-M430’s DMZ port in dotted decimal notation. Note: Make sure the IP addresses of the LAN, WAN and DMZ are on separate subnets. -
Page 75: The Pass Through Screen
Transfer Protocol) is an Internet File Transfer Protocol similar to FTP, but uses UDP (User Datagram Protocol) rather than TCP (Transmission Control Protocol). PPTP ALG Select this check box to enable PPTP ALG on the LTE3202-M430 to detect PPTP traffic and help build PPTP sessions through the LTE3202-M430’s NAT. RSTP ALG Select this check box to have the LTE3202-M430 detect RSTP traffic and help build RTSP sessions through its NAT. - Page 76 Enable this to turn on the PPTP ALG on the LTE3202-M430 to detect PPTP traffic and help build PPTP sessions through the LTE3202-M430’s NAT. Enable L2TP Enable this to turn on the L2TP ALG on the LTE3202-M430 to detect L2TP traffic and help build L2TP sessions through the LTE3202-M430’s NAT. Apply Click Apply to save your changes back to the LTE3202-M430.
-
Page 77: Ddns
Users can always use the same domain name instead of a different dynamic IP address that changes each time to connect to the LTE3202-M430 or a server in your network. The LTE3202-M430 must have a public global IP address and you should have your registered DDNS account information on hand. - Page 78 (","). User name Enter your user name. Password Enter the password assigned to you. Apply Click Apply to save your changes back to the LTE3202-M430. Cancel Click Cancel to reload the previous configuration for this screen. LTE3202-M430 User’s Guide...
-
Page 79: Remote Management
• Use the Web interface screen to modify the server port for the HTTPS service (Section 12.2 on page 79). • Use the TR069 screen to configure the LTE3202-M430 to be managed by an ACS (Section 12.3 on page 80). -
Page 80: The Tr069 Screen
An administrator can use an ACS to remotely set up the LTE3202-M430, modify settings, perform firmware upgrades as well as monitor and diagnose the LTE3202-M430. You have to enable the device to be managed by the ACS and specify the ACS IP address or domain name and username and password. -
Page 81: The Telnet Screen
ACS Password Enter the TR-069 password for authentication with the auto-configuration server. Enable Periodic Inform Select the check box for the LTE3202-M430 to send periodic inform via TR-069 on the WAN. Periodic Inform Interval Enter the time interval (in seconds) at which the LTE3202-M430 sends information to the auto-configuration server. -
Page 82: The Upnp Screen
IP address, convey its capabilities and learn about other devices on the network. In turn, a device can leave a network smoothly and automatically when it is no longer in use. Use this screen to enable UPnP on the LTE3202-M430. Click Configuration > Remote Management > UPnP to open the following screen. -
Page 83: The Bandwidth Management Screen
Enable Bandwidth Select the check box to use the Bandwidth Management. Management Default Select a profile from the drop-down list to be the LTE3202-M430’s default bandwidth management profile. Profile of Bandwidth Management Best effort Best Effort is the bandwidth management profile with the highest priority. Enter the data rate for both Uplink (UL) and Downlink (DL) in MB/s for the Best Effort profile. - Page 84 Table 41 Configuration > Remote Management > Bandwidth Management LABEL DESCRIPTION Add New Click Add new to add a new device to one of the LTE3202-M430’s bandwidth management profiles. Delete All Click Delete All to remove all entries. This displays the number of bandwidth management profiles created in the LTE3202- M430.
-
Page 85: Short Message
LTE3202-M430 received from mobile devices or the service provider. When the SMS box is full the LTE3202-M430 will begin to delete older entries as it adds new ones. 13.1.1 What You Can Do in this Chapter •... -
Page 86: Inbox Screen
Figure 62 Configuration > Short Message > Inbox: Open Message 13.4 Outbox Screen Use this screen to view messages sent from the LTE3202-M430. To access this screen, click Configuration > Short Message > Outbox. LTE3202-M430 User’s Guide... -
Page 87: Draft Screen
Click Delete to remove the message record. 13.5 Draft Screen Use this screen to view messages not yet sent from the LTE3202-M430. To access this screen, click Configuration > Short Message > Draft. Figure 64 Configuration > Short Message > Draft The following table describes the labels in this screen. -
Page 88: Sim Sms Screen
This field displays the mobile phone number from which the message is sent. Time This field displays the date and time the message was received. Content This field displays the content of the message. Action Click Delete to remove the message record. LTE3202-M430 User’s Guide... -
Page 89: System
14.1 Overview Use the system screens to configure general LTE3202-M430 settings. 14.1.1 What You Can Do in this Chapter • Use the General screen to view basic information about the LTE3202-M430 and restart the LTE3202- M430 (Section 14.2 on page 89). -
Page 90: The User Account Screen
Click Reset to reload the previous configuration for this screen. 14.3 The User Account Screen This screen allows you to set the domain name and change the LTE3202-M430’s system password. It is strongly recommended that you change your LTE3202-M430's system password. To access this screen, click Maintenance >... -
Page 91: The Time Settings Screen
M430 has a software mechanism to get the current time and date from an external server. To change your LTE3202-M430’s time zone, click Maintenance > Time Settings. The screen displays as shown. You can have the LTE3202-M430 get the date and time from a time server or change the IP address or URL of your time server. -
Page 92: The Firmware Upgrade Screen
To access this screen, click Maintenance > Firmware Upgrade. This screen displays the current firmware version and status of the LTE3202-M430. Type in the location of the file you want to upload in the Select File field or click Choose File to find it. Remember that you must decompress compressed (.ZIP) files before you can upload them. -
Page 93: The Settings Profile Screen
Click the Restore button to clear all user-entered configuration information and return the LTE3202-M430 to its factory defaults. The LTE3202-M430 automatically restarts. You can also press the Reset button on the rear panel to reset the factory defaults of your LTE3202-M430. Refer to Section 1.5.2.3 on page 13... -
Page 94: Import & Export Profile
Do not turn off the LTE3202-M430 while configuration file upload is in progress. Backup Configuration allows you to back up (save) the LTE3202-M430’s current configuration to a file on your computer. The configuration file should be saved and edited in UTF-8 (without BOM) format, if you’re using Windows Notepad, make sure you choose File >... -
Page 95: Troubleshooting
15.2 Power, and Hardware Installation The LTE3202-M430 does not turn on. None of the LEDs turn on. Make sure the LTE3202-M430 is correctly installed (refer to your Quick Start Guide). Press the power button to turn the LTE3202-M430 on. See Section 1.5.2 on page 12... - Page 96 1.5.2 on page Make sure your Internet browser does not block pop-up windows and has JavaScripts. Make sure your computer is connected to the LTE3202-M430 and is in the same subnet as the LTE3202- M430. Reset the device to its factory defaults, and try to access the LTE3202-M430 with the default IP address.
-
Page 97: Internet Access
If the problem continues, contact your ISP. The Internet connection is slow or intermittent. There might be a lot of traffic on the network. If the LTE3202-M430 is sending or receiving a lot of information, try closing some programs that use the Internet, especially peer-to-peer applications. -
Page 98: Wireless Connections
Make sure your computer (with a wireless adapter installed) is within the transmission range of the LTE3202-M430. Check that both the LTE3202-M430 and your computer are using the same wireless and wireless security settings. I can only see newer logs. Older logs are missing. -
Page 99: Appendix A Customer Support
• Brief description of the problem and the steps you took to solve it. Corporate Headquarters (Worldwide) Taiwan • Zyxel Communications Corporation • http://www.zyxel.com Asia China • Zyxel Communications (Shanghai) Corp. Zyxel Communications (Beijing) Corp. Zyxel Communications (Tianjin) Corp. • http://www.zyxel.cn India • Zyxel Technology India Pvt Ltd • http://www.zyxel.in Kazakhstan •... - Page 100 • Zyxel Singapore Pte Ltd. • http://www.zyxel.com.sg Taiwan • Zyxel Communications Corporation • http://www.zyxel.com/tw/zh/ Thailand • Zyxel Thailand Co., Ltd • http://www.zyxel.co.th Vietnam • Zyxel Communications Corporation-Vietnam Office • http://www.zyxel.com/vn/vi Europe Austria • Zyxel Deutschland GmbH • http://www.zyxel.de Belarus • Zyxel BY • http://www.zyxel.by...
- Page 101 Appendix A Customer Support Belgium • Zyxel Communications B.V. • http://www.zyxel.com/be/nl/ • http://www.zyxel.com/be/fr/ Bulgaria • Zyxel България • http://www.zyxel.com/bg/bg/ Czech Republic • Zyxel Communications Czech s.r.o • http://www.zyxel.cz Denmark • Zyxel Communications A/S • http://www.zyxel.dk Estonia • Zyxel Estonia • http://www.zyxel.com/ee/et/ Finland •...
- Page 102 • Zyxel Communications Poland • http://www.zyxel.pl Romania • Zyxel Romania • http://www.zyxel.com/ro/ro Russia • Zyxel Russia • http://www.zyxel.ru Slovakia • Zyxel Communications Czech s.r.o. organizacna zlozka • http://www.zyxel.sk Spain • Zyxel Communications ES Ltd • http://www.zyxel.es Sweden • Zyxel Communications • http://www.zyxel.se Switzerland •...
- Page 103 Appendix A Customer Support • http://www.zyxel.ch/ Turkey • Zyxel Turkey A.S. • http://www.zyxel.com.tr • Zyxel Communications UK Ltd. • http://www.zyxel.co.uk Ukraine • Zyxel Ukraine • http://www.ua.zyxel.com Latin America Argentina • Zyxel Communication Corporation • http://www.zyxel.com/ec/es/ Brazil • Zyxel Communications Brasil Ltda.
- Page 104 Appendix A Customer Support North America • Zyxel Communications, Inc. - North America Headquarters • http://www.zyxel.com/us/en/ Oceania Australia • Zyxel Communications Corporation • http://www.zyxel.com/au/en/ Africa South Africa • Nology (Pty) Ltd. • http://www.zyxel.co.za LTE3202-M430 User’s Guide...
-
Page 105: Appendix B Common Services
H.323 1720 NetMeeting uses this protocol. HTTP Hyper Text Transfer Protocol - a client/server protocol for the world wide web. HTTPS HTTPS is a secured http session often used in e- commerce. LTE3202-M430 User’s Guide... - Page 106 Simple Network Management Program. SNMP-TRAPS TCP/UDP Traps for use with the SNMP (RFC:1215). SQL-NET 1521 Structured Query Language is an interface to access data on many different types of database systems, including mainframes, midrange systems, UNIX systems and network servers. LTE3202-M430 User’s Guide...
- Page 107 TFTP Trivial File Transfer Protocol is an Internet file transfer protocol similar to FTP, but uses the UDP (User Datagram Protocol) rather than TCP (Transmission Control Protocol). VDOLIVE 7000 Another videoconferencing solution. LTE3202-M430 User’s Guide...
-
Page 108: Appendix C Legal Information
The contents of this publication may not be reproduced in any part or as a whole, transcribed, stored in a retrieval system, translated into any language, or transmitted in any form or by any means, electronic, mechanical, magnetic, optical, chemical, photocopying, manual, or otherwise, without the prior written permission of Zyxel Communications Corporation. Published by Zyxel Communications Corporation. All rights reserved. - Page 109 The maximum RF power operating for each band as follows: the band 1710.2 – 1784.8 MHz is 870.96 mW. • WCDMA Band I The maximum RF power operating for each band as follows: the band 1922.6 to 1977.4 MHz is 194.98 mW. LTE3202-M430 User’s Guide...
- Page 110 Hrvatski Zyxel ovime izjavljuje da je radijska oprema tipa u skladu s Direktivom 2014/53/UE. (Croatian) Íslenska Hér með lýsir, Zyxel því yfir að þessi búnaður er í samræmi við grunnkröfur og önnur viðeigandi ákvæði tilskipunar 2014/53/ (Icelandic) LTE3202-M430 User’s Guide...
- Page 111 2. The regulatory limits for maximum output power are specified in EIRP. The EIRP level (in dBm) of a device can be calculated by adding the gain of the antenna used (specified in dBi) to the output power available at the connector (specified in dBm). LTE3202-M430 User’s Guide...
- Page 112 If this product is end of life, take it to a recycling station designated by local authorities. At the time of disposal, the separate collection of your product and/or its battery will help save natural resources and ensure that the environment is sustainable development. LTE3202-M430 User’s Guide...
- Page 113 - 灰塵及污物 - 切勿接觸灰塵、污物、沙土、食物或其他不合適的材料。 • 雷雨天氣時,不要安裝,使用或維修此設備。有遭受電擊的風險。 • 切勿重摔或撞擊設備,並勿使用不正確的電源變壓器。 • 若接上不正確的電源變壓器會有爆炸的風險。 • 請勿隨意更換產品內的電池。 • 如果更換不正確之電池型式,會有爆炸的風險,請依製造商說明書處理使用過之電池。 • 請將廢電池丟棄在適當的電器或電子設備回收處。 • 請勿將設備解體。 • 請勿阻礙設備的散熱孔,空氣對流不足將會造成設備損害。 • 請插在正確的電壓供給插座 ( 如 : 北美 / 台灣電壓 110V AC,歐洲是 230V AC)。 • 假若電源變壓器或電源變壓器的纜線損壞,請從插座拔除,若您還繼續插電使用,會有觸電死亡的風險。 • 請勿試圖修理電源變壓器或電源變壓器的纜線,若有毀損,請直接聯絡您購買的店家,購買一個新的電源變壓器。 • 請勿將此設備安裝於室外,此設備僅適合放置於室內。 • 請勿隨一般垃圾丟棄。 LTE3202-M430 User’s Guide...
- Page 114 This product contains in part some free software distributed under GPL license terms and/or GPL like licenses. Open source licenses are provided with the firmware package. You can download the latest firmware at www.zyxel.com. To obtain the source code covered under those Licenses, please contact support@zyxel.com.tw to get it. LTE3202-M430 User’s Guide...
-
Page 115: Index
LAN configuration General wireless LAN screen contact information cookies copyright CTS threshold current date/time hardware connections customer support installation data fragment threshold Internet Explorer date DHCP server disclaimer Java LTE3202-M430 User’s Guide... - Page 116 Service Set good habits SIM card SSID stateful inspection firewall status supported browsers overview see also Network Address Translation Netscape Navigator Network Address Translation thresholds data fragment RTS/CTS time TR-069 ACS setup overview Universal Plug and Play LTE3202-M430 User’s Guide...
- Page 117 46, 52, 98 authentication 54, 55 channel encryption example fragmentation threshold limitations MAC address filter 50, 55 preamble RADIUS server RTS/CTS threshold security SSID WPA-PSK 57, 59 example limitations push button wireless security WPA-PSK 57, 59 example limitations example LTE3202-M430 User’s Guide...
Need help?
Do you have a question about the LTE3202-M430 and is the answer not in the manual?
Questions and answers