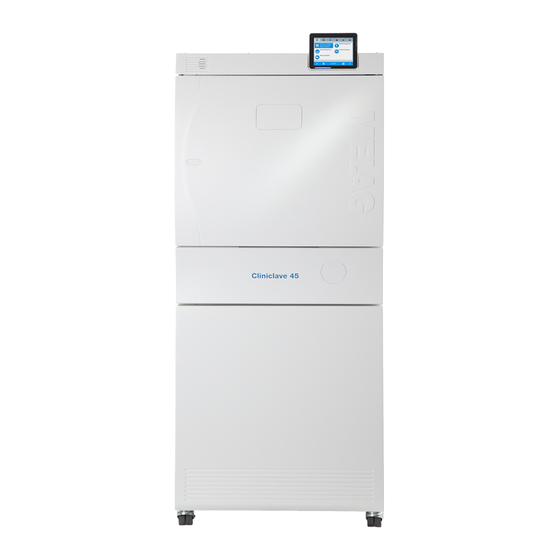
MELAG Cliniclave 45 User Manual
Large steam sterilizer
Hide thumbs
Also See for Cliniclave 45:
- User manual (94 pages) ,
- Technical manual (52 pages) ,
- Technical manual (52 pages)
Table of Contents
Advertisement
User manual
Cliniclave
Cliniclave
Large steam sterilizer
as of software v3.218
EN
Dear doctor,
We thank you for your confidence demonstrated by the purchase of this MELAG product.
As an owner-run and operated family concern founded in 1951, we have a long history of successful specialization in
hygiene products for practice-based use. Our focus on innovation, quality and the highest standards of operational
reliability has established MELAG as the world's leading manufacturer in the instrument treatment and hygiene field.
You, our customer are justified in your demand for the best products, quality and reliability. Providing "competence in
hygiene" and "Quality – made in Germany", we guarantee that these demands will be met. Our certified quality
management systems is subject to close monitoring: Our certified quality management systems is subject to close
monitoring: one instrument to this end is our annual multi-day audit conducted in accordance with ISO 13485 and
ISO 9001. This guarantees that all MELAG products are manufactured and tested in accordance with strict quality
criteria.
The MELAG management and team.
®
45
®
45 M
Advertisement
Table of Contents

Related Manuals for MELAG Cliniclave 45


Summary of Contents for MELAG Cliniclave 45
- Page 1 Our certified quality management systems is subject to close monitoring: one instrument to this end is our annual multi-day audit conducted in accordance with ISO 13485 and ISO 9001. This guarantees that all MELAG products are manufactured and tested in accordance with strict quality criteria.
- Page 2 Please store the user manual carefully and in close proximity to the device, e.g. in the bracket on the inside of the floor unit door. It represents a component of the product. Validity This manual is valid for the autoclave Cliniclave 45 and Cliniclave 45 M. About this manual Symbols used...
- Page 3 MELAG devices are synonymous for long-term quality. When you eventually need to decommission your MELAG device, we offer a special disposal service. Simply contact your stockist. In affixing the CE mark, the manufacturer declares that this medical product fulfils the basic requirements of the medical products directive.
- Page 4 ¾“ water tap with safety combination As option Floor unit (for Cliniclave 45) Reverse osmosis unit MELAdem 56 (for Cliniclave 45) or MELAdem 56 M (for Cliniclave 45 M) Leak detector (water stop) Loading system for effortless loading and unloading...
-
Page 5: Table Of Contents
Table of contents Log printer ..............47 Chapter 1 – Device description ....... 8 Touch sensitivity ............48 Intended Use ..............8 Energy-saving mode ..........49 Views of the device ............9 Chapter 7 – Functional Checks ..... 50 Colour-Touch Display ..........11 Load mount ..............13 Vacuum test ............... - Page 6 Setup, installation and commissioning The autoclave should only be set-up, installed and commissioned by MELAG authorized persons. Never operate the autoclave in areas exposed to the danger of explosion.
- Page 7 Carrying the autoclave The autoclave should only ever be carried by four people. In exceptional cases, the Cliniclave 45 can be carried by two persons. In such cases, observe and comply with the corresponding specifications issued by your respective professional association.
-
Page 8: Chapter 1 - Device Description
Only ever use the autoclave for the applications as foreseen in the technical documentation and only in connection with the devices and components as recommended by MELAG. As with the preceding instrument treatment and in accordance with §2 MPBetreibV, the sterilization of instruments and textiles using this steam sterilizer may only be carried out by competent personnel. -
Page 9: Views Of The Device
Chapter 1 – Device description Views of the device Front side 1. CF card slot 2. Colour-Touch Display 3. LED status bar 4. Door (swings open left/right) 5. Opening for door opening in an emergency 6. Validation fitting* 7. Power switch (covered, accessible from the side) 8. - Page 10 Chapter 1 – Device description Back side 20. Fan 21. Pressure and emergency release behind cover plate Lower side 22. Waste water connection 23. Feed water inflow (from water treatment unit) 24. Connection of the concentrate duct from the water treatment unit 25.
-
Page 11: Colour-Touch Display
Chapter 1 – Device description Colour-Touch Display Status bar Menu bar Main area Action bar Fig. 2: Fore view with Colour-touch display Symbols in the status bar Meaning Programs/Tests Indicates whether a program/test is running Immediate output Indicates whether immediate output is activated/deactivated Additional drying Indicates whether additional drying is activated/deactivated Graphic logs... - Page 12 Chapter 1 – Device description Symbols in the action bar Meaning Door open Opens the steam sterilizer door Back Returns to the previous window Forwards Navigates to the next window Cancel/ Navigates to the superordinate menu, leaves the window without Return without saving saving...
-
Page 13: Load Mount
Up to three mounts of this type can be used per sterilization unit. * We do not recommend using this mount in the rear half of the Cliniclave 45 M with the loading system "Standard". In such a case, please use the loading system "Comfort". -
Page 14: Chapter 2 - First Steps
The record of installation and set-up is to be completed by the responsible person and a copy be sent to both MELAG and the stockist as proof of correct set-up, installation and commissioning. This is a constituent part of any guarantee claim. -
Page 15: Switch On The Autoclave
Chapter 2 – First steps Switch on the autoclave The autoclave is switched-on via the power switch on the right-hand side of the autoclave. Opening and closing the door PLEASE NOTE Entry on the display is only possible when the door is closed. The autoclave is fitted with a motor-driven automatic door locking mechanism with a thread spindle. - Page 16 Chapter 2 – First steps To close the door, press it firmly inwards until the automatic door lock engages. After the door has been closed, the display returns to the program menu. The door is locked pressure-tight upon program start. Please observe the following when closing the autoclave door: ...
-
Page 17: Chapter 3 - Loading The Steam Sterilizer
Chapter 3 – Loading the steam sterilizer Chapter 3 – Loading the steam sterilizer Preparing the sterilization material The most important precondition for the safe disinfection and sterilization of sterilization material is the correct cleaning and care of the sterilization material in accordance with the manufacturer’s specifications. The choice of materials, cleaning fluid and treatment procedures used are also of great significance. -
Page 18: Loading The Autoclave
Insert trays or cassettes in the chamber only with their appropriate mount. Use perforated trays such as those from MELAG. Only in this way can the condensate drain off. The use of a non-perforated base or half-shell to accept the sterilization material can result in poor drying results. - Page 19 Chapter 3 – Loading the steam sterilizer WARNING The use of unsuitable sterilization containers results in insufficient steam penetration and even failure of the sterilization. This can also prevent condensate drain-off. This produces poor drying results. This can result in unsterile instruments and thus endanger the health of patient and practice team.
- Page 20 We do not recommend using this mount in the rear half of the Cliniclave 45 M with the loading system "standard". In such a case, please use the loading system "comfort".
- Page 21 Chapter 3 – Loading the steam sterilizer Loading system MELAG provides a loading system, enabling the effortless and ergonomic loading and unloading of the autoclave. This consists of a loading trolley, slide rail, batch slider and loading hook. The applicable operating manual provides information regarding the set-up and use of the loading trolley.
-
Page 22: Chapter 4 - Sterilizing
Chapter 4 – Sterilizing Chapter 4 – Sterilizing Important information regarding routine operation Daily routine controls Check the sterilization chamber and seal for its correct condition, see Chapter 8 – Maintenance, Cleaning. Check the operation readiness of the recording equipment, see Chapter 5 –... -
Page 23: Selecting The Program
Given normal operation of a Cliniclave 45, this requires c. 13 minutes and 20 minutes for a Cliniclave 45 M. 2) By taking into account the specified load quantities, the program-specific drying times guarantee excellent drying of the sterilized equipment. - Page 24 Chapter 4 – Sterilizing Additional program Use/function Vacuum test For measurement of the leakage rate, text with dry and cold devices (test without load) Bowie & Dick test Steam penetration test with special test package (available from specialist stockists) Conductivity For manual measurement of the feed water quality measurement Emptying...
-
Page 25: Starting The Program
To activate automatic shutdown, set a check mark and confirm with SAVE. WARNING Unsupervised operation of the device can result in damage to the device or your facility. In such a case, MELAG does not accept any liability. Never operate the device unattended. Unsupervised operation of electrical devices, including this autoclave at the operator’s risk. -
Page 26: Sterilization Phase Is Ended
Chapter 4 – Sterilizing Following the program run on the computer You can follow the progress of a current program on every computer of the user network via the website integrated in the autoclave. The autoclave must be assigned an IP address and be connected to the user network. Open a web browser window (we recommend Mozilla Firefox or Internet Explorer). -
Page 27: Drying Phase
Chapter 4 – Sterilizing Drying phase The autoclave provides excellent drying of the sterilization material. If difficult-to-dry items require better drying, you can undertake the following steps to improve drying: e.g. stand the transparent and paper sterilization packaging upright, see section Loading the autoclave on page 18. -
Page 28: The Clearance Process
Chapter 4 – Sterilizing WARNING The standard DIN EN 285 prescribes very good drying (residual moisture < 1% for textiles/0.2 % for metal). This is not guaranteed if a program is aborted prematurely. In such a case, following the requirements placed on sterilization by DIN EN 285 and DIN 58946-7, sterilization is classified as not completed successfully. -
Page 29: Removing The Sterilized Equipment
Chapter 4 – Sterilizing Batch indication comprises the checking of the indicators used in the sterilization program e.g. MELAcontrol/MELAcontrol PRO. Clearance of the indicator strip is possible only if it changes colour entirely. Batch clearance comprises the checking of the process parameters using the sterilization results on the autoclave and the sterilization log as well as checking of the individual packaging for damage and residual moisture. -
Page 30: Storing Sterile Instruments
Chapter 4 – Sterilizing Storing sterile instruments Use only standard-conform packaging for the sterilized equipment. Do not store the sterilized instruments in the treatment room. Observe the provisions of DIN 58953, part 8 and the following criteria when storing sterilized equipment: Observe the following criteria when selecting the storage location and duration of the sterilized equipment: ... -
Page 31: Chapter 5 - Logging
Chapter 5 – Logging Chapter 5 – Logging Batch documentation The batch documentation acts as proof of the successful conclusion of the sterilization process and represents an obligatory part of quality control (MPBetreibV). The steam sterilizer internal log memory saves such data as the program type, batch and process parameters of all the programs completed. - Page 32 Chapter 5 – Logging Inserting the CF card The card slot for the CF card is located on the right-hand side of the display housing. Proceed as follows in order to insert the CF card in the slot. Insert the CF card in the card slot fully with the raised finger edge pointing rightwards and to the rear.
- Page 33 Chapter 5 – Logging Enter the user name and password and confirm with SAVE. Connection via TCP With a TCP connection, enter the TCP port number in the autoclave as follows: Select a connection via TCP. The TCP port currently set is displayed on the lower pushbutton (Standard TCP port: 65001) Press this pushbutton to alter the pre-set TCP port.
- Page 34 Chapter 5 – Logging Double click in Windows Explorer on the log file. When the ending is unfamiliar, Windows 7 displays the adjacent message. Select Select a program from a list of installed programs and confirm with OK. Select the editor from a list of programs in the opening window. Ensure to tick the option Always use the selected program to open this kind of file so that the operating system recognizes this ending the next time.
-
Page 35: Outputting Logs Immediately And Automatically
Chapter 5 – Logging Outputting logs immediately and automatically Outputting text logs automatically after program end (immediate output) If you want to output the associated text log automatically after the end of a program, use the Immediate output option. As delivered, the autoclave is set to automatic log output via the CF card. Activating the Immediate output option: Select the Settings menu Select the Logging option. -
Page 36: Subsequent Log Output
Chapter 5 – Logging Recording graphic logs (optional) If you wish to output a graphic log in addition to a text log, activate the Graphic logs option. The following additional requirements must be fulfilled in order to record graphic logs: ... -
Page 37: Determining The Log Format
Chapter 5 – Logging Outputting a log from the log list Proceed as follows to output a specific log from the internal memory: Select the Log output menu. Select Log list and press CONTINUE. A list with all text logs is displayed which have been saved in the internal memory. - Page 38 >> Never change code on follow. line << Proof of authenticity (electronic signature); 01004170D314F2F18B55772ABC9972B8E37E8430 Should never be altered; decoding the code (by 3637720D1E3866C3BC15143F50193212631C7144 MELAG) indicates whether the data was generated on a 1CCC0F85B6FB796276DC018603F3AC3BC0C1064F MELAG autoclave and has been changed. FD1AEDC25052452FBED17825410C2CC75B42CAD3 965A291942E3164CBC4D5654E37B5D27BF7C6E46...
-
Page 39: Finding A Log
Direct transfer of the log to a computer via the network and using the MELAG FTP server allows you to determine directly in the FTP server where on your computer the device directory with log files is to be saved. - Page 40 Chapter 5 – Logging Log type File Explanation ending Malfunction in standby .STB This log type is generated following the malfunctions registered during a time at which no program was active. System log .LOG A sort of log book listing all malfunctions and changes to the system in order of their incidence.
-
Page 41: Chapter 6 - Settings
Chapter 6 – Settings Chapter 6 – Settings Logging Chapter 5 – Logging on page 31. User administration An individual ID and user PIN can be issued to every user to facilitate reliable traceability via the clearance process after the end of a sterilization program. The user is able to authenticate himself before clearing the batch. - Page 42 PIN number of this ID to "0". Changing the Admin PIN The Admin PIN (Standard: 1000) can be edited like every other User PIN and should be changed after delivery. PLEASE NOTE If you forget the Admin PIN, consult your stockist/MELAG customer services provider.
-
Page 43: Additional Drying
Chapter 6 – Settings Additional drying Used with the types of load specified in this chapter (see the section Loading the autoclave), the program-specific drying times guarantee very good drying of the sterilized equipment. For difficult drying tasks choose the Additional drying option to extend the drying time by 50%. Select the Settings menu →... -
Page 44: Light Intensity
Chapter 6 – Settings Light intensity You can change the light-intensity and thus the contrast of the display via the keys. Volume You can change the volume via the keys. Key tones Select YES or NO to determine whether a tone should be emitted every time a pushbutton is pressed. This can be deactivated at any time. -
Page 45: Screensaver
Chapter 6 – Settings Screensaver A screensaver can be activated to protect the display in standby operation. This displays a continuous slide show of any pictures. Proceed as follows to activate screensavers and pictures for the slide show. Select the Settings menu. Navigate to the Screensaver option. -
Page 46: Intelligent Drying
Chapter 6 – Settings Intelligent drying In contrast to a conventional time-controlled drying procedure, with which the duration of the drying phase is determined by the program, the duration of the intelligent drying is automatically calculated using the residual moisture in the sterilization chamber. A number of factors play a role in this process including e.g. the nature of the load, wrapped or unwrapped, the load quantity, the distribution of the load in the sterilization chamber etc. -
Page 47: Log Printer
Chapter 6 – Settings Press the symbol to search for all the label printers available in the practice network. If one or more label printers are available in the practice network, these will be displayed in the list of printers. Select the desired label printer from the list and confirm with SAVE. -
Page 48: Touch Sensitivity
Chapter 6 – Settings Press the symbol to search for all log printers available in the network. If one or more log printers are available in the network, these will be displayed in the list of printers. Select the desired log printer from the list and confirm with SAVE. The display returns to the "Log printer"... -
Page 49: Energy-Saving Mode
103°C. Waiting time 2 (W2) After a pre-set waiting time of 25 minutes (Cliniclave 45) or 40 minutes (Cliniclave 45 M), the double-jacket steam generator is no longer heated. Accordingly, the length of the program run time increases by a few minutes upon the next start, depending on the length of the operating pause, as the double-jacket steam generator must first be pre-heated to the necessary start temperature. -
Page 50: Chapter 7 - Functional Checks
If the treatment indicator strips or the treatment indicator sheets are uncoloured or exhibit less colour in the centre of the star in comparison to the end, air-removal was insufficient. In such a case, please consult the stockist customer services/MELAG customer services. -
Page 51: Helix Test Body System Melacontrol/Melacontrol Pro
Chapter 7 – Functional Checks Helix test body system MELAcontrol/MELAcontrol PRO The Helix test body system is an indicator and batch control system fulfilling the requirements of DIN EN 867-5. It consists of a test body, the Helix and an indicator strip. If sterilizing category "critical B“... -
Page 52: Chapter 8 - Maintenance
Chapter 8 – Maintenance Chapter 8 – Maintenance Cleaning Door seal, chamber, chamber sealing face, mount, trays Check the chamber, including the door seal and chamber sealing face and the load mount once a week for impurities, deposits or damage. If you find any impurities, remove any trays, cassettes and the mount from the chamber from the front. -
Page 53: Avoiding Staining
Maintenance should only be performed by trained customer services technicians, or stockist technicians. Consult your stockist or the nearest MELAG customer services point. Maintain the specified servicing intervals. Regular maintenance is vital to ensure reliable operation and value retention of the autoclave. -
Page 54: Chapter 9 - Operating Pauses
Please observe the following whilst carrying the autoclave: The autoclave should always be carried by four people. In exceptional cases, the Cliniclave 45 can be carried by two persons. In such cases, observe and comply with the corresponding specifications issued by your respective professional association. -
Page 55: Emptying The Double-Jacket Steam Generator
Chapter 9 – Operating Pauses WARNING Lifting and carrying too heavy a load can result in spinal injury. Failure to observe these provisions can result in crushing. Please ensure that you comply with the transport instructions. Transport within the practice Please observe the following during transport, within a room or the practice: ... -
Page 56: Chapter 10 - Description Of Function
Chapter 10 – Description of function Chapter 10 – Description of function The sterilization procedure The autoclave sterilizes on the basis of the fractionated vacuum procedure. This guarantees the complete and effective wetting/penetration of the sterilization material with saturated steam. This option enables the sterilization of loads common to a doctor's practice or clinic. -
Page 57: Program Sequence
Chapter 10 – Description of function Program sequence A program runs in three phases. After program start, you can follow the program run in the display. It shows the chamber temperature and pressure as well as the time until the end of sterilization/the drying. Regular sterilization program Program phase Description... -
Page 58: Chapter 11 - Malfunctions
Should you be unable to find the relevant event, or your efforts do not redress the problem, you can contact your nearest stockist or authorized MELAG customer service provider. To enable us to give the best possible service, please have your autoclave serial number and a detailed description of the fault to hand. - Page 59 Chapter 11 – Malfunctions Incident Possible cause What you can do Poor drying results In addition to an orderly Check that the autoclave is set up device function, the drying correctly. The autoclave must be level. depends to a large extent on ...
- Page 60 Repeat vacuum test, when autoclave is cold test started with load and empty 4000 sterilization programs have been Contact a MELAG customer services provider run/a year has elapsed since or your stockist to arrange servicing. The commissioning or the last servicing.
- Page 61 Chapter 11 – Malfunctions Event Possible causes What you can do Immediate output is activated in the Press YES if you wish to output the logs not yet Settings menu Logging, and the transferred to the computer. computer has been selected as output medium, but has not yet been connected/has not been switched on.
-
Page 62: Opening The Door Manually
Chapter 11 – Malfunctions Event Possible causes What you can do Drainage line blocked Check the waste water hose for kinks Check the siphon for blockage Packaging residue or soiling in the Check the load; do not place any packaging pressure sensors of the chamber nozzles. -
Page 63: Glossary
→ Distilled water products requiring sterilization Authorized persons DIN EN ISO 11140-1 Depot technicians or MELAG-specified customer Standard – the sterilization of products for use in medical services trained by MELAG. treatment – chemical indicators – part 1: General Batch... - Page 64 Without hollows or gaps, solid, compact, closed sterilization in a sterilizer in accordance with DIN EN Soft sterilization packaging 285. [DIN EN 285] eg. a paper bag or transparent sterilization packaging MELAG network adapter Standard conform ® Ethernet adapter for the log printer MELAprint 42; a...
-
Page 65: Technical Data
Technical Data Technical Data ® Model name Cliniclave Table-top device with floor unit Device dimensions (HxWxD) 91 x 65 x 91 cm 160 x 65 x 91 cm Sterilization chamber Ø 44 cm x 72 cm (diam. x depth) Effective capacity 1 StU Volume of the sterilization 105 litres... - Page 66 Technical Data ® Model name Cliniclave 45 M Device dimensions (HxWxD) 160 x 65 x 153 cm Sterilization chamber Ø 44 cm x 134 cm (diam. x depth) Effective capacity 2 StU Volume of the sterilization 200 litres chamber Weight (empty) 315 kg 340 kg (with floor unit and MELAdem 56 M) Operating weight...
-
Page 67: Appendix A - Accessories
11045 Floor unit for Cliniclave 45, door hinge right 65 x 86 x 73 cm 11047 Floor unit for Cliniclave 45 M, door hinge left or right 65 x 145 x 73 cm 11048 Mounts Mount for 2 instrument baskets 32.5 x 60 x 27.7 cm... - Page 68 Appendix A – Accessories Designation Dimensions Order no. (W x D x H) Other Package holder, short 18.4 x 28 x 8.7 cm 22410 Package holder, long 18.4 x 37 x 8.7 cm 22420 Leak detector (water stop) 01056 Installation package 09027...
- Page 70 MELAG Medizintechnik oHG Geneststraße 6-10 10829 Berlin Germany E-mail: info@melag.de Web: www.melag.de Responsible for content: MELAG Medizintechnik oHG We reserve the right to technical alterations Your stockist:...
Need help?
Do you have a question about the Cliniclave 45 and is the answer not in the manual?
Questions and answers