
Related Manuals for Samsung RS2*3*


Summary of Contents for Samsung RS2*3*
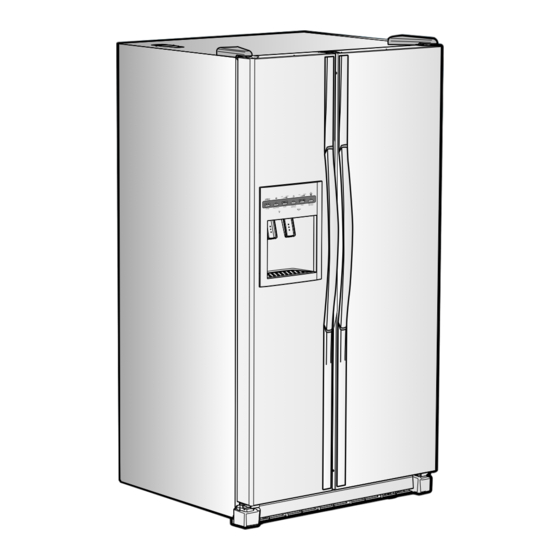
- Page 1 SAMSUNG Home Appliance Service Model: SIDE-BY-SIDE REFRIGERATOR RS2 * 3 * RS2 * 2 * RS2 * 1 * SAM0096...
-
Page 2: Important Safety Notice
The manufacturer or dealer cannot be responsible for the interpretation of this information. SAMSUNG ELECTRONICS AMERICA, INC. Technical Service Guide All rights reserved. This service guide may not be reproduced in whole or in part in any form without written permission from the SAMSUNG ELECTRONICS Company. WARNING Copyright ⓒ2004... -
Page 3: Table Of Contents
Contents 1. Safety instruction on services 2. Warranty information ··································· 3. Mechanical Disassembly ································ 4. Circuit Diagram ······································ 5. Operation Principles By Parts Of Circuit 6. Illustrated Parts Catalog ································· Appendix Ⅰ Ⅰ (Reference for circuit diagnostics) ● ······························ ························ ····················... -
Page 4: Safety Instruction On Services
It must be in the same assembled state when compared with the state before disassembly. ●Check the surrounding conditions of the installed refrigerator. When the refrigerator is located at humid or wet place, or the installed state is unstable, change the location. ●If needed, do the ground. -
Page 5: Warranty Information
SAMSUNG or SAMSUNG's authorized service center. SAMSUNG will repair or replace any part found to be defective, at our option and at no charge as stipulated herein, with new or reconditioned parts during the limited warranty period specified above. All replaced parts and products become the property of SAMSUNG and must be returned to SAMSUNG. -
Page 6: Mechanical Disassembly
Tempered Glass Shelf Plastic Drawers in Refrigerator Gallon Door Bin ······································· Water Filter ········································· Damper in the Refrigerator Twin cool in the Refrigerator Refrigerator Thermistor 3-2) Freezer Disassembly Door Bin in Freezer ···································· Freezer Door Light Switch Plastic(Wire) Drawer in Freezer Freezer Shelf ········································... -
Page 7: 3-1) Refrigerator Disassembly
Refrigerator Door Light Switch The refrigerator has a door light switch located in the upper right corner for the refrigerator. 1. Use a small flat-blade screwdriver to unlock the locking tab and pull the switch out until the wire connector is visible. -
Page 8: Refrigerator Light
Mechanical Disassembly Refrigerator Light The refrigerator light is located in the upper portion of refrigerator. 1. Pull the tip on the cover. Tempered Glass Shelf These shelves allow the storage of larger items and pull out for easy access. 1. Pull the shelf out as far as it goes. -
Page 9: Warranty Information
6. Remove the damper from the refrigerator. Twin cool in the Refrigerator 1. Pull out the Twin cool by unlocking the hooks. Refrigerator Thermistor The refrigerator thermistor is located inside of the upper light cover of the refrigerator. THERMISTOR... -
Page 10: 3-2) Freezer Disassembly
Mechanical Disassembly 3-2) Freezer Disassembly Door Bin in Freezer The door bins allow storage of perishable items. 1. Push the bin up and slide it out. Freezer Door Light Switch This switch is located in the left-hand portion of the freezer and sends a signal to the processor. -
Page 11: Ice Dispenser & Ice Maker
Mechanical Disassembly Ice Dispenser & Ice Maker The ice dispenser is located in the upper portion of the freezer. This assembly stores ice made by the icemaker and dispenses ice. 1. Lift the ice bucket up ① and slide out the ice dispenser assembly ②. -
Page 12: Freezer Light
1. Remove the screw and the light cover. Evaporator Fan Motor The evaporator fan is located in the middle rear of refrigerator. This fan circulates cold air in the refrigerator. 1. Remove the fan spring, and than remove fan and protector motor. -
Page 13: Evaporator In Freezer
Mechanical Disassembly Evaporator in Freezer Evaporator is located in the bottom of freezer to produce cold air driven across the evaporator coils. 1. Take off the ductwork in Freezer. 2. Disconnect the wire connector (Heater, Bimental, and Thermistor). 3. Desolder the inlet and outlet tubes. 4. -
Page 14: Mechanical Disassembly
Mechanical Disassembly 3-3) Machine Compartment Disassembly Machine Compartment & & Electric Box 1. Disconnect the power cord of the refrigerator. 2. Remove the fixed screws (6) of compressor cover. 3. Slide up and take off the compressor cover to see the machine compartment. -
Page 15: Circuit Diagram
4. CIRCUIT DIAGRAM... -
Page 16: Operation Principles By Parts Of Circuit
5. OPERATION PRINCIPLES BY PARTS OF CIRCUIT 5-1) POWER Terminal ● Vcc(DC 5V) << BLDC +12V(DC 12V) When turned on, rectified AC voltage which is stepped down on 2nd transformer flows between ① and ③ at about AC 15V, goes through the diode D101 and D104 is changed to DC, and provide constant 12V. It provides 5V to MICOM and other circuits via regulator REG102 (MC7805ACT), and make entire PCB operate. - Page 17 OPERATION PRINCIPLES BY PARTS OF CIRCUIT 5-3) RESET CIRCUIT RESET Circuit allows the whole program to go back to the initial setting by initializing parts such as the RAM in MICOM with the power supply into MICOM or with an instant power failure. Upon the power supply, the reset terminal voltage becomes "LOW"...
- Page 18 OPERATION PRINCIPLES BY PARTS OF CIRCUIT 5-5) DOOR SWITCH DETECTON CIRCUIT 1) If R-Door is opened, the contact point of the door switch (4-3) becomes open, and the current of PCB line comes through R404 and R405 and provides 5 volt which is recognized as door is opened, and turn off the fan at different load.
- Page 19 OPERATION PRINCIPLES BY PARTS OF CIRCUIT 5-6) TEMP SENSING CIRCUIT 1) Sensor uses a thermistor which has a temp coefficient of negative resistance and controls resistance. When the heat goes up, the resistance gets down and vice versa. R302, 4, 6, 9 and C301~C303, C305 are parts for noise prevention but they are not related to temp sensing characteristics.
- Page 20 OPERATION PRINCIPLES BY PARTS OF CIRCUIT Temp to Resistance of Sensor & MICOM PORT Voltage Sensor CHIP : PX41C Standard Temp. Voltage(V) Temp. Resistance(㏀) -50 °F/ - 45. 6 °C 4.694 -19°F/-28.3°C 153319 -49 °F/ - 45. 0 °C 4.677 -18°F/-27.8 °C 144794 -48 °F/ - 44.
- Page 21 OPERATION PRINCIPLES BY PARTS OF CIRCUIT 5-7) DAMPER CIRCUIT 1) The temperature of R-room is controlled by opening and closing of damper with stepping motor, supplying & blocking cold air. 2) TA7774P (IC07) operates the damper. TA7774P is the driver IC only for step motor. If the regular signal is provided to TA7774P from Micom, send combined signal to Quad-Polar step motor to rotate on certain direction.
- Page 22 OPERATION PRINCIPLES BY PARTS OF CIRCUIT 2) DISPLAY OPERATION Like the signal diagram below, Micom sends “ high ” signal through MICOM 6 terminals of NO #1→ 2 → 3 → 4 → 5 → 6 for 2ms every 12ms. This signal goes to output terminal via input terminal of IC5 (KID65783AP or TD62783AP).
- Page 23 OPERATION PRINCIPLES BY PARTS OF CIRCUIT 5-9) Load Control Circuit 1) Main PCB processes most of the load control for electronic refrigerators. 2) Compressor, F-Room, defrost heater, and other functions are controlled with relay. 3) For example, to operate compressor, MICOM 29 pin outputs high (5V) signal which goes into IC3 Pin #4. The IC3 pin NO 4 plays the same role as the base of NPN TR.
- Page 24 OPERATION PRINCIPLES BY PARTS OF CIRCUIT 5-10) ICE MAKER OPERATION CIRCUIT 1) The ice maker circuit above is to control the ice maker kit installed on the F room. 2) This circuit is the hardware to control ejection and horizontal positioning, ice making temperature detection and full icing detection.
- Page 25 OPERATION PRINCIPLES BY PARTS OF CIRCUIT 5-11) OPTION Circuit This circuit operates with the initial power on, uses DIODE (1N4148) or JUMPER WIRE. To modify option circuit, Power must be turned off before modification and turned on after the modification. Refer to the table below, the default factory values are highly recommended unless exceptional cases.
-
Page 26: Illustrated Parts Catalog
6. Illustrated Parts Catalog. 6-1) Freezer 1-10 10-1 10-2 11-5 11-4 11-3 11-1 11-2 12-5 12-4 12-3 12-1 12-2 1-15 1-14 1-12 1-21 1-13 1-11 1-19 1-20 1-18 1-17 1-16 14-1 14-2 14-3 14-4 14-5 14-6 14-7 15-5 15-2 15-3 15-1 15-4 15-8... - Page 27 Illustrated Parts Catalog. 6-2) Refrigerator 11-1 11-2 12-1 12-2...
- Page 28 Illustrated Parts Catalog. 6-3) Cabinet 26-3 26-1 26-2 27-1 27-2 14-1 14-1-1 14-1-2 14-1-3 14-1-4 14-2 14-2-1 14-2-3 14-2-2 14-3 24-1 27-6 24-3 27-3 24-2 27-4 27-5 14-2-4 14-2-5 14-2-6...
- Page 29 Illustrated Parts Catalog. 6-4) Disassembly of Freeze Door 9-11 9-10 14-3 14-1 14-2...
- Page 30 Illustrated Parts Catalog. 6-5) Disassembly of Refrigerator Door 12-3 12-1 12-2...
-
Page 31: Appendix Ⅰ Ⅰ (Reference For Circuit Diagnostics)
Appendix Ⅰ Ⅰ (Reference for circuit diagnostics) Ref.1) Measure Load Terminals Turn off Power, disassemble Housing connected to MAIN PCB CN70,71,72 and measure followings LOAD TERMINALS PCB CASE VALUE 1) DEFROST HEATER CN71 ⑪ & ③ 2) ICE PIPE HEATER CN72 ①... - Page 32 Appendix Ⅰ Ⅰ (Reference for circuit diagnostics) Turn on Power and check status of Relay & Driving Circuit by checking followings according to load operation. LOAD RELAY RY76 /RY75 DEFROST / COMP OFF RY75 RY76 /RY75 COMP ON RY75 RY76 /RY75 DEFROST RY75 RY73 /RY74...
- Page 33 272, Oseon-Dong, Kwangsan-Gu, Kwangju-City, Korea, 506-253 TEL : 82-62-950-6810, 6811 FAX : 82-62-950-6829 - This Service Manual is a property of Samsung Electronics Co., Ltd. Any unauthorized use of Manual can be punished under applicable International and/or domestic law. - ELECTRONICS ©...
Need help?
Do you have a question about the RS2*3* and is the answer not in the manual?
Questions and answers