Table of Contents
Advertisement
Advertisement
Chapters
Table of Contents
Troubleshooting

Related Manuals for Samsung ML-1615


Summary of Contents for Samsung ML-1615
- Page 1 SAMSUNG Laser Printer User's Guide ML-1610 Series...
- Page 2 This manual is provided for information purposes only. All information included herein is subject to change without notice. Samsung Electronics is not responsible for any damages, direct or indirect, arising from or related to use of this manual.
-
Page 3: Contact Samsung World Wide
Contact SAMSUNG WORLD WIDE If you have any comments or questions regarding Samsung products, contact the SAMSUNG customer care center. Country ARGENTINE AUSTRALIA AUSTRIA BELGIUM BRAZIL CANADA CHILE CHINA COLOMBIA COSTA RICA CZECH REPUBLIC DENMARK ECUADOR EL SALVADOR ESTONIA KAZAHSTAN... - Page 4 REP. DOMINICA 1-800-751-2676 REPUBLIC OF 0818 717 100 IRELAND RUSSIA 8-800-555-55-55 SINGAPORE 1800-SAMSUNG (7267864) SLOVAKIA 0800-SAMSUNG (726786) SOUTH AFRICA 0860 726 7864 (SAMSUNG) SPAIN 902 10 11 30 SWEDEN 0771-400 200 SWITZERLAND 0800-7267864 TAIWAN 0800-329-999 THAILAND 1800-29-3232 / 02-689-3232 TRINIDAD &...
-
Page 5: Table Of Contents
ONTENTS Chapter 1: Special Features ... 1.2 Printer Driver Features ... 1.3 Printer Components ... 1.4 Understanding the Control Panel ... 1.6 Chapter 2: Unpacking ... 2.2 Installing the Toner Cartridge ... 2.4 Loading Paper ... 2.7 Connecting a Printer Cable ... 2.9 Turning the Printer on ... - Page 6 AINTAINING Chapter 4: Maintaining the Toner Cartridge ... 4.2 Redistributing Toner ... 4.3 Replacing the Toner Cartridge ... 4.5 Using the Toner Save Mode ... 4.5 Cleaning the Printer ... 4.6 Cleaning the Outside ... 4.6 Cleaning the Inside ... 4.6 Consumables and Replacement Parts ...
- Page 7 Important Precautions and Safety Information When using this machine, these basic safety precautions should always be followed to reduce risk of fire, electric shock, and injury to people: Read and understand all instructions. Use common sense whenever operating electrical appliances. Follow all warnings and instructions marked on the machine and in the literature accompanying the machine.
- Page 8 Unplug the machine from the PC and AC wall outlet, and refer servicing to qualified service personnel under the following conditions: •When any part of the power cord, plug, or connecting cable is damaged or frayed. •If liquid has been spilled into the machine. •If the machine has been exposed to rain or water.
-
Page 9: Laser Safety Statement
Environmental and Safety Consideration Laser Safety Statement The printer is certified in the U.S. to conform to the requirements of DHHS 21 CFR, chapter 1 Subchapter J for Class I(1) laser products, and elsewhere, is certified as a Class I laser product conforming to the requirements of IEC 825. Class I laser products are not considered to be hazardous. -
Page 10: Ozone Safety
During normal operation, this machine produces ozone. The ozone produced does not present a hazard to the operator. However, it is advisable that the machine be operated in a well ventilated area. If you need additional information about ozone, please contact your nearest Samsung dealer. Power Saver This printer contains advanced energy conservation technology that reduces power consumption when it is not in active use. -
Page 11: Canadian Radio Interference Regulations
Radio Frequency Emissions FCC regulations This device complies with Part 15 of the FCC Rules. Operation is subject to the following two conditions: • This device may not cause harmful interference, and • This device must accept any interference received, including interference that may cause undesired operation. -
Page 12: Declaration Of Conformity (European Countries)
Declaration of Conformity (European Countries) Approvals and Certifications The CE marking applied to this product symbolizes Samsung Electronics Co., Ltd. Declaration of Conformity with the following applicable 93/68/EEC Directives of the European Union as of the dates indicated: January 1, 1995: Council Directive 73/23/EEC Approximation of the laws of the member states related to low voltage equipment. - Page 14 Introduction Congratulations on the purchase of your Printer! This chapter includes: • Special Features • Printer Driver Features • Printer Components • Understanding the Control Panel...
-
Page 15: Introduction
Special Features Your new printer is equipped with special features that improve the print quality, giving you a competitive edge. You can: Print with excellent quality and high speed • You can print at 600 dots per inch (dpi). • Up to 16 ppm in A4 (17 ppm in Letter). Handle paper flexibly •... -
Page 16: Printer Driver Features
Printer Driver Features Your printer drivers will support the following standard features: • Paper source selection • Paper size, orientation and media type • number of copies Table below lists a general overview of features supported by your printer drivers. Feature Toner Save Print quality option... -
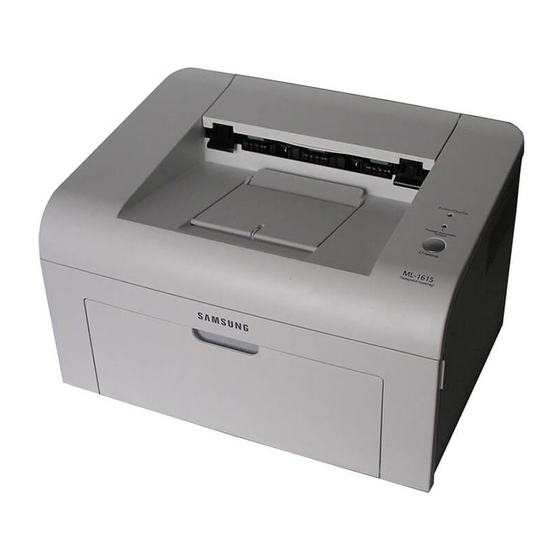
Page 17: Printer Components
Printer Components Front View Output support Front cover Paper input tray Rear guide NTRODUCTION Paper output tray Top cover (Face down) Control panel Inside view Side guides Toner cartridge... -
Page 18: Rear View
Rear View Power switch USB port Power receptacle NTRODUCTION... -
Page 19: Understanding The Control Panel
Understanding the Control Panel On Line/Error and Toner Save LEDs If the On Line/Error lights green, the printer is ready to print. If the On Line/Error lights red, the printer is experiencing an error, such as jammed paper, no paper, the open top or front cover, or the empty toner cartridge. -
Page 20: Manual Feeding
If you press the Cancel button in Ready mode, this LED is on and the Toner Save mode is enabled. If you press this button once again, this LED is off and the Toner Save mode is disabled. If the On Line/Error and Toner Save LEDs blink, your system has some problems. -
Page 21: Setting Up Your Printer
Setting Up Your Printer This chapter provides step by step information on setting up your printer. This chapter includes: • Unpacking • Installing the Toner Cartridge • Loading Paper • Connecting a Printer Cable • Turning the Printer on • Printing a Demo Page •... -
Page 22: Unpacking
Unpacking Remove the printer and all accessories from the packing carton. Make sure that the printer has been packed with the following items: Toner Cartridge CD-ROM Paper Cover The paper cover is to prevent dust and moisture from contaminating your paper loaded in the tray. When you need to open the machine (for example, cleaning inside of the machine, removing the jammed paper or installing the toner cartridge), remove the paper cover from your ma-... -
Page 23: Selecting A Location
Carefully remove all of packing tape from the printer. Tape Selecting a Location Select a level, stable place with adequate space for air circulation. Allow extra space for opening cover and tray. The area should be well-ventilated and away from direct sunlight or sources of heat, cold, and humidity. -
Page 24: Installing The Toner Cartridge
Installing the Toner Cartridge Grasp the front cover and pull it toward you to open. Note: Because the printer is very light, it may be moved when you use it; for example, when opening/closing the tray or installing/ removing the toner cartridge. Be careful not to move the printer. Remove the toner cartridge from its bag and remove the paper protecting the cartridge by pulling the packing tape. - Page 25 Gently roll the cartridge 5 or 6 times to distribute the toner. Thoroughly rolling the cartridge will assure maximum copies per cartridge. Note: If toner gets on your clothing, wipe it off with a dry cloth and wash clothing in cold water. Hot water sets toner into fabric. Cautions: •...
- Page 26 Unfold the toner cartridge handle and grasp it. Insert the cartridge in the printer until it snaps into place. Note: Carefully insert or pull out the toner cartridge not to scratch against the printer. Close the front cover. Make sure that the cover is securely closed.
-
Page 27: Loading Paper
Loading Paper You can load approximately 150 sheets of paper in the tray. Grasp the paper input tray and pull it toward you to open. Pinch the rear guide and pull it out to extend the tray. Note: Because the printer is very light, it may be moved when you use it;... - Page 28 Load paper with the print side facing up. Make sure that all four corners are flat in the tray. Pay attention not to overload paper. Paper overloading may cause paper jams. Pinch the rear guide to adjust for the paper length and pinch the side guide and slide it to the left flush against the paper.
-
Page 29: Connecting A Printer Cable
If necessary, close the paper cover to keep the paper loaded in the tray from dust. Connecting a Printer Cable To print from your computer, you need to connect your printer to your computer with a Universal Serial Bus (USB) cable. Note: Connecting the printer to the USB port of the computer requires a certified USB cable. -
Page 30: Turning The Printer On
Connect the other end of the cable to the USB port on your computer. See your computer User’s Guide if you need help. Turning the Printer on Plug the power cord into the power receptacle on the back of the printer. Plug the other end into a properly grounded AC outlet and turn on the printer using the power switch. -
Page 31: Printing A Demo Page
Printing a Demo Page Print a demo page to make sure that the printer is operating correctly. Press and hold down the Cancel button on the control panel for about 2 seconds to print a demo page. The Demo page shows the printer’s current configuration. 2.11 ETTING RINTER... -
Page 32: Installing Printer Software
Installing Printer Software The supplied CD-ROM contains Windows printing software, Linux printing software, on-line User’s Guide and Acrobat Reader to view the User’s Guide. If you are printing from Windows You can install the following printer software using the CD-ROM. •... - Page 33 2.13 ETTING RINTER...
-
Page 34: Using Print Materials
Using Print Materials This chapter will help you understand types of paper you can use with this printer and how to properly load paper in the tray for the best print quality. This chapter includes: • Choosing Paper and Other Materials •... -
Page 35: Choosing Paper And Other Materials
Choosing Paper and Other Materials You can print on a variety of print materials, such as plain paper, envelopes, labels, transparencies and so on. See “Paper Specifications” on page 6.3. To get the best possible print quality, use only high-quality copier-grade paper. When you choose print materials, consider the followings: •... -
Page 36: Type And Capacities
Type and Capacities Paper Type Plain paper Envelopes Labels Transparency films Card stocks a. Maximum capacity may be reduced depending on the paper thickness. b. If you load more than one sheet, paper jams will occur. You must load only one sheet at a time in the tray. - Page 37 • For envelopes: - Use only well-constructed envelopes with sharp, well creased folds. - Do not use envelopes with clasps and snaps. - Do not use envelopes with windows, coated lining, self- adhesive seals, or other synthetic materials. - Do not use damaged or poorly made envelopes. - Only use envelopes recommended for laser printers.
- Page 38 • For Card Stock or Custom-sized materials: - Postcards, 3.5 by 5.83 in.(index) cards and other custom- sized materials can be printed with this printer. The minimum size is 76 by 127mm(3.0 by 5.0 in.) and the maximum size is 216 by 356mm(8.5 by 14 in.) - Always insert the short-edge into the Manual Feed first.
-
Page 39: Verifying The Output Location
Verifying the Output Location The printer has the paper output tray that collects paper face- down, in correct order. Notes: • If you continuously print many pages, the surface of the output tray may become hot. Be careful not to touch the surface, and especially keep children away from the surface. -
Page 40: Using Manual Feed Mode
Using Manual Feed Mode If you select Manual Feed in the Source option, you can manually load paper in the tray. Manually loading paper can be helpful when you want to check the print quality after each page is printed. If you experience a paper jam from the tray, load one sheet of paper at a time into the tray. -
Page 41: Printing On Special Materials
Printing on Special Materials Open the paper input tray. Load the print material in the paper input tray. Do not mix types. See the following directions to load each type of print material. •Load the envelopes in the tray with the flap side down. The stamp area is on the left side and the end of the envelope with the stamp area enters the printer first and center of the tray. - Page 42 •Load transparencies in the tray with print side up, and the top with the adhesive strip going first. Notes: • To prevent transparencies from sticking to each other, do not let the printed sheets stack up as they are printed out. •...
-
Page 43: Canceling A Print Job
Adjust the side guide to the edge of the material. When you print on special material, you must select Manual Feed for Source from the software application, and then select the correct paper size and type. For details, see Software User’s Guide. Press the Cancel button to start feeding. - Page 44 In Manual Feed mode, you can’t cancel a print job by pressing the Cancel button. To cancel a print job in Manual Feed mode: Turn the printer off. Double-click the icon at right bottom of the window. Double-click this icon to view the queue of the print jobs.
-
Page 45: Maintaining Your Printer
Maintaining Your Printer This chapter provides suggestions for maintaining the toner cartridge and the printer. This chapter includes: • Maintaining the Toner Cartridge • Using the Toner Save Mode • Cleaning the Printer • Consumables and Replacement Parts... -
Page 46: Maintaining The Toner Cartridge
Maintaining the Toner Cartridge Toner cartridge storage To get the maximum results from the toner cartridge, keep the following guidelines in mind. • Do not remove the toner cartridge from its package until ready for use. • Do not refill the toner cartridge. The printer warranty does not cover damage caused by using a refilled cartridge. -
Page 47: Redistributing Toner
Redistributing Toner When toner is low, faded or light areas may appear on a printed page. You may be able to temporarily improve the print quality by redistributing the toner. The following procedures may allow you to finish the current print job before replacing the toner cartridge. - Page 48 Gently shake the toner cartridge from side to side five or six times to redistribute the toner. Note: If the toner gets on your clothing, wipe it off with a dry cloth and wash clothing in cold water. Hot water sets toner into fabric.
-
Page 49: Replacing The Toner Cartridge
Replacing the Toner Cartridge If the print remains light after redistributing toner (see page 4.3), replace the toner cartridge. Remove the old cartridge and install a new toner cartridge. See “Installing the Toner Cartridge” on page 2.4. Using the Toner Save Mode The Toner Save mode allows the printer to use less toner on each page. -
Page 50: Cleaning The Printer
Cleaning the Printer To maintain the print quality, follow the cleaning procedures below each time the toner cartridge is replaced or if print quality problems occur. Note: While cleaning the inside of the printer, be careful not to touch the transfer roller (located underneath the toner cartridge). Oil from your fingers can cause print quality problems. -
Page 51: Cleaning Inside The Printer
Turn the printer off and unplug the power cord, then wait for the printer to cool. Open the front door. Pull the toner cartridge out and remove it from the printer.. With a dry, lint-free cloth, wipe away any dust and spilled toner from the toner cartridge area and the toner cartridge cavity. - Page 52 Note: To prevent damage to the toner cartridge, do not expose it to light for more than few minute. Cover it with a piece of paper, if necessary. Also, do not touch the black transfer roller inside the printer. Locate the long strip of glass (LSU) inside the top of the cartridge compartment, and gently swab the glass to see if dirt turns the white cotton black.
-
Page 53: Consumables And Replacement Parts
See the table below. Transfer Roller Pick-up Roller Fuser Unit To purchase the consumables and replacement parts, contact Samsung dealer or the place where you bought your product. We strongly recommend that items be installed by a trained service personnel. AINTAINING RINTER... -
Page 54: Solving Problems
Solving Problems This chapter provides helpful information for what to do if you encounter an error while using your printer. This chapter includes: • Troubleshooting Checklist • Solving General Printing Problems • Clearing Paper Jams • Solving Print Quality Problems •... -
Page 55: Troubleshooting Checklist
Troubleshooting Checklist If the printer is not working properly, consult the following checklist. If the printer does not pass a step, follow the corresponding troubleshooting suggestions. Check Check the power cord and the power switch. Make sure that the On Line/Error LED is on. -
Page 56: Solving General Printing Problems
Solving General Printing Problems For problems with the operation of your printer, refer to the table for suggested solutions. Problem Possible Cause The Printer The printer is not does not print. receiving power. The printer is not selected as the default printer. - Page 57 Problem Possible Cause The printer The printer driver may does not print. be incorrectly (continued) installed. The printer is malfunctioning. Paper does not Paper has not been feed into the loaded correctly. printer. There is too much paper in the tray. The paper is too thick.
- Page 58 Problem Possible Cause The printer The printer cable is prints, but the loose or defective. text is wrong, garbled, or incomplete. The wrong printer driver was selected. The software application is malfunctioning. Pages print, The toner cartridge is but are blank. defective or out of toner.
-
Page 59: Clearing Paper Jams
Clearing Paper Jams Occasionally, paper can be jammed during a print job. Some of causes include: • The tray is overfilled. • The front cover has been opened during a print job. • Paper that does not meet paper specifications has been used. See “Paper Specifications”... - Page 60 Open the top cover and the inner cover. Cautions: • When removing the jammed paper, be careful not to touch the heat roller (located underneath the inner cover). It is hot and could cause burns! • The top and inner cover themselves may also be hot due to the heat roller.
-
Page 61: In The Paper Feed Area
Close the inner cover and the top cover. Printing resumes automatically. Note: Failed pages will not reprint. Try printing the pages. In the Paper Feed Area Remove any missfeed paper by pulling it out by the visible edge from the tray. Make sure that all of the paper is properly aligned in the tray. -
Page 62: Around The Toner Cartridge
Around the Toner Cartridge Open the front cover. Pull the toner cartridge out and remove it from the printer. Gently pull the paper toward you. Check that there is no other paper in the printer. OLVING ROBLEMS... -
Page 63: Tips For Avoiding Paper Jams
Reinstall the toner cartridge and close the front cover. Your printer resumes printing the document from failed pages. Tips for Avoiding Paper Jams By selecting the correct paper types, most paper jams can be avoided. If a paper jam occurs, follow the steps outlined in “Clearing Paper Jams”... -
Page 64: Solving Print Quality Problems
Solving Print Quality Problems Problem Light or faded If a vertical white streak or faded area appears on the page: print • The toner supply is low. You may be able to temporarily extend the toner cartridge life. See “Redistributing Toner” on page 4.3. -
Page 65: Gray Background
Problem Vertical lines Gray background Toner smear Vertical repetitive defects 5.12 OLVING ROBLEMS Solution If black vertical streaks appear on the page: • The drum inside the toner cartridge has probably been scratched. Install a new toner cartridge. If white vertical streaks appear on the page: •... - Page 66 Problem Background Background scatter results from bits of toner distributed on scatter the printed page. • The paper may be too damp. Try printing with a different batch of paper. Do not open packages of paper until necessary so that the paper does not absorb too much moisture.
-
Page 67: Wrinkles Or Creases
Problem Wrinkles or creases Back of printouts are dirty Black pages Loose toner Character Voids 5.14 OLVING ROBLEMS Solution • Ensure that the paper is loaded properly. • Check the paper type and quality. See “Paper Specifications” on page 6.3. •... -
Page 68: Horizontal Stripes
Problem Horizontal stripes If horizontally aligned black streaks or smears appear: • The toner cartridge may be installed improperly. Remove the cartridge and reinsert. • The toner cartridge may be defective. Install a new toner cartridge. See “Installing the Toner Cartridge” on page 2.4. -
Page 69: Troubleshooting Error Messages
Troubleshooting Error Messages When the printer experiences an error, the control panel will indicate an error message with the indicator lights. Find the light pattern below that matches the printer light pattern and follow the solutions to clear the error. LED status legend symbol for “light off”... -
Page 70: Common Windows Problems
Common Windows Problems Problem “File in Use” message appears during installation. “General Protection Fault”, “Exception OE”, “Spool32”, or “Illegal Operation” messages appear. Note: Refer to Microsoft Windows 98, Me, 2000 or XP User’s Guide that came with your PC for further information on Windows error messages. Possible Cause and Solution Exit all software applications. -
Page 71: Common Linux Problems
LPRng is defined as the first queue in /etc/printcap, therefore it is not possible for the Samsung Printer Package to change the default when some queues have otherwise been defined using printtool. - Page 72 Problem The N-up setting does not The N-up feature is achieved through post-processing of work correctly for some the PostScript data that is being sent to the printing of my documents. system. However, such post-processing can only be adequately achieved if the PostScript data conforms to the Adobe Document Structing Conventions.
- Page 73 Problem How do I specify the IP address of my SMB server? Some documents come out as white pages when printing. I have CUPS and some options (such as N-up) seem to be always enabled even though I don’t pick them in LLPR. I configured a printer to print to a file, but I get “Permission denied”...
-
Page 74: Chapter 6: Specifications
Specifications This chapter includes: • Printer Specifications • Paper Specifications... -
Page 75: Printer Specifications
358 x 299 x 217 mm / 14.1 x 11.8 x 8.5 in. Temperature:10 ~ 32 °C / 50 ~ 90 °F; Humidity: 20 ~ 80 % RH SPL (Samsung Printer Language) 2 MB (non expandable) Windows font USB 1.1 (Compatible with USB 2.0) -
Page 76: Paper Specifications
• Before purchasing large quantities of paper, ensure the paper meets the requirements specified in this User’s Guide. Caution: Using paper that does not meet these specifications may cause problems, requiring repairs. These repairs are not Samsung warranty or service agreements. covered by the Samsung has no control. PECIFICATIONS... -
Page 77: Supported Sizes Of Paper
Supported Sizes of Paper Size (mm/in.) Plain paper Letter (216 x 279/8.5 x 11) A4 (210 x 297/8.3 x 11.7) A5 (148 x 210/5.8 x 8.2) Executive (184 x 267/7.25 x 10.5) Legal (216 x 356/8.5 x 14) JIS B5 (182 x 257/7.2 x 10.1) ISO B5 (176 x 250/6.9 x 9.8) A6 (105 x 148/4.1 x 5.8) Oficio (216 x 343/8.5 x 13.5 ) -
Page 78: Guidelines For Using Paper
Guidelines for Using Paper For the best result, use conventional 75 g/m Ensure that the paper is of good quality, and free of cuts, nicks, tears, spots, loose particles, dust, wrinkles, voids, and curled or bent edges. If you are unsure of what type of paper you are loading (such as, bond or recycled), check the label on the package. -
Page 79: Paper Specifications
Paper Specifications Acid Content Caliper Curl in Ream Cut Edge Conditions Fusing Compatibility Grain Moisture Content Smoothness Paper Output Capacity Output Tray Face-down output tray PECIFICATIONS Category 5.5 ~ 8.0 pH 0.094 ~ 0.18 mm (3.0 ~ 7.0 mils) Flat within 5 mm (0.02 in.) Cut with sharp blades with no visible fray. -
Page 80: Printer And Paper Storage Environment
Printer and Paper Storage Environment Paper storage environmental conditions directly affect the feed operation. Ideally, the printer and paper storage environment should be at or near room temperature, and not too dry or humid. Remember that paper is hygroscopic; it absorbs and loses moisture rapidly. Heat works with humidity to damage paper. - Page 81 NDEX cancel, print 3.10 card, print 3.9 clean, printer 4.6 connect power cord 2.10 USB cable 2.9 control panel, use 1.6 demo page, print 2.11 envelopes, print 3.8 error, solve 5.16 install, toner 2.4 labels, print 3.8 load paper 2.7 output tray 3.6 paper guidelines 3.3 paper jams, clear 5.6...
- Page 82 USB cable, connect 2.9...
- Page 83 Samsung Printer Software User’s Guide...
- Page 84 ONTENTS NSTALLING Chapter 1: Installing Printer Software ... 3 Changing the Software Language ... 4 Reinstalling Printer Software ... 5 Removing Printer Software ... 5 ASIC RINTING Chapter 2: Printing a Document ... 6 Printer Settings ... 7 Layout Tab ... 7 Paper Tab ...
- Page 85 Creating a New Page Overlay ... 16 Using a Page Overlay ... 17 Deleting a Page Overlay ... 17 HARING THE RINTER Chapter 4: Windows 9x/Me ... 18 Setting Up a Host Computer ... 18 Setting Up a Client Computer ... 18 Windows NT 4.0 or higher ...
-
Page 86: Installing Printer Software In Windows
Installing Printer Software in Windows This chapter includes: • Installing Printer Software • Changing the Software Language • Reinstalling Printer Software • Removing Printer Software Installing Printer Software All applications should be closed on your PC before beginning installation. : If the “New Hardware Wizard” window appears during the installation procedure, click the box to close the window, or click Cancel. -
Page 87: Changing The Software Language
If the test page prints out correctly, click Yes. If not, click No to reprint it. To register yourself as a user of Samsung Printers in order to receive information from Samsung, select the checkbox and click Finish. You are now sent to the Samsung web site. -
Page 88: Reinstalling Printer Software
Reinstalling Printer Software You can reinstall the software if installation fails. Start Windows. From the Start menu select Programs or All Programs → your printer driver name → Maintenance. Or place the CD-ROM into the CD-ROM drive. Select Repair. You will see a component list so that you can reinstall any one item individually. -
Page 89: Basic Printing
Basic Printing This chapter explains the printing options and common printing tasks in Windows. This chapter includes: • Printing a Document • Printer Settings - Layout Tab - Paper Tab - Graphics Tab - Extras Tab - About Tab - Printer Tab - Using a Favorite Setting - Using Help Printing a Document... -
Page 90: Printer Settings
Printer Settings You can use the printer properties window, which allows you to access all of the printer options you need when using your printer. When the printer properties are displayed, you can review and change the settings needed for your print job. Your printer properties window may differ, depending on your operating system. -
Page 91: Paper Tab
Paper Tab Use the following options to set the basic paper handling specifications when you access the printer properties. See “Printing a Document” on page 6 for more information on accessing printer properties. Click the Paper tab to access various paper properties. Copies Copies allows you to choose the number of copies to be printed. -
Page 92: Graphics Tab
Graphics Tab Use the following Graphic options to adjust the print quality for your specific printing needs. See “Printing a Document” on page 6 for more information on accessing printer properties. Click the Graphics tab to display the properties shown below. Resolution You can select the printing resolution by choosing 600 dpi (Normal) or 300 dpi (Draft). -
Page 93: Extras Tab
Extras Tab You can select output options for your document. See “Printing a Document” on page 6 for more information about accessing the printer properties. Click the Extras tab to access the following feature: Watermark You can create a background text image to be printed on each page of your document. -
Page 94: Using A Favorite Setting
Using a Favorite Setting The Favorites option, which is visible on each properties tab, allows you to save the current properties settings for future use. To save a Favorites item: Change the settings as needed on each tab. Enter a name for the item in the Favorites input box. Click Save. -
Page 95: Advanced Printing
Advanced Printing This chapter explains printing options and advanced printing tasks. • Your printer driver Properties window that appears in this User’s Guide may differ depending on the printer in use. However the composition of the printer properties window is similar. -
Page 96: Printing Posters
Printing Posters This feature allows you to print a single-page document onto 4, 9, or 16 sheets of paper, for the purpose of pasting the sheets together to form one poster-size document. To change the print settings from your software application, access printer properties. -
Page 97: Fitting Your Document To A Selected Paper Size
Fitting Your Document to a Selected Paper Size This printer feature allows you to scale your print job to any selected paper size regardless of the digital document size. This can be useful when you want to check fine details on a small document. -
Page 98: Creating A Watermark
Creating a Watermark To change the print settings from your software application, access printer properties. See “Printing a Document” on page 6. Click the Extras tab, and click the Edit button in the Watermark section. The Edit Watermark window appears. Enter a text message in the Watermark Message box. -
Page 99: Using Overlays
Using Overlays What is an Overlay? An overlay is text and/or images stored in the computer hard disk drive (HDD) as a special file format that can be printed on Dear ABC any document. Overlays are often used to take the place of preprinted forms and letterhead paper. -
Page 100: Using A Page Overlay
Using a Page Overlay After an overlay has been created, it is ready to be printed with your document. To print an overlay with a document: Create or open the document you want to print. To change the print settings from your software application, access printer properties. -
Page 101: Sharing The Printer Locally
Sharing the Printer Locally You can connect the printer directly to a selected computer, which is called “host computer,” on the network. The printer can be shared by other users on the network through a Windows 95 or higher network printer connection. •... -
Page 102: Using Status Monitor
Using Status Monitor If an error occurs while printing, the Status Monitor window appears, showing the error. OTES • The Status Monitor program can only be used if you connect your printer to your computer with the USB cable, or if the printer is networked. -
Page 103: Changing The Status Monitor Program Settings
Changing the Status Monitor Program Settings Select the Status Monitor icon on the Windows task bar and right-click on the Status Monitor icon. Select Option. The following window opens. • Display when job is finished for network printer shows the Status Monitor balloon when your job is complete. (Only for a network supported printer.) •... -
Page 104: Using Your Printer In Linux
Using Your Printer in Linux You can use your printer in a Linux environment. This chapter includes: • System Requirements • Installing the Printer Driver • Changing the Printer Connection Method • Uninstalling the Printer Driver • Using the Configuration Tool •... -
Page 105: Installing The Printer Driver
Installing the Printer Driver Make sure that you connect the printer to your computer. Turn both the computer and the printer on. When the Administrator Login window appears, type in “root” in the Login field and enter the system password. : You must log in as a super user (root) to install the printer software. -
Page 106: Changing The Printer Connection Method
Click the Connection tab and ensure that the printer port is set properly. If it is not, change the device setting. You can use the Settings tab and the Queue tab to view the printer’s current settings. If necessary, you can change the settings. -
Page 107: Uninstalling The Printer Driver
The Info tab shows general information about the printer. If you are an Internet user, you can click Go to the Web page for this printer to access the Samsung web page. Click the Job tab to inspect and manage the job queue for the selected printer. -
Page 108: Changing Llpr Properties
The Properties tab allows you to change the default printer settings. : Regular users are able to override the system-wide default settings defined by the administrator. When a regular user clicks Apply, these custom settings will be saved in the user’s profile and may be used later with LLPR. - Page 109 NDEX advanced printing, use 12 document, print Windows 6 Extras properties, set 10 favorites settings, use 11 Graphics properties, set 9 help, use 11 install printer driver Linux 22 Windows 3 language, change 4 Layout properties, set Linux 25 Windows 7 Linux configuration tool 24 driver...
- Page 110 Rev.3.00 www.samsungprinter.com...
Need help?
Do you have a question about the ML-1615 and is the answer not in the manual?
Questions and answers