Table of Contents
Advertisement
Quick Links
MARCH 2000
16-80020-101
®
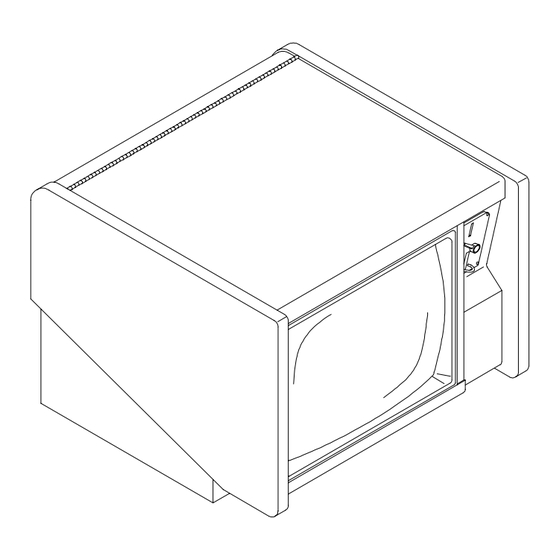
TOUCHSCREEN VIDEO
GAME MACHINE CONVERSION
FOR USE ON THESE CABINETS
Manual Includes
• Installation • Operations • Adjustments • Parts Information • Wiring • Troubleshooting •
The manufacturer intends that this game is to be operated for amusement purposes only and not in contravention of
any federal, state or local law or regulation of the United States or any foreign country governing gaming devices. All
operators of this game are responsible for its operation in accordance with such laws and regulations. The
manufacturer's factory settings for this game may require adjustment in order to comply with laws applicable in an
operator's specific jurisdiction. It is the operator's responsibility to determine whether adjustments are necessary
and, if they are, to make the appropriate adjustments prior to operating the amusement game.
MIDWAY AMUSEMENT GAMES, LLC.
3401 North California Avenue Chicago, Illinois 60618-5899 USA
http://www.midway.com
Advertisement
Table of Contents

Related Manuals for Midway TOUCH MASTER 8000


Summary of Contents for Midway TOUCH MASTER 8000
- Page 1 It is the operator’s responsibility to determine whether adjustments are necessary and, if they are, to make the appropriate adjustments prior to operating the amusement game. MIDWAY AMUSEMENT GAMES, LLC. 3401 North California Avenue Chicago, Illinois 60618-5899 USA...
- Page 2 ® How to adjust the volume of your Touchmaster VGM: SYSTEM SETUP VER : X.XX XXXXX XX/XX/XX GAME-COIN DISPLAY HIGH SETUP AUDITS SCORES OPERATOR LOCATION DIAGNOSTIC SETUP MESSAGE ENGLISH ESPANOL FREEPLAY FREE SETUP BUTTON CREDIT EXIT CASH DOOR Illustration A. Setup Button Location Illustration B.
- Page 3 C H A P T E R ETUP NOTICE: Information in this manual is subject to change without notice. Midway Amusement Games, LLC reserves the right to improve equipment function, design, or components as progress in engineering or manufacturing methods may warrant. Field...
- Page 4 Use only Midway authorized parts. For safety and reliability, do not substitute parts or modify Midway products. Substitute parts or modifications may void EMC directive or FCC type acceptance. WARNING: DISCONNECT POWER. Always turn AC power off and unplug the line cord before attempting service or adjustments.
- Page 5 Calibrate the screen each time you clean the VGM. Use the Calibration Test steps to determine if recalibration is required (refer to Calibration in this section). NOTICE: Neither Midway Amusement Games, LLC nor its affiliates sponsors, authorizes, condones, or is in any way associated with tournaments using any ®...
- Page 6 The incorrect assembly will cause sync and touchscreen calibration errors. TOOLS REQUIRED FOR CONVERSION Philips head screwdriver, flat head screwdriver, safety utility knife, 5/16 nut driver or socket wrench. Setup - 4 Midway Amusement Games, LLC...
- Page 7 ® TOUCHMASTER CONVERSION KIT PACKAGING ADAPTER GAME ELECTRONICS TOUCHSCREE CONTROLLER FASTENERS HARNESS ENVELOPE CONTANING: MANUAL, SMALL DECALS, AND MARQUEE DECAL MARQUEE RETAINER CARTON SIDE DECALS ® Touchmaster Conversion Kit Setup - 5...
- Page 8 Press SETUP button, then the TEST SCREEN button on screen. Line up crosshair Turn off AC power and unplug line cord. Install with cross. Then hit EXIT TEST on screen. cash door. Unpack parts. Inspect for damage. Setup - 6 Midway Amusement Games, LLC...
- Page 9 Remove original VGM electronics. TOUCHSCREEN COIN CONNECTOR CABLE SPEAKER COIN LOCKOUT TOUCHSCREEN CONTROLLER CABLE You may have one or both of these connectors. Disconnect: 9- or 15-pin coin mechanism cable, Open cabinet door. Disconnect touch screen 2-pin DC fan connector (some models do not connector and/or touch screen controller cable have one), 2-pin speaker connector, coin connector, depending on model.
- Page 10 Attach touch controller wires to +12 and GND. of cabinet. Apply decals trim to fit. Cut keyhole. Stow wiring and cables in front of security bar. Apply correct sized front decal. Add marquee. Verify power supply connections. Setup - 8 Midway Amusement Games, LLC...
- Page 11 DETAILED INSTALLATION PROCEDURE Verify Original Equipment Operation 1. INSPECT PARTS Unpack the conversion kit and verify that nothing was damaged in shipping. 2. FLATTEN DECALS Unfold the side panel decals. Stack large, heavy items like newspapers, books, or magazines on them until the weight flattens them sufficiently for use. 3.
- Page 12 CALIBRATE mode as needed to calibrate the screen as accurately as possible. NOTICE If the existing touchscreen cannot be calibrated correctly, troubleshoot and repair or replace any defective components before proceeding. The kit electronics will not make these symptoms go away. Setup - 10 Midway Amusement Games, LLC...
- Page 13 REMOVE ORIGINAL EQUIPMENT ELECTRONICS REAR OF CABINET WITH DOOR OPEN 1. Unplug VGM. Insert key or keys into rear lock or locks and turn clockwise to unlock. Open cabinet door. DANGER: HIGH VOLTAGE CRTs and their power supplies can retain energy for long periods of time after power has been turned off.
- Page 14 WARNING: DO NOT SUBSTITUTE PARTS Using inferior parts or modifying a VGM could cause serious injury or equipment damage! Use only Midway authorized parts. For safety and reliability, do not substitute parts or modify Midway products. Substitute parts or modifications may void EMC directive or FCC type acceptance.
- Page 15 INSTALL GAME ELECTRONICS ® 1. ORIENT ELECTRONICS Place the Touchmaster CPU Board Assembly behind the cabinet so the heat sink is near the video monitor. The heat sink should be toward the front left side of the cabinet, opposite cash door. 2.
- Page 16 FG (green wire with yellow stripe) should already be connected. The –5V terminal is not used. The AC wires remain connected from the original equipment. 12. Attach touchscreen controller power wires at the GND screw (green) and the +12V screw (orange) Setup - 14 Midway Amusement Games, LLC...
- Page 17 (black) (black/green) (not used) -5V 1A (orange) +12V AC 115V 95V~135VAC 190V~260VAC INSIDE CHANGE 47Hz~63Hz TYPICAL POWER SUPPLY CONNECTIONS 13. ATTACH Secure, but do not overtighten, the top six screws on the power supply terminal strip. 14. CONTROLLER Attach Touchscreen Controller Connector to the socket on the CPU Board Assembly.
- Page 18 You can correct this by following the procedure on the next page. If you do not have an inversion problem, skip to the last page of this chapter. Setup - 16 Midway Amusement Games, LLC...
- Page 19 INVERTING TOUCHSCREEN SIGNALS 1. Turn off AC power and unplug the line cord. 2. Open the cabinet door. 3. Locate the P2 connector on P2 CONNECTOR the CPU Board Assembly (at HEAT SINK the J6 designation) and remove the connector from the socket.
- Page 20 9. MARQUEE Fold marquee artwork in half and insert it into the marquee retainer. Place the plastic retainer on top of the cabinet. The magnets at the base of the marquee hold it in place. Setup - 18 Midway Amusement Games, LLC...
- Page 21 C H A P T E R YSTEM NOTICE: Information in this manual is subject to change without notice. Midway Amusement Games, LLC reserves the right to make improvements in equipment function, design, or components as progress in engineering or manufacturing methods may warrant.
- Page 22 Assemble three groups of numbers whose total is eleven. How fast can you calculate sums? LANGUAGE - Display word recognition skills ™ Wordz Guess the phrase by picking letters to complete each word. Spelling counts, just like in school. System - 2 Midway Amusement Games, LLC...
- Page 23 VIDEO GAME MACHINE (VGM) OPERATION STARTING UP Each time the game is first turned on or power is restored, it executes code from the boot ROM. These self-diagnostic tests automatically verify and report the condition of the hardware and game EPROMs. If any individual test fails an error message for that test is displayed for three seconds or until any on-screen button is touched.
- Page 24 CONTROLLER TOUCHSCREEN TYPICAL LOCATION OF TOUCHSCREEN COMPONENTS System - 4 Midway Amusement Games, LLC...
- Page 25 OPERATOR CONTROLS CABINET SWITCHES The external switches are located on the rear of the game near the line cord. ♦ Power Switch The Power Switch turns the game on or off. It does not reset the game variables. ♦ Circuit Breaker The Circuit Breaker protects the game from fault conditions.
- Page 26 After completing any task, you must return to this screen to restore game play SYSTEM SETUP VER : X.XX XXXXX XX/XX/XX GAME-COIN HIGH DISPLAY SETUP SCORES AUDITS OPERATOR LOCATION DIAGNOSTIC MESSAGE SETUP ENGLISH ESPANOL FREE CREDIT EXIT TYPICAL SYSTEM SETUP SCREEN System - 6 Midway Amusement Games, LLC...
- Page 27 GAME/COINAGE SETUP ® NOTICE: Applicable law may dictate changes in the Touchmaster game compliment, and may also regulate the appearance, bonus awards, language, or other variables on a game-by-game basis. The example here shows how operators might use these utilities ®...
- Page 28 ROYAL QUEST – HI-LO BONUS WORD GAMES - MAX. CHANCES ENABLE EROTIC GAMES AWARD FREE GAMES HIGHEST SCORE FREE GAME SHOW TRIVIA ANSWER AUTO RESET HIGH SCORES RESET RETURN AFTER PLAYS TYPICAL FINAL GAME ADJUSTMENTS SCREEN System - 8 Midway Amusement Games, LLC...
- Page 29 COINAGE SETUP This submenu lets you set individual revenue characteristics. CANCEL Reverts to the previous menu without saving your changes. NEXT Advances to the next sub menu. CUSTOM Takes you to a sub menu where you can modify coin values ACCEPT Saves your changes to coin values PRESET COINAGE VALUES...
- Page 30 CLEAR ALL AUDITS CLEAR ALL HIGH SCORES RESET OPERATOR MESSAGE CONTINUE? TYPICAL RESTORE FACTORY SETTINGS SCREEN If you touch YES, all factory settings are restored. Touching NO will return to the GAME/COINAGE SETUP menu. System - 10 Midway Amusement Games, LLC...
- Page 31 DISPLAY AUDITS This submenu allows you to assess how well the games are played. The screen displays earnings and other aspects of the game that reveal player skill levels. Statistics may be reset to zero after viewing. CLEAR ALL Sets every audit quantity to zero. Record the information before using this command. GAME DETAILS Takes you to a sub menu where you can view, clear, and reset high scores for individual games.
- Page 32 TYPICAL GAME HIGH SCORE SCREEN In the screen above, CLEAR erases all the scores, RESET restores the factory values of the top ten scores, and RETURN brings you back to the HIGH SCORE CLEAR/RESET menu. System - 12 Midway Amusement Games, LLC...
- Page 33 OPERATOR MESSAGE The game can display an on-screen message to draw attention, announce contests, welcome players, etc. CLEAR Deletes all characters from the screen simultaneously. Use it to erase old messages. BKGD Changes the color of the background area behind the message. Provides contrast. TEXT Changes the color of the message.
- Page 34 7. The DELETE key erases the character above the flashing insertion cursor. 8. When finished, touch the RETURN button to save the name and go back to the previous screen. System - 14 Midway Amusement Games, LLC...
- Page 35 TOUCH KEY LOCATION ADJUSTMENT SYSTEM ™ The Touch Key setup feature lets you make some “local adjustments” to games without removing the cash door to access the SETUP button. A Personal Identification Number (PIN) gives access, allowing you or other designated employees to vary loudness, insert new messages, reset scores, etc., without having keys for the cabinet.
- Page 36 TOUCH KEY USE: You can turn over local adjustments to designated employees using this procedure: 1. While in Attract mode, touch the Midway Amusement Games, LLC logo at the bottom of the screen. CATEGORIES ENGLISH SPANISH CARD ACTION WORD SKILL...
- Page 37 SERIAL NO. SETUP You can enter a four-digit alpha-numeric serial number. If you have multiple VGMs that can print reports, serial numbers can identify each unit. SERIAL NO. SETUP cannot be accessed through Touch Key. The only time you will see your serial number is when you return to this screen or create a printout. CLEAR Deletes all characters in the location name at once.
- Page 38 However, this omits the Touchscreen Controller tracking test. The CALIBRATE button was included to encourage a quick check of the touchscreen functions each time the cash door is emptied. System - 18 Midway Amusement Games, LLC...
- Page 39 VIDEO TEST Video tests provide patterns which verify monitor performance or making adjustments. You can modify some monitor characteristics using the monitor controls remote board. ALIGNMENT GRID Lets you check or adjust monitor convergence, linearity, and dynamic focus. GRADIENT TEST Permits you to optimize CRT screen image for brightness and contrast.
- Page 40 NOTICE: There is a master volume control on the CPU Board Assembly. Change this potentiometer only if there is not enough range in the on-screen volume adjustment. Refer to audio Troubleshooting. System - 20 Midway Amusement Games, LLC...
- Page 41 SWITCH TEST Switch tests allow you to manually check each switch used in the game. Because the Touchscreen uses a digital controller to sense player input, it has a separate test (refer to Calibrate steps). OPEN Indicates a circuit with no continuity. This is a Normally Open switch condition. CLOSED Indicates a circuit with continuity.
- Page 42 ® Touchmaster displays one vertical and one horizontal line on the screen. The lines should intersect over the box when you remove your finger. Repeat this procedure for each box on the screen. System - 22 Midway Amusement Games, LLC...
- Page 43 CALIBRATE TEST This test verifies touch tracking for the entire active screen area and lets you detect any calibration errors. Intersecting lines indicate screen location coordinates from the Touchscreen Controller. RETURN Returns you to the previous screen. RETURN CONTROLLER VERSION X.XX TYPICAL CALIBRATION TEST SCREEN Check the accuracy of the Touchscreen Controller can be checked without going through a new calibration procedure.
- Page 44 NOTES ______________________________________________ _____________________________________________ _____________________________________________ _____________________________________________ _____________________________________________ _____________________________________________ _____________________________________________ _____________________________________________ _____________________________________________ _____________________________________________ _____________________________________________ _____________________________________________ _____________________________________________ _____________________________________________ _____________________________________________ _____________________________________________ _____________________________________________ _____________________________________________ _____________________________________________ System - 24 Midway Amusement Games, LLC...
- Page 45 LLC Parts or circuit modifications may cause serious injury or equipment damage! Use only Midway authorized parts. For safety and reliability, do not substitute parts or modify Midway products. Substitute parts or modifications may void EMC directive or FCC type acceptance.
- Page 46 NOTES: 1. Version specific. Contact your distributor for the latest part numbers of these components. 2. Some versions of software do not require that all sockets be filled. 3. The battery is permanently attached to the memory IC and cannot be replaced separately. Service - 2 Midway Amusement Games, LLC...
- Page 47 SERVICING We recommend that you read the SAFETY NOTICES section thoroughly before beginning service. This VGM uses complex electronic components that can be very SENSITIVE to static electricity. The following precautions must be observed and followed prior to handling any of the electronics. 1.
- Page 48 Do not attempt to substitute the original Touchscreen controller for the one included in the kit. Although they look similar, the new one has the latest software instruction set. Early devices may not calibrate correctly or provide the highest degree of accuracy. Service - 4 Midway Amusement Games, LLC...
- Page 49 TOUCHSCREEN CONTROLLER ♦ Touchscreen Contact your authorized distributor for information regarding replacement touchscreens. ♦ CPU Board Assembly Switch off power to the VGM and unplug from AC power. Unlock and open the rear cover. Slide the rear edge of the CPU Board Assembly out enough to disconnect the Touchscreen Controller cable. Extract harness cables from the board connectors.
- Page 50 Discharge any static electricity build up in your body by touching the metal chain lug. This must be done BEFORE touching or handling any of the electronic assemblies. ORIENTATION OF FIELD REPLACEABLE ELECTRONIC COMPONENTS Service - 6 Midway Amusement Games, LLC...
- Page 51 ® OUCHMASTER CONVERSION C H A P T E R Wiring WARNING: GROUND Video Game Machine (VGM). Failure to reconnect all ground wires or replace metal shields and covers with each mounting screw installed and securely tightened may result in radio frequency interference.
- Page 52 Digital Circuits +4.90V to +5.10V Not Used -4.75V to -5.25V Audio Circuits +11.5V to +12.5V Orange Ground Return Black NOTE: Full Metal Chassis Power Supply has +5V adjustment. Open Frame voltages are all fixed. Wiring - 2 Midway Amusement Games, LLC...
- Page 53 TYPICAL CABINET WIRING (for models with 15-pin connectors) ® Touchmaster Conversion Kit Wiring - 3...
- Page 54 WIRING ADAPTER CABLE (for models with 9-pin connectors) Wiring - 4 Midway Amusement Games, LLC...
- Page 55 LED INDICATOR STATUS CHART DESIGNATION LOCATION FUNCTION COLOR STATE MEANING LED 1 CPU BOARD PROCESSOR NO POWER (No DC ASSEMBLY ACTIVITY power at the CPU) LOCKED UP (Faulty CPU instructions) BLINKING NORMAL OPERATION LED 2 CPU BOARD RESET GREEN NO POWER (CPU not ASSEMBLY INDICATOR operating)
- Page 56 ..................Wiring - 6 Midway Amusement Games, LLC...
- Page 57 ® OUCHMASTER CONVERSION C H A P T E R Troubleshooting NOTICE : The conversion kit CPU Board Assembly is not ® interchangeable with the standard Touchmaster Board Assembly. The assemblies look very similar but have different part numbers. The incorrect assembly will cause sync and touchscreen calibration errors.
- Page 58 3. You should see a glow from the LEDs if there is voltage in the processor circuits. (This does not mean that voltages or signals are as they should be, but it does indicate that the CPU Board is Troubleshooting - 2 Midway Amusement Games, LLC...
- Page 59 receiving some DC power from the Power Supply.) 4. Turn OFF VGM power. 5. Unplug the AC line cord. 6. Inspect the CPU Board Assembly. 7. Ensure that the DC Power connector is attached and fully seated onto the mating board connector. 8.
- Page 60 Enter Menu System by pressing the SETUP button inside the coin vault. From SYSTEM SETUP menu, choose the VIDEO TESTS (refer to Section One for additional details). Use these tests to check the operation of screens used in the VGM. Troubleshooting - 4 Midway Amusement Games, LLC...
- Page 61 VGM Can Not Be Played Symptom Problem Suggested Solution • Cash door Unlock and remove cash door. Empty the cash box. VGM will not accept blockage Inspect for counterfeit currency. Check vault and currency or tokens. • remove items that block the path from the coin VGM does not start.
- Page 62 5. Set the pulse width adjustment to long pulses if the bills do not register when inserted into the acceptor. 6. Verify that each acceptor is operating properly by placing it in a known functional unit. REAR VIEW OF CABINET WITH DOOR OPEN Troubleshooting - 6 Midway Amusement Games, LLC...
- Page 63 Touchscreen Malfunctions Symptom Problem Suggested Solution • Dirty screen Clean the entire cabinet frequently, especially the video Touchscreen is not screen glass and the touchscreen area. It is not accurate for two or necessary to switch off power to the VGM to clean the more players.
- Page 64 Touchscreen connector. 4. Check that the cable is fully seated in the connector. 5. Ensure that the Touchscreen Controller is operating properly by placing in a known good unit. Troubleshooting - 8 Midway Amusement Games, LLC...
- Page 65 COIN METER SETUP BUTTON CALIBRATE BUTTON SPEAKER CASH DOOR CONNECTOR CUTAWAY OF COMPONENTS BEHIND CASH DOOR ® Touchmaster Conversion Kit Troubleshooting - 9...
- Page 66 6. Any reading here indicates that the supply voltages are unstable and may contain ripple or noise. 7. Verify proper operation of CPU Board Assembly by placing it in a known functional unit. Troubleshooting - 10 Midway Amusement Games, LLC...
- Page 67 • 1. Unlock and remove the cash door. Audio is distorted or muffled. 2. Enter the VGM Menu System by pressing the • A constant low hum SETUP button. may be present. • 3. From the SYSTEM SETUP menu, go to Sounds may be DIAGNOSTICS and choose SOUND TESTS.
- Page 68 SETUP button. 7. From the SYSTEM SETUP menu, go to DIAGNOSTICS and choose VIDEO TEST. These tests will verify some functions of the video circuits. Wrong board 1. Turn OFF VGM power. assembly Troubleshooting - 12 Midway Amusement Games, LLC...
- Page 69 1. Ensure that the CPU Board Assembly is correct for assembly this VGM. Monitors for some VGMs require different sync polarity than Midway production units. Units with incorrect polarity or unusual sync connections will result in what appears to be horizontal tearing or complete loss of sync.
- Page 70 • Security failure 1. Check to see if security key is missing or incorrectly “Security Key Error” installed on CPU Board Assembly. message 2. Confirm that security key version matches software version. Troubleshooting - 14 Midway Amusement Games, LLC...
- Page 72 Installation of this kit does not guarantee compliance with FCC or EMC requirements. You are solely responsible, and Midway has no responsibility for FCC and EMC compliance of installed kits. Don’t install any compliance label on the product until the testing agency acknowledges compliance.
Need help?
Do you have a question about the TOUCH MASTER 8000 and is the answer not in the manual?
Questions and answers