Table of Contents
Advertisement
Advertisement
Table of Contents

Related Manuals for Canon DADF-AV1


Summary of Contents for Canon DADF-AV1
- Page 1 Revision 2.0 DADF-AV1 Service Manual...
- Page 2 When changes occur in applicable products or in the contents of this manual, Canon will release technical information as the need arises. In the event of major changes in the contents of this manual over a long or short period, Canon will issue a new edition of this manual.
- Page 3 Introduction Symbols Explanation Symbols Explanation Disconnect the connector. Connect the power cable. Connect the connector. Disconnect the power cable. Remove the cable/wire from the Turn on the power. cable guide or wire saddle. Install the cable/wire to the cable Turn off the power. guide or wire saddle.
-
Page 4: Table Of Contents
Contents Contents Safety Precautions....................1 Notes Before Servicing........................2 Points to Note at Cleaning........................2 Notes on Assembly/Disassembly......................2 1. Product Overview.....................3 Features.............................4 Specifications..........................5 Name of Parts............................. 6 External View............................6 Cross Section ........................... 6 2. Technical Explanation..................7 Basic Configuration..........................8 Functional Configuration........................8 Electric Circuit Diagram........................ - Page 5 Contents 4. Parts Replacement and Cleaning..............35 List of Parts............................36 External Cover............................ 36 Main Unit............................37 Consumable Parts Requiring Periodic Replacement and Cleaning Points..........37 List of Clutch, Solenoid, Motor, PCB.....................38 List of Sensor............................39 Other..............................40 Removing this Machine from the Host Machine................41 Procedure............................41 Actions after Reinstalling the ADF......................
- Page 6 Contents 6. Installation...................... 84 Checking Before Installation......................85 Check Items when Turning OFF the Main Power...................85 Points to Note on Installation........................85 Product Name.............................85 Unpacking............................86 Unpacking Procedure.......................... 86 Checking the Contents........................87 Installation Procedure........................88 Installing the DADF..........................88 Connecting the DADF Cable........................ 91 Installing Hinge Covers........................94 Affixing the Labels (INCH/AB/K Type Only)...................
-
Page 7: Safety Precautions
Safety Precautions Notes Before Servicing......2 Points to Note at Cleaning....2 Notes on Assembly/Disassembly..2... -
Page 8: Notes Before Servicing
Safety Precautions Notes Before Servicing CAUTION: At servicing, be sure to turn off the power source of the host machine according to the specified steps and disconnect the power plug. CAUTION: Do not turn off the power switch when downloading is under way. Turning off the main power switch while downloading is under way can disable the machine. -
Page 9: Product Overview
Product Overview Features..........4 Specifications........5 Name of Parts........6... -
Page 10: Features
1. Product Overview Features • Improvement of quick-engaging/disengaging the Pickup roller assembly and the Separation roller • Improvement of paper curl detection by the modification the Document length sensor • Installation of the Document delivery Lamp function... -
Page 11: Specifications
1. Product Overview Specifications Item Specifications Document pickup method Automatic pickup and delivery Document loading direction Face-up Document loading position Aligned to center Document separation method Upper separation Document weight Single -sided AB configuration: 42 to 128 g/m (Single-sided one sheet feed: 38 to 128 g/m Inch configuration: 50 to 128 g/m Double-sided 50-128 g/m... -
Page 12: Name Of Parts
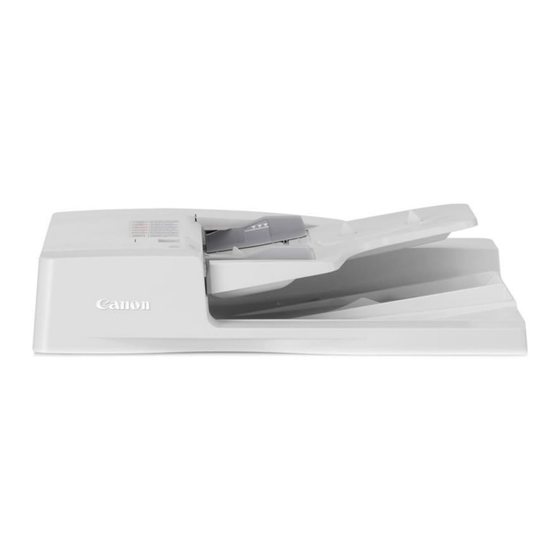
1. Product Overview Name of Parts External View Name Name Feeder Cover Document supply tray Front Cover Document delivery assembly Rear Small Cover Front Cover Slide guide Cross Section [9] [8] Name Name Lower registration roller Lower delivery reversal roller Upper registration roller Lead roller 2 (upper) Pickup roller assembly... -
Page 13: Technical Explanation
Technical Explanation Basic Configuration....... 8 Controls..........11 Basic Operation........12 Document Pickup/Feed.......18 Document Reversing......20 Document Delivery......22 Document Detection......23 Detecting Jams........27 Power Supply........29 Stamp Operation (If equipped with the Stamp Unit)........30 Original Output Indicator..... 31 Upgrading..........32... -
Page 14: Basic Configuration
2. Technical Explanation Basic Configuration Functional Configuration ■ List of Major Electric Parts PCB1 PCB4 PCB5 PCB2 PCB3 Symbol Name Symbol Name Pickup clutch PCB1 ADF driver PCB Registration clutch PCB2 Document set LED PCB Release solenoid PCB3 Different width sensor PCB Stamp solenoid PCB4 Document width sensor PCB... - Page 15 2. Technical Explanation Name Name Lower delivery reversal roller ■ Sensor Layout SR9/SR10/SR11/SR12 SR15 SR13/SR14 Symbol Name Detection description Registration sensor Registration arch creation timing Lead sensor Image Leading start/completion timing Delivery reversal sensor Delivery reversal timing Document set sensor Document set detection Cover open/closed sensor Open/close of Feeder Cover...
-
Page 16: Electric Circuit Diagram
2. Technical Explanation Symbol Name Role Pickup motor Pickup documents. Read motor Feeds documents when Stream reading or Delivery. Release solenoid Shifts the Lower delivery reversal roller after reversal of a document. Stamp solenoid Stamps on a document. Pickup clutch Transmit the Pickup motor drive to the Pickup roller and the Feed roller. -
Page 17: Controls
2. Technical Explanation Controls Controls Item Reference Basic Operation “Basic Operation” on page 12 Document Pickup/Separation “Document Pickup/Feed” on page 18 Document Reversing “Document Reversing” on page 20 Document Delivery “Document Delivery” on page 22 Document Detection “Document Detection” on page 23 Detecting Jams “Detecting Jams”... -
Page 18: Basic Operation
2. Technical Explanation Basic Operation Outline The ADF has the following operation modes. Operation mode name Outline of operation Associated print mode Forward pickup/Delivery Picks up, reads, and then delivers a document. Single-sided document -> Simplex printing Single-sided document -> Duplex printing Forward feed/Reverse Picks up, reads, reverses, and delivers a document. -
Page 19: Forward Pickup/Reverse Delivery Operation
2. Technical Explanation Completion of reading of Completion of reading of first document sheet second document sheet Completion of delivery of Start of reading of the second document sheet/ second document sheet End of job Completion of delivery of first document sheet Forward Pickup/Reverse Delivery Operation Duplex read operation (when two document sheets are placed) - Page 20 2. Technical Explanation Document Start of reading of front side of first document sheet End of reading of Pickup and formation of loop of first document sheet first document sheet Position to start of Stop after feeing the first reading of first document sheet document sheet to reversal position To next...
- Page 21 2. Technical Explanation Stop after feeding the first Removal of registration loop of document sheet to reversal reverse side of the first document position sheet/Re-pickup/ Release of the Lower delivery reversal roller Removal of idle registration Position to start reading of loop at the first document sheet/ reverse side at Re-pickup/Release of...
- Page 22 2. Technical Explanation Start of separation at End of reading of front side of the seconddocument sheet/ second document sheet Pressurization of the Lower delivery reversal roller Start of reading of top side of Stop after feeding second document sheet the second document sheet to reversal position Delivery of first document sheet...
- Page 23 2. Technical Explanation Removal of idle registration Start of reading of reverse loop at the second document sheet/ side of second document sheet Re-pickup/Release of the Lower delivery reversal roller End of reading of reverse Delivery of second document sheet/ side of second document sheet Pressurization at the Lower delivery reversal roller...
-
Page 24: Document Pickup/Feed
2. Technical Explanation Document Pickup/Feed Basic Operation After pressing the start key with a document placed on the Document supply tray, a document is picked up in the following procedure. ■ Pickup Operation The Pickup motor (M1) drives to lower the Pickup roller assembly through the Pickup clutch (CL1) and then the Pickup roller rotates to feed a document. -
Page 25: Pickup Roller Assembly And Separation Roller
2. Technical Explanation ■ Stream reading The stream reading starts when the leading edge of a document reaches the reading point and the read start signal is received from the host machine. "Stream reading" is a scan function which a document is scanned while feeding along the Document glass. The Scanner which is fixed under the Document glass reads the image. -
Page 26: Document Reversing
2. Technical Explanation Document Reversing Basic Operation There are two types of document reversal operation: one that is performed from the top to the reverse side of the document and the other that is performed from the reverse side to the top of the document. Since the basic operation methods are identical, only the reversal operation performed from the reverse side to the top is discussed below. - Page 27 2. Technical Explanation Lower registration roller Upper delivery Read roller 1 reversal roller (Upper) Reading start point...
-
Page 28: Document Delivery
2. Technical Explanation Document Delivery A document is delivered by the Lead roller 2 (upper) and the Upper delivery reversal roller driven by the Read motor (M2). Upper delivery reversal roller Read roller 2 (Upper) -
Page 29: Document Detection
2. Technical Explanation Document Detection Outline This machine detects a document using either of the two methods depending on the print mode. • Normal print mode (other than mixed size print mode and banner paper mode) • Mixed size print mode and banner paper mode Normal print mode Function Description... - Page 30 2. Technical Explanation SR14 SR15 SR13 The following table shows the relationship among length detection sensor signals, document widths, and initial document sizes. Document width detection Document length detec- Detected size tion Width (mm) Document Document Document Document Document INCH AB/INCH AB/K width sensor...
-
Page 31: Mixed Width Document Size Detection
2. Technical Explanation Document width detection Document length detec- Detected size tion More than 11 × 17 288.2 11 × 17 11 × 17 Mixed width document size detection In case that mixed width and length documents are set, 3 types of paper detections such as maximum width, other than maximum width and length are performed. - Page 32 2. Technical Explanation Different series of size 297.0 257.0 210.0 182.0 Inch configuration Mixed Different series of size LTRR STMT STMTR Maximum size Width (mm) 215.9 139.7 11 × 17 279.0 215.9 LTRR STMT Item Contents Combination assured Not assured. (Possible to feed) Not assured.
-
Page 33: Detecting Jams
2. Technical Explanation Detecting Jams This machine detects document jams using the sensors shown below. Document jam check timing is controlled by the host machine which determines jam occurrence by document existence on the specific sensors. Jam codes can be checked by outputting a jam error log report in the service mode of the host machine. ACC ID JAM Code JAM Type... - Page 34 2. Technical Explanation *2: Limited functions jam is a jam for preventing an original to be left inside the machine when a problem which requires the machine moves to limited functions mode occurs. If an error occurs for some reasons, a jam message is displayed to make the user to perform jam removal.
-
Page 35: Power Supply
2. Technical Explanation Power Supply The power supply lines are shown below. This machine power is supplied from the host machine. Motor Solenoid Clutch Host machine Sensor ADF driver PCB... -
Page 36: Stamp Operation (If Equipped With The Stamp Unit)
2. Technical Explanation Stamp Operation (If equipped with the Stamp Unit) When the stamp function is selected on the FAX mode or scan mode, a document is stamped indicating that a document is already read or sent. The Stamp solenoid (SL2) drives the Stamper. The Stamp solenoid (SL2) is driven by the signal from the ADF driver PCB (PCB1). Document Stamper Stamp solenoid... -
Page 37: Original Output Indicator
2. Technical Explanation Original Output Indicator After completion of reading, the LED at the Document delivery LED PCB (PCB5) lights ON to prevent from leaving a document. The LED keeps lighting for 10 seconds and then turns OFF. PCB5 Related service mode •... -
Page 38: Upgrading
2. Technical Explanation Upgrading Outline Since this equipment is not equipped CPU, upgrading is not possible by itself. Upgrade it on the host machine. -
Page 39: Periodical Service
Periodical Service List of Work for Servicing....34... -
Page 40: List Of Work For Servicing
3. Periodical Service List of Work for Servicing PR:Replacement (Periodically replaced parts) CR:Replacement (consumable parts) CL:Cleaning LU:Lubrication AD:Adjustment CH:Maintenance Part name Part number Work interval Counter Remarks Reference (COUNTER > DRBL-2) Pickup roller assembly FM1-D470 CR/80,000 DF-PU-RL Clean with a cloth “Removing the sheets which is dampened... -
Page 41: Parts Replacement And Cleaning
Parts Replacement and Cleaning List of Parts......... 36 Removing this Machine from the Host Machine........... 41 External Cover........44 Main Unit..........49 Periodic Replacing Parts, Durable Parts, Cleaning Parts.......52 Sensor..........56 Clutch, Motor, PCB, Other....61... -
Page 42: List Of Parts
4. Parts Replacement and Cleaning List of Parts External Cover Name Reference Front Cover “Removing the Front Cover” on page 44 Rear Cover “Removing the Rear Cover” on page 45 Feeder Cover “Removing the Feeder Cover” on page 46 Rear Small Cover “Removing the Rear Cover”... -
Page 43: Main Unit
4. Parts Replacement and Cleaning Main Unit Name Reference Feed Assembly “Removing the Feed Assembly” on page 49 Consumable Parts Requiring Periodic Replacement and Cleaning Points Name Reference Pickup roller assembly “Removing the Pickup Roller Assembly” on page Separation roller “Removing the Separation Roller”... -
Page 44: List Of Clutch, Solenoid, Motor, Pcb
4. Parts Replacement and Cleaning Name Reference Stamper “Replacing the Stamp” on page 53 Left hinge “Removing the Left Hinge” on page 54 List of Clutch, Solenoid, Motor, PCB PCB1 PCB4 PCB5 PCB2 PCB3 Symbol Name Main Unit Reference Pickup motor “Removing the Pickup Motor (M1)”... -
Page 45: List Of Sensor
4. Parts Replacement and Cleaning List of Sensor SR14 SR15 SR12 SR11 SR10 SR13 Symbol Name Main Unit Reference Registration sensor Feed assembly “Removing the Sensor (SR1,SR2,SR3)” on page 56 Read sensor Feed assembly Delivery reversal sensor Feed assembly Document set sensor Cover open/closed sensor Document length sensor 1 Document supply tray... -
Page 46: Other
4. Parts Replacement and Cleaning Other Name Reference Right hinge “Removing the Right Hinge” on page 64 Platen roller “Removing the Platen Roller” on page 65... -
Page 47: Removing This Machine From The Host Machine
4. Parts Replacement and Cleaning Removing this Machine from the Host Machine Procedure ■ For imageRUNNER ADVANCE 4500 Series/imageRUNNER ADVANCE C3500 Series 1. Remove the Cover of Reader [1]. • 2 Rubber Caps [2] • 2 Screws [3] 2. Disconnect the Grounding Cable [1]. •... - Page 48 4. Parts Replacement and Cleaning 4. Remove the ADF [1]. CAUTION: When holding this equipment, be careful not to touch the Platen roller [3]. • 2 Screws [2] ■ For imageRUNNER C3025/C3020 Series 1. Remove the Cover of Reader [1]. •...
-
Page 49: Actions After Reinstalling The Adf
4. Parts Replacement and Cleaning 2. Disconnect the Grounding Cable [1]. • 2 Connectors [2] • 1 Screw [3] • 1 Wire Saddle [4] 3. Open the ADF. 4. Remove the ADF [1]. CAUTION: When holding this equipment, be careful not to touch the Platen roller [3]. •... -
Page 50: External Cover
4. Parts Replacement and Cleaning External Cover Removing the Front Cover ■ Procedure 1. Open the Feeder Cover [1]. 2. Remove the screw [1]. 3. Open the ADF. 4. Remove the 2 screws [2]. -
Page 51: Removing The Rear Cover
4. Parts Replacement and Cleaning 5. Close the ADF. 6. Remove the Front Cover [1]. • 3 Hooks [2] Removing the Rear Cover ■ Procedure 1. Open the Feeder Cover [1]. -
Page 52: Removing The Feeder Cover
4. Parts Replacement and Cleaning 2. Remove the Rear Small Cover [1]. • 1 Screw [2] 3. Remove the Rear Cover [1]. • 2 Screws [2] • 2 Claws [3] Removing the Feeder Cover ■ Preparation 1. Remove the Rear Cover.“Removing the Rear Cover”... -
Page 53: Removing The Inner Cover
4. Parts Replacement and Cleaning ■ Procedure 1. Remove the Harness [1]. • 1 Screw [2] • 1 Grounding Wire [3] • 1 Connector [4] • 1 Wire Saddle [5] • 2 Clamps [6] 2. Remove the Feeder Cover [1]. •... - Page 54 4. Parts Replacement and Cleaning ■ Procedure 1. Remove the Inner Cover [1]. • 1 Screw [2] • 2 Claws [3]...
-
Page 55: Main Unit
4. Parts Replacement and Cleaning Main Unit Removing the Feed Assembly ■ Preparation 1. Remove the Front Cover.“Removing the Rear Cover” on page 45 2. Remove the ADF from the host machine.“Removing this Machine from the Host Machine” on page 41 3. - Page 56 4. Parts Replacement and Cleaning 3. Remove the 8 Connectors [1] on the ADF driver PCB. 4. Remove the Document supply tray [1]. • 1 Screw [2] • 1 Grounding Wire [3] • 1 Ferrite Core [4] • 1 Harness [5] 5.
- Page 57 4. Parts Replacement and Cleaning 9. Remove the harness guide [1]. • 1 Screw [2] • 1 Connector [3] 10. Remove the Feed assembly [1]. • 6 Screws [2]...
-
Page 58: Periodic Replacing Parts, Durable Parts, Cleaning Parts
4. Parts Replacement and Cleaning Periodic Replacing Parts, Durable Parts, Cleaning Parts Removing the Pickup Roller Assembly ■ Procedure 1. Open the Feeder cover [1]. 2. Remove the Pickup roller assembly [1]. 3. When replacing the Pickup roller assembly with a new one, clear the parts counter. •... -
Page 59: Removing The Separation Roller
4. Parts Replacement and Cleaning Removing the Separation Roller ■ Procedure 1. Open the Feeder cover [1]. 2. Remove the Separation roller [1]. 3. When replacing the Separation roller with a new one, clear the parts counter. • COPIER > COUNTER > DRBL-2 > DF-SP-RL Replacing the Stamp ■... -
Page 60: Removing The Left Hinge
4. Parts Replacement and Cleaning 3. Attach the new Stamper [1]. (Be careful to set the Stamper side to the front.) 4. Close the Feeder cover and Separation guide. CAUTION: If the Stamper is floating, a jam can occur. Be sure to push in the Stamper until it clicks. 5. - Page 61 4. Parts Replacement and Cleaning 2. Remove the Left hinge [1]. • 6 Screws [2] CAUTION: Be careful not to drop the Left hinge. Hold it while removing the screws from it. 3. When replacing the Left hinge with a new one, clear the parts counter. •...
-
Page 62: Sensor
4. Parts Replacement and Cleaning Sensor Removing the Different Width Sensor PCB (PCB3) ■ Preparation 1. Remove the Inner cover.“Removing the Inner Cover” on page 47 ■ Procedure 1. Remove the sensor holder [1]. • 3 Screws [2] 2. Remove the Different width sensor PCB [1]. •... - Page 63 4. Parts Replacement and Cleaning ■ Procedure 1. Remove the fixing plate [1]. • 3 Screws [2] 2. Turn over the Feed assembly, remove the following parts. • 1 Resin ring [1] • 1 Flange [2] • 1 Pulley [3] •...
- Page 64 4. Parts Replacement and Cleaning 3. Remove the Platen roller unit [1]. • 2 Claws [2] 4. Remove the Cover [1]. • 2 Screws [2]...
- Page 65 4. Parts Replacement and Cleaning 5. Remove the Lead roller 2(upper) [1]. • 1 Resin ring [2] • 1 Flange [3] • 1 Pulley [4] • 1 E-ring [5] • 1 Bearing [6] • 1 Gear [7] • 1 Bushing [8] 6.
- Page 66 4. Parts Replacement and Cleaning 7. Remove the Sensors [1]. • 3 Connectors [2] [1] SR3 [1] SR1 [1] SR2...
-
Page 67: Clutch, Motor, Pcb, Other
4. Parts Replacement and Cleaning Clutch, Motor, PCB, Other Removing the Pickup Motor (M1) ■ Preparation 1. Remove the Rear Cover.“Removing the Rear Cover” on page 45 2. Remove the Clutch unit.“Removing the Pickup Clutch/Registration Clutch (CL1/CL2)” on page 62 ■... -
Page 68: Removing The Pickup Clutch/Registration Clutch (Cl1/Cl2)
4. Parts Replacement and Cleaning ■ Procedure 1. Remove the Read motor [1]. • 1 Connector [2] • 3 Screws [3] • 1 Spring [4] ■ Actions after Replacement 1. Adjusting the Magnification.“Adjusting the Magnification” on page 103 Removing the Pickup Clutch/Registration Clutch (CL1/CL2) ■... -
Page 69: Removing The Adf Driver Pcb (Pcb1)
4. Parts Replacement and Cleaning 2. Remove the 2 Clutches [1]. • 2 Resin rings [2] • 2 Bushings [3] [1] CL1 [1] CL2 Removing the ADF Driver PCB (PCB1) ■ Preparation 1. Remove the Rear Cover.“Removing the Rear Cover” on page 45 ■... -
Page 70: Removing The Right Hinge
4. Parts Replacement and Cleaning ■ Procedure 1. Remove the sensor holder [1]. • 3 Screws [2] 2. Remove the LED PCB [1]. • 1 Screw [2] • 1 Connector [3] Removing the Right Hinge ■ Preparation 1. Remove the ADF from the host machine.“Removing this Machine from the Host Machine”... -
Page 71: Removing The Platen Roller
4. Parts Replacement and Cleaning 2. Remove the Right hinge [1]. • 2 Screws [2] Removing the Platen Roller ■ Preparation 1. Remove the Feed assembly.“Removing the Feed Assembly” on page 49 ■ Procedure 1. Remove the fixing plate [1] •... - Page 72 4. Parts Replacement and Cleaning 2. Turn over the Feed assembly, remove the following parts. • 1 Resin ring [1] • 1 Flange [2] • 1 Pulley [3] • 1 E-ring [4] • 1 Bearing [5] • 1 Gear [6] •...
- Page 73 4. Parts Replacement and Cleaning 4. Remove the Platen roller [1]. • 2 Screws [2] • 1 Plate [3] • 1 Platen roller holder (front) [4] • 1 Bushing [5] • 1 Gear [6] • 1 Platen roller holder (rear)[7]...
-
Page 74: Adjustment
Adjustment Overview..........69 Basic Adjustment........ 70... -
Page 75: Overview
5. Adjustment Overview Adjustment After Replacing the Parts In case of removing the parts as shown below, adjust the following item. Parts to replace Adjustment item Reference Motor/Other roller Adjusting the Magnification “Adjusting the Magnification” on page 103 Adjustment In case of removing this equipment and then re-installed, adjust it in order as shown below. Adjustment item Reference Adjusting the Height... -
Page 76: Basic Adjustment
5. Adjustment Basic Adjustment Overview of Adjustment The DADF has the following adjustment items. The following is the order of adjustment. Adjustment Items Adjusting the Height Adjusting the Perpendicularity Adjusting the Read Position Adjusting the Magnification Adjusting the Image Position (Main Scanning Direction) Adjusting the Image Position (Sub Scanning Direction) Adjusting the White Level Adjusting the Height... - Page 77 5. Adjustment ● When Check with the Paper 1. Check the rear-left height of the DADF. Cut a sheet of paper to make a paper slip with width of 45mm. Set paper against the protrusion in such a manner that the sheet is nearly hidden, and then close the DADF.
- Page 78 5. Adjustment 2. Pull out the set paper. Pull out the paper in the direction of the arrow to check that slight resistance is felt. 3. Check the front-left height of the DADF. Set paper against the protrusion in such a manner that the sheet is nearly hidden, and then close the DADF. CAUTION: Set paper so that it does not reach the document reader.
- Page 79 5. Adjustment 4. Pull out the set paper. Pull out the paper in the direction of the arrow to check that slight resistance is felt. ■ Checking the Right Hinge Height 1. Be sure that the white plate is in close contact with the front and rear document glass when this Equipment is closed. ■...
-
Page 80: Adjusting The Perpendicularity
5. Adjustment ■ Adjusting the Left Hinge Height 1. Adjust the height with the left hinge height adjusting screw. CAUTION: Loosen the lock nut before adjustment, and tighten it after adjustment. • If the front spacer is floating, turn the adjusting screw clockwise to bring the front spacer closer to the glass. •... - Page 81 5. Adjustment 2. Check the perpendicularity at the leading edges of the test chart and copy. Measure dimensions A and B on the test chart and dimensions A' and B' on the copy. If (A-B) is not same as (A'-B'), go step 3 and following steps.
- Page 82 5. Adjustment 3. Loosen the screw securing the right hinge, and slide the hinge to the front or rear with reference to the marking-off line to adjust the perpendicularity. • For B'>A Slide the hinge to rear side. • For A'>B' Slide the hinge to front side.
- Page 83 5. Adjustment 5. Remove the White Plate. 6. Place the White Plate on the Copyboard Glass by aligning it with the Index Sheet. 7. Close the DADF, and then open it again.
-
Page 84: Adjusting The Reading Position
5. Adjustment 8. Press the White Plate upward as shown in the figure below. CAUTION: If the White Plate is pressed downward, it is placed on the Index Sheet, so be sure to press it upward. 9. With the DADF closed, check that the White Plate is not placed on the Index Sheet as shown in the figures. CAUTION: Be sure that there is no gap between the White Plate and the Index Sheet. -
Page 85: Adjusting The Magnification
5. Adjustment 3. Select the following item in the service mode to check the value, and write down the new adjustment value on the service label. COPIER > ADJUST > ADJ-XY > STRD-POS NOTE: The service label affixed to the back of Reader Front Cover. CAUTION: If the DADF fails auto adjustment and indicates [NG], go through the following: 1. -
Page 86: Adjusting The Image Position (Main Scanning Direction)
5. Adjustment 2. Change the value as gap A in the figure. • If the printed image is longer: Increase the value. (The image shrinks in the feed direction.) • If the printed image is shorter: Decrease the value. (The image extends in the feed direction.) Setting Value;... -
Page 87: Adjusting The Image Position (Sub Scanning Direction)
5. Adjustment 2. Change the value as gap A in the figure. • If the image is displaced to the rear: Increase the value. (The image shifts to the front.) • If the image is displaced to the front: Decrease the value. (The image shifts to the rear.) Setting Value;... -
Page 88: Adjusting The White Level
5. Adjustment 2. Change the value as gap A in the figure. • If the image is displaced to the trailing edge: Increase the value. (The image shifts to the leading edge.) • If the image is displaced to the leading edge: Decrease the value. (The image shifts to the trailing edge.) Setting Value;... - Page 89 5. Adjustment 1. Place the white copy paper which the user usually uses on the copyboard glass. Execute the following item in the service mode. COPIER > FUNCTION > CCD > DF-WLVL1 2. Press [OK] or [Yes]. Automatic adjustment starts. 3.
-
Page 90: Installation
Installation Checking Before Installation....85 Unpacking........... 86 Checking the Contents......87 Installation Procedure......88 Checking After Installation....96 Adjustment.......... 97... -
Page 91: Checking Before Installation
6. Installation Checking Before Installation Check Items when Turning OFF the Main Power Check that the main power switch is OFF. 1. Turn OFF the main power switch of the Host Machine. 2. Be sure that control panel display and main power lamp are both turned OFF, and then disconnect the power plug from the outlet. -
Page 92: Unpacking
6. Installation Unpacking Unpacking Procedure NOTE: The equipment is secured by tapes, cushioning and other materials to protect it from vibration and impact during transit. Remove all such tapes and cushioning materials as instructed below before installing this equipment. 1. Take out the DADF from the carton. NOTE: The weight of the DADF is about 8.2kg. -
Page 93: Checking The Contents
6. Installation Checking the Contents Make sure that none of the following parts are missing. [10] [1] DADF 1pc. [2] Hinge Cover 2pcs. [3] Face Seal 2pcs. [4] Screw (Stepped Screw (black); M5x6) 2pcs. [5] Screw (Flat Head Screw; M4x10) 2pcs. [6] Screw (RS Tightening;... -
Page 94: Installation Procedure
6. Installation Installation Procedure 2. Affix the Face Seal on the holes. CAUTION: Check that the main power switch is OFF and the power plug is disconnected from the outlet. Installing the DADF 1. Remove the 2 screws and 2 Face Seals. •... - Page 95 6. Installation 4. Hook the hinges of the DADF to the Stepped Screws 5. Fix the hinges. from behind of the host machine and then slide the • 2 Screws (Flat Head Screw; M4x10) DADF to the front of the host machine. NOTE: CAUTION: For the right hinge, fit the edge of the Screw to the...
- Page 96 6. Installation 7. Place the White Plate on the Copyboard Glass by 9. Press the White Plate upward as shown in the figure aligning it with the Index Sheet. below. CAUTION: If the White Plate is pressed downward, it is placed on the Index Sheet, so be sure to press it upward.
-
Page 97: Connecting The Dadf Cable
6. Installation Connecting the DADF Cable 4. Connect the connectors of the DADF cable, and then ■ For imageRUNNER ADVANCE 4500 fix the Grounding Cable. Series/imageRUNNER ADVANCE • 2 Connectors • 1 Screw (RS Tightening; M3x8) C3500 Series • 2 Wire Saddles CAUTION: Fix the Grounding Cable in the correct direction. - Page 98 6. Installation 5. Put the gap between two tie-wrap of the DADF cable 2. Remove the Face Seal. to the groove of the Cover of Reader and then fix it. • 2 Screws (RS Tightening; M3x8) • 2 Rubber Caps 3.
- Page 99 6. Installation 4. Connect the connectors of the DADF cable, and then 5. Put the gap between two tie-wrap of the DADF cable fix the Grounding Cable. to the groove of the Cover of Reader and then fix it. • 2 Connectors •...
-
Page 100: Installing Hinge Covers
6. Installation Installing Hinge Covers CAUTION: • Be sure to install the Hinge Covers from the correct direction. Not doing so can cause deformation or breakage. 1. Install 2 Hinge Covers. • Do not install the Hinge Covers in the other way around. -
Page 101: Cleaning The Adf Scan Glass
6. Installation 2. Close the DADF. Affix the pinch caution label 1 in the appropriate language. Cleaning the ADF Scan Glass 1. Open the DADF. 2. Using the cleaning sheet supplied for Host Machine, wipe the Stream Reading Glass to clean. 3. -
Page 102: Checking After Installation
6. Installation Checking After Installation Disposal Parts Following disposal parts are remained after completion of the installation work. [1] Removed Face Seal 3pcs. [2] Screw (Binding; M4x8) 2pcs. [3] Wire Saddle (small) 2pc. *1 [4] Wire Saddle (large) 1pc. *2 [5] Remaining Finger Pinch Caution Label 1 1pc (INCH/AB/K type only) [6] Remaining Finger Pinch Caution Label 2 1pc... -
Page 103: Adjustment
6. Installation Adjustment Adjusting the Height ■ Check the Left Hinge Height Overview of Adjustment ● When Visual Check The DADF has the following adjustment items. The following is the order of adjustment. Adjustment Items 1. Close the DADF and check whether the front and Adjusting the Height rear ADF scan glass spacers are in close contact with the ADF scan glass. - Page 104 6. Installation ● When Check with the Paper 1. Check the rear-left height of the DADF. Cut a sheet of paper to make a paper slip with width of 45mm. Set paper against the protrusion in such a manner that the sheet is nearly hidden, and then close the DADF.
- Page 105 6. Installation ■ Check the Right Hinge Height 3. Check the front-left height of the DADF. Set paper against the protrusion in such a manner that the sheet is nearly hidden, and then close the DADF. 1. Be sure that the white board is in close contact with the front and rear copyboard glass when the DADF is closed.
-
Page 106: Adjusting The Perpendicularity
6. Installation ■ Adjusting the Left Hinge Height Adjusting the Perpendicularity 1. Adjust the height with the left hinge height adjusting 1. Copy the test chart with the DADF. screw. CAUTION: Loosen the lock nut before adjustment, and tighten it 2. - Page 107 6. Installation 3. Loosen the screw securing the right hinge, and slide 5. Remove the White Plate. the hinge to the front or rear with reference to the marking-off line to adjust the perpendicularity. 6. Place the White Plate on the Copyboard Glass by aligning it with the Index Sheet.
-
Page 108: Adjusting The Reading Position
6. Installation 7. Close the DADF, and then open it again. 9. With the DADF closed, check that the White Plate is not placed on the Index Sheet as shown in the figures. CAUTION: Be sure that there is no gap between the White Plate and the Index Sheet. -
Page 109: Adjusting The Magnification
6. Installation 3. Select the following item in the service mode to 2. Change the value as gap A in the figure. check the value, and write down the new adjustment • If the printed image is longer: Increase the value. value on the service label. -
Page 110: Adjusting The Image Position (Main Scanning Direction)
6. Installation Adjusting the Image Position (Main Scanning Direction) 2. Change the value as gap A in the figure. • If the image is displaced to the rear: Increase the value. (The image shifts to the front.) • If the image is displaced to the front: Decrease the value. -
Page 111: Adjusting The Image Position (Sub Scanning Direction)
6. Installation Adjusting the Image Position (Sub Scanning Direction) 2. Change the value as gap A in the figure. • If the image is displaced to the trailing edge: Increase the value. (The image shifts to the leading edge.) • If the image is displaced to the leading edge: 1. -
Page 112: Adjusting The White Level
6. Installation Adjusting the White Level NOTE: 1. This is a item of adjustment in which the white level of images made in stream reading mode are matched with the white level of images made in book mode. If this adjustment is skiped, the following will likely occur: •... -
Page 113: Appendices
APPENDICES Service Tools........108 General Circuit Diagram....109... -
Page 114: Service Tools
Service Tools Service Tools Solvents and Oils Name Uses Composition Remarks Alcohol Cleaning; e.g., Fluoride-family hydrocarbon • Do not bring near fire. plastic, rubber; external covers. Alcohol • Procure locally. Surface activating agent • Substitute: IPA (iso- Water propyl alcohol) Solvent Cleaning;... -
Page 115: General Circuit Diagram
General Circuit Diagram General Circuit Diagram General Circuit Diagram (1/1) Pickup clutch Registration clutch Release solenoid Stamp solenoid Pickup motor Read motor J109 J105 MT10 MT12 J101 J201 J412 J212 J203 J312H J112H J103H J312 J112 J103 MT11 PCB1 ADF driver PCB J1 3 MT 7 PCB 5...