
Related Manuals for Cosori CP016-PC


Summary of Contents for Cosori CP016-PC
- Page 1 Premium 6-Quart Pressure Cooker Model No.: CP016-PC Questions or Concerns? Mon - Fri 9:00 AM - 5:00 PM PT support@cosori.com | (888) 402-1684...
- Page 2 WITH HEARTFELT THANKS We thank you for purchasing a Premium 6-Quart Pressure Cooker by Cosori, and we’re excited to see what you’ll cook up. We’re looking forward to preparing many easy, fresh meals with you. When we say “with you,” we mean it—our helpful Customer Support Team is available at support@cosori.com.
-
Page 3: Table Of Contents
Table of Contents Package Contents Package Contents 1 x CP016-PC Premium 6-Quart Specifications Pressure Cooker Important Safeguards 1 x Rice Spoon Getting to Know Your Pressure Cooker 1 x Ladle · Control Panel 1 x Rice Measuring Cup · Display 1 x Water Collection Cup ·... -
Page 4: Important Safeguards
This can clog the pressure release valve, cause steam to sputter, or cause burns. Only cook these foods as directed by a Cosori • Do not immerse your cooker or its plug in recipe. -
Page 5: Getting To Know Your Pressure Cooker
GETTING TO KNOW YOUR PRESSURE COOKER Inside of lid Inside of cooker FRONT BACK Lid Handle 10. Safety Pin Water Collection Cup Inner Pot 12. Power Cord Handles 13. Sealing Ring Housing 14. Anti-Clog Filter Display 15. Float Valve Sealing Ring Control Panel 16. -
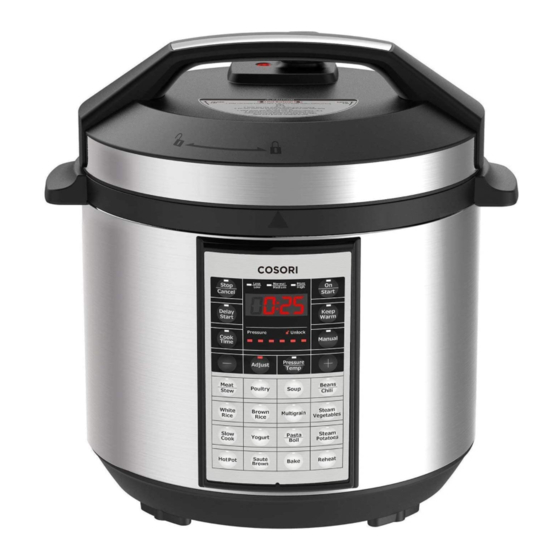
Page 6: Control Panel
CONTROL PANEL Cancel any Start cooking cooking program Less Normal More Stop Medium High Cancel Start Change start time Keep Warm Mode of cooking program (page 17) Delay Keep Warm Start Manual Pressure/ Change cooking time Temperature Modes Pressure Unlock (page 16) Cook Manual... -
Page 7: Display
DISPLAY Adjust indicator Less Normal More Medium High Time display Pressure indicator Pressure Unlock Flashes red when lid is (see chart below) not properly secured to the housing Number of Pressure Temperature indicator bars 5.8 psi / 40 kPa 228°F / 109°C 230°F / 110°C 6.5 psi / 45 kPa 7.3 psi / 50 kPa... -
Page 8: Before First Use
BEFORE FIRST USE Setting Up Remove all packaging from the pressure cooker and its accessories, including any temporary stickers. Make sure everything is included (see Package Contents, page 3). Unlock and remove the lid by turning the handle counterclockwise until the symbol lines up with at the top of the control panel. -
Page 9: Water Test
Water Test Make sure you perform the Water Test before using your pressure cooker. This will help you learn how to use the cooker, and make sure it’s working properly. Put the inner pot into the cooker. Plug in. [ Figure 2.1 Pour in 4 cups of water. -
Page 10: Safely Releasing Pressure
SAFELY RELEASING PRESSURE You can wait for pressure to release naturally, or use quick release. CAUTION! • Do not place hands, face, or skin over the pressure release valve. • Do not open the lid until steam is finished releasing. The lid will stay locked until the float valve drops down. -
Page 11: Cooking With Your Pressure Cooker
COOKING WITH YOUR PRESSURE COOKER Pressure Cooking The preset pressure cooking programs are Meat/Stew, Poultry, Soup, Beans/Chili, White Rice, Brown Rice, Multigrain, Steam Vegetables, Steam Potatoes, and Bake. NOTE: • Do not fill the pot above the “MAX” line. If RICE ingredients expand easily in water (such as dry rice or pasta), do not fill pot over halfway. - Page 12 Adjust Program What You Can Make Cooking Time Setting Less Stewed meat 25 minutes Meat/Stew 30 minutes Normal Tender, juicy meats More So tender it falls off the bone 45 minutes Less Chicken wings or drumettes 8 minutes Poultry Normal Tender breasts, thighs, and drumsticks 15 minutes 25 minutes...
-
Page 13: Non-Pressurized Cooking
Non-Pressurized Cooking These preset cooking programs do not use pressure: Slow Cook, Yogurt, Pasta/Boil, Hot Pot, Sauté/Brown, and Reheat. NOTE: • The glass lid may be used for all non-pressurized programs, except Yogurt culturing. • Never use the main cooker lid with Sauté/Brown. Slow Cook, Hot Pot, Sauté/Brown, and Reheat Press On/Start. - Page 14 Pasta/Boil The temperature for this program is 212°F (100°C) and cannot be changed. Put the inner pot into the cooker. Plug Press On/Start. The display will show in. Add liquid. “ “ as the cooker heats up. Select Pasta/Boil. Press Adjust to The cooker will beep 5 times when change the power mode.
- Page 15 Step 1: Heating the Milk (cont.) Step 2: Culturing Yogurt Use a thermometer to check the Stir yogurt starter in with the milk. temperature of the milk. The Secure the main lid. temperature should be 180°F (82°C) or higher. Press Yogurt. The display will show “.
-
Page 16: Manual Cooking
Manual Cooking Use the Manual function to customize your own cooking program. Choose from Pressure or Temperature modes. Manual Pressure Mode Manual Temperature Mode Put the inner pot into the cooker. Plug NOTE: The Manual Temperature Mode is for non- in. -
Page 17: Other Functions
Other Functions Delay Start Changing Temperature Units This lets you add ingredients now, but start The default temperature units for the cooker cooking later. Delay Start will not work with are Fahrenheit (F), but can be switched to Yogurt, Pasta/Boil, Hot Pot, Sauté/Brown, Celsius (C). -
Page 18: Care & Maintenance
CARE & MAINTENANCE Unplug the cooker and allow it to completely cool before cleaning. Remove the water collection cup and Inside of lid rinse it out. Place it back onto the cooker. Take the sealing ring out of the lid. The inner pot, glass lid, sealing ring, and steamer rack are easy to clean and dishwasher safe. -
Page 19: Troubleshooting
8). Sealing ring is broken. Replace the sealing ring. If necessary, purchase a new sealing ring from Amazon.com (search for “Cosori 6qt Sealing Ring”). Lid is damaged or defective. Contact Customer Support (page 22). Steam is leaking from the... - Page 20 TROUBLESHOOTING (CONT.) Problem Cause Solution Rice is half-cooked, too There is not enough water added. Add more water according to your hard, or burned. recipe. Cooker was opened too soon after After cooking has finished, leave the lid cooking has finished. on for 5-10 minutes.
-
Page 21: Warranty Information
TERMS & POLICY in the user manual. Some states do not allow this exclusion or limitation of incidental or Cosori warrants all products to be of the highest consequential losses so the foregoing disclaimer quality in material, craftsmanship, and service, may not apply to you. -
Page 22: Customer Support
Defective Products & Returns Should your product prove defective within the specified warranty period, please contact Customer Support via support@cosori.com with your order number. Do not dispose of your product before contacting us. Once our Customer Support Team has approved your request, please return the unit with a copy of the invoice and your order number. - Page 23 If you’re happy with this Premium 6-Quart Pressure Cooker, the fun doesn’t have to stop here. Check out www.cosori.com for the full line of all our beautiful and thoughtfully designed cookware. They might fit right at home in your kitchen!
- Page 24 Questions or Concerns? Mon - Fri 9:00 AM - 5:00 PM PT support@cosori.com | (888) 402-1684...
Need help?
Do you have a question about the CP016-PC and is the answer not in the manual?
Questions and answers