Table of Contents
Advertisement
Quick Links
WARRANTY
Top Flite Models guarantees this kit to be free from defects in both
material and workmanship at the date of purchase. This warranty
does not cover any component parts damaged by use or
modification. In no case shall Top Flite's liability exceed the
original cost of the purchased kit. Further, Top Flite reserves the
right to change or modify this warranty without notice.
In that Top Flite has no control over the final assembly or material
used for final assembly, no liability shall be assumed nor accepted
for any damage resulting from the use by the user of the final
user-assembled product. By the act of using the user-assembled
product, the user accepts all resulting liability.
If the buyer is not prepared to accept the liability associated
with the use of this product, the buyer is advised to return
this kit immediately in new and unused condition to the place
of purchase.
For product support contact www.top-flite.com/support
READ THROUGH THIS MANUAL BEFORE STARTING CONSTRUCTION.
IT CONTAINS IMPORTANT INSTRUCTIONS AND WARNINGS
CONCERNING THE ASSEMBLY AND USE OF THIS MODEL.
© 2018 Top Flite, a Hobbico
company.
®
www.top-flite.com
WARNING! This product may use a lithium polymer (LiPo) battery.
Improper handling may result in FIRE! You are responsible for
following all safety precautions as outlined in this instruction manual.
1
INSTRUCTION
MANUAL
SPECIFICATIONS
Wingspan: 86 in [ 2184 mm]
Wing Area: 1358 sq in [87.6 dm
Weight: 24.7– 27 lb [11222 – 12247g]
Wing
42– 46 oz/sq ft
Loading:
[128–140 g/dm
Length: 66.3 in [1683mm]
Radio: 7 channel minimum
Engine: 3.4–3.7 cu in
[55–61cc] spark ignition gas
Elec. Motor: Rimfire .65 (80-85-160)
Outrunner Brushless
Flight Battery: 12S (2 x 6S) 5000 mAh/5500 mAh
ESC: 160 A High Voltage
2
]
2
]
TOPA0716
Advertisement
Table of Contents

Related Manuals for Top Flite F6F Hellcat


Summary of Contents for Top Flite F6F Hellcat
-
Page 1: Instruction Manual
WARRANTY SPECIFICATIONS Wingspan: 86 in [ 2184 mm] Top Flite Models guarantees this kit to be free from defects in both material and workmanship at the date of purchase. This warranty Wing Area: 1358 sq in [87.6 dm does not cover any component parts damaged by use or modification. -
Page 2: Table Of Contents
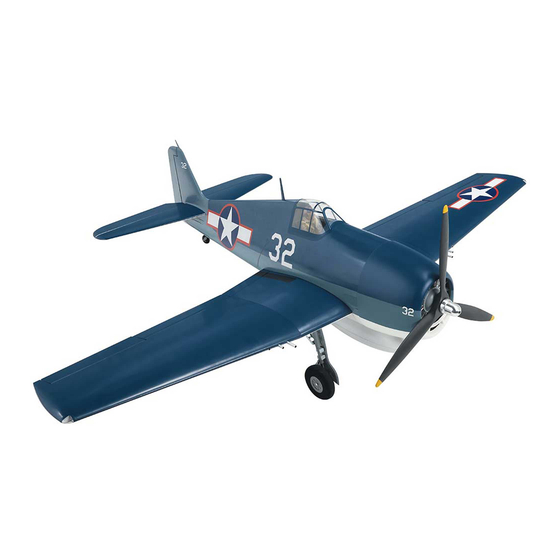
5151 East Memorial Drive had many requests for a F6F Hellcat so Top Flite developed Muncie, IN 47302-9252 the Giant F6F Hellcat ARF to get you in the air quickly with Tele. (800) 435-9262 a great looking model, without the sanding and covering Fax (765) 741-0057 required to build a kit. -
Page 3: Scale Competition
Get help from an experienced pilot when learning to operate engines. 1. Your Giant F6F Hellcat ARF should not be considered a toy, but rather a sophisticated, working model that functions very Use safety glasses when starting or running engines. -
Page 4: Lithium Battery Warning
ALWAYS keep a supply of sand accessible when A L W A Y S charging a LiPo battery. Dumping sand on the battery ALWAYS remove the propeller if the motor batteries will assist in extinguishing a LiPo chemical fire. will be connected when working on your plane. ALWAYS remove the batteries from the plane after a ALWAYS remove the motor batteries from the plane crash. -
Page 5: Decisions You Must Make
The radio installation for the Giant F6F Hellcat ARF can be achieved using four different radio set-ups: a Basic Radio Note: See the included layout drawing for required servos Set-up, an Advanced Radio Set-up and the S.Bus System... -
Page 6: S.bus System Set-Up (Standard Servos)
SBD-1 S.Bus Decoder Cables allow the use of existing Voltage, meaning that you could run a straight 2S LiPo for analog and digital servos, too. By providing today’s pilots your receiver battery. with tomorrow’s technology, the Futaba S.Bus system is Many ser vo choices are nothing short of revolutionary. -
Page 7: S.bus System Set-Up (S.bus Servos)
The Top Flite Giant F6F Hellcat ARF has been designed for required to fi nish the Top Flite Giant F6F Hellcat ARF. Order Robart pneumatic and electric main and tail gear retracts. -
Page 8: Covering Tools
CA applicator tips (HCAR3780) ORDERING REPLACEMENT PARTS CA debonder (GPMR6039) Scale Warbird Template (TOPR2187) Replacement parts for the Top Flite Giant F6F Hellcat ARF 36" metal ruler are available using the order numbers in the Replacement Hobbico High Precision Diagonal Cutter 5"... -
Page 9: Contents
18 months. Grumman built a total of 12,275 F6F Hellcats. It fi rst saw combat in August 1943 in an attack on Marcus Island. The F6F Hellcat was credited with destroying 5,223 aircraft. It had a kill-to-loss ratio of 19:1 with the U.S. - Page 10 7. Glue the LED support in the wing tip. 2. Tie the end of the string from the wing tip light recess to the plug of the red LED. Secure the string with a piece of masking tape. 3. Pull the wire through the wing until the connector exits the root of the wing panel.
-
Page 11: Install The Flap Servo
Install the Flap Servo 5. Once the epoxy has cured, remove the clamps. 1. Carefully remove the left fl ap servo hatch from the Place a 1/16" [1.6 mm] spacer, wing by peeling off the masking tape holding the hatch to such as a piece of cardstock the wing. -
Page 12: Install The Aileron Servo
of the supplied heat shrink tubing in half and slide it over the servo connections. Shrink the tubing by applying heat to the tubing. 13. Place the fl ap servo hatch with the servo in the wing. Be certain that the hatch is positioned correctly as shown. Secure the hatch using four #2 x 3/8"... -
Page 13: Install The Aileron And Flap Pushrods
4. Secure the aileron hatch to the wing using four #2 x 3/8" [9.5mm] fl at head sheet metal screws. Use thin CA to harden the screw threads. 1. Slide a silicone clevis retainer over a 4-40 threaded metal clevis. Thread a 4-40 nut followed by the 4-40 metal clevis, threaded 16 turns onto a 4-40 x 6"... - Page 14 The heat of the pushrod should melt the solder – not the fl ame of the torch or soldering iron – thus The F6F Hellcat was fi tted with the 2,100 hp Pratt & allowing the solder to fl ow. The end of the wire should be Whitney R-2800-10W engine, the same engine used in coated with solder all the way around.
-
Page 15: Mount The Retracts
Mount the Retracts Install the left retract fi rst. 3. Tie the Actuator extension or pressure lines along with a fl ap and aileron servo extension or S.Bus hub, depending on your setup, and a 16" (400 mm) servo extension for the wing tip lights to the string in the retract bay. - Page 16 8. Install the second landing gear door mount and position as shown. 9. Retract the landing gear and position the landing gear door over the strut. Center the door in the opening. Place a piece of masking tape on each side of the retract. Mark the position of the mounting holes on the tape.
-
Page 17: Join The Wing Panels
apply a couple of drops of thin CA between the gear door mount and the landing gear strut. 15. Go back to step 1 on page 15 of Mount the Retracts and install the right retract. Join the Wing Panels Note: Keep the retracts in the retracted (up) position. -
Page 18: Assemble The Fuselage
7. Loosen the screws and remove the outer wing panel. The 4-40 socket head cap screws will have left a mark on the aluminum blade. Use a metal fi le to cut a shallow 1/32" (0.8mm) slot in the aluminum blade. ASSEMBLE THE FUSELAGE Install the Stabilizer 4. - Page 19 the pivot point of each hinge must align with the center of the trailing edge. To achieve this alignment, the hinges will be fairly deep in the fi n. Also note that the hinges must be perpendicular to the trailing edge. 3.
-
Page 20: Install The Tail Light
Install the Tail Light 8. Mix up approximately ¼ oz. [7.4cc] of 30-minute epoxy. Use a toothpick to thoroughly apply the epoxy in the holes in the fi n and rudder. Use the toothpick to get the epoxy out of the opening of the holes in the rudder and fi n so it doesn’t get into the hinge pin. -
Page 21: Mount The Retractable Tail Gear
Mount the Retractable Tail Gear 5. Use wire cutters to cut the supplied braided cable into two equal lengths. Slide a swage (metal tube) over one end of the cables. Then, guide the end of the cable back through. 1. Remove the steering arm from the Robart #160WC retractable tail gear assembly (not included). -
Page 22: Install The Elevator And Rudder Servos
INSTALL THE ELEVATOR 10. Place the tail gear in the fuselage while simultaneously guiding the pull-pull cable through the white plastic guide AND RUDDER SERVOS tubes. Also route the actuator extensions or air lines through the fuselage. 1. If you are installing pneumatic retracts, insert the pressure tank in the fuselage. - Page 23 4. Insert the servo tray. Use the six holes in the servo tray as guides to drill 1/16" [1.5mm] pilot holes into the servo tray frame. Secure the servo tray to the frame with #2 x 3/8 sheet metal screws and #2 fl at washers. Harden the screw holes with thin CA.
- Page 24 and a silicone clevis retainer, 16 turns, onto both elevator pushrods and the rudder pushrod. 12. Mount the control horns to the elevators the same way 9. Follow your radio setup diagram to connect the elevator, they were mounted on the ailerons, by drilling 3/32" [2.5mm] rudder and tail wheel steering to the receiver.
- Page 25 remove the threaded metal clevis and nut from the control horn end, remove the pushrod from the fuselage, cut it to the correct length and solder a metal solder clevis on the end. Reinstall the pushrod from the front and connect the solder clevis to the servo arms.
-
Page 26: Electric Motor Installation
ELECTRIC MOTOR INSTALLATION If you are powering the F6F Hellcat with a gas engine, skip ahead to GAS ENGINE INSTALLATION on page 29. 1. The removable battery hatch is secured at the factory with two #2 x 3/8" [9.5mm] sheet metal screws. Remove the two screws from inside of the fuselage. - Page 27 4. Install the motor mount on the RimFire 65 motor following the instructions included with the XX-Large Stand Off Motor Mount. The front of the drive washer should be 6-3/4" [171mm] from the back of the stand offs. 6. Assemble the ESC mount as shown. Drill 5/64" [2mm] pilot holes through the doubler as shown.
-
Page 28: Gas Engine Installation
12. WITHOUT THE PROPELLER INSTALLED, check the rotation of the motor. Switch on the transmitter, then receiver. Connect the Great Planes Series Connector to both batteries and plug the Series Connector into the ESC. Advance the throttle and check that the motor is rotating counterclockwise. - Page 29 3. Install the engine mounting bolts and fender washers from the back of the fi rewall. The engine mounting hardware is not included in the F6F Hellcat. It should be included with the engine. If your engine did not include fender washers, we recommend purchasing them.
- Page 30 9. Glue the ignition battery tray in the fuselage. Note that the wider slot is to the back. 7. Drill a 3/16" [4.5mm] hole at the marks on the fi rewall for the throttle and choke outer pushrod tubes. Remove the engine before drilling the holes.
- Page 31 14. Install the throttle and choke servos in the servo tray. Harden the screw holes with thin CA. 15. Follow the setup diagram for your installation to connect the throttle and choke to the receiver. 12. Carefully study the following images and glue the throttle/choke servo tray together as shown.
- Page 32 20. Trim the throttle pushrod at the mark, slide a silicone clevis retainer over the clevis and thread the clevis and threaded rod ¼" [6mm] into the throttle pushrod. Reinstall the clevis on the throttle servo arm and check the operation 18.
-
Page 33: Install The Pneumatic Air Valve Controls
3. Glue the two plywood servo tray doublers to the bottom of the control valve servo tray. 25. Place the ignition module on a piece of R/C foam rubber (not included) and secure it to the top of the fi rewall box with the included four rubber bands. -
Page 34: Assemble And Install The Fuel Tank
ASSEMBLE AND INSTALL THE FUEL TANK 1. Roughen both ends of the brass tubes with sandpaper. 7. Glue the control valve servo tray in the fuselage. 8. Plug the retract control valve servo into the receiver. We set channel 1 for the retracts for the S.Bus setup. 2. - Page 35 Secure the fuel line to the carburetor with a tie strap. During its lifetime, the F6F Hellcat went through very few changes or updates. There were only two basic versions, the F6F-3 and F6F-5. The Hellcat fl ew in combat for 2-years and then disappeared.
-
Page 36: Install The Cowl
INSTALL THE COWL 1. Sand a bevel on one end of each of the four 10 x 25mm 4. Once satisfi ed with the fi t, use 6-minute epoxy to glue cowl ring dowels. We found putting the dowels in a drill and the dowels in the cowl ring. - Page 37 7. We painted the space between the cylinders and the 10. Use 6-minute epoxy to glue the dummy engine to plywood engine frame fl at black. Paint is not included. the plywood wood frame. Align the dummy engine with the embossed circle on the plywood frame.
- Page 38 HOW TO MAKE AN EXTENDED 7/64” BALL WRENCH 1. Cut the 7/64" ball wrench in approximately equal parts. 2. Use a piece of sandpaper to remove the coating from the wrench 1-1/2" (38mm) from the cut. 12. Before gluing, use sandpaper to roughen the gluing area inside the cowl.
- Page 39 16. Make three 1/2" [13 mm] holes in the front of the dummy engine for removing and installing the 6-32 socket 21. Remove the cowl from the fuselage before cutting head cap screws. to prevent the fi berglass dust from entering the carburetor. Use a high speed rotary tool with a sanding drum to cut the 17.
-
Page 40: Finish The Wing
FINISH THE WING Option 1: This allows the lights to be controlled manually when the receiver is switched on. Install the on/off switch for 1. If electric retracts have been installed, use double- the lights in the side of the fuselage. Plug the switch into any sided tape or sticky-backed hook and loop material (not channel in your receiver (channel 2 in our setup). -
Page 41: Install The Belly Pan
cut and remove a 1/4" [6mm] wide strip of covering, 1/32" [.8mm] from the inside of the outline. 2. Remove the wing and place waxed paper between the wing and the fuselage at the leading and trailing edge. This will prevent the wing from becoming glued to the fuselage if the epoxy should run out of the joint. -
Page 42: Apply The Final Details
9. The F6F Hellcat has the option of installing a pitot tube. It is held in place with magnets, allowing it to be removed 2. - Page 43 3. Apply the decals to both of the side panels. 5. Trim the armor plate/head rest as shown. Test fi t the armor plate in the fuselage and trim as needed. Roughen the back of the armor plate and use medium CA to glue the armor plate in the fuselage.
- Page 44 8. Glue the plywood instrument panel back into the plastic instrument panel. 6. Trim the front panel as shown and apply the decals. Roughen the back of the panel and glue it to the front of the cockpit, centered at the front of the cockpit fl oor. 9.
-
Page 45: Apply The Decals
Please use the following pictures as a guide for the decal placement. 11. Again, check the pilot position before gluing the control stick in the cockpit fl oor. 12. Wash the canopy in warm water, and then, dry it off. Place the canopy on the fuselage. -
Page 46: Install The Antenna Mast
Vibration can also cause the fuel to foam, which will, in turn, cause the engine to run hot and quit. We use a Top Flite Precision Magnetic Prop Balancer 4. Xoar Electric Propeller: Enlarge the propeller shaft (TOPQ5700) in the workshop and keep a Great Planes hole to 10mm using a metric prop reamer or a letter gauge Fingertip Prop Balancer (GPMQ5000) in our fl ight box. -
Page 47: Balance The Model Laterally
If, after you have become accustomed to the way the Giant the motor could start unexpectedly at any time causing F6F Hellcat ARF fl ies, you would like to change the throws serious injury. to suit your taste, that is fi ne. However, too much control... - Page 48 At the Servos The pushrod farther out The pushrod closer in means More Throw means Less Throw At the Control Surfaces The pushrod farther out The pushrod closer in means Less Throw means More Throw 1. Use a box or something similar to prop up the bottom of the fuselage so the horizontal stabilizer and wing will be level.
-
Page 49: Balance The Model (C.g.)
Once the throws are set, apply a drop of threadlocker to the threads on the pushrod and tighten the nuts against the clevises. 6" [152 mm] IMPORTANT: With the throws set, now is a good time to set the failsafe on the transmitter. The failsafe may save your plane if the signal is lost and prevent the electric motor from accidentally coming on. -
Page 50: Check List
CHECK LIST 17. Place your name, address, AMA number and telephone number on or inside your model. This is an AMA rule. During the last few moments of preparation your mind 18. Make sure the failsafe is set, to prevent accidents. may be elsewhere anticipating the excitement of the fi rst fl ight. -
Page 51: Flying
Not mounting control horns solidly; Poor fi t of Take it easy with the Giant F6F Hellcat ARF for the fi rst few clevis pin in horn; Side-play of wire pushrods caused by fl ights, gradually getting acquainted with it as you gain large bends;... -
Page 52: Landing
.40-size sport One fi nal note about fl ying your Giant F6F Hellcat ARF. Have a model. Also, don’t pull the throttle all the way back and leave goal or fl ight plan in mind for every fl ight. -
Page 53: Servo Setup Diagrams
BASIC SETUP (Gas/Electric) Futaba R617FS Receiver (FUTL7627) (1 Req) Futaba R6014HS Receiver (FUTL7645) (1 Req) (if installing the optional tank drop and light controller) Servo minimum torque 95 ozf-in (6.8 kgf-cm ) (8 Req) Aileron Futaba S3305 (FUTM0045)/Tactic TSX47 (TACM0247) Servo minimum torque 40 ozf-in (2.8 kgf-cm ) (2 Req) Futaba S3004 (FUTM0004)/Tactic TSX35 (TACM0235) 12"... - Page 54 ADVANCED SETUP (Gas/Electric) Futaba R6014HS Receiver (FUTL7645) (1 Req) Servo minimum torque 95 ozf-in (6.8 kgf-cm ) (8 Req) Futaba S3305 (FUTM0045)/Tactic TSX47 (TACM0247) Aileron Servo minimum torque 40 ozf-in (2.8 kgf-cm ) (2 Req) Futaba S3004 (FUTM0004)/Tactic TSX35 (TACM0235) 12"...
- Page 55 (Gas/Electric) S.BUS SETUP (Non S.Bus Servos) Futaba R6303SB Receiver (FUTL7661) (1 Req) Futaba R7006SB Receiver (FUTL7673) (1 Req) Servo minimum torque 95 ozf-in (6.8 kgf-cm ) (8 Req) Futaba S3305 (FUTM0045)/Tactic TSX47 (TACM0247) Aileron Servo minimum torque 40 ozf-in (2.8 kgf-cm ) (2 Req) Futaba S3004 (FUTM0004)/Tactic TSX35 (TACM0235) SBD-1 S.Bus Decoder 16"...
- Page 56 (Gas/Electric) S.BUS SETUP (S.Bus Servos) Futaba R7006SB Receiver (FUTL7673) (1 Req) Futaba S3071HV Servo (FUTM0717) (8 Req) Servo minimum torque 40ozf-in (2.8 kgf-cm ) (2 Req) Aileron Futaba S3073HV (FUTM0719) 6" to 8" (152mm to 203mm) Servo Extension Futaba (FUTM4140)/Tactic (TACM2701) (1 Req) FSH67 Male-to-Male Extension 3"...
Need help?
Do you have a question about the F6F Hellcat and is the answer not in the manual?
Questions and answers