Table of Contents
Advertisement
Quick Links
Advertisement
Chapters
Table of Contents

Related Manuals for PERCo CT/L-04.2

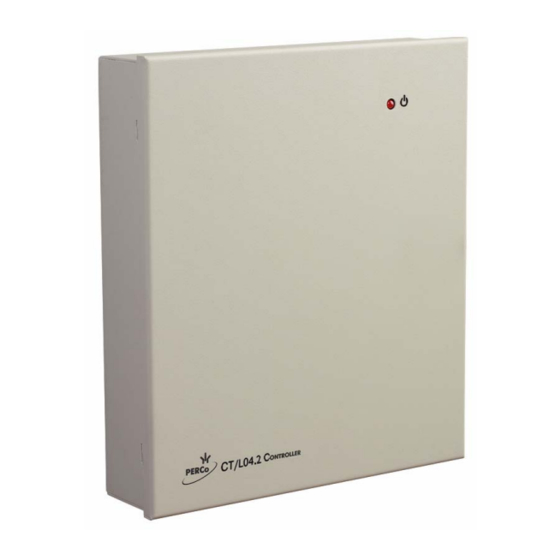
Summary of Contents for PERCo CT/L-04.2
- Page 1 Controller CT/L-04.2 ASSEMBLY AND OPERATION MANUAL...
- Page 2 Controller CT/L-04.2 Assembly & Operation Manual...
-
Page 3: Table Of Contents
Appendix 2. Instruction on connection of the alcohol detection device ......45 Appendix 3. Instruction on connection of the controller through PoE-splitter .....47 Appendix 4. Instructions for connecting biometric readers manufactured by Suprema ..49 Appendix 5. CT/L-04.2 Controller Web-interface. User Manual .........50 ... - Page 4 This Operation Manual (hereinafter – the Manual) provides information on technical specifications and operation of CT/L-04.2 controller. The Manual aims to provide correct operation of the controller and complete use of its technical capabilities. The Manual contains data on installation and maintenance, and also a reference section.
-
Page 5: Application
Assembly & Operation Manual APPLICATION CT/L-04.2 controller (hereinafter – the controller) is a part of PERCo-Web ACS. The controller supports connection up to 8 different PERCo readers (Sect. 5.8) and enables to organize up two two-way passages or up to four one-way passages. -
Page 6: Technical Specifications
Electric shock protection class ..............III (IEC 61140) Mean lifetime ......................8 years Dimensions ....................205×189×45 mm Weight ....................... max. 1.8 kg Depends on the selected controller configuration (see Section 5.4). Events from connected CL-201 controllers are stored in the memory of CT/L-04.2 controller. -
Page 7: Delivery Set
Assembly & Operation Manual DELIVERY SET 4.1 Standard delivery set Controller ........................... 1 Jumper ..........................11 Resistor С2-33H-0.25-4.7 kOhm ..................2 Suppressor 15-18 V ......................4 Mounting hardware: plastic dowel ........................3 screw ..........................3 self-adhesive cable tie mount ..................3 nylon cable tie 100 mm .................... -
Page 8: Description
connection via Ethernet (IEEE 802.3) interface; support of TCP/IP protocol suite (ARP, IP, ICMP, TCP, UDP, DHCP); support of application layer of communications protocol of PERCo-Web system; updating of embedded software through Ethernet. On default, the controller has: ... -
Page 9: Controller Boards
Assembly & Operation Manual The controller as a part of ACS provides: operation in ACM: “Open”, “Control”, “Security” , “Closed”; saving of the set mode in the non-volatile memory, to avoid the turn-off of the mode in case of power failure; ... - Page 10 CT/L-04.2 Controller Table 1. The purpose of connecting blocks of the bottom board Name of the physical contact Contact Purpose in the Web- interface Connector ХТ1 (IN) Input 1 “Door sensor #1” or “Input for PASS A signal” “Common” –...
-
Page 11: Ip-Address Setting
Assembly & Operation Manual Name of the physical contact Contact Purpose in the Web- interface Connector ХТ8 (OUT3) normally open contact “Relay control output OD #3” or Output 3 central contact “Additional output OUT #3” normally closed contact Connector ХТ9 (OUT4) normally open contact “Relay control output OD #4”... -
Page 12: Controller Configuration Templates
CT/L-04.2 Controller If the IP-address (gateway, subnet mask) is changed by the user, the controller starts to work with the new settings immediately without switching power supply. Note: It is possible to change network settings of the controller from PC via Web-interface or software. -
Page 13: Signals Of Inputs
Assembly & Operation Manual 6. The controller to operate one vehicle checkpoint and one one-way lock; 7. The controller to operate one vehicle checkpoint and two one-way locks; 8. The controller to operate one vehicle checkpoint and one two-way lock; 9. -
Page 14: Inputs Dua, Dust, Dub, Fa
CT/L-04.2 Controller Signals activation depends on description of their default status in Normal status of contact parameter in PERCo-Web software): If input is described as Opened, it is activated by a turn-on of low-level signal relative to GND contact. In such case a normally opened relay contact or a scheme of open collector output may be a control element. -
Page 15: Settings Of Output Signals
Assembly & Operation Manual 5.6 Settings of output signals 5.6.1 Relay outputs OUT1 – OUT4 The controller is equipped with four relay outputs OUT1 – OUT4. Connection to the outputs is performed via XT6 – XT9 connecting blocks of the controller bottom board. Every output has a complex group of contacts: normally open NO, normally closed NC and common output C. -
Page 16: Outputs Lda, Ldst, Ldb
(IN #6). Activation of all signals depends on description of their initial status in Normal status of contact parameter in PERCo-Web software: If input is described as Opened, it is activated by a turn-on of low-level signal relative to GND contact. -
Page 17: Al" Input Configuration
Assembly & Operation Manual Note: If according to the configuration, input of the controller is used for connection of the RC-button, that it is configured as “Opened” without any possibility being modified. Control element “relay contact” should provide following characteristics of signals: Minimum commutating current ................ -
Page 18: Connection To Rs-485 Interface
CT/L-04.2 Controller When AL is armed, its resistance is constantly measured with necessary averaging. AL integration time is set by Violation duration parameter and it is equal to 70 ms or 300 ms. The requirements for detecting the AL state at these AL integration time are shown in Table 4: Table 5. -
Page 19: Marking And Packaging
Assembly & Operation Manual MARKING AND PACKAGING The marking label of the controller is placed on the back of the housing. The marking label provides following information concerning the controller: trade mark and contact details of the manufacturer; name and number of model; ... -
Page 20: Installation
CT/L-04.2 Controller INSTALLATION Installation should be performed in accordance with work safety noted in Sect. 7.1. Installation should be done in accordance with local building requirements. 8.1 Cable lengths Cables for mounting are shown in Table 6. Mounting of communication lines should comply with EIA/TIA RS-422A/485 standards. -
Page 21: Installation Order
Assembly & Operation Manual 8.2 Installation order Connection to the controller is performed in accordance with scheme shown on Figures 3 - 13 with the use of cables from Table 6. The position of connecting blocks on the controller’s board is presented on Figure 1. Installation of connected devices (turnstiles, locks, power supply, etc.) is performed according to the instructions given in technical documents of corresponding devices. - Page 22 CT/L-04.2 Controller Figure 3. Common scheme of connections...
-
Page 23: Door Control Configuration
Assembly & Operation Manual 4. Fix the controller with three screws through holes in the controller housing (use dowels from the delivery set if necessary). 5. Select the way to set IP-address of the controller (Sect. 5.3) and install a jumper on XP1 connector in accordance with the Table 2, if necessary. - Page 24 The locks LB-, LBP-series do not require mounting of the door sensor (the CT/L-04.2 controllers can trace the door opening based on the contact group of the lock). In this case, is necessary to installed jumpers on the lower board of the controller: for OUT1 –...
-
Page 25: Turnstile And Electromechanical Gates Configuration
Notes: The Device output mode of operation parameter of OD should be in Potential for PERCo turnstiles. The Registration of the passage after ID card presentation parameter of OD should be in Yes for swing gate WMD-05S and WMD-06. - Page 26 CT/L-04.2 Controller Figure 6. Connection schemes of “Turnstile control” configuration...
-
Page 27: Vehicle Checkpoint Configuration
Assembly & Operation Manual Figure 7. Connection schemes of the gates 8.2.4 Vehicle checkpoint configuration When installing a controller, is necessary to correspond with operation logic of control unit of vehicle checkpoint: Operation of control unit of vehicle checkpoint is performed via two relays – when passage is allowed OUT1 relay is activated and held, sending “Open”... - Page 28 CT/L-04.2 Controller Figure 8. Connection scheme of boom barriers to the controller of vehicle checkpoint Figure 9. Connection scheme of passage sensors...
-
Page 29: Rc-Panel Configuration
Assembly & Operation Manual Note: Output normalization parameter of OD should be set into After closing mode. If operation is performed via one relay, Automatic closing function should be turned on in the control unit of OD of vehicle checkpoint, in such case a minimum waiting period for automatic closing should be set - Regulation Т.C.V. -
Page 30: Connecting A Fire Alarm Device
CT/L-04.2 Controller Figure 10. Connection scheme of RC-panel or WRC of “Turnstile control” and “Vehicle checkpoint control” configurations 8.2.6 Connecting a Fire Alarm Device In case of fire alarm or other emergency situation, there is possibility of automatic unlocking (passage opening) of all ODs connected to the controller board and the controllers of the second level. -
Page 31: Connection Of Optional Equipment
Assembly & Operation Manual Figure 11. Connection scheme for configuring “ШC” inputs as “AL” 8.2.8 Connection of optional equipment To connect optional equipment, follow the next recommendations: 1. The typical connection schemes of the optional equipment are shown on Figures 12, 13, 14. - Page 32 CT/L-04.2 Controller Figure 13. Connection scheme of optional equipment to controller inputs...
- Page 33 Assembly & Operation Manual Figure 14. Connection scheme of optional equipment to “Open collector” outputs 2. To connect the optional equipment, use cable type №4 (Table 6). 3. Fix cables with plastic ties to self-adhesive cable tie mount, included into delivery set, by installing them inside the housing of the controller.
-
Page 34: Configuration
Network software PERCo-Web. Note: You may buy optional software from official PERCo distributors. Also, specified software, the procedure of his licensing and electronic versions of the operating manual are available on the website of the company PERCo http://www.perco.com... -
Page 35: Update Of Embedded Software
This program goes together with files “Software to change firmware”. The current version of the program is available on the website of the company www.perco.com in the section Support > Software. Also, update embedded software and format the memory is possible using the Web-... -
Page 36: Operation
CT/L-04.2 Controller 11 OPERATION When operating the controller, follow security measures indicated in Sect. 7.2. After the configuration, the controller can operate in the following modes: Without connection to the security system server. If connection to Ethernet network and PC is also unavailable, the controller can perform the following functions: ... -
Page 37: Indication Of Acs, Events And Controller Configurations
Assembly & Operation Manual Operation mode “Closed” is mode of passage prohibition. OD will be unblocked before the change of operating mode. Pressing of buttons of remote control board and RC-button (“Exit”) are ignored. When any card is presented, an event of access violation is registered. Operation mode “Security”... -
Page 38: Troubleshooting
11.3 Troubleshooting The elimination of possible malfunctions listed below is made by the buyer. If the fault persists, we recommend you to contact one of the service centers of PERCo company. A list of service centers is given in the Certificate. - Page 39 If the controller does not detect connection to Ethernet network (light indicators are off), connect it to the cable that connects the other controller or computer. If the controller still does not detect connection to Ethernet network or the communication is not reestablished, contact PERCo service in order to repair this controller.
-
Page 40: Maintenance
CT/L-04.2 Controller 12 MAINTENANCE Technical staff performing maintenance of the controller should be acquainted with construction and operating procedures of the controller. All works should be done by high-skilled electricians. Information about scheduled maintenance is recorded in the log of maintenance and monitoring of the technical condition of means of the security fire alarm system. - Page 41 Assembly & Operation Manual Table 8. List of maintenance works according to the regulations №1 (checklist №1) Devices, Norms and Work Procedure instrument, events equipment 1.1 Disconnect power supply from AC There should not Rags, brush, flat current, clean up the controller and power be traces of dirt brush supply surface from dust, dirt and damp.
-
Page 42: Transportation And Storage
CT/L-04.2 Controller 13 TRANSPORTATION AND STORAGE The controller in the original package should be transported in closed freight containers or in other closed type cargo transport units. The storage of the controller is allowed indoors at ambient temperature from -20°C to... -
Page 43: Appendix 1. Instruction On Connection Of The Card Capture Reader
Guide of the administrator of these systems. An example of connection of the PERCo card capture readers is shown on Figures 15 and 16. Any available inputs and outputs are used in the current controller configuration. - Page 44 CT/L-04.2 Controller Figure 15. Scheme of connection of the card capture reader IC-02.1...
- Page 45 Assembly & Operation Manual Figure 16. Scheme of connection of the card capture reader IC-05...
-
Page 46: Appendix 2. Instruction On Connection Of The Alcohol Detection Device
(one breathalyzer is for one direction of passage). Operation of the controller with the breathalyzer is possible only after configuring it in PERCo-Web software. The procedure of configuration is described in the Guide of the administrator of these systems. - Page 47 Assembly & Operation Manual The breathalyzer has two control outputs where the signal PASS and FAIL are removed. The scheme on Figure 18 is used to connect the breathalyzer (two different free inputs are used in the current configuration of the controller). Figure 18.
-
Page 48: Appendix 3. Instruction On Connection Of The Controller Through Poe-Splitter
Note: For some models of splitters output voltage is chosen with the switcher. Operating with PERCo equipment it is necessary to turn the switcher into “12V” mode. Requirements for connecting devices The characteristics of power consumption of the controller when connected through splitter should meet the following requirements: Admissible value of supply voltage .............. - Page 49 Assembly & Operation Manual Procedure of controller connection Cables used in installation are mentioned in Table 6. When you connect the controller through the splitter, follow the next procedure: 1. Find the mounting place of the splitter. It is recommended to install the splitter inside of controller housing (do not install the splitter from the controller at distance more than 2m).
-
Page 50: Appendix 4. Instructions For Connecting Biometric Readers Manufactured By Suprema
2. As a fingerprint reader when controlling one of the directions of a double-sided lock (turnstile). In this case, zoning control is supported; the OD is controlled by the outputs of the CT/L-04.2 controller. The Suprema controller connects to the CT/L-04.2 controllers via the Wiegand interface via the AC-02 interface converter (connection diagrams - Figure 20). -
Page 51: Appendix 5. Ct/L-04.2 Controller Web-Interface. User Manual
User Manual Appendix 5. CT/L-04.2 Controller Web-interface. User Manual CONTENTS WEB-INTERFACE OPPORTUNITIES................51 CONNECTION TO WEB-INTERFACE OF THE CONTROLLER........51 SETTING ........................52 Change of network setting of the controller ............52 Setting of the access password of the controller ...........53 ... -
Page 52: Web-Interface Opportunities
Note: Change of configurations via Web-interface of the controller is not available if the controller is under control of network or local software of PERCo systems (you can only monitor the configuration; operations are forbidden). The access to Web- interface is allowed if the software is configured to Allow Web-interface. It is possible after stopping the operation of the software and stopping the server of PERCo system. -
Page 53: Setting
On the page, you can select following: 1. The title bar if he page contains PERCo trademark and buttons to select the language of Web-interface. By clicking on the PERCo company logo you navigate to the main page from other sections of Web-interface. -
Page 54: Setting Of The Access Password Of The Controller
CT/L-04.2 Controller Web-Interface IP-address 10.x.x.x, where x – is a number from 0 to 254; Subnet mask 255.0.0.0. To change network settings of the controller (only in user mode, Sect. 5.3 of Operation manual): 1. Click consistently in the Web-interface menu: Settings → Network. The page with working area will be opened: 2. -
Page 55: Choice Of Settings Of Memory Allocation
30 000 cards and 550 000 events, 40 000 cards and 390 000 events. Note: In software PERCo-Web are supported all these options, but their choice is only available in the Web interface. To change Settings on the memory allocation of the controller: 1. -
Page 56: Configuration Of The Settings Of The Controller Resources
CT/L-04.2 Controller Web-Interface 2. The controller configurations are presented in dropdown list of working area of the page. The window Configuration template should be opened where selected configuration is specified: 3. In the opened window click Continue. The controller configuration will be changed. -
Page 57: Physical Contacts (Inputs And Outputs)
User Manual Note: For the resource Reader (number), the parameter Card rights number: indicates the number of the set of card rights used for passing with this reader. Individually for each card can be configured 12 different sets of rights. 4. -
Page 58: Readers
When you add optional readers, they have the configuration similar to the card capture readers attached to the same directions of the OD. In this regard, added readers are not appeared in network and local software of PERCo-Web system. To configure the Settings of the reader: 1. -
Page 59: The Reading Format Of The Card Identifiers
Change of this parameter when you have already entered the access control cards, results in the passage on these cards will be impossible. When connecting to the controller working under software of PERCo systems, the current formant may not be shown (nothing is selected from the formats). In this case to change the reading format of card identifiers is PROHIBITED. -
Page 60: Internal Responses
CT/L-04.2 Controller Web-Interface 4.2.5 Internal responses To set internal responses of the controller: 1. Click consistently in the Web-interface menu: Configuration → Edit → Internal responses. The page with working area will be opened: 2. To add the new response, click the Add button, to change the Settings of internal response or delete it, click in the working area of the page on the line with the response name. -
Page 61: Control Of Operating Device
User Manual 5. To remove the response from the list, click the Delete button. The window Internal response (number) will be closed, the internal response will be deleted. 6. To exit the window Internal response (number) without saving changes, click the Cancel button. -
Page 62: Access Cards
Note: Emergency list of cards in the controller CT/L-04.2 is not saved, after loading his second viewing in the Web-interface becomes unavailable. To enter the card identifiers: 1. - Page 63 User Manual In the working area of the page click the Switch off card reader input button. 4. Entering of the card identifiers manually: In the working area of the page click the Manual input button. The window Card input will be opened: ...
-
Page 64: The List Of Stored Cards
CT/L-04.2 Controller Web-Interface The list of stored cards To work with the list of the cards stored previously in the controller’s memory: 1. Click consistently in the Web-interface menu: Access cards → List. The page with working area will be opened: 2. - Page 65 Attention! Setting of Settings of time access criteria via the controller is possible only in network software of PERCo systems. In the Web-interface is only possible to change the time criterion (time zone, weekly schedule, flexible daily schedule, flexible weekly schedule) and transition from one set of time Settings to another set by changing his number.
-
Page 66: Loading The Identifiers From A File
CT/L-04.2 Controller Web-Interface Loading the identifiers from a file Attention! When loading the list of cards from the file to the controller, previously loaded cards are deleted automatically from the controller memory. The list of the cards can be loaded only from the file cards.bin, created via Web- interface of the controller earlier. -
Page 67: Status
User Manual 3. There is possibility of selection in the report of events by categories and time. To do this, click the Filter button, the window Filter will be opened: 4. In the dropdown list Selected categories: [number] put ticks the event categories which should be reported. -
Page 68: Diagnostics
CT/L-04.2 Controller Web-Interface 9. DIAGNOSTICS For diagnostics and maintenance of the controller: Click in the Web-interface menu: Diagnostic. The page with working area will be opened: 2. To start testing the status of the controller hardware click the Start button in the line Diagnostics (50 min):. - Page 69 PERCo Polytechnicheskaya str., 4, block 2 194021, Saint Petersburg Russia Tel: +7 812 247 04 64 E-mail: export@perco.com support@perco.com www.perco.com...
- Page 70 www.perco.com...
Need help?
Do you have a question about the CT/L-04.2 and is the answer not in the manual?
Questions and answers