
Related Manuals for Maxspect Turbine Duo TD-6K


Summary of Contents for Maxspect Turbine Duo TD-6K
- Page 1 Owner’s Manual Bedienungsanleitung Mode d’emploi Manuali dei Prodotti Manual do Proprietário Instrukcja Obsługi 用户手册 使用說明書...
-
Page 3: Dear Customer
Thank you for purchasing this product. English For optimum performance and safety, please read these instructions carefully. User Memo: Date of purchase: Dealer name: Dealer address: Dealer website: Dealer email: Dealer phone no.: Please visit us on facebook or twitter! https://www.facebook.com/Maxspect http://twitter.com/maxspectled... -
Page 4: Package Content
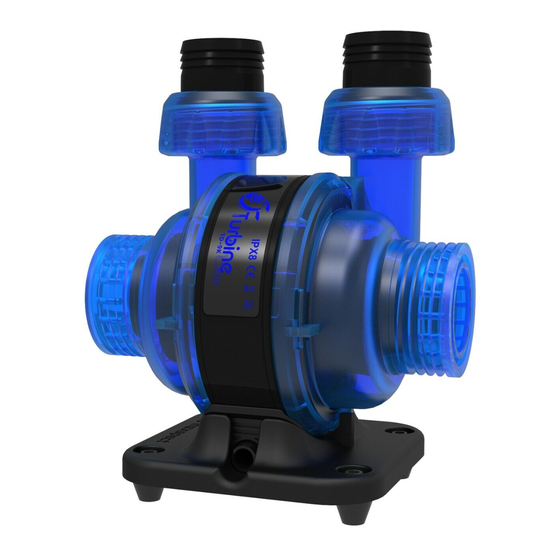
Package Content Please check the content in the package. English Main Components Pump Unit Controller Power Supply Unit Power Cable Backup Battery Adaptar Inlet Spare Parts 1. Ф58mm 2pcs 2. 1” 2pcs 2A. Ф32mm 2pcs 3. Ф40mm 2pcs 4. 2pcs 5. - Page 5 Package Content Y-Tubing Spare Parts English 9. Ф58mm 1pc 10. 1” 1pc 10A. Ф32mm 1pc 10B. Ф25mm/1” 1pc Ф32mm/1¼” 1pc 11. Ф40mm 1pc 12. 1pc Single Outlet Spare Parts 13. 1pc 14. 1pc...
- Page 6 Precautions Before using this Maxspect™ Turbine Duo DC Pump please read these operating instructions carefully. Take special care to follow the safety English suggestions listed below. Afterwards keep this manual handy for future reference. READ AND FOLLOW ALL SAFETY INSTRUCTIONS DANGER –...
- Page 7 Precautions Always unplug an appliance from an outlet when not in use, before putting on or taking off parts, and before cleaning. Never yank cord to pull plug from outlet. Grasp the plug and pull to disconnect. English Do not use an appliance for other than intended use. The use of attachments not recommended or sold by the appliance manufacturer may cause an unsafe condition.
-
Page 8: Maintenance Of The Appliance
Maxspect recommends doing a cleaning every 6 months or as necessary. This can be accomplished by opening the impeller housing and gently brushing the impeller and inside of impeller housing with a soft brush under running water. -
Page 9: Inlet Installation
Installation Inlet Installation You can switch the union coupling between 2/2A to fit a different size pipe while Turbine Duo English runs as a closed loop pump. Or you can also install two intake grids while it runs as a return pump. - Page 10 Installation Outlet Installation Duo Outlets: Switch the union couplings among 7/7A/7B/7C to a fit different size pipe or English hose. Combined Outlet using Y-Tubing: Switch the union couplings among 10/10A/10B to a fit different size pipe or hose.
- Page 11 Installation Single Outlet: You can also replace the B impeller housing by the cap to make it a single outlet DC pump. English Important: Only B impeller housing can be replaced by the cap. Pump Base must be installed before putting into use. Direction of Outlet Both A and B impeller housings can be installed in three directions.
- Page 12 The product is packed with a power switch adapter which featured with two power source cables, one end connects to the power supply unit offered by Maxspect, the other end connects to a DC12v battery (sold separately). When the power from the...
-
Page 13: Interface Introduction
Operating Instructions 1. While the OLED screen is activated, press both buttons simultaneously to enter the setup page. English 2. Press to switch between the settings. 3. Rotator to set a value. 4. Press to save the setting. Switching between Automatic and Manual Mode Manual Mode: Manually set a water movement mode and flow level for your Turbine Duo. - Page 14 Operating Instructions OLED Screen Icon Water Movement Modes English English Constant Speed Mode Pulsing Mode Random Mode Advanced Pulsing Mode Variables Maximum Flow Ramp Up Time Maximum Flow Time Minimum Flow Wind Down Time Minimum Flow Time Variables Illustration Water Movement Mode Illustration Constant Speed Mode Configurable Variables Flow range: 1-10...
- Page 15 Operating Instructions Pulsing Mode English Configurable Variables Flow range:1-10 Time range: 2-30s Level 8 Level 4 = 10s Random Mode Configurable Variables Max flow range:2-10, Min flow range: 1-9 Level 8 Level 4...
-
Page 16: Manual Mode
Operating Instructions Advanced Pulsing Mode English Configurable Variables Flow range: 1-10 Time range: 2s-5m Level 8 Level 4 Manual Mode Main Interface Setting Page < > 1. Press to switch between the settings. 2. Rotator to set a value. 3. Press to save the setting. -
Page 17: Automatic Mode
Operating Instructions Automatic Mode English < > 1. Press to switch between the settings. 2. Rotator to set a value. 3. Press to save the setting. Feed Mode Feed Time(Max 60m) Count Down Flow Level In either main interface, press to enter Feed Mode. -
Page 18: Maintenance Instructions
Maintenance Instructions System Setup System Setup features a set of functions allowing you to do perform maintenance on the English appliance. To enter the System Setup page, first turn off the appliance, then press and hold control dial while turning the appliance back on. Keep on holding the control dial until the system setup page is shown on OLED monitor. - Page 19 Maintenance Instructions 2. Restore This function allows you to restore the firmware to its original factory version. After finish English restoring the firmware, it’ll restart automatically and the firmware version number will be shown on the screen. 1. Rotate to select “Restore”. 2.
-
Page 20: Limited Warranty
The warranty, disclaimer, and remedies set forth above are exclusive and replace all others, oral or written, expressed or implied. At no time will any Maxspect (HongKong) Limited dealers, agents, or employees be authorized to make any modifications, extension, or addition to this warranty. -
Page 21: Specifications
Specifications Specifications For the latest specifications of Turbine Duo DC Pump, please visit: www.maxspect.com English... -
Page 22: Sehr Geehrter Kunde
Dank fü r den Kauf dieses Produkts. Fü r eine optimale Leistung und Sicherheit, lesen Sie bitte diese Anleitung sorgfä ltig. Nutzer-Memo: Deutsch Kaufdatum Hä ndler: Hä ndleradresse: Hä ndlerwebsite: Hä ndler-E-Mail: Hä ndlertelefon Bitte besuchen Sie uns auf Facebook oder Twitter! https://www.facebook.com/Maxspect http://twitter.com/maxspectled... - Page 23 Packungsinhalt Bitte ü berprü fen Sie den Lieferumfang auf Vollstä ndigkeit. Hauptbestandteile Deutsch Steuereinheit Stromkabel Pumpe Netzteil Backup-Batterie- Adapter Pumpeneingangsteile 1. Ф58mm 2pcs 2. 1” 2pcs 2A. Ф32mm 2pcs 3. Ф40mm 2pcs 4. 2pcs 5. 2pcs Doppelpumpe-Auslassteile 6. Ф51mm 2pcs 7.
- Page 24 Packungsinhalt Y-Rohrteile 9. Ф58mm 1pc 10. 1” 1pc 10A. Ф32mm 1pc 10B. Ф25mm/1” 1pc Deutsch Ф32mm/1¼” 1pc 11. Ф40mm 1pc 12. 1pc Einzelpumpe -Auslassteile 13. 1pc 14. 1pc...
- Page 25 Sicherheitshinweise Vor der ersten Inbetriebnahme des Maxspect™ DC pump Turbine Duo sollten Sie diese Bedienungsanleitung sorgfä ltig lesen. Bitte beachten Sie die folgenden Sicherheitshinweise mit groß er Sorgfalt. Bewahren Sie diese Anleitung auch zum spä teren Nachschlagen auf. Deutsch LESEN UND FOLGEN SIE ALLE SICHERHEITSHINWEISE 1.
- Page 26 Sicherheitshinweise 4. Ziehen Sie das Gerä t immer aus der Steckdose, bevor Sie es benutzen, bevor Sie es anziehen oder abnehmen, bevor Sie es reinigen. Niemals das Kabel ziehen, um den Stecker aus der Steckdose zu ziehen. Fassen Sie den Stecker an und ziehen Sie ihn abziehen 5.
- Page 27 Bedingungen in Salzwasseraquarien und der Ansammlung von Algen und anderen organischen Stoffen, ist es sehr ratsam, die Pumpe zu reinigen um seine Langlebigkeit zu gewä hrleisten. Aus diesem Grund, empfehlt Maxspect die Pumpe mindestens alle 6 Monate oder bei Bedarf Deutsch auch ö...
-
Page 28: Installation
Installation Einlassinstallation Bei Verwendung der Turbine Duo Pumpe in einem geschlossenem System, kö nnen die Anschlusskupplung 2 oder 2A, je nach Durchmesser der Rö hren oder Schlä uchen, eingesetzt werden Deutsch Bei Verwendung der Turbine Duo Pumpe als Rü cklaufpumpe, kö nnen die zwei Einlaufgitter installiert werden. - Page 29 Installation Ausganginstallation Doppelausgang: Bei Verwendung der Turbine Duo Pumpe mit den Doppelausgä ngen, kö nnen die Anschlusskupplung 7 / 7A / 7B / 7C, je nach Durchmesser der Rö hren oder Schlä uchen, eingesetzt werden. Deutsch Gekoppelter Auslass mit Y-Rohr: Bei Verwendung der Turbine Duo Pumpe mit dem Y- Rohr, kö...
- Page 30 Installation Einzelauslass: Bei Verwendung der Turbine Duo Pumpe mit nur einem Auslass, muss das B-Laufradgehä use durch die Abdeckung 14 ersetzt werden. Deutsch Wichtig: Nur das B-Laufradgehä use kann durch die Abdeckung 14 ersetzt werden. Die Pumpenbasis muss vor Inbetriebnahme wieder installiert werden. Richtung der Auslä...
- Page 31 Bedienungsanleitung Die Turbine Duo Steuereinheit ON / OFF, Futtermodus-Taste Modus-Taste, Setup-Taste Power-Anzeige Manuellen-Modusanzeige Deutsch Automatik-Modusanzeige Einstellanzeige Einstellrad Ein- / Ausschalten der Turbine Duo Die ON / OFF-Taste 4s lang gedrü ckt halten um die Pumpe ein- oder ausschalten. Wurde ausschalten gewä hlt, schalten sich die Pumpe, sowie die Anzeigen und der OLED-Bildschirm der Steuereinheitlers, aus.
- Page 32 Bedienungsanleitung 1. Wä hrend der OLED-Bildschirm aktiviert ist, um die Setup- Seite aufzurufen, gleichzeitig die Tasten , drü cken. 2. Um zwischen den Einstellungen zu wechseln auf drü cken. 3. Den Drehknopf drehen um einen Wert einzustellen. 4. Auf die Taste drü...
- Page 33 Bedienungsanleitung OLED Screen Icon Wasser Bewegungsmodus Permanent Strö mungsmodus Pulsierender Modus Zufallsmodus Erweiterten Pulsier Modus Variablen Deutsch Maximaler Fluß Anstiegszeit Maximale Fließ zeit Mindestdurchfluss Abstiegszeit Minimale Fließ zeit Dargestellten Verfahren Wasserbewegungsabbildung Permanent Strö mungsmodus Konfigurierbare Variablen Durchflussbereich: 1-10 Ebene 8...
- Page 34 Bedienungsanleitung Pulsierender Modus Deutsch Konfigurierbare Variablen Durchflussbereich:1-10 Zeitbereich: 2-30s Ebene 8 Ebene 4 = 10s Zufallsmodus Konfigurierbare Variablen Max Durchflussbereich:2-10, Min Durchflussbereich: 1-9 Ebene 8 Ebene 4...
- Page 35 Bedienungsanleitung Erweiterten Pulsier Modus Deutsch Konfigurierbare Variablen Durchflussbereich: 1-10 Zeitbereich: 2s-5m Ebene 8 Ebene 4 Manuellen Modus Hauptanzeige Einstellungsanzeige < > 1. Um zwischen den Einstellungen zu wechseln auf drü cken. 2. Den Drehknopf drehen um einen Wert einzustellen. 3. Auf die Taste drü...
- Page 36 Bedienungsanleitung Auto-Modus < > Deutsch 1. Um zwischen den Einstellungen zu wechseln auf drü cken. 2. Den Drehknopf drehen um einen Wert einzustellen. 3. Auf die Taste drü cken, um die Einstellung zu speichern. Futter-Modus Feed Zeit (Max 60m) Zä hlen Sie nach unten Durchfluss Um den Futtermodus aufzurufen, in einer der Hauptanzeige auf drü...
- Page 37 Wartungshinweise Systemeinrichtung Das Systemeinrichtungsmenu verfü gt ü ber eine Reihe von Funktionen, die es dem Benutzer ermö glichen, die Wartung des Gerä tes durchzufü hren. Um das Systemeinrichtungsmenu aufzurufen, schalten Sie zuerst die Gerä t aus und drü cken Sie dann auf das Einstellrad, wä hrend Sie das Gerä t wieder einschalten. Halten Sie das Deutsch Einstellrad so lange gedrü...
- Page 38 Wartungshinweise 2. Wiederherstellen Mit dieser Funktion kann der Benutzer die Firmware auf die Werkseinstellung wieder zurü ckstellen. Nach Wiederherstellung der Firmware wird das Gerä t automatisch neu gestartet und die Firmware-Versionsnummer wird angezeigt. Deutsch 1. Drehen Sie das um “Restore” auzuwählen. 2.
-
Page 39: Garantie
Garantie Maxspect Ltd. haftet für alle Produkte des Maxspect™ gegen Mängel in der Ausfü hrung fü r einen Zeitraum von 12 Monaten ab dem Kaufdatum. Wenn ein Mangel wä hrend der Garantiezeit vorliegt, wird Maxspect Ltd das Produkt kostenlos nach eigenem Ermessen entweder reparieren (mit neu- oder Austauschteilen) oder das Produkt ersetzen (durch ein neues oder ein Austauschgerä... -
Page 40: Technische Angaben
Technische Angaben Hinweis: Fü r die neuesten Spezifikationen der Turbine Duo DC Pumpe, besuchen Sie bitte: www.maxspect.com Deutsch... -
Page 41: Cher Client
Date d’achat : Nom du revendeur : Franç ais Adresse du revendeur : Site internet du revendeur : E-mail du revendeur : N° de té lé phone du revendeur : Vous pouvez nous rejoindre sur facebook ou twitter ! https://www.facebook.com/Maxspect http://twitter.com/maxspectled... -
Page 42: Contenu De L'emballage
Contenu de l’emballage Merci de vé rifier le contenu de votre emballage. Composants principaux Pompe Unité de Contrô le Alimentation Câ ble d'alimentation Franç ais Adaptateur batterie de secours Piè ces pour entré e de pompe 1. Ф58mm 2pcs 2. 1” 2pcs 2A. - Page 43 Contenu de l’emballage Piè ces pour tube en Y 9. Ф58mm 1pc 10. 1” 1pc 10A. Ф32mm 1pc 10B. Ф25mm/1” 1pc Ф32mm/1¼” 1pc Franç ais 11. Ф40mm 1pc 12. 1pc Piè ces pour unique sortie de pompe 13. 1pc 14. 1pc...
-
Page 44: Précautions D'utilisation
Précautions d’utilisation Avant toute utilisation du DC pompe Turbine Duo Maxspect™, veuillez lire attentivement ce manuel d’utilisation. Soyez particulièrement attentifs aux consignes de sé curité qui suivent. Gardez soigneusement ce manuel pour toute future utilisation. LIRE ET SUIVRE TOUTES LES INSTRUCTIONS DE SÉ CURITÉ... - Page 45 Précautions d’utilisation 4. Toujours dé brancher un appareil d'une prise lorsqu'il n'est pas utilisé , avant de mettre ou de retirer des piè ces et avant de le nettoyer. Ne tirez jamais le cordon pour retirer la fiche de la prise. Saisissez la fiche et tirez pour la dé brancher. 5.
-
Page 46: Entretien De La Pompe
. Aussi, Maxspect recommande de nettoyer la pompe au minimum tous les 6 mois ou plus souvent si nécessaire. Pour ce faire, il faut démonter la pompe, puis à l’aide d’une brosse douce, nettoyer dé... -
Page 47: Installation
Installation Installation entré e de pompe Pour une utilisation de la pompe Turbine Duo en circuit fermé, il est possible d’employer les raccords union 2 ou 2A, en fonction de la taille du tuyau ou du tube à adapter. Franç ais Pour une utilisation de la pompe Turbine Duo comme pompe de retour, il est possible d’installer 2 grilles de protection 4 sur l’admission. - Page 48 Installation Installation sortie de pompe En double sortie : En fonction du tube PVC ou du tuyau à adapter, diffé rents raccords sont disponibles : 7 / 7A / 7B / 7C. Franç ais En sortie combiné e avec tube en Y : En fonction du tube PVC ou du tuyau à adapter, diffé...
- Page 49 Installation En sortie simple : pour une utilisation de la pompe en simple sortie, la protection de la roue à aube B peut ê tre remplacer par la protection 14. Franç ais Important : seul la protection de la roue à aube B peut ê tre remplacé la protection 14.
-
Page 50: Instructions D'utilisation
Instructions d’utilisation L'unité de commande de la Turbine Duo ON / OFF, bouton Mode Nourrissage Commutateur de mode, bouton de configuration Voyant d'alimentation Indicateur de mode manuel Indicateur de mode automatique Indicateur de ré glage Bouton de commande Franç ais Allumer / é... -
Page 51: Pré Sentation De L'affichage
Instructions d’utilisation 1. Lorsque l'é cran OLED est allumé , pour accé der à la page de configuration, il faut appuyer simultané ment sur les 2 2. Appuyez sur pour changer les diffé rents paramè tres. 3. Tourner pour dé finir une valeur. 4. - Page 52 Instructions d’utilisation Icô ne de l'é cran OLED Modes circulation de l'eau Mode flux constant Mode flux pulsé Mode alé atoire Mode flux avancé Variables Dé bit maximal Temps de monté e Temps de dé bit maximum Dé bit minimum Temps de descente Temps de dé...
- Page 53 Instructions d’utilisation Mode flux pulsé Franç ais Variables configurables Plage de dé bit:1-10 Plage de temps: 2-30s Niveau Niveau = 10s Mode alé atoire Variables configurables Plage de dé bit maximale:2-10 : 1-9 Mini débit Niveau Niveau...
- Page 54 Instructions d’utilisation Mode flux avancé Franç ais Variables configurables Plage de dé bit: 1-10 Plage de temps: 2s-5m Niveau Niveau mode manuel Affichage principal É cran de ré glage < > 1. Appuyez sur pour changer les diffé rents paramè tres. 2.
-
Page 55: Mode Auto
Instructions d’utilisation Mode Auto < > 1. Appuyez sur pour changer les diffé rents paramè tres. 2. Tourner pour dé finir une valeur. Franç ais 3. Appuyez sur pour sauvegarder les paramè tres. Mode Nutrition Temps d'alimentation (Max 60m) Compte à rebours Niveau de dé... -
Page 56: Instructions De Maintenance
Instructions de maintenance Configuration du systè me La configuration du systè me comporte un ensemble de fonctions permettant à l'utilisateur de ré aliser une maintenance sur la pompe Pour accé der au menu de configuration du systè me, é teindre d'abord l'appareil, puis appuyer et maintenir la molette de commande tout en allumant l'appareil. - Page 57 Instructions de maintenance 2. Restaurer Cette fonction permet à l'utilisateur de restaurer le firmware au ré glage d'usine. Aprè s avoir terminé la restauration du firmware, la rampe redé marre automatiquement et la version du firmware sera affiché e. 1. Tourner pour sé...
-
Page 58: Limite De Garantie
12 mois à compter de la date d’achat. Si un défaut est ré vé lé au cours de la pé riode de garantie, Maxspect Ltd., à sa convenance, ré parera (avec des piè ces neuves ou de rechanges) ou remplacera (par une unité nouvelle ou ré paré e) le produit, gratuitement. -
Page 59: Caractéristiques
Caracté ristiques Remarque : Pour les derniè res spé cifications de Turbine Duo DC Pump, visitez: www.maxspect.com Franç ais... -
Page 60: Gentile Cliente
Per ottimizzare prestazioni e sicurezza, vi preghiamo di leggere attentamente le istruzioni Utente memo: Data di acquisto: Rivenditore: Indirizzo del rivenditore: Italiano Sito web del rivenditore: E-mail del rivenditore: Telefono del rivenditore: Puoi seguirci su facebook e twitter! https://www.facebook.com/Maxspect http://twitter.com/maxspectled... - Page 61 Contenuto Scatola Per favore verifica il contenuto della scatola. Componenti principali Pompa Controllore Alimentatore Cavo di alimentazione Adattatore batteria di backup Ricambi aspirazione Italiano 1. Ф58mm 2pcs 2. 1” 2pcs 2A. Ф32mm 2pcs 3. Ф40mm 2pcs 4. 2pcs 5. 2pcs Ricambi usciata Duo 6.
- Page 62 Contenuto Scatola Ricambi tutatura a Y 9. Ф58mm 1pc 10. 1” 1pc 10A. Ф32mm 1pc 10B. Ф25mm/1” 1pc Ф32mm/1¼” 1pc 11. Ф40mm 1pc 12. 1pc Riccambi uscita singola Italiano 13. 1pc 14. 1pc...
- Page 63 Precauzioni Prima di utilizzare il a DC Pump Maxspect ™ Turbine Duo hiamo di leggere attentamente le istruzioni. Far particolare attenzione e seguire i suggerimenti di sicurezza elencati di seguito. Successivamente tenere questo manuale a portata di mano per riferimento...
- Page 64 Precauzioni 4. Scollegare sempre l'apparecchio da una presa quando non è in uso, prima di mettere o togliere parti e prima di pulire. Non attaccare mai il cavo per tirare la spina dalla presa. Afferrare la spina e tirare per scollegare. 5.
-
Page 65: Manutenzione Dell'apparecchio
è consigliabile pulire la pompa per garantire la longevità dell'apparecchio. Maxspect raccomanda di effettuare una pulizia ogni 6 mesi o a seconda delle necessità . Ciò può essere effettuato aprendo il vano della girante e spazzolando delicatamente la girante ed il vano stesso con una spazzola morbida sotto acqua corrente. -
Page 66: Installazione
Installazione Installazione dell'ingresso È possibile scambiare i raccordi 2 / 2A tra di loro per adattarlo a un tubo di dimensioni diverse in quanto la Turbine Duo funziona come una pompa a circuito chiuso. Italiano Oppure è possibile installare due griglie di aspirazione per farla funzionare come pompa di ritorno. - Page 67 Installazione Installazione dell'uscita Uscite della Duo: Scambia i raccordi tra 7 / 7A / 7B / 7C per adattare ai tubi divarie dimensioni. Italiano L'uscita combinata con l'utilizzo del raccordo a Y: scambia i raccordi tra 10/10A/10B a seconda del diametro del tubo.
- Page 68 Installazione Luscita singola: puoi anche sostituire l'alloggio del rotore B con il tappo per farla funzionare come pompa DC a singola uscita. Italiano Importante: solo il vano del rotore B può essere sostituito con il tappo. Direzione dell'uscita Sia il vano del rotore A sia quallo del rotore B possono essere installati in 3 direzioni. 0°...
-
Page 69: Istruzioni Per L'uso
Il prodotto è dotato di un adattatore per interruttori di alimentazione dotato di due cavi di alimentazione, una estremità collegata all'unità di alimentazione offerta da Maxspect, l'altra estremità si collega a una batteria DC12v (venduta separatamente). Quando la potenza dell'alimentatore viene interrotta, la... - Page 70 Istruzioni Per L’Uso 1. Mentre è attiva la schermata OLED, premere contemporaneamente entrambi i pulsanti per accedere alla pagina di configurazione. 2. Premere per passare tra le impostazioni. 3. Ruotare per impostare un valore. 4. Premere per salvare l'impostazione. Passaggio tra modalità automatica e manuale Modalità...
- Page 71 Istruzioni Per L’Uso Icona dello schermo OLED Modo di movimento dell'acqua Modalità a velocità costante Modalità a pulsazione Modalità casual Modo a Pulsazione Avanzato Variabili Massima flusso ccelerazioneDurata Durata massima d'acqua di accelerazione di flusso Minima flusso d'acqua Durata di deccelerazione Durataminima di flusso Illustrazione delle variabili Italiano...
- Page 72 Istruzioni Per L’Uso Modalità a pulsazione Campo di portata Campo di portata:1-10 Intervallo di tempo: 2-30s Italiano livello 8 livello 4 = 10s Modalità casual Variables configurables Massima portata:2-10, Portata minima: 1-9 livello 8 livello 4...
-
Page 73: Modalità Manuale
Istruzioni Per L’Uso Modo a Pulsazione Avanzato Variables configurables Campo di portata: 1-10 Intervallo di tempo: 2s-5m Italiano livello 8 livello 4 Modalità Manuale Interfaccia principale Pagina delle Impostazioni < > 1. Premere per passare tra le impostazioni. 2. Ruotare per impostare un valore. -
Page 74: Modalità Automatica
Istruzioni Per L’Uso Modalità automatica < > 1. Premere per passare tra le impostazioni. 2. Ruotare per impostare un valore. 3. Premere per salvare l'impostazione. Modalità di alimentazione Italiano Tempo di alimentazione (Max 60m) Conti giù Livello di Flusso In un'interfaccia principale, premere per entrare in Modalità... -
Page 75: Istruzioni Di Manutenzione
Istruzioni di manutenzione Configurazione del sistema L'impostazione del sistema contiene un insieme di funzioni che consentono di effettuare la manutenzione sull'apparecchio. Per accedere alla pagina di configurazione del sistema, prima spegnere l'apparecchio, quindi tenere premuto il selettore di controllo accendendo l'apparecchio. Continuare a tenere premuto il selettore di controllo fino a visualizzare la pagina di impostazione del sistema sul monitor OLED. - Page 76 Istruzioni di manutenzione 2. Restore Questa funzione consente di ripristinare il firmware nella sua versione originale. Dopo aver completato il ripristino del firmware, verrà riavviato automaticamente e il numero di versione firmware verrà visualizzato sullo schermo. 1. Ruota e seleziona "Restore". 2.
-
Page 77: Termini Di Garanzia
EFFETTUATE RIPARAZIONI NON AUTORIZZATE. ESCLUSIONE DEI DANNI INDIRETTI E ACCIDENTALI: L’utilizzatore dei prodotti della Maxspect Ltd. non ha diritto ad alcun risarcimento danni diretti o indiretti, senza limitazione, derivanti da: disagi, danni ai beni personali, telefoni, le perdite materiali ecc... Questa garanzia conferisce diritti legali specifici. -
Page 78: Specificazioni
Specificazioni Nota: Per le ultime specifiche di Turbine Duo DC Pump, visitare: www.maxspect.com Italiano... -
Page 79: Prezado Cliente
Para um melhor desempenho e seguranç a, por favor leia cuidadosamente estas instruç õ es. User Memo: Data da Compra: Nome Loja: Endereç o Loja: Website Loja: Email Loja: Portuguê s Telefone Loja: Por favor, visite-nos no Facebook ou Twitter! https://www.facebook.com/Maxspect http://twitter.com/maxspectled... -
Page 80: Conteúdo Da Embalagem
Conteú do da Embalagem Por favor, analise o conteú do da embalagem. Componentes principais Bomba Controlador Fonte de Energia Cabo de energia Adaptador de Bateria Peç as Sobressalentes de Entrada 1. Ф58mm 2pcs 2. 1” 2pcs 2A. Ф32mm 2pcs 3. Ф40mm 2pcs Portuguê... - Page 81 Conteú do da Embalagem Peç as Sobressalentes Tubo-Y 9. Ф58mm 1pc 10. 1” 1pc 10A. Ф32mm 1pc 10B. Ф25mm/1” 1pc Ф32mm/1¼” 1pc 11. Ф40mm 1pc 12. 1pc Peç as Sobressalentes de Saí da Simples Portuguê s 13. 1pc 14. 1pc...
- Page 82 Precauç õ es Antes de usar seu DC pump Maxspect™ Turbine Duo por favor leia este manual de instruç õ es cuidadosamente. Tenha cuidado e siga corretamente todas as instruç õ es descritas. Mantenha sempre ao alcance este manual para eventual consulta.
- Page 83 Precauç õ es 4. Desligue sempre um aparelho de uma tomada quando nã o estiver em uso, antes de colocar ou retirar peç as e antes de limpar. Nunca puxe pelo cabo para retirar da tomada. Segure o plug e puxe para desconectar. 5.
- Page 84 é aconselhá vel limpar a bomba para garantir a longevidade do aparelho. Maxspect recomenda fazer uma limpeza a cada 6 meses ou, com maior frequencia se necessá rio. Isso pode ser conseguido abrindo o invó lucro do impulsor e escovando suavemente o impulsor e dentro da caixa com uma escova macia sob á...
- Page 85 Instalaç ã o Instalaç ã o de Entrada Você pode alternar o acoplamento de uniã o entre 2 / 2A para caber em um tubo de tamanho diferente, enquanto Turbine Duo funciona como uma bomba de circuito fechado. Portuguê s Ou você...
- Page 86 Instalaç ã o Instalaç ã o de Saí da Duas Saí das: Mude os acoplamentos de uniã o entre 7 / 7A / 7B / 7C para um tubo ou mangueira de tamanho diferente. Saí da combinada usando Tubo-Y: Mude os acoplamentos de uniã o entre 10 / 10A / 10B Portuguê...
- Page 87 Instalaç ã o Saí da Simples: Você també m pode substituir a carcaç a do impulsor B pela tampa para torná -la uma bomba DC de saí da ú nica. Importante: somente a carcaç a do impulsor B pode ser substituí da pela tampa.A base da bomba deve ser instalada antes de colocar Portuguê...
- Page 88 ã o, uma extremidade se conecta à unidade de alimentaç ã o oferecida pela Maxspect, a outra extremidade se conecta a uma bateria DC 12v (vendida separadamente). Quando a alimentaç ã o da...
- Page 89 Instruç õ es de operaç ã o 1. Enquanto a tela OLED estiver ativada, pressione os botõ es simultaneamente para entrar na pá gina de configuraç ã o. 2. Pressione para alternar entre as configuraç õ es. 3. Rotacione para definir um valor. 4.
- Page 90 Instruç õ es de operaç ã o Í cone da tela OLED Modos de movimento da á gua Modo de velocidade constante Modo de Pulso Modo Randomico Modo Pulsaç ã o Avanç ado Variá veis Fluxo má ximo Tempo de subida Tempo de fluxo má...
- Page 91 Instruç õ es de operaç ã o Modo de Pulso Variá veis Configurá veis Escala de fluxo:1-10 Intervalo de tempo: 2-30s Ní vel 8 Ní vel 4 = 10s Portuguê s Modo Randomico Variá veis Configurá veis Max Escala de fluxo:2-10, Min Escala de fluxo: 1-9 Ní...
-
Page 92: Modo Manual
Instruç õ es de operaç ã o Modo Pulsaç ã o Avanç ado Variá veis Configurá veis Escala de fluxo: 1-10 Intervalo de tempo: 2s-5m Ní vel 8 Ní vel 4 Portuguê s Modo manual Interface Principal Pá gina de Configuraç ã o <... -
Page 93: Modo Automático
Instruç õ es de operaç ã o Modo Automá tico < > 1. Pressione para alternar entre as configuraç õ es. 2. Rotacione para definir um valor. 3. Pressione o para salvar a configuraç ã o. Modo de alimentaç ã o Tempo de alimentaç... - Page 94 Instruç õ es de Manutenç ã o System Setup A Configuraç ã o do Sistema possui um conjunto de funç õ es que permitem ao usuá rio executar a manutenç ã o no dispositivo. Para entrar na pá gina de Configuraç ã o do Sistema, primeiro desligue o dispositivo elé trico e, em seguida, pressione e mantenha pressionado o botã...
- Page 95 Instruç õ es de Manutenç ã o 2. Restore Esta funç ã o permite ao usuá rio restaurar o firmware para sua versã o original de fá brica. Apó s concluir a restauraç ã o do firmware, o dispositivo será reiniciado automaticamente e o nú mero da versã...
- Page 96 ISENÇ Ã O DE DANOS E CONSEQÜ Ê NCIAS: Você e qualquer outro usuá rio dos produtos Maxspect Ltd. nã o terá direito a quaisquer danos acidentais, incluindo, sem limitaç ã o, perda de uso da unidade, inconveniê ncia, danos a bens pessoais, telefonemas, perda de renda ou lucros.
- Page 97 Especificaç õ es ATENÇ Ã O: Para especificaç õ es mais recentes dos Turbine Duo DC pump, tipos e espectro de cores, por favor, visite nosso website em www.maxspect.com Portuguê s...
-
Page 98: Szanowny Kliencie
Dziekujemy i gratulujemy za zakup naszego produktu. Prosimy o uwazne przeczytanie ponizszych instrukcji w celu uzyskania optymalnej wydajnosci i bezpieczenstwa. User Memo: Data zakupu: Sprzedawca: Adres sprzedawcy: Strona web sprzedawcy: E-mail sprzedawcy: Telefon sprzedawcy: Polski Odwiedz nas na Facebook i Twitter! https://www.facebook.com/Maxspect http://twitter.com/maxspectled... -
Page 99: Zawartość Opakowania
Zawartość opakowania Proszę sprawdzić zawartość opakowania. Części składowe Pompa Kontroler Zasilacz kabel zasilający Adapter zasilania awaryjnego Zapasowe części wlotu 1. Ф58mm 2pcs 2. 1” 2pcs 2A. Ф32mm 2pcs 3. Ф40mm 2pcs Polski 4. 2pcs 5. 2pcs Zapasowe części wylotu Duo 6. - Page 100 Zawartość opakowania Zapasowe części trójnika Y 9. Ф58mm 1pc 10. 1” 1pc 10A. Ф32mm 1pc 10B. Ф25mm/1” 1pc Ф32mm/1¼” 1pc 11. Ф40mm 1pc 12. 1pc Zapasowe części pojedynczego wylotu 13. 1pc 14. 1pc Polski...
-
Page 101: Środki Ostrożności
Środki ostrożności Prosze o uwazne przeczytanie ponizszych instrukcji obslugi przed uzyciem zestawu oswietleniowego DC pump Maxspect™ Turbine Duo. Prosze zwrò cic szczegò lna uwage na zawarte ponizej instrukcje. Prosimy o przechowanie podrecznika do wykorzystania w przyszlosci. PRZECZYTAJ I przestrzegać WSZYSTKICH INSTRUKCJI BEZPIECZEŃSTWA 1. - Page 102 Środki ostrożności 5. Nie używaj urządzenia w innym celu niż przewidziany. Używanie dodatkó w nie polecanych bądź sprzedawanych przez producenta może stwarzać zagrożenie. 6. Nie instaluj bądź przechowuj urządzenia w miejscu wystawionym na warunki atmosferyczne bądź temperatury poniżej temperatury zamarzania. 7.
-
Page 103: Konserwacja Urządzenia
Jednakże, przez ciężkie warunki pracy w morskim akwarium i wynikającym naroście alg i organiki, zaleca się czyszczenie pompy by zapewnić długotrwałe działanie urządzenia. Maxspect zaleca czyścić urządzenie co 6 miesięcy lub tak często jak tego wymaga. By przystąpić do czyszczenia należy otworzyć osłonę wirnika i delikatnie wyszorować... - Page 104 Instalacja Instalacja wlotu Możesz zamieniać gwint przyłącza pomiędzy 2/2A by dopasować inny rozmiar rury podczas gdy Turbine Duo pracuje jako pompa zamkniętego obiegu. Lub można też zainstalować dwie sieci wlotowe podczas pracy jako pompa zwrotna. Polski...
- Page 105 Instalacja Instalacja wylotu Wyloty Duo: Zamieniaj gwinty uniwersalne pomiędzy 7 / 7A / 7B / 7C na rurę o różnej wielkości lub wąż. Łączone wyloty z użyciem trójnika Y: Przełącz gwinty pomiędzy 10 / 10A / 10B na rurę o różnej średnicy lub wąż. Polski...
- Page 106 Instalacja Pojedynczy wylot: Można również wymienić obudowę wirnika B na zaślepkę, aby uzyskać pojedynczą pompę prądu stałego. Uwaga: Tylko wirnik B może być wymieniony na zaślepkę. Podstawa pompy musi być założona przed uruchomieniem. Polski Kierunek wylotu Obydwie obudowy wirnika A i B mogą być zainstalowane w 3 kierunkach. 0°...
- Page 107 Tryb Baterii: Ustaw prędkość pracy pompy w czasie kiedy jest zasilana z baterii awaryjnej. Urządzenie jest pakowane z adapterem zasilania awaryjnego z dwoma gniazdami kabla zasilającego, jeden służy do podpięcia zasilania z zasilacza oferowanego przez Maxspect, a drugi do podłączenia baterii DC12v (sprzedawana oddzielnie). Kiedy prąd z zasilacza zostaje...
- Page 108 Instrukcje obslugi 1. Kiedy ekran OLED jest aktywny, naciśnij przyciski naraz by wejść w tryb ustawień. 2. Naciśnij by przełączać między ustawieniami. 3. Przekręć by ustawić wartość. 4. Naciśnij by zapisać ustawienie. Przełączanie pomiędzy trybami Automatycznym i Manualnym Tryb Manualny: Ręcznie ustaw tryb ruchu wody i poziom przepływu w swoim Turbine Duo. Tryb Automatyczny: Zestaw programó...
- Page 109 Instrukcje obslugi Wyświetlacz ikon OLED Tryby falowania Tryb ręczny Tryb pulsacyjny Tryb losowy Zaawansowany Tryb Pulsowania Variables Maksymalny przepływ Czas przyspieszania Maksymalny czas przepływu Minimalny przepływ Czas hamowania Minimalny czas przepływu Ilustracja zmiennych Ilustracja trybu przepływu wody Tryb ręczny Polski Zmienne konfigurowalne Zakres przepływu: 1-10 Poziom 8...
- Page 110 Instrukcje obslugi Tryb pulsacyjny Zmienne konfigurowalne Zakres przepływu:1-10 Zakres czasu: 2-30s Poziom 8 Poziom 4 = 10s Tryb losowy Polski Zmienne konfigurowalne Maks Zakres przepływu:2-10, Min Zakres przepływu: 1-9 Poziom 8 Poziom 4...
-
Page 111: Tryb Ręczny
Instrukcje obslugi Zaawansowany Tryb Pulsowania Zmienne konfigurowalne Zakres przepływu: 1-10 Zakres czasu: 2s-5m Poziom 8 Poziom 4 Tryb ręczny Główny interfejs Strona Ustawień < > Polski 1. Naciśnij by przełączać między ustawieniami. 2. Przekręć by ustawić wartość. 3. Naciśnij by zapisać ustawienie. - Page 112 Instrukcje obslugi trybu Automatycznego < > 1. Naciśnij by przełączać między ustawieniami. 2. Przekręć by ustawić wartość. 3. Naciśnij by zapisać ustawienie. Tryb karmienia Czas podawania (Maks 60m) Odlicz na dół Poziom przepływu Polski W głównym interfejsie naciśnij by wejść w tryb Karmienia.
-
Page 113: Ustawienia Systemowe
Instrukcje Konserwacja Ustawienia Systemowe Ustawienia Systemowe zawierają zestaw funkcji pozwalających użytkownikowi przeprowadzić konserwacje lampy. By wejść w stronę Ustawień Systemowych, najpierw wyłącz lampę, następnie naciśnij i przytrzymaj pokrętło nastawne jednocześnie włączając lampę ponownie. Przytrzymuj pokrętło nastawne aż strona Ustawień Systemowych wyświetli się na ekranie OLED. W Ustawieniach Systemowych jest 5 opcji. - Page 114 Instrukcje Konserwacja 2. Restore(Przywracanie) Ta funkcja pozwala użytkownikowi przywrócić oryginalne firmware lampy. Po przywróceniu firmware do oryginalnego stanu, lampa zostanie uruchomiona ponownie a numer firmware zostanie wyświetlony. 1. Obracać się wybrać “Restore”. 2. naciśnij by przywrócić firmware. 3. Reset Ta funkcja pozwala użytkownikowi przywrócić ustawienia fabryczne lampy. Po przywróceniu ustawień, lampa uruchomi się...
- Page 115 Pompa prądu stałego Maxspect™ Turbine Duo pokryte są 12 miesieczną gwarancją, ktòra obejmuje wady produkcji. Jeżeli wada produkcji pojawi sie w okresie gwarancji, Maxspect Ltd. zastrzega sobie prawo naprawy (przy użyciu zarówno części nowych jak i regenerowanych) bądź wymiany (na produkt nowy bądź...
- Page 116 Specyfikacje Uwaga Najnowsze informacje dotyczące pompy DC Turbine Duo, Proszę odwiedź: www.maxspect.com Polski...
- Page 117 亲爱的客户, 多谢您选购我司商品。 为确保您的安全及使用本产品时得到最佳的效果,请详细阅读此使用手册。 用户资料: 购买日期: 经销商名称: 经销商地址: 经销商网页: 经销商电邮: 经销商电话: 简 中...
- Page 118 包装内容 请检查包装内物件是否齐全。 主要部件 泵体 控制器 电源 电源线 备用电源转接线 进水口配件 1. Ф58mm 2 个 2. 1” 2 个 2A. Ф32mm 2 个 3. Ф40mm 2 个 4. 2 个 5. 2 个 双出水口配件 简 中 6. Ф51mm 2 个 7. ¾” 2 个 7A.
- Page 119 包装内容 二合一出水口配件 9. Ф58mm 1 个 10. 1” 1 个 10A. Ф32mm 1 个 10B. Ф25mm/1” 1 个 Ф32mm/1¼” 1 个 11. Ф40mm 1 个 12. 1 个 单出水口配件 13. 1 个 14. 1 个 简 中...
- Page 120 注意事项 请在操作前,仔细阅读本操作说明,并特别注意遵照下列安全建议。 请保留本说明书以便日後查阅。 阅读并遵照以下所有安全说明 1. 危险-为避免可能触电,在装有水的鱼缸内操作设备请格外小心。出现以下任一情况时,不 要尝试自行维修,请交由授权服务提供商处理。 a) 如果设备出现任何不正常漏水的情况,请立即断开电源。 b) 安装后请仔细检查设备,如果设备中不应有水的部位被沾湿,请不要将设备接通电源。 c) 如果设备的电源线或插头受损,或因为误操作、跌落而造成损坏,请不要继续使用设备。 d) 为避免设备的插头或插座被水沾湿, 应将鱼缸放置在墙上装有插座的旁边。 并且所有从鱼 缸连接至插座的电源线的最低位应该低于插座的高度。如果插座不慎被水沾湿,不要直 接拔出插头,应先断开插座所在电路的电源或拔出保险丝,然后再拔出插头清理积水。 2. 如果使用中的设备附近有儿童,或设备由儿童操作,请格外注意。 3. 为避免可能受伤,请不要触碰任何转动中的部件。 简 中 4. 以下情况须先拔出插头:不再使用、安装、拆除或清洁前,不要拉扯电源线,应抓紧插头将 插头从插座中拔出。 5. 不要将设备用作其他用途。在设备上使用未经厂家出售或推荐的零件可能会导致不安全。 6. 不要将设备安装、放置在户外,或温度在零度以下的环境中。 7. 使用设备前请确保设备安装牢固。 8. 仔细阅读并遵守设备上的安全指引。 9. 如果必须使用电源线延长线,延长线的电流负载能力必须满足设备的需求。 10. 应适当放置电源线以避免被踩踏或被其他物品挤压。手被沾湿时不要插、拔电源线。...
- Page 121 注意事项 11. 设备只能放置在水中使用,而且泵体必须完全浸没在水中。 12. 为保持设备良好的运作性能,安装设备时出水口和入水口间的垂直距离不应大于 2 米。 简 中...
- Page 122 设备维护 设备维护 设备一旦被安装使用后,一般情况下不需要过多关注便能良好地运作。然而,在海水鱼缸这样 复杂的环境下,设备内部可能会生长出海藻或其他有机物。因此,我们建议用户每 6 个月、或 在需要的情况下清洁设备以确保其使用寿命。清洁时,只需将泵体两侧拆开并放入流水中,用 刷子清理泵体内部的积聚物。如果泵体内部积聚了碳酸钙,可用醋等弱酸将其清除,使用强酸 可能会损坏设备。清洁后请重新安装设备。 15A. 泵罩(A) 15B. 泵罩(B) 16. 螺丝 17A. 叶轮(A) 17B. 叶轮(B) 18. 硅胶垫圈 19. 转子盖 20. 硅胶座 21. 轴承 22. 陶瓷轴承 23. 硅胶座 24. 转子 25. 定子 26. 螺母 27. 泵座 28. 硅胶脚垫 简...
- Page 123 安装指南 进水口安装 当设备被用作循环泵时,可使用 2 或 2A 号接头匹配不同尺寸的水管。 或当设备被用作上水泵时,进水口两侧可安装过滤罩以避免异物进入泵体。 简 中...
- Page 124 安装指南 出水口安装 双出水口:可以使用 7、7A、7B 或 7C 号接头来匹配不同尺寸的软、硬水管。 二合一出水口:可以使用 10、10A 或 10B 号接头来匹配不同尺寸的软、硬水管。 简 中...
- Page 125 安装指南 单出水口:可将泵体 B 侧罩体和叶轮拆除,更换为泵盖使之成为单出水口水泵。 提示:只有 B 侧泵罩可以更换为泵盖;水泵运作前必须安装底座。 出水口方向 简 中 A 和 B 侧的出水口均有三个方向可以调节。 0° 90° 180°...
- Page 126 操作指南 控制器 开/关、喂饲模式按钮 模式切换、设置按钮 电源指示灯 手动模式指示灯 自动模式指示灯 设置指示灯 旋钮 开、关设备 按住开关按钮超过 4 秒可以停止设备运行。当设备停止时,泵体停止运转,控制器显示屏和指 示灯会熄灭。如果设备连接了 ICV6(另售),可通过 Syna-G App 激活设备。 初始化设备 使用设备前,需要对设备进行初始化设置。 系统时钟 最低流量 后备电源模式 系统时钟:将系统时钟设置为用户当地的时间。 最低流量:设置设备的最低流量。包括喂饲模式在内的所有水流模式,其可设置的最低流量均 简 中 以此参数作为基础开始计算。最低流量的可设置范围是:1%-90%。 后备电源模式: 设置设备工作在后备电源模式下的流量。随设备附送的一条电源转换线,它有 两个电源连接头,一头(DC24v)连接市电,一头(DC12v)连接后备电源(用户自 行准备),当市电被切断时,电源转换线将自动切换至后备电源供电。...
- Page 127 操作指南 1. 当 OLED 屏在激活的情况下,同时按动 和 按钮 可进入设置界面。 2. 按动 按钮切换选项。 3. 旋转 设置参数。 4. 按动 按钮保存设置。 切换自动模式和手动模式 手动模式: 手动设置设备的水流模式和流量。 自动模式: 一组可以独立设置水流模式和流量,并能够 24 小时循环的设定。 手动模式主界面 自动模式主界面 < > 3 秒 主界面功能介绍 主界面 当前时间点 当前时间 水流模式 流量 流量指示计 简 中 设置界面 时间点(共...
- Page 128 操作指南 OLED 显示屏图标说明 水流模式 恒速模式 快慢模式 随机模式 高级快慢模式 变量参数 最高流量 上升时长 最高流量持续时长 最低流量 下降时长 最低流量持续时长 变量参数说明 水流模式示例 恒速模式 简 中 可设置参数 可设置流量范围: 1-10 档 8 档...
- Page 129 操作指南 快慢模式 可设置参数 可设置流量范围: 1-10 档, 可设置时间范围: 2-30 秒 8 档 10 秒 4 档 = 10 秒 随机模式 简 中 可设置参数 最大流量可设置范围: 2-10 档,最小流量可设置范围: 1-9 档 8 档 4 档...
- Page 130 操作指南 高级快慢模式 可设置参数 可设置流量范围: 1-10 档,可设置时间范围: 2 秒-5 分钟 8 档 2 秒 4 秒 4 档 8 秒 20 秒 手动模式 主界面 设置界面 < > 简 中 1. 按动 切换选项。 2. 旋转 设置参数。 3. 按动 保存设置。...
- Page 131 操作指南 自动模式 < > 1. 按动 切换选项。 2. 旋转 设置参数。 3. 按动 保存设置。 喂饲模式 喂饲时间 (最长 60 分钟) 倒计时 流量指示计 在任一主界面下按动 进入喂饲模式。 简 中 1. 按动 激活设置界面。 2. 按动 切换选项。 3. 旋转 设置参数。 4. 按动 保存设置。...
- Page 132 维护指南 系统设定 系统设定包含一组基础功能供用户维护设备使用。 要进入系统设定界面,首先断开设备电源,按住 ,然后接通设备电源,直到屏幕显示系统 旋鈕 设定界面便可松开旋钮。 系统设定包含 5 项功能: 1. 固件更新 2. 固件恢复 3. 恢复出厂设置 4. 系统测试 5. 型号选择 6. 退出 1. 固件更新 此功能用于更新系统固件。 1. 转动 选择 “Firmware”。 开始更新固件。 2. 按动 简 中 1. 当系统检测不到 micro SD card 或正确的固件文件 时,屏幕会相应提示"NO SD Card"或"Wrong File"。...
- Page 133 维护指南 2. 固件恢复 此功能用于恢复出厂固件。当成功恢复后,系统会自动重启,版本号会显示在启动界面中,恢 复出厂固件不会影响用户设定。 1. 转动 选择 “Restore”。 2. 按动 开始恢复固件。 3. 恢复出厂设置 此功能用于恢复出厂设置。成功恢复后,系统会自动重启。 1. 转动 选择 “Reset”。 2. 按动 恢复出厂设置。 4. 系统测试 此功能用于系统检测。用户应在经销商或售后服务人员的指导或授意下执行系统检测操作。 型号选择 此功能用于设置设备型号,并且当设备和 Syna-G 系统连接时,作为设备名称使用。正常情况 简 中 下,用户不应更改此项设定。 6. 退出 1. 转动 选择 “Exit”。 2. 按动 退出系统设置。...
- Page 134 产品保修 所有迈光品牌(Maxspect)产品自购买之日起 12 个月内若有质量问题,可享有 Maxspect 公 司的保修服务。若在保修其内出现质量问题,Maxspect 公司将免费维修或更换配件。 若产品由于误用,被改装,发生事故,处理不当,或使用不当而受到损坏,或未经授权自行维 修的,则不在保修范围之内。不在保修范围的情况包括但不限于,修改电路等被视为误用或滥 用而损坏产品的行为。 间接及附带损害免费声明: Maxspect 对您或其他使用者的间接或附带损害不承担责任。间接或附带损害包括但不限于, 使用产品造成的损失或不便,对个人财产造成的损失,如电话,收入损失或盈利损失。本质保 书赋予您合法权利,在不同的地区您还可能享有其它权利。 除上面明确提出的内容外,Maxspect 公司对产品的质量,性能,适销性或特别用途的适用性 均没有作出明示或暗示的担保或陈述。因此,本产品“按现状”提供,您作为购买者承担有关此 产品的质量和性能的全部风险。 在任何情况下,Maxspect 公司均不对因本产品或其文件的缺陷而引起的直接的、间接的、特 别的、附带的或结果性的损害承担责任。 上述质保书,声明和故障排除方法是唯一版本,没有其它口头的或书面的,明示的或暗示的内 容。在任何时候,Maxspect 公司的经销商,代理商或雇员都无权对此质保书进行更改、扩展 或补充。 由于某些地区不允许此类附带性或结果性损害的免责或有限责任,上述限制可能不适用于您。 简 中...
- Page 135 规格参数 提示: 关于产品规格等详细信息,请浏览 Maxspect 官方网站:www.maxspect.com 简 中...
- Page 136 親愛的客戶, 多謝您選購我司商品。 為確保您的安全及使用本產品時得到最佳的效果,請詳細閱讀此使用說明書。 用戶資料: 購買日期: 經銷商名稱: 經銷商地址: 經銷商網頁: 經銷商電郵: 經銷商電話: 請在 facebook 及 twitter 上關注我們! https://www.facebook.com/Maxspect http://twitter.com/maxspectled 繁 中...
- Page 137 包裝內容 請檢查包裝內物件是否齊全。 主要部件 泵體 控制器 電源 電源線 後備電源轉接線 進水口配件 1. Ф58mm 2 個 2. 1” 2 個 2A. Ф32mm 2 個 3. Ф40mm 2 個 4. 2 個 5. 2 個 雙出水口配件 6. Ф51mm 2 個 7. ¾” 2 個 7A.
- Page 138 包裝內容 二合一出水口配件 9. Ф58mm 1 個 10. 1” 1 個 10A. Ф32mm 1 個 10B. Ф25mm/1” 1 個 Ф32mm/1¼” 1 個 11. Ф40mm 1 個 12. 1 個 單出水口配件 13. 1 個 14. 1 個 繁 中...
- Page 139 注意事項 請在操作前,仔細閱讀本操作說明,並特別注意遵照下列安全建議。 請保留本說明書以便日後查閱。 閱讀並遵照以下所有安全指引 1. 危險-為避免可能觸電,在裝有水的魚缸內操作設備請格外小心。出現以下任一情況時,不要 嘗試自行維修,請交由授權服務提供商處理。 a) 如果設備出現任何不正常漏水的情況,請立即斷開電源。 b) 安裝後請仔細檢查設備,如果設備中不應有水的部位被沾濕,請不要將設備接通電源。 c) 如果設備的電源線或插頭受損,或因為誤操作、跌落而造成損壞,請不要繼續使用設備。 d) 為避免設備的插頭或插座被水沾濕,應將魚缸放置在墻上裝有插座的旁邊。並且所有從 魚缸連接至插座的電源線的最低位應該低於插座的高度。如果插座不慎被水沾濕,不要 直接拔出插頭, 應先斷開插座所在電路的電源或拔出保險絲, 然後再拔出插頭清理積水。 2. 如果使用中的設備附近有兒童,或設備由兒童操作,請格外注意。 3. 為避免可能受傷,請不要觸碰任何轉動中的部件。 4. 以下情況須先拔出插頭:不再使用、安裝、拆除或清潔前,不要拉扯電源線,應抓緊插頭將 插頭從插座中拔出。 5. 不要將設備用作其他用途。在設備上使用未經本生產商出售或推薦的零件可能會導致不安全。 6. 不要將設備安裝、放置在戶外,或溫度在零度以下的環境中。 7. 使用設備前請確保設備安裝牢固。 繁 中 8. 仔細閱讀並遵守設備上的安全指引。 9. 如果必須使用電源線延長線,延長線的電流負載能力必須滿足設備的需求。 10. 應適當放置電源線以避免電源線被踩踏或被其他物品擠壓。 手被沾濕時不要插、 拔電源線。...
- Page 140 注意事項 11. 設備只能放置在水中使用,而且泵體必須完全浸沒在水中。 12. 為保持設備良好的運作性能,安裝設備時出水口和進水口間的垂直距離不應大於 6.5 英尺 (2 米)。 繁 中...
- Page 141 設備維護 設備維護 設備一旦被安裝使用後,一般情況下不需要過多關注便能良好地運作。然而,在海水魚缸這樣 複雜的環境下,設備內部可能會生長出海藻或其他有機物。因此,我們建議用戶每 6 個月、或 在需要的情況下清潔設備以確保其使用壽命。清潔時,只需將泵體兩側拆開並放入流水中,用 刷子清理泵體內部的積聚物。如果泵體內部積聚了碳酸鈣,可用醋等弱酸將其清除,使用強酸 可能會損壞設備。清潔後請重新安裝設備。 15A. 泵罩(A) 15B. 泵罩 (B) 螺絲 17A. 葉輪(A) 17B. 葉輪(B) 矽膠墊圈 轉子蓋 矽膠座 軸承 陶瓷軸承 矽膠座 轉子 定子 螺母 底座 矽膠腳墊 繁 中...
- Page 142 安裝指南 進水口安裝 當設備被用作循環泵時,可使用 2 或 2A 號接頭匹配不同尺寸的水管。 或當設備被用作上水泵時,進水口兩側可安裝過濾罩以避免異物進入泵體。 繁 中...
- Page 143 安裝指南 出水口安裝 雙出水口:可以使用 7、7A、7B 或 7C 號接頭來匹配不同尺寸的軟、硬水管。 二合一出水口:可以使用 10、10A 或 10B 號接頭來匹配不同尺寸的軟、硬水管。 繁 中...
- Page 144 安裝指南 單出水口:可將泵體 B 側罩體和葉輪拆除,更換為泵蓋使之成為單出水口水泵。 提示:只有 B 側泵罩可以更換為泵蓋;水泵運作前必须安裝底座。 出水口方向 A 和 B 側的出水口均有三個方向可以調節。 繁 中 0° 90° 180°...
- Page 145 操作指南 控制器 開/關、餵飼模式按鈕 模式切換、設置按鈕 電源指示燈 手動模式指示燈 自動模式指示燈 設置指示燈 旋鈕 開、關設備 按住開關按鈕超過 4 秒可以停止設備。當設備停止時,泵體停止運轉,控制器顯示屏和指示燈 會熄滅。如果設備連接了 ICV6(另售),可通過 Syna-G App 激活設備。 初始化設備 使用設備前,需要對設備進行初始化設置。 系統時鐘 最低流量 後備電源模式 系統時鐘:將系統時鐘設置為用戶當地的時間。 最低流量:設置設備的最低流量。包括喂飼模式在內的所有水流模式,其可設置的最低流量均 以此參數作為基礎開始計算。最低流量的可設置範圍是:1%-90%。 後備電源模式: 設置設備工作在後備電源模式下的流量。隨設備附送的一條電源轉換線,它有 兩個電源連接頭,一頭(DC12v)連接市電,一頭(DC24v)連接後備電源(用戶自 行準備),當市電被切斷時,電源轉換線將自動切換至後備電源供電。 繁 中...
- Page 146 操作指南 1. 當 OLED 屏在激活的情況下,同時按動 和 按钮 可進入設置界面。 2. 按動 切換選項。 3. 旋轉 設置參數。 4. 按動 保存設置。 切換自動模式和手動模式 手動模式: 手動設置設備的水流模式和流量。 自動模式: 一組可以獨立設置水流模式和流量,並能夠 24 小時循環的設定。 手動模式主界面 自動模式主界面 < > 3 秒 主界面功能介紹 主界面 當前時間點 當前時間 水流模式 流量 流量指示計 設置界面 繁 中 時間點(共...
- Page 147 操作指南 OLED 顯示屏圖標說明 水流模式 恆速模式 快慢模式 隨機模式 進階快慢模式 變量參數 最高流量 上升時長 最高流量持續時長 最低流量 下降時長 最低流量持續時長 變量參數說明 水流模式示例 恆速模式 繁 中 可設置參數 可設置流量範圍: 1-10 檔 8 檔...
- Page 148 操作指南 快慢模式 可設置參數 可設置流量範圍: 1-10 檔, 可設置時間範圍: 2-30 秒 8 檔 10 秒 4 檔 = 10 秒 隨機模式 繁 中 可设置参数 最大流量可設置範圍: 2-10 檔, 最小流量可設置範圍: 1-9 檔 8 檔 4 檔...
- Page 149 操作指南 進階快慢模式 可設置參數 可設置流量範圍: 1-10 檔,可設置時間範圍: 2 秒-5 分鐘 8 檔 2 秒 4 秒 4 檔 8 秒 20 秒 手動模式 主界面 設置界面 < > 1. 按動 切換選項。 2. 旋轉 設置參數。 繁 中 3. 按動 保存設置。...
- Page 150 操作指南 自動模式 < > 1. 按動 切換選項。 2. 旋轉 設置參數。 3. 按動 保存設置。 喂飼模式 喂飼時間 (最長 60 分鐘) 倒計時 流量指示計 在任一主界面下按動 進入喂飼模式。 1. 按動 激活設置界面。 2. 按動 切換選項。 繁 中 3. 旋轉 設置參數。 4. 按動 保存設置。...
- Page 151 維護指南 系統設定 系統設定包含一組基礎功能供用戶維護設備使用。 要進入系統設定界面,首先斷開設備電源,按住旋鈕,然後接通設備電源,直到屏幕顯示系統 設定界面便可鬆開旋鈕。 系統設定包含 5 項功能: 1. 固件更新 2. 固件恢復 3. 恢復出廠設置 4. 系統測試 5. 型號選擇 6. 退出 1. 固件更新 此功能用於更新系統固件。 1. 轉動 選擇 “Firmware”。 2. 按動 開始更新固件。 1. 當系統檢測不到 micro SD Card 或正確的固件文件 時,屏幕會相應提示“NO SD Card”或“Wrong File”。 2.
- Page 152 維護指南 2. 固件恢复 此功能用於恢復出廠固件。當成功恢復後,系統會自動重啟,版本號會顯示在啟動界面中,恢 復出廠固件不會影響用戶設定。 1. 轉動 選擇 “Restore”。 2. 按動 開始恢復固件。 3. 恢復出廠設置 此功能用於恢復出廠設置。成功恢復後,系統會自動重啟。 1. 轉動 選擇 “Reset”。 2. 按動 恢復出廠設置。 4. 系統測試 此功能用於系統檢測。用戶應在經銷商或售後服務人員的指導或授意下執行系統檢測操作。 5. 型號選擇 此功能用於設置設備型號,並且當設備和 Syna-G 系統連接時,作為設備名稱使用。正常情況 下,用戶不應更改此項設定。 6. 退出 繁 中 1. 轉動 選擇 “Exit”。 2. 按動 退出系統設置。...
- Page 153 產品保修 所有邁光品牌(Maxspect)產品自購買之日起 12 個月內若有質量問題,可享有 Maxspect 公 司的保修服務。若在保修其內出現質量問題,Maxspect 公司將免費維修或更換配件。 若產品由於誤用,被改裝,發生事故,處理不當,或使用不當而受到損壞,或未經授權自行維 修的,則不在保修範圍之內。不在保修範圍的情況包括但不限於,使用改裝配件和修改電路等 被視為誤用或濫用而損壞產品的行為。 間接及附帶損害免費聲明: Maxspect 對您或其他使用者的間接或附帶損害不承擔責任。間接或附帶損害包括但不限於, 使用產品造成的損失或不便,對個人財產造成的損失,如電話,收入損失或盈利損失。本質保 書賦予您合法權利,在不同的地區您還可能享有其它權利。 除上面明確提出的內容外,Maxspect 公司對產品的質量,性能,適銷性或特別用途的適用性 均沒有作出明示或暗示的擔保或陳述。因此,本產品“按現狀”提供,您作為購買者承擔有關此 產品的質量和性能的全部風險。 在任何情況下,Maxspect 公司均不對因本產品或其文件的缺陷而引起的直接的、間接的、特 別的、附帶的或結果性的損害承擔責任。 上述質保書,聲明和故障排除方法是唯一版本,沒有其它口頭的或書面的,明示的或暗示的內 容。在任何時候,Maxspect 公司的經銷商,代理商或雇員都無權對此質保書進行更改、擴展 或補充。 由於某些地區不允許此類附帶性或結果性損害的免責或有限責任,上述限制可能不適用於您。 繁 中...
- Page 154 規格參數 提示: 有關產品規格等詳細信息,請瀏覽 Maxspect 官方網站:www.maxspect.com 繁 中...
- Page 156 NOTE: Products, packaging, features and specifications are subject to change. All screen images are simulated. © 2009-2017 Maxspect Limited. Reproduction in whole or in part without written permission is prohibited. All rights reserved. Maxspect is trademarkof Maxspect Limited. Maxspect™ Turbine Duo DC Pump Owner’s Manual Version 1.0...
Need help?
Do you have a question about the Turbine Duo TD-6K and is the answer not in the manual?
Questions and answers