Table of Contents
Advertisement
Quick Links
Advertisement
Table of Contents

Related Manuals for Autel Robotics EVO


Summary of Contents for Autel Robotics EVO
- Page 2 These safety instructions will show you the steps to get started safely with EVO. Only you can ensure that you fly EVO securely and never jeopardize the safety of yourself, other people, or their property.
- Page 3 Information, including still and motion imagery and data from the aircraft’s sensors, will be stored on the EVO’s internal drive. If your aircraft ever needs to be sent to us for service, the information on the internal storage unit may be used to diagnose problems with the aircraft.
- Page 4 Don’t use the battery again. Contact our customer support team for a replacement. Battery Charging It should take a maximum of 80 minutes to fully charge the EVO battery, though charging times will vary according to the remaining battery level. Other battery charging notes and words of caution: •...
- Page 5 • Completely discharge the battery before disposal • Dispose of the battery properly at an approved battery recycling location Flying EVO Safely & Securely Take-off & Landing Place the aircraft on a level, open surface and stand at a distance of at least 5 meters to its rear.
- Page 6 Storage & Maintenance Carefully check every part of the aircraft after any crash or collision. Keep the EVO aircraft, including camera gimbal holder and propellers, stored out of the reach of children and pets. • Store the aircraft, battery and remote control in a cool, dry place •...
-
Page 7: Table Of Contents
Contents Chapter 1 About This Manual 1.1 Legends 1.2 Before First Flight 1.2.1 Reading the Included Documents 1.2.2 Mobile App Installation (Optional) Chapter 2 Getting to Know Your Smart Drone 2.1 Aircraft 2.1.1 Functionality Description 2.1.2 Flight LED Indicators 2.1.3 Aircraft Battery 2.1.4 Gimbal &... - Page 8 3.3 Aircraft Preparation 3.3.1 Unfolding the Aircraft 3.3.2 Propellers Installation 3.3.3 Compass Calibration Chapter 4 Flight Operations 4.1 Preflight Checklist 4.2 Remote Control & Flight Operations 4.2.1 Motor Start & Aircraft Takeoff 4.2.2 Command Stick Controls (Mode 2) 4.2.3 Landing & Motor Shutdown Chapter 5 Maintenance &...
-
Page 9: Chapter 1 About This Manual
Thank you for purchasing EVO and welcome to the Autel Robotics family. Use this manual to get a detailed look at EVO’s features and how best to make use of them when operating the aircraft and remote control. Please read it in its entirety — with the other included documentation —... -
Page 10: Mobile App Installation (Optional)
WARNING Make sure the aircraft and other components in the box are accounted for. Do not use incompatible components or attempt to modify EVO in any way inconsistent with the instructions in the official aircraft documentation. 1.2.2 Mobile App Installation (Optional) -
Page 11: Chapter 2 Getting To Know Your Smart Drone
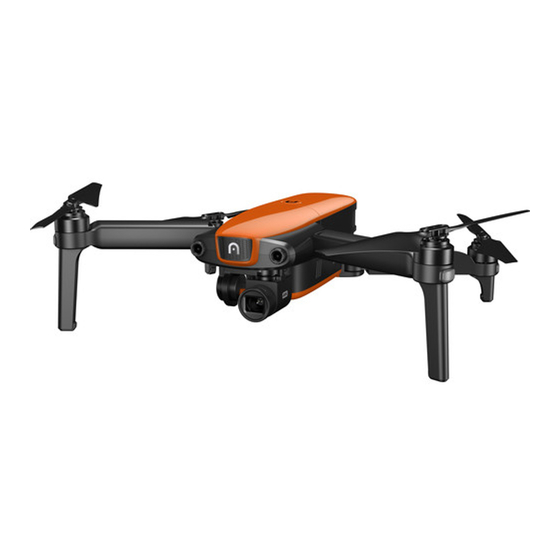
Getting to Know Your Smart Drone Now you can explore, discover and create like never before. EVO delivers not only advanced features like obstacle avoidance and intelligent flight modes, but also high-tech muscle that brings home a top speed of 44 mph, a 30-minute flight time and an operating distance of 4.2 miles. - Page 12 ③ Front LED Indicators ⑥ Camera Gimbal Right Side ⑦ Aircraft Battery ( ⑨ Fan Exhaust ⑧ Micro-SD Card Slot Rear Side ⑩ Rear Avoidance Sensor ⑬ Rear LED Indicators ⑭ Power Button ⑪ Micro-USB Port ⑫ Remote Control Pairing Button/Pairing Indicator...
-
Page 13: Flight Led Indicators
An LED indicator is located on the end of each aircraft arm. The front LEDs will light up solid red to help you identify the direction of the EVO’s nose. The rear LEDs will display the current flight status of the aircraft. Refer to this chart to confirm the meaning of the different status indicators. -
Page 14: Aircraft Battery
R - Solid Light Calibration is failed 2.1.3 Aircraft Battery EVO’s custom-designed, rechargeable Li-Po battery with a capacity of 4300mAh can provide up to 30 minutes of continuous flight with a full charge. It should be charged exclusively using the supplied charger. - Page 15 Aircraft Battery ① Removal Button ② Capacity Level Indicators ③ Power Button ¾ Turning On the Battery ¾ Make sure the battery is off before attaching it to the aircraft. After attaching it, press and hold the Power Button for 3 seconds. The capacity level indicators will display the current battery level.
- Page 16 z Additional Functions The smart functions listed below will give you a full understanding of the aircraft battery and how to protect and preserve the battery life. ¾ ¾ Storage Self-Discharge Protection: In order to prevent damage, after the battery has been idle for 6 days and the voltage is higher than 12V, the battery will discharge automatically to approximately 70% of total power.
-
Page 17: Gimbal & Camera
③ Roll Motor ⑥ Pitch Motor IMPORTANT • The EVO XI-5A Camera Gimbal is held in place with a gimbal holder to protect the gimbal from the incidental rotation — and to avoid damage when stored. • Remember to remove the holder before powering up the aircraft. - Page 18 Before turning on the aircraft, insert a micro SD card into the port illustrated below. EVO supports SD card capacity up to 128GB. If you plan to shoot HD video, we recommend using a Class 10 or UHS-1 micro SD card.
-
Page 19: Built-In Smart Flight System
To transfer photos and videos to your computer, connect it to the aircraft via the Micro USB Port as shown below. 2.1.5 Built-in Smart Flight System EVO delivers stable and user-friendly flight control via its built-in Smart Flight System. The system enables a variety of advanced functions, including Go Home, Failsafe, and the Starpoint Positioning System, and operates using the modules described below. -
Page 20: Smart Flight Features
Rear Avoidance Infrared transmitter/receiver on the rear of the aircraft that scans for Sensor potential obstacles. z Flight Modes EVO’s 2 flight modes help you pilot the aircraft according to GPS availability and flying conditions. Flight Modes Flight Modes Description GPS Mode is activated if the aircraft detects proper GNSS signals. - Page 21 • If the Go Home function is activated within a 10m radius from the home point, the aircraft will automatically descent and land. z Failsafe The Failsafe function is designed to help EVO automatically return home or land on-site when necessary. ¾ Communication Lost ¾...
- Page 22 When the aircraft arrives above the home point, Landing Protection functionality will detect the ground conditions below. EVO will land automatically if the ground is level and flat. If not, it will hover at the current location to wait for the next command.
- Page 23 The Forward Vision System on the front of the aircraft uses image data to calculate the distance between the aircraft and potential obstacles. The system will halt EVO’s forward progress when an obstacle is detected. Infrared sensors detect motion and measure any heat being emitted by potential obstacles to the rear of the aircraft.
-
Page 24: Remote Control
1-meter height. 2.2 Remote Control EVO has an unobstructed range of up to 7km under optimum conditions. The remote control supports live video downlink, and functions without a paired mobile device. The video downlink system and aircraft remote control system operate at 2.4GHz or 900MHz, depending on what you select. - Page 25 With a 180° adjustable viewing angle for optimum ① Mobile Device Holder visibility Displays the flight status, warning messages and ② Flight Information Panel real-time live view ③ Command Sticks Control the orientation and movement of the aircraft ④ Hand Grips These are foldable to allow for compact storage ⑤...
-
Page 26: Live View Panel
The function is customized by yourself using the ⑭ Customizable Button A mobile app The function is customized by the user using the ⑮ Customizable Button B mobile app ⑯ Record Button Press the button to start or stop recording video ⑰... - Page 27 ⑧ Remote Control Signal Shows the current signal strength Estimates how much longer the aircraft can stay in ⑨ Remaining Flight Time the air Indicates that the Micro SD Card is installed and ⑩ Micro SD Card available Indicates the signal strength of nearby GNSS ⑪...
- Page 28 Estimates how much longer the aircraft can stay in ① Remaining Flight Time the air ② Remote Control Battery Displays the battery level remaining Displays the aircraft altitude relative to the home ③ Altitude point Displays the horizontal distance between the aircraft ④...
- Page 29 Press the Screen Navigation Dial to confirm this value or press the Screen Navigation Button (DISP) to go back to the last step. ¾ Camera Settings ¾ Camera (* =default value) Photo Mode *Single, Burst (3/*5/7/14), Time Lapse (2/*5/7/10/20/30/60), AEB (*3/5) Photo Format *JPG, RAW, JPG+RAW Video Resolution...
-
Page 30: Indicator Lights
Indicator Icons Aircraft Movement Ascend Descend Nose rotates left Nose rotates right Move forward Move backward Move left Move right Remote Control Calibration Refer to Section 3.2.3 ( 27) for detailed calibration instructions. ¾ Vision Settings ¾ Access these settings to turn Visual Obstacle Avoidance on/off and select Show Radar Map. -
Page 31: Remote Controller Buzzer Alerts
Indicates sufficient battery level when the remote control is in use, or G-● that a full charge has been reached when charging G-◎ Indicates that the remote control is charging while powered on Y-● Low battery warning R-● Indicates that the remote control is charging while powered off R-◎... -
Page 32: Chapter 3 Preflight Preparation
Chapter 3 Preflight Preparation EVO features a user-friendly design and comes fully assembled out of the box. In order to ensure safe drone operation, please read and understand the instructions and warnings below before your first flight. 3.1 Battery Preparation 3.1.1 Aircraft Battery Installation... - Page 33 ¾ Charging the aircraft and remote control ¾ Aircraft Battery: Plug the charging connector into the battery’s charge port, as shown on the right. IMPORTANT Make sure to fully charge the aircraft battery before flight. Remote Control: Open the protector on the USB port and plug in the provided charging cable.
-
Page 34: Remote Control Preparation
Capacity Level Status During Charging 75%~100% 50%~75% 25%~50% 0%~25% - Solid Green Light - Flashing Green Light ¾ ¾ During Charging: The Power Button ( ) on the remote control will be green when it is powered on, or red when it’s powered off. You can monitor the charging process on the Flight Information Panel. -
Page 35: Powering Up/Off The Remote Control
z Positioning the Antennas Vertically align the antennas in parallel with each other, as shown below. Strong Weak 3.2.2 Powering Up/Off the Remote Control z Powering Up Press and hold the Power Button ( ) for 2 seconds until you hear a short beep. -
Page 36: Pairing The Aircraft & Remote Control
3.2.4 Pairing the Aircraft & Remote Control The remote control and aircraft come paired out of the box. When you need to pair your EVO and remote control again — such as after pressing the Remote Control Pairing Button on the aircraft — follow these steps:... -
Page 37: Aircraft Preparation
Turn off the remote control. Remove the gimbal guard first then turn on the aircraft. Press and hold the Remote Control Pairing Button for about 3 seconds. The Pairing Indicator will flash quickly, indicating the aircraft is ready to pair with the remote control. -
Page 38: Propellers Installation
z Removing & Reinstalling the Gimbal Holder Always remove the gimbal holder before powering up the aircraft. Slowly pull out the attached gimbal holder, as shown in the diagram. After using the aircraft, reinstall the gimbal holder in order to protect the gimbal from damage. -
Page 39: Compass Calibration
Legends Lock Direction: Fasten the propeller by rotating it as indicated. Unlock Direction: Unfasten the propeller by rotating it as indicated. Black-coded propeller > Pairs with > Black-coded motor Orange-coded propeller > Pairs with > Orange-coded motor z Attaching the Propellers Verify the aircraft is powered off. - Page 40 WARNING The compass is very sensitive to electromagnetic interference causing compass error and poor flight. If you find the compass abnormal after calibration, move the aircraft to another location and try again. When calibrating the compass, remember to: Set up in an open outdoor area. Stay clear of all sources of magnetic interference, like magnetite or the steel reinforcement found in concrete.
-
Page 41: Chapter 4 Flight Operations
4.1 Preflight Checklist Follow these steps to carry out a full preflight checkup: • Fully charge the EVO aircraft battery, remote control, and your mobile device • Remove the gimbal holder • Make sure the propellers are in proper condition and are correctly attached •... -
Page 42: Motor Start & Aircraft Takeoff
Start the motors and take off using the remote control. Pilot the aircraft carefully. Land the aircraft, then shut down the motors. 4.2.1 Motor Start & Aircraft Takeoff NOTE The aircraft will not take off if the battery level is 15% or lower. ¾... - Page 43 TIPS For novices, we recommend moving the Command Sticks slowly while you get comfortable flying the aircraft. z Left Command Stick ¾ Ascend/Descend ¾ Command the aircraft to ascend by pushing the stick up, and descend by pressing it down. Left Side Veiw Left Side Veiw Ascend...
-
Page 44: Landing & Motor Shutdown
Right Stick Right Stick 4.2.3 Landing & Motor Shutdown EVO can be landed manually, automatically, or passively. Follow the steps below to land the aircraft by each of these means. IMPORTANT Always land gently on a flat, level, open surface. - Page 45 2s toe-in for 2s WARNING The toe-in action will always shut down the motors even if EVO is in midair. Pay extra cautious and use this feature only in an emergency. z Automatic Landing...
- Page 46 z Passive Landing Whenever either of the following conditions is met, Failsafe will be triggered and the aircraft will automatically land on-site. ¾ ¾ The Low Battery Warning is activated in non-GPS environment. The Critically Low Battery Warning is activated. ¾...
-
Page 47: Chapter 5 Maintenance & Service
IMPORTANT Before updating, make sure: • The motors are not spinning. • The battery levels of both EVO and the remote control are not less than 25%. • There’s adequate space to store the firmware file on your camera’s micro SD card. -
Page 48: Troubleshooting Tips
IMPORTANT • The upgrade takes about 15 minutes. Don’t turn off EVO or the remote control, or remove your SD card from the camera during the process. Do not start the motors. • After upgrading, the remote control may be disconnected from the aircraft. -
Page 49: Storage & Maintenance
To ensure optimum performance of the product, we suggest you read and follow the maintenance instructions in this section carefully. • Store EVO, the battery and the remote control in an environment that’s clean, dry, cool and ventilated. • Keep EVO out of sunlight when not in use. -
Page 50: Customer Service
This warranty does not apply to: • Batteries that cycle-charged for more than 200 times; • Products subjected to abnormal use or environmental conditions, accident, mishandling, neglect, unauthorized alteration, misuse, improper installation or repair, or improper storage; • Products with signs of tampering or altering of the serial number label, waterproof mark, etc.;... - Page 51 • For warranty repairs: proof of purchase • For non-warranty repairs: Preferred method of payment Autel Robotics’ support team will review your application within 72 hours after receiving it. After a preliminary evaluation of the problem, our Customer Support Team will contact you promptly.
-
Page 52: Chapter 6 Appendix
20cm between the radiator & your body. This transmitter must not be co-located or operating in conjunction with any other antenna or transmitter. For EVO Series with model EF7, SAR tests are conducted using standard operating positions accepted by the FCC/ISEDC with the device. When used, please keep the distance with a minimum of 10mm from the body. -
Page 53: Flight Restricted Area Illustration
20cm between the radiator & your body. For EVO Series with model EF7, SAR tests are conducted using standard operating positions accepted by the FCC/ISEDC with the device. When used, please keep the distance with a minimum of 10mm from the body. - Page 54 NOTE The pilot is responsible for ensuring they are following all flight rules and regulations in the areas they fly. Category I: Major airports & flight areas where drones operate at low altitudes • Take-off Restricted Zones (No-Fly Zones) These areas are set within 2.4km (based on country-imposed rules) around the midway point of specified locations.
-
Page 55: Specifications
site, the app will display a warning message. 6.2 Specifications Aircraft Specifications 1000g Max. Take-off Weight Hover Precision GPS+ Ultrasonic+IMU: Horizontal: ±1.5m, Vertical: ±0.2m; Vision+IMU: Horizontal: ±0.1m, Vertical: ±0.1m Max. Yaw Rate 200 dps Max. Inclination Angle 35 deg Max. Ascent/Descent Speed Ascent: 5m/s Descent: 3m/s Max. - Page 56 Battery Voltage 11.4 V Charging Environment Temperature 10°C~45°C (50°F~113°F) Discharging Environment -20°C~60°C (-4°F~140°F) Temperature Temp: -10°C~40°C (14°F~104°F) Storage Temperature & Humidity Humidity: 65±20%RH Flight Time 30 mins Camera Gimbal Specifications Operating Current 150mA@12V (Non-video Mode) Input Voltage 12 V Operating Temperature -10°C~50°C(14°F~122°F) Weight 67.5g (Camera incl.)
- Page 57 Remote Control Specifications OLED Screen Nits Max. Operating Time 3.8 hours RF Receiver Operating 2.4GHz~2.4835GHz 902MHz~928MHz Frequency 2.4GHz~2.4835GHz Video Link Frequency 902MHz~928MHz Operating Temperature 0°C~40°C (32°F~104°F) 1 year: -20°C~25°C(-4°F~77°F) Storage Temperature 3 months: -20°C~45°C(-4°F~113°F) Max. Control and Video Transmission Distance Transmission Power (EIRP) FCC: <=26 dBm CE: <=20 dBm Operating Current/Voltage...
Need help?
Do you have a question about the EVO and is the answer not in the manual?
Questions and answers