Table of Contents

Related Manuals for KERN DAB 200-2


Summary of Contents for KERN DAB 200-2
- Page 1 KERN & Sohn GmbH Ziegelei 1 Phone: +49-[0]7433- 9933-0 D-72336 Balingen Fax: +49-[0]7433-9933-149 E-Mail: info@kern-sohn.com Internet: www.kern-sohn.com Operating manual Electronic Moisture Analyser KERN DAB Version 1.3 2018-08 DAB-BA-e-1813...
-
Page 2: Table Of Contents
KERN DAB Version 1.3 2018-08 Operating manual Electronic Moisture Analyser Contents TECHNICAL DATA ..................... 4 DECLARATION OF CONFORMITY ..............5 APPLIANCE OVERVIEW ................... 6 3.1 Keyboard overview ........................8 3.2 Overview of display ........................9 BASIC INFORMATION (GENERAL) ..............10 4.1 Proper use ........................... - Page 3 CARRY OUT YOUR FIRST MEASUREMENT ..........27 DEFINE DRYING PARAMETERS ..............29 Enter ident number for drying method ..................29 Set heating profile........................30 Selecting switch-off criterion ....................32 Set drying temperature ......................33 Setting the drying period for time-controlled switching-off ........... 34 CARRYING OUT DRYING AND MEASURING PROCESSES .....
-
Page 4: Technical Data
Halogen (1 x 400 W) Radiator type Infrared (1 x 400 W) Factory option TDAB-A02-A Temperature range 40°C - 199°C Models DAB 100-3 / DAB 200-2 1°C steps selectable Temperature range 40°C - 160°C Factory option TDAB-A02-A 1°C steps selectable... -
Page 5: Declaration Of Conformity
Housing 240 x 365 x 180 mm Available Ø 92 mm, 20 mm high drying room Net weight 4.8 kg Electric Supply 220V 50 Hz AC 2 Declaration of Conformity To view the current EC/EU Declaration of Conformity go to: www.kern-sohn.com/ce DAB-BA-e-1813... -
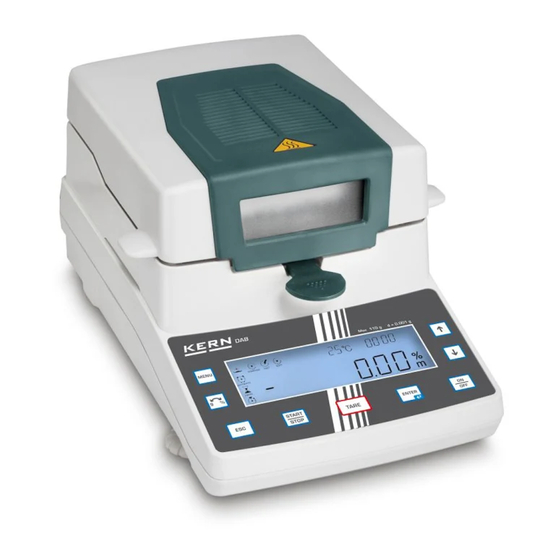
Page 6: Appliance Overview
3 Appliance overview Pos. Designation Viewing panel Heating hood Halogen lamp Heat shield Sample dish Windshield Removal aid Display Keyboard Adjustable foot DAB-BA-e-1813... - Page 7 Pos. Designation RS232C-interface connection Bubble level Mains connection socket DAB-BA-e-1813...
-
Page 8: Keyboard Overview
3.1 Keyboard overview Button Function • Call up menu • Switch over display of result • Cancel • Start / finish drying and measuring process • Taring • Confirm / store settings • Turn on/off • Select parameter (forward) • Increase digit •... -
Page 9: Overview Of Display
3.2 Overview of display Example: Working window during drying process Pos. Designation Status display - drying process enabled Enabled heating profile flashes Standard drying Fast drying Soft drying Enabled switch-off criterion flashes Automatic switch-off Time controlled switch-off Manual switch off Previous drying time Current temperature Display in % moisture... -
Page 10: Basic Information (General)
Information is available on KERN’s home page (www.kern-sohn.com) with regard to the monitoring of balance test substances and the test weights required for this. In KERN's accredited DKD calibration laboratory test weights and balances may be calibrated (return to the national standard) fast and at moderate cost. -
Page 11: Basic Safety Precautions
5.1 Pay attention to the instructions in the Operation Manual Carefully read this operation manual before setup and commissioning, even if you are already familiar with KERN balances. All language versions contain a non-binding translation. The original German is binding. -
Page 12: Warning Pictograms
5.2.1 Warning pictograms High voltage Chemical burn / corrosion General hazard Fire or explosion Poisoning Hot Surface 5.3 Personnel training The instrument may only be operated and maintained by trained personnel. DAB-BA-e-1813... -
Page 13: Danger Information
Carefully read this operation manual before setup and commissioning, even if you are already familiar with KERN instruments. Never make any modifications or design changes to the equipment whatsoever. Always use original spare parts and accessories. - Page 14 The moisture analyser operates using heat! Maintain sufficient space in the environment of the instrument to prevent heat build-up (distance from the instrument 20cm, upwards 1m). The heat extractor of the sample must never be covered, blocked, taped up or altered in any other way. Never place combustible materials on, under or next to the instrument, as the environment of the instrument heats up to a high temperature.
-
Page 15: Transport And Storage
6 Transport and storage 6.1 Testing upon acceptance When receiving the appliance, please check packaging immediately, and the appliance itself when unpacking for possible visible damage. 6.2 Packaging / return transport Keep all parts of the original packaging for a possibly required return. -
Page 16: Unpacking And Checking
Sufficient distance from heat-sensitive materials in area around instrument. Protect the instrument against high humidity, vapours and dust, Major display deviations (incorrect weighing results) may be experienced should electromagnetic fields (e.g. due to mobile phones or radio instruments), static electricity accumulations or instable power supply occur. Change location or remove source of interference. -
Page 17: Placing
7.3 Placing The moisture analyser is supplied part-assembled. Control whether the delivery is complete immediately after unpacking the individual parts and assemble the separate component parts according to the sequences. 1. Put heat shield into the sample chamber. 2. Place windshield in a way that the pin in the heat shield is aligned to the hole in the heat shield. -
Page 18: Levelling
7.4 Levelling Precise alignment and stable installation are a precondition for repeatable results. To compensate for minor unevenness or tilts of the base, level the instrument. Level instrument with foot screws until the air bubble of the water balance is in the prescribed circle. ... -
Page 19: Mains Connection
7.5 Mains connection Power supply is provided via the supplied mains cable. Check, whether the voltage acceptance on the device is set correctly. Do not connect the appliance to the power grid unless the information on the instrument (sticker) matches the local mains voltage. Do not eliminate the protective effect by using an extension lead without earth terminal. -
Page 20: Initial Commissioning
7.7 Connection of peripheral devices Before connecting or disconnecting of additional devices (printer, PC) to the data interface, always disconnect the moisture analyser from the power supply. Only use accessories and peripheral devices by KERN, as they are ideally tuned to the appliance. DAB-BA-e-1813... -
Page 21: Adjustment
• Carry out adjustment as near as possible to the balance’s maximum weight (recommended adjustment weight see chap. 1). Info about test weights can be found on the Internet at: http://www.kern-sohn.com. Press and keep pressed until „CAL“ is displayed. - Page 22 Put the required adjustment weight carefully into the centre of the sample dish. Adjustment is carried out automatically. After successful adjustment the balance automatically returns to weighing mode, „100,000 g“ will be displayed. Take away adjustment weight. Wait until „0.000 g“ appears. DAB-BA-e-1813...
-
Page 23: Calibrate / Adjust Temperature Of The Heating Module
Temperature calibration We recommend performing occasional tests of the instrument’s temperature value, using the optional temperature calibration set KERN DAB-A01. Before you do this, allow the device to cool down for at least 3 hours after the last heating phase. - Page 24 Set test parameters: After pressing the first ident number <0> will be displayed. Using arrow keys select e.g. ident number <1> and confirm by . The currently set heating profile flashes. Using arrow keys select heating profile <SOFT> and confirm by The currently set heating profile and switch-off criterion flashes.
- Page 25 Confirm by , the currently set drying temperature flashes. Use the arrow keys to enter the desired test temperature. For the first or the first two digits select a value and confirm by Using arrow keys select the desired value for the last digit. ...
-
Page 26: Temperature Adjustment
Begin temperature calibration: Switch on temperature calibration set. Close heating hood and press . The instrument will be automatically heated to the set temperature. The current temperature and the elapsed time will be indicated in the display. After approx. 15 minutes finish by . -
Page 27: Carry Out Your First Measurement
9 Carry out your first measurement We recommend to carry out a first simple measurement in order to get acquainted with the device and the displays. Here you work with the ex-factory set drying parameters (standard drying 120°C, automatic switch off). In order to obtain exact results, the instrument must have reached its operating temperature (see warm-up time chap. - Page 28 When drying is finished, an acoustic signal will sound. The result will be displayed. Using the display of results can be switched over into % moisture % dry content residual weight in grams. Open the heating hood and remove the sample with the help of the removal aid.
-
Page 29: Define Drying Parameters
10 Define drying parameters In chapter 9 you have already carried out a first measurement with the factory settings. The device provides a great variety of setting options that allow you to adapt a drying method to your sample. Three heating profiles (standard drying, soft drying, fast drying) and three switch-off criteria (time-controlled, automatic, manual) can be selected. -
Page 30: Set Heating Profile
2. Set heating profile Using arrow keys select required heating profile and confirm by Options: Standard drying Fast drying Soft drying Standard drying <STANDARD> This heating profile is suitable for most samples. The sample will be heated drying temperature will kept constantly... - Page 31 Fast drying <FAST> This heating profile is suitable for samples with high moisture content (such as liquids). The temperature will initially rise very fast after the start and for a short time will exceed the set drying temperature by 30%. That way the latent heat will be compensated, thereby accelerating the drying process.
-
Page 32: Selecting Switch-Off Criterion
3. Selecting switch-off criterion A switch-off criterion defines under which conditions the device should cancel the drying process. Switch-off criteria save continuous time controls and manual cancelling of drying processes. Furthermore they ensure that measurements are always finished under the same conditions, thereby providing repeatable measurements. -
Page 33: Set Drying Temperature
4. Set drying temperature After acknowledgement of the selected switch-off criterion by , the currently set drying temperature is flashing. Using arrow keys , select the desired value for the first or the first two digits and confirm by ... -
Page 34: Setting The Drying Period For Time-Controlled Switching-Off
5. Setting the drying period for time-controlled switching-off After acknowledgement of the drying temperature by , the currently set drying period is flashing. Using arrow keys , select the desired value for the first digit and confirm by , the next digit is flashing. -
Page 35: Carrying Out Drying And Measuring Processes
11 Carrying out drying and measuring processes In order to obtain exact results, the instrument must have reached its operating temperature (see warm-up time chap. 1). For this warm-up time the instrument must be connected to the power supply. ... - Page 36 Confirm all flashing indicated parameters one by one by or change them as necessary. Open heating hood and place removal aid with an empty sample dish on the sample dish retainer. Make sure that the sample dish is resting flat on the sample dish retainer.
- Page 37 When drying is finished, an acoustic signal will sound. The result will be displayed. Using the display of results can be switched over into % moisture % dry content residual weight in grams. Open the heating hood and remove the sample with the help of the removal aid.
-
Page 38: Rs 232 Interface
Disconnect moisture analyser from the power supply and connect to the appliance interface with a suitable cable. Faultless operation requires an adequate KERN interface cable. Communication parameters of the RS 232 interface of moisture analyser and printer must match. -
Page 39: Print Out Protocol
12.3 Print out protocol: To edit a protocol press and keep it pressed until “PRINT“ appears. The display changes automatically to „L-E“. Acknowledge with . The protocol of the measurement carried out as last is displayed under the ident number „1“. The instrument stores the last five protocols (ident number 1 -5). -
Page 40: Continuous Data Transmission
Sample protocol (KERN YKB-01N): MOISTURE DETERMINATION (1) Protocol ident number (1) Gerätetyp Machine Type: DAB 100-3 Heating Mode: STANDARD Selected heating profile Stop Mode: AUTO STOP Selected switch-off criterion Drying temperature Heating Temp: 120 °C Time elapsed: 03:52 Overall duration of drying process Wet W: 10.145 g... - Page 41 Choose the data transmission type, pressing , switch it on/off using the navigation buttons residual mass in grams % humidity % solid content DAB-BA-e-1813...
- Page 42 Press to confirm. The indication used to set the data transmission cycle, i.e. <C---2> will be displayed. Press to confirm and set the required data transmission cycle using the navigation buttons (you can select from: 1, 2, 5, 10, 30, 60, 120, 300, 600 s).
- Page 43 This is the starting/finishing time of continuous data transmission when the measurement is started/completed. Using our data transmission software, i.e. Balance connection (KERN SCD 4.0) the displayed values will be sent to the computer as per the pre-defined data transmission cycle.
-
Page 44: General Information Concerning Moisture Analysis
The radiation applied in the KERN DAB penetrates mainly the sample in order to be transformed inside it into heat energy that is, warming from the inside to the outside. A minor amount of radiation is reflected by the sample, a reflection that is less in dark samples than in light-coloured ones. -
Page 45: Preparing A Sample
13.4 Preparing a sample Prepare one sample at a time for measuring. This prevents the sample from exchanging moisture with its surroundings. If several samples have to be taken at the same time, they should be packed in airtight boxes so that they do not undergo changes during storage. -
Page 46: Sample Material
13.5 Sample material Easy to determine are usually samples with the following characteristics: Grainy to powdery, pourable solids Thermally stable materials, emitting the moisture to be determined easily without other substances evaporating at the same time Liquids that vaporize to leave a dry substance without developing a film ... -
Page 47: Drying Temperature
The glass fibre filter is also useful as a protection when splashing materials are dealt with (each splash falsifies the final result). You will find examples taken from actual use in our application manual, available from the KERN home page (www.kern-sohn.com). DAB-BA-e-1813... -
Page 48: Servicing, Maintenance, Disposal
Loose residue sample/powder can be removed carefully with a brush or manual vacuum cleaner. 14.2 Servicing, maintenance The appliance may only be opened by trained service technicians who are authorized by KERN. Ensure that the balance is regularly calibrated, see chap. Monitoring of test resources. 14.3 Disposal ... -
Page 49: Instant Help
15 Instant help Possible causes of errors: In case of an error in the program process, briefly turn off the balance and disconnect from power supply. The weighing process must then restart from the beginning. Fault Possible cause • The appliance is not switched on. Display is not lit up.
Need help?
Do you have a question about the DAB 200-2 and is the answer not in the manual?
Questions and answers