Eminent EM7680 Manual
Tv streamer powered by libreelec kodi
Hide thumbs
Also See for EM7680:
- Firmware update (6 pages) ,
- Firmware update (6 pages) ,
- Firmware update (7 pages)
Table of Contents
Advertisement
Advertisement
Table of Contents

Related Manuals for Eminent EM7680


Summary of Contents for Eminent EM7680
- Page 1 EM7680 TV Streamer powered by LibreELEC Kodi...
-
Page 2: Table Of Contents
6.0 Change Kodi language interface ................8 7.0 Audio passthrough setup ..................10 7.1 Connect the EM7680 with an HDMI and/or S/PDIF cable via your Home cinema set to your TV ......................11 7.1.1 Connect the EM7680 to an AV receiver by “HDMI” ........11 7.1.2 Connect the EM7680 to an AV receiver by HDMI and optical cable ...12... -
Page 3: Introduction Tv Streamer
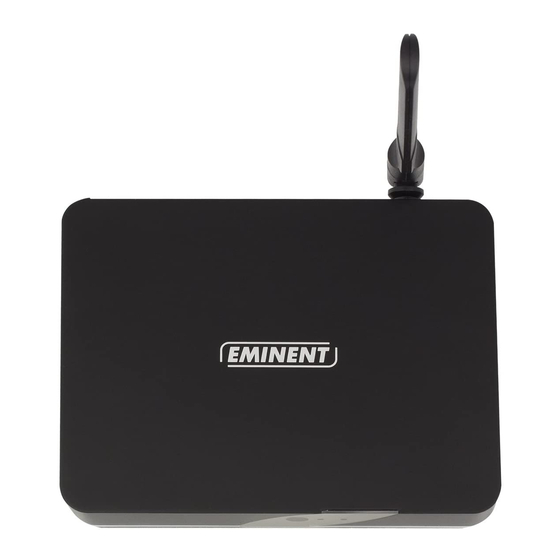
ENGLISH 1.1 Introduction TV streamer With the Eminent EM7680 TV streamer you can stream files from the internet or from your home network, watch all your movies in full HD, view your high quality photo albums and listen to your music collection. The Eminent EM7680 TV Streamer comes with a five year warranty. -
Page 4: Explanation Of The Remote Control
ENGLISH 2.0 Explanation of the remote control Power On/Off Colored Hotkeys. See the below descriptions Mute 10 sec. back in movie Pause/play Go to LibreELEC settings Rewind 10 sec. forward in movie Stop In movie menu Go to Music section Fast forward Go to Video section Go to Pictures section... -
Page 5: Explanation Of The Connections
Wifi network adapters. 4.0 Connecting the TV streamer 1. Connect the HDMI cable to the HDMI connection of the EM7680 and connect the other side of the HDMI cable to a free HDMI connection on your television. -
Page 6: Setting Up The Tv Streamer
5.0 Setting up the TV streamer. 1. Make sure the “On/Off” switch is switched to ‘On’ to start up the TV streamer. 2. Once the EM7680 has booted, a wizard appears. This wizard can be used to setup the TV streamer. - Page 7 ENGLISH 4. You have the option to change the name of your TV streamer. If you wish to change the TV streamers name, you can change the name so it will be recognizable when you see the TV streamer in your network. Click “Next”. The following screen appears: 5.
-
Page 8: Change Kodi Language Interface
ENGLISH 7. Click “Next”. Your TV Streamer is now ready to use. All these settings you have entered or changed can also be changed in the “Settings” menu. 6.0 Change Kodi language interface 1. Use the navigation buttons to go to the cog-wheel icon. - Page 9 ENGLISH 2. Click on the ‘OK’ button on your remote control. The following screen appears: 3. Select ‘Interface settings’ and press the “OK’’ button on your remote control. The following screen appears: 4. Select ‘Regional’. With the navigation buttons go to the right side and click on ‘Language’...
-
Page 10: Audio Passthrough Setup
7.0 Audio passthrough setup If your EM7680 is connected to a AV receiver by HDMI or S/PDIF connection, you will need to “enable passthrough” so your AV receiver will be able to decode the audio streams such like DTS or Dolby Digital. -
Page 11: Connect The Em7680 With An Hdmi And/Or S/Pdif Cable Via Your Home Cinema Set To Your Tv
7.1.1 Connect the EM7680 to an AV receiver by “HDMI” 1. Connect one side of the HDMI cable to the HDMI output of the EM7680. 2. Connect the other side of the HDMI cable to the HDMI input of your Home Cinema Set. -
Page 12: Connect The Em7680 To An Av Receiver By Hdmi And Optical Cable
2. Connect the other side of the HDMI cable to the HDMI input of your TV. 3. Connect the optical cable ( not included ) to the optical output of your EM7680. 4. Connect the other side of the optical cable ( not included ) to an available optical input of your Home Cinema Set. - Page 13 Receiver or Home cinema set using a HDMI cable or an Optical cable. 7. Your EM7680 is now ready to play encoded files like Dolby and DTS through your AV receiver. For Dolby True-HD and DTS-HD audio passthrough enable “True-...
-
Page 14: Stream Your Media Files
14 | ENGLISH 8. Notice: only enable TrueHD and DTS-HD when you have connected the EM7680 via HDMI. When you want to passthrough audio via optical cable then do not enable True-HD capable receiver” and “DTS-HD receiver”. 8.0 Stream your media files 8.1 Stream your media through Windows... - Page 15 15 | ENGLISH 3. Use the navigation buttons to go to “Movies”. Press the “OK” button on your remote control. The following screen appears:...
- Page 16 16 | ENGLISH 4. Press “Add videos” and click “OK” button on your remote control. The following screen appears: 5. Select ‘Browse” and press “OK” button on your remote control. The following screen appears:...
- Page 17 17 | ENGLISH 6. Select ‘add network location’ and press the ”OK” button on your remote control. The following screen appears: In the new window make sure Protocol Windows network ( SMB ) is selected for your Network Share, then fill out Server Name. To retrieve your PC name simply just press the “Windows”...
- Page 18 18 | ENGLISH 8. You will notice the full network path of “your media directory” you have added in the previous steps. By default Kodi will leave the name of the media source the same as your original media directory. You will also notice that Kodi will give you the option to change the name of the media source.
-
Page 19: Stream Your Media Trough Nas
19 | ENGLISH 11. Press the “OK” button on your remote control to view and play your video files. 8.2 Stream your media trough NAS 1. Please make sure your TV streamer is powered on and connected to your home network if you want to stream media from your NAS. - Page 20 20 | ENGLISH 3. Use the navigation buttons to go to “Movies”. Press the “OK” button on your remote control. The following screen appears: 4. Press “Add videos” en click “OK” button on your remote control. The following screen appears: 5.
- Page 21 21 | ENGLISH 6. Select ‘Zeroconf browser' and press ‘OK’ button on your remote control. The following screen appears: Select your NAS and press on “OK”. 7. Select the video directory you wish to add and press the “OK” button on your remote control.
- Page 22 22 | ENGLISH 8. You will notice the full network path of “your media directory” you have added in the previous steps. By default Kodi will leave the name of the media source the same as your original media directory. You will also notice that Kodi will give you the option to change the name of the media source.
-
Page 23: Stream Your Video's Through Usb Drive
23 | ENGLISH 11. Press the “OK” button on your remote control to view and play your video files. 8.3 Stream your video’s through USB drive In the following steps we will describe how to stream your videos through an USB drive. -
Page 24: Audio And Subtitle Selection
24 | ENGLISH 4. Use the navigation buttons to select per example “Movies” and press “OK” on you remote control. 5. Enter the name of your USB drive and press “OK” on your remote control to view your files and play the movie you want. 9.0 Audio and Subtitle selection When more than one subtitle or audio streams are available, you will have the option to switch between them. -
Page 25: Download And Add Subtitles
7. Use the navigation keys to go to “Audio stream” and select your desired audio stream. 9.1 Download and add subtitles The EM7680 uses third party add-on Opensubtitles.org to download and add subtitles when it is not build in your movie file. Opensubtitles.org have recently decided to make their service only available to registered users, registered on the official website from Opensubtitles.org. - Page 26 26 | ENGLISH 1. Fill out your desired username, email address and password. 2. Once you have filled out your desired credentials, you must tick “I’m not a robot” and click on the button “Register”. 3. You will now receive a confirmation mail with an activation link. Click on the link to active your Opensubtitle.org account.
- Page 27 27 | ENGLISH 2. Select “Subtitles” and press the “OK” button on you remote control. The following screen will appear: 3. Select “Opensubtitles.org” and press the “OK” button on your remote control. The following screen will appear:...
- Page 28 28 | ENGLISH 4. Choose “Configure”: 5. A screen opens where you can fill out the credentials for your Opensubtitles.org account. After filling gout your credentials, press the “OK” button. 6. You are now able to use the Opensubtitles.org services and download subtitles.
-
Page 29: Extra Features
The latest Frequently asked questions for your product can be found on the support page of your product. Eminent will update these pages frequently to assure you have the most recent information. Visit www.eminent-online.com for more information about your product. - Page 30 A power socket is needed which should be close and easy accessible from the device. Repairing of the device should be done by qualified Eminent staff. Never try to repair the device yourself. The warranty immediately voids when products have undergone self-repair and/or by misuse.
-
Page 31: Warranty Conditions
Eminent warranty. Products are not covered by the Eminent warranty when exposed to incorrect/improper use, external influences or when opening the service parts of the product by parties other than Eminent.
Need help?
Do you have a question about the EM7680 and is the answer not in the manual?
Questions and answers