Table of Contents
Advertisement
Advertisement
Table of Contents

Subscribe to Our Youtube Channel
Summary of Contents for LectroTruck LTA6512
-
Page 2: Table Of Contents
Table of Contents Model/ Serial Number Page 1 Parts Breakdown Page 26-30 Drive Screw (1200-1500 lb.) Page 26 Introduction Page 1 Drive Screw (600 lb.) Page 27 Overview Page 2 Outer Frame Page Warranty Information Page 2 Battery Box (Steel) Page 28 Standard Equipment Page 3-4... -
Page 3: Model/ Serial Number
Model and Serial Number Page 1 The serial number of your Lectro-Truck is on a nameplate attached to the flat cross brace on the inner frame. This is located about half way down the back of the unit. Date Model Number Serial Number Upon receipt of your Lectro-Truck please place the date, model and serial number in th e boxes provided. -
Page 4: Overview
Overview of the Lectro-Truck Page 2 The Lectro-Truck operates using the basic principles of leverage and balance. B y mastering the techniques outlined in this manual, a single operator is capable of handling and moving heavy loads that previously required two or more persons. Your Lectro-Truck is a battery powered, motor-driven machine, with a specially designed inner and outer frame. -
Page 5: Standard Equipment
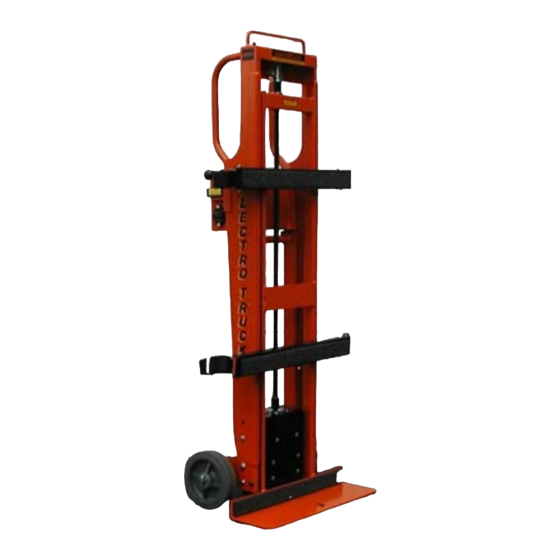
Standard Equipment Page 3 Aluminum Models: (left to right) LTA6512, Steel Models: (left to right) LTA5512, LTA4512 1268E, 1260E 1. Protective switch guard * 15. Heavy duty 1½ HP planetary gear reduction motor. 2. All weather safety switches * 16. Wide tread, non-marring, 8” roller 3. -
Page 6: Optional Accessories
Sealed non-spill battery 2 Load securing strap bars Porta ble battery carrying pack Automatic Electromagnetic brake On-Board Battery Charger LTA6512 Owners-Operating Manual Porta ble battery carrying pack 2 Load securing strap bars Hook bar/Leverage bar Automatic Electromagnetic brake User Friendly, Built-In Tri-Pod Sealed non-spill battery 10”... - Page 7 The complete portable power pack includes a 12 -volt battery and an aluminum carrying case. Replacement battery and Aluminum Power Pack battery cases are also a vailable separately. The Power Pack is available for the LTA6512, LTA5512, and LTA4512 only. Wheel Brakes (Page 25) The wheel brakes allow the user to climb and descend steps, even if the steps are pitched, uneven, or cracked.
- Page 8 Lectro-Truck and get it ready for use. If you have ordered an LTA4512, LT A5512, or LTA6512, your unit will come with a portable battery pack. The battery should be connected inside the pack. The battery pack is either installed on the unit already or packed separately.
- Page 9 If your Lectro-Truck still does not operate after trying all the above, contact our office at 1-800-619-0625, and ask for service. Installation of Portable Side Handles (Steel Models, LTA5512, & LTA6512) Diagram #1 Handle 3/8” bolt...
- Page 10 The plunger latches can be found inside the battery pack of your unit. LTA6512 - Y ou will have three plungers. The two with the n uts on them are for the extension handle, and the plunger without the nut is to be installed in the leverage/ hook bar.
- Page 11 To remove the charging plug, twist the plug to the left and pull. For the LTA6512, LTA5512, and the LTA4512 it is recommended that you remove the battery pack from the unit before charging. If our battery charger has been ordered, the battery charger will be located inside the battery pack.
-
Page 12: Basic Maintenance
Proper Battery Charging Procedures Page 10 Proper charging of your battery is very important. If your battery isn’t working properly, your Lectro-Truck will not be working to it’s fullest potential, either. The battery supplied with your Lectro-Truck is made up of cells that can be damaged if it isn’t charged properly. - Page 13 Installation of Strap Bars and Concave Attachment Page 11 To place the strap bar attachment on the Lectro-Truck, stand in front of the machine with the strap bar in your hands. Holding the front of the strap bar diagonally, put the strap bar “ears” inside the Inner Frame, and turn the strap bar until it is parallel to the toe plate.
-
Page 14: Balancing A Load
General Lectro-Truck Information (continued) Page 12 ALWAYS REFER TO THESE GENERAL SAFETY RULES: 1. When in doubt as to whether or not you are able to handle a load by yourself, always have someone else help. 2. Be sure that no one is in front of or below the Lectro-Truck during operation. The operator(s) should be safely behind or above the load at all times. - Page 15 Page 13 Stair Climbing Prior to climbing any staircase, be sure the steps are able to support the weight of the Lectro-Truck and load before attempting to climb the stairs. 1. Pull the Lectro-Truck, with your load attached, to the base of the steps. (Figure 5) Figure 5 2.
-
Page 16: Descending Stairs
Page 14 Stair Climbing (continued) 4. Repeat steps 2 and 3 until you have reached the top of the steps that you are climbing. Figure 8 Allow NO ONE under the load while climbing or descending steps. Descending Stairs 1. At the top of the steps, recline your load back, and extend your load down two steps. -
Page 17: Portable Dock Leveler
Page 15 Descending Stairs (continued) 3. Repeat steps 1 and 2 until you are down to the bottom of the steps. Figure 11 Portable Dock Leveler Your Lectro-Truck can be used as a portable dock leveler, as illustrated in Figure 12. Loads can be easily moved from a dock, up or down, to a truck or trailer, as the situation requires. - Page 18 Page 16 Loading Onto a Truck or Trailer (continued) 4. Push the wheels down/ load up button, and start the load on it’s way up to the back of the truck. (Figure 15). Continue lifting the load until it is all the way up. (Figure 16) 5.
-
Page 19: Thresholds
Page 17 Overcoming Curbs and Other Obstacles Curbs Curbs are easy to step over. Back up to any curb that you must climb, and raise the wheels to the top of the curb. Raise the wheels high enough and move them back over the curb to allow room for the load. Raise the load just as you would to climb the last stair in a flight of stairs. -
Page 20: Pitched Steps
Page 18 Miscellaneous Other Situations (continued) Pitched Steps Steps that slant forward, or “pitched steps,” may require the use of the Lectro-Truck Wheel Brake attachment (Page 25.) These “boots” slip over the wheels, and pivot down so that you have a flat placement of your wheels. -
Page 21: General Troubleshooting
Page 19 General Troubleshooting Lectro-Truck will not operate in either direction. If there is NO noise coming from the Lectro-Truck when the button is pushed... 1. Check to see that the Circuit Breakers are in “on” position. The “on” position is when the small arm of the Circuit Breaker is enclosed by the Circuit Breaker. - Page 22 LTA6512 TRIPOD: The tripod on the LTA6512 is built into the unit. To set the load back onto the tripod, run the wheels up 6 inches and break load back onto the 8” wheels. With the load resting back in a balanced position, press the tripod latch with your foot.
- Page 23 Practice using the All Terrain Wheels with a 300 lb. to 500 lb. load, following the three NOTE steps above. CAUTION: Be sure the hook bar on the LTA6512 is locked in place when using All Terrain Wheels. Lectro-Truck Owner's Manual...
-
Page 24: Caster Attachments
1. Position the Lectro-Stack so the wheels are centered on the toe plate of the Lectro-Truck. 2. Locate the proper “eyelets” to use on the rear of the Lectro-Stack to feed your straps through. (See chart below.) Model Eyelets to Use LTA6512 A & D Eyelets LTA5512 A & D LTA4512 C &... -
Page 25: Balance Box
Page 23 Balance Box The Balance Box is used whenever you have a low heavy load where it’s center of gravity is so low you have extreme difficulty breaking the load back on the steps; or the load is so low and heavy that it overcomes the operator and wants to roll back down the steps. -
Page 26: Hook Box
Lectro-Truck to reach. See the following chart to find out if a Hook Box can work for you. Model Lectro-Truck Maximum Truck Number Lift Height Bed Height LTA6512 41” 39” LTA5512 41” 39” 1268E 39”... -
Page 27: Toe Plate Adapter
Page 25 Toe Plate Adapter Toe Plate Adapters come in two standard sizes (12” x 24” and 12” x 30”.) However, they can be fabricated to any size to best fit your needs. To mount your Toe Plate Adapter, center it on the Toe Plate and then drill two holes through the Toe Plate using the Toe Plate Adapter as a guide. - Page 28 Page 26 7/16” Jam Nut (H7) 1/2” Internal Tooth Lock Washer (H5) 7/16” Hex Nut (H1) Drive Screw Assembly 1/2” Custom Washer (H8) For Models: Bearing Housing Complete (CC14A) LTA6512E LTA5512E 1268E 7/16” Flat Washer (H2) 1260E 3/4” Flat Washer (H4) Bumper (Aluminum: CH22R / Steel: CF22R) 3/4”...
- Page 29 Page 27 7/16” Jam Nut (H7) 1/2” Internal Tooth Lock Washer (H5) 7/16” Hex Nut (H1) 1/2” Custom Washer (H8) Drive Screw Assembly Thrust Bearing (CC17) For Model: Bearing Housing (CC14) LTA4512E Thrust Bearing (CC17) 7/16” Flat Washer (H2) 5/8” Flat Washer (H3) Bumper (CA19R) 5/8”...
-
Page 30: Parts Breakdown
Parts Breakdown Page 28 Outer Frame Battery Box Motor Box Lectro-Truck Owner's Manual... -
Page 31: Strap Bar
Parts Breakdown (continued) Page 29 Battery Pack Strap Bar + — Inner Frame Lectro-Truck Owner's Manual... -
Page 32: Hook Box
Parts Breakdown (continued) Page 30 Tripod Hook Box All-Terrain Wheels Lectro-Truck Owner's Manual... -
Page 33: General Service
Page 31 General Service Adjustment of the Electromagnetic Brake Allen Screws Tools Needed: • 3 mm Allen Wrench • 8 mm Open End Wrench • Feeler Gauge (.008) 1. Use the feeler gauge to check the air gap of the brake. The gap should be at .008 (eight thousandths). -
Page 34: Disassembly Of Drive Screw
Page 32 General Service (continued) Disassembly/ Assembly of Drive Screw Disassembly: 1. Lay Lectro-Truck flat, battery box/pack side up. 7/16” Jam Nut (H7) 2. Raise hook bar (if applicable) to ‘up’ position and secure. 1/2” Internal Tooth Lock Washer (H5) 3. -
Page 35: Wiring Diagram (Lg. Alum.)
#18 Blk #18 Rd #18 Rd #18 Wht Upper Limit Switch 12V AC On-Board Battery Charger ATTERY IRCUIT REAKER #8 Blk #8 Red LTA6512 ODEL & LTA5512 #8 Blk #8 Red IRING Down #18 Blk IAGRAM IODE RAKE OSITIVE LACK... -
Page 36: Wiring Diagram (Steel)
Page 34 Wiring Diagrams (continued) #18 Red #18 Blk 12V AC #18 Wht On-Board Battery Charger #18 Red LTA4512 ODEL IRING ATTERY IRCUIT REAKER IAGRAM #8 Blk #8 Red OSITIVE LACK EGATIVE – P HITE Upper Limit Switch #18 Blk Lower Limit Switch IODE RAKE... - Page 37 Page 35 Wiring Diagrams (continued) Lower Limit Switch #18 Blk #18 Rd #18 Rd #18 Wht/ Blue 12V AC On-Board Battery Charger ATTERY IRCUIT REAKER #8 Blk #8 Red 1260E ODEL & 1268E Down IRING #18 Blk IAGRAM IODE RAKE OSITIVE LACK EGATIVE...
-
Page 38: Parts List
Parts List Manual # Part # Description Outer Frame 1268 & 1268E Outer Frame 1260 & 1260E Outer Frame LTA6512E Outer Frame LTA5512E Outer Frame LTA4512E Outer Frame CH1SHRD LTA6512E Shroud CA1SHRD LTA4512E Shroud Rollers (Steel Models) 1.250 Rollers (LTA6512E & LTA5512E) 1.500 Rollers (LTA4512) 1.375 Roller Axle (Steel Models) Roller Axle (LTA6512E &... -
Page 39: Drive Screw
Parts List Manual # Part # Description Drive Screw Assembly Hex Nut (7/16") Flat Washer (7/16") Flat Washer (5/8" - Old Drive Screw) Flat Washer (3/4" - New Drive Screw) Plastic Flat Washer (3/4"x 1 1/2") Plastic Flat Washer (3/4"x 1 1/4") Internal Tooth Lock Washer (1/2") Jam Nut (7/16") Custom Washer (1/2") -
Page 40: Battery Pack (Aluminum)
Parts List Manual # Part # Description Motor Box Assembly CC23 Drive Motor (1 1/2 Hp) CA23 Drive Motor (3/4 Hp) CC23A Drive Motor Kit - Steel Models (1 1/2 Hp) CH23A Drive Motor Kit - LTA6512E & LTA5512E (1 1/2 Hp) CA23A Drive Motor Kit - LTA4512E (3/4 Hp) CC8A... -
Page 41: Battery Box (Steel)
Parts List Manual # Part # Description Battery Box LT12 Battery (All models except LTA4512E) LA1812 Battery (LTA4512E) CE27R Battery Box Complete (Steel Models) CH27R Battery Box Complete (LTA6512E) CC30F Female Charge Plug w/ Flange (Battery Box) CE27 Protective Wrap Around (Steel Models) CH27 Protective Wrap Around (LTA6512E) CE271... -
Page 42: Strap Bars
Parts List Manual # Part # Description Switches CC25 Control Switch (Old Style) CC25A Control Switch (New Style) CC25AC Control Switch Cap CC25LS Limit Switch CC25LSBU Limit Switch & Upper Bracket CC25LSBL Limit Switch & Lower Bracket LSBU Limit Switch Bracket (Upper) LSBL Limit Switch Bracket (Lower) Wires/ Harness... - Page 43 Parts List Manual # Part # Description Concave Strap Bar CC90 Concave - 12" Diameter (Steel Models) CH90 Concave - 12" Diameter (Aluminum Models) CC90D Concave - 2-12" Diameter (Steel Models) CH90D Concave - 2-12" Diameter (Aluminum Models) CC90SP Commercial Concave - 36" Diameter (Steel Models) CH90SP Commercial Concave - 36"...
-
Page 44: Concave Attachment
Parts List Manual # Part # Description Caster Attachment CC91 Caster Attachment (Standard) CC91N Caster Attachment (New Style) CC91HD Caster Attachment (Heavy Duty) CC91A Caster Base (Standard) CC91AN Caster Base (New Style) CC91AHD Caster Base (Heavy Duty) CC91B Caster Slide (Standard) CC91BHD Caster Slide (Heavy Duty) CC91C... -
Page 45: Miscellaneous Items
Parts List Manual # Part # Description Lectro-Stack LS2000-1 Winch LS2000-3 Wheel (6"x 2") LS2000-4 Caster Wheel LS2000-5 Steel Sheave (2.5") LS2000-6 Steel Sheave (1.35") LS2000-7 Steel Dowel Pin (.5"x 1.25") LS2000-8 Clevis Pin (.5"x 1.25") LS2000-9 Clevis Pin (.5"x 1.5") LS2000-10 Clevis Pin (.5"x 2.5") LS2000-15...
Need help?
Do you have a question about the LTA6512 and is the answer not in the manual?
Questions and answers