Aidcall Touchsafe Pro User Manual
Wireless nursecall system
display panel v3.00a
Hide thumbs
Also See for Touchsafe Pro:
- Installation manual (38 pages) ,
- Installation & user manual (23 pages) ,
- User manual (12 pages)
Table of Contents
Advertisement
Touchsafe® Pro
Wireless Nursecall System
_________________________________________________________________________________________________
Aidcall operates a policy of continual product improvement and
reserves the right to modify the specification of its products.
If any variation to the details in this document are suspected please
contact Aidcall's Technical Support.
Aidcall, a business unit of Legrand Electric Ltd
Cowley Road, Blyth Riverside Business Park, Blyth, Northumberland, NE24 5TF.
T: +44 (0) 1670 357 431 www.aidcall.co.uk
________________________________________________________________
Display Panel V3.00a
User Guide
Doc No. FM5505 issue D Page 1
Advertisement
Table of Contents

Related Manuals for Aidcall Touchsafe Pro


Summary of Contents for Aidcall Touchsafe Pro
- Page 1 Aidcall operates a policy of continual product improvement and reserves the right to modify the specification of its products. If any variation to the details in this document are suspected please contact Aidcall’s Technical Support. Aidcall, a business unit of Legrand Electric Ltd Cowley Road, Blyth Riverside Business Park, Blyth, Northumberland, NE24 5TF. T: +44 (0) 1670 357 431 www.aidcall.co.uk ________________________________________________________________ Doc No. FM5505 issue D Page 1 ...
-
Page 2: Table Of Contents
CONTENTS Section Topic Page 1 Product Overview 2 2 Important Safety Instructions 3 3 Regulatory Information 4 4 Maintenance & Care 4 5 Display Panel Options 5 6 Display Panel Features 6 7 Main Screen 7 8 System Configuration 8 9 Nurse Call 14 10 View Client Notes/Accept Call 15 11 Nurse Present 16 ... -
Page 3: Important Safety Instructions
2. SAFETY INSTRUCTIONS Read and understand these instructions before use. Keep these instructions for future reference. To reduce the risk of electric shock do not disassemble this product unless you are qualified. Opening or removing covers may expose you to dangerous voltages or other hazards. No user serviceable parts inside. Refer all servicing to qualified service personnel. This product should only be connected to a 220‐240VAC 50/60Hz mains supply. If you are unsure of the type of power supply consult your local power company. The internal battery must only be replaced qualified service personnel. Use only manufacturer approved rechargeable battery as identified in the installation manual. USB Ports are for Engineers use only – they are not suitable for charging Smartphones or Tablets. Do not push objects of any kind into the USB Ports as this may result in damage. This product should be located at least 2 metres away from other electronic equipment. Failure to provide this separation may result in reduced radio range. Do not locate this product above a radiator or other heat source. Slots in the product housing are provided for ventilation. These openings must not be blocked or covered. Do not push objects of any kind through the slots as this may result in damage or injury. Do not expose to direct sunlight. Do not expose this product to dripping or splashing water. As with any electronic equipment take care not to spill liquids into any part of the system. Liquids can cause a failure and/or a fire hazard. Clean with a hard‐surface disinfectant wipe or a damp cloth and a non‐abrasive cleaning product. Polish with a dry duster. DO NOT use a wet cloth. The display can be cleaned with proprietary screen cleaners or wipes. ... -
Page 4: Regulatory Information
3. REGULATORY INFORMATION This symbol on the product indicates it complies with all relevant EU Directives as required by law. Radio & Telecommunication Terminal Equipment; R&TTE Directive 1999/5/EC Safety of Information Technology Equipment; EN 60950‐1:2006+A12:2011 Electro Magnetic Compatibility; EMC 2004/108/EC Restriction of Hazardous Substances; RoHS 2011/65/EU A copy of the complete Declaration of Conformity is available from Aidcall. This symbol on the product indicates it is classed as Electrical or Electronic Equipment and should not be disposed of with other commercial waste at the end of its working life. The Waste of Electrical and Electronic Equipment (WEEE) Directive (2012/19/EU) has been put in place to recycle products using the best available recovery and recycling techniques to minimise impact on the environment, treat hazardous substances and avoid increasing landfill. For product disposal please contact your supplier and check the terms and conditions of the purchase contract and ensure this product is not mixed with other commercial waste for disposal. This symbol on batteries indicates separate collection. Batteries contain chemicals that can be hazardous to health and the environment and should not be disposed of in the waste bin. The EU Directive (2006/6/EC) has been put in place to ensure the safe disposal and recycling of batteries. Return used batteries to your supplier or drop‐off at your local municipal waste recycling depot. NTENTS 4. MAINTENANCE & CARE ... -
Page 5: Display Panel Options
5. DISPLAY PANEL OPTIONS There are 4 different models of Touchsafe Pro Display Panel; 10” or 15” screen with or without an internal RFE (Radio Front End). A maximum of 32 Panels can be connected on the same system. 10” Panel with 10” Panel ‐ No RFE internal RFE 15” Panel with 15” Panel ‐ No RFE internal RFE ... -
Page 6: Display Panel Features
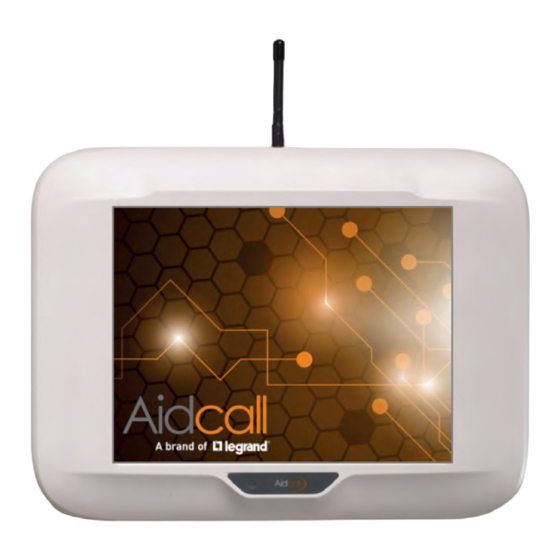
6. DISPLAY PANEL FEATURES Both the 10” and 15” Display Panel options operate exactly the same and have all the same features, it’s only the screen size that differs. Antenna (on internal RFE options only) Internal Alarm Sounder 10” or 15” TFT LCD Touch Screen Wall or Desk Mounting Enclosure Green Power LED POWER LED The power LED should normally be illuminated STEADY GREEN when the mains supply is connected. The power LED will FLASH GREEN when the panel is operating on standby battery alone. Text on the screen will also indicate the power status and if the standby battery is getting low. ALARM SOUNDER All alarm calls, system alerts, reminders etc. will be displayed on screen and different tones are sounded to identify the different call types. Some tones can be silenced from the panel whereas others (e.g. Emergency) have to be silenced at source. A volume control is available in the panel settings. ... -
Page 7: Main Screen
7. MAIN SCREEN When no calls exist the main screen will display the time similar to below. The buttons along the top of the screen are coloured BLUE on the Master panel, any additional panels on the same system will have YELLOW coloured buttons. Touch to see Touch to see Touch to see Touch to see Touch to see Main Screen Alarms Screen Map Screen Doors Screen Beds Screen* Time Day Clock* ... - Page 8 7. MAIN SCREEN SUPPLY INDICATOR This should normally be STEADY GREEN stating “Supply: OK”. If it changes to ORANGE and states “Mains Fail” then the mains power is off and the panel is operating from its standby battery. The panel will continue to operate as normal for several hours. If the whole buildings power is off report this through the normal channels, if only the panel mains power has failed call your Service Engineer immediately. If it changes to RED and states “Mains/Battery Low” then the mains power is still off and the standby battery power is getting low – the panel is likely to turn itself off soon. If it changes to YELLOW and states “Battery Critical” then the standby battery power is very low (or the mains power is on but the battery is disconnected) – call your Service Engineer immediately. If it changes to PURPLE and states “Battery Low” then the panel’s daily self‐test has detected that the battery is not holding its charge and it needs replacing – call your Service Engineer immediately. LOG ON OPTIONS If you need to make any changes to the system setup, change client names, add notes etc. then you’ll need to be given a password. Touch the Log On button and an “Enter Password” box will appear on the screen as shown alongside… There are 3 Log On options; Engineer, Manager or Matron. Touch the symbol and choose the required Log On option from the pull down box. Enter the required password (4 digits) using the keypad and touch the Log On button in the bottom left hand corner of the keypad. The screen will change to show the parameters available for each Log On – see below; ...
-
Page 9: System Configuration
8. SYSTEM CONFIGURATION EDIT DETAILS This allows the editing of a client’s details. Note: edits performed on the Master panel are saved and sent to all other panels on the Network. Select the Device to edit from the pull‐down box (or type its ID in the Filter box). Use the keypad to change the Residents/Room Name. Text entered in the Notes box will be displayed on‐screen by touching the banner for a call or Reminder. Select which Zone/Ward/Bed AVI’s you want to operate with this call point. Select if you want a Reminder Enabled, choose the Reminder Type as Fixed (for Medication at fixed times) or Variable (for Reminders at fixed intervals). Set the Start time for the first reminder, the Interval between reminders and Duration (time until last reminder) from the pull‐down boxes. See sections 27 & 28 for examples. ... - Page 10 8. SYSTEM CONFIGURATION STAFF ID This allows a staff name to be assigned to an Infra‐Red Buddy ID or a Bluebell Pager ID. When these devices are used (to clear an alarm call down for example) the staff name is recorded against that event in the System Log. Select the Staff ID you want to assign a name to from the pull‐down box (or type the ID in the Filter box). The Staff ID’s are assigned from 01 to 99. Use the keypad to enter the Staff Name. Touch Save when done then Close to exit. CHANGE PASSWORD Passwords are a 4 digit number and can be changed if the user has permission. ...
- Page 11 8. SYSTEM CONFIGURATION ZONE ROUTING Calls from each zone can be set to display on specific panels during the day and different panels at night. Select the Zone from the pull‐down box, set the Day Enabled switch on and tick the check boxes for the Day Time Panels you want this zone calls to be displayed on during the day. Set the Night Enabled switch on and tick the check boxes for the Night Time Panels you want this zone calls to be displayed on during the night. Repeat for each zone in the pull‐down box. Note: the night start time and duration is set in the Night Mode option. Press the Save button then Close to exit. COMMON CALLS Common call types can be set to display on specific ...
- Page 12 8. SYSTEM CONFIGURATION SYSTEM LOG Select a date from the pull‐down box and choose a filter option to narrow the search and then press Show. This will display all events on the panel for the selected date/filter. Press the Close button to exit. ZONED PAGERS The scheme must have a radio paging system installed. Select a Zone from the pull‐down box then enter the pager ID’s you want to be notified during the Day and 2 Night Modes in the boxes alongside each call type. The keypad will be displayed when you click on a box to ...
- Page 13 8. SYSTEM CONFIGURATION DATE/TIME The date and time must be set on the Master Panel (1). Once set, the date and time is sent to all other panels on the network every minute to synchronise them. Select the Date and Time from the pull‐down boxes then select the local Timezone. Tick the checkbox to enable Automatic Daylight Saving adjustments every March and October Press Save and the time & date is synchronised from the Master to all other panels every minute. Press the Close button to exit. COPY DATA When Master Panel (1) has been setup, plug a USB memory stick into one of the USB Ports on the lower face of the Panel. Press Copy All To USB and wait until the Current Directory box shows 100%. Press Close and ...
-
Page 14: Nurse Call
9. NURSE CALL If the Orange Nurse Call button is pressed (or the Orange cord is pulled) on a Call Point this will be displayed on the panel as shown below; The screen banner is orange like the Nurse call button. Touch the banner to display Client Notes – see Section 10. Press the Accept button on the banner to silence the alarm and notify all other panels the call is being dealt with. The screen banner changes to purple when a call is accepted – see Section 10. TO CANCEL THE CALL You must visit the Call Point CALLING CANCEL and press the LIGHT GREY HC. 345 ID. 001 button to cancel the call ... -
Page 15: View Client Notes/Accept Call
10. VIEW CLIENT NOTES/ACCEPT CALL TO VIEW CLIENT NOTES Touch the screen banner to view Client Notes; this will be displayed on the panel as shown below; Notes can be added or edited via the Edit Details option using a Matron or Manager Log On. Touch Close when done. TO ACCEPT A CALL Press the Accept button on the screen to acknowledge that the call is being dealt with; this will be displayed on the panel as shown below; ... -
Page 16: Nurse Present
11. NURSE PRESENT After a Nurse Call has been made, visit the patient and press the Green button on their Call Point to register Nurse Present, this will be displayed on the panel as shown below; The screen banner is green like the Nurse Present button. Touch the banner to display Client Notes if required. Press the Accept button on the banner to notify all other panels the call is being dealt with. The screen banner changes to purple when a call is accepted. TO CANCEL THE CALL CALLING Press the LIGHT GREY CANCEL HC. 345 ID. 001 button to cancel the call ... -
Page 17: Assistance Call
12. ASSISTANCE CALL After pressing the Green button to register Nurse Present press the Orange Nurse Call button again (or pull the Orange cord) to request Assistance, this will be displayed on the panel as shown below; The screen banner is yellow for an Assistance call. Touch the banner to display Client Notes. Press the Accept button on the banner to silence the alarm and notify all other panels the call is being dealt with. The screen banner changes to purple when a call is accepted. TO CANCEL THE CALL You must visit the Call Point CALLING CANCEL and press the LIGHT GREY HC. 345 ID. 001 button to cancel the call ... -
Page 18: Emergency Call
13. EMERGENCY CALL If the Red Emergency button is pressed (or the Red Emergency pull‐switch is pulled) on a Call Point this will be displayed on the panel as shown below; The screen banner is red like the Emergency Call button. Touch the banner to display Client Notes. An Emergency Call cannot be Accepted or silenced from the screen. TO CANCEL THE CALL You must visit the Call Point CALLING CANCEL and press the LIGHT GREY HC. 345 ID. 001 button to cancel the call ... -
Page 19: Cardiac Call
14. CARDIAC CALL If the Blue Cardiac pull‐switch is pulled‐out on a Call Point this will be displayed on the panel as shown below; The screen banner is blue like the Cardiac button. Touch the banner to display Client Notes. A Cardiac Call cannot be Accepted or silenced from the screen. TO CANCEL THE CALL You must visit the Call Point CALLING CANCEL and press the LIGHT GREY HC. 345 ID. 001 button to cancel the call ... -
Page 20: Wc Call
15. WC CALL If the Orange Nurse Call button is pressed (or the Orange cord is pulled) on a Call Point fitted in a WC (i.e. toilet) this will be displayed on the panel as shown below; The screen banner is yellow for a WC call. Touch the banner to display Client Notes. Press the Accept button on the banner to silence the alarm and notify all other panels the call is being dealt with. The screen banner changes to purple when a call is accepted. TO CANCEL THE CALL You must visit the Call Point CALLING CANCEL and press the LIGHT GREY HC. 345 ID. 001 button to cancel the call ... -
Page 21: Bed To Be Cleaned Call
16. BED TO BE CLEANED CALL Bed Status is an option which must be enabled in each Call Point that requires the feature. If the Bed Status is changed to “To Be Cleaned” on a Call Point this will be displayed on the panel as shown below; The screen banner is grey for a Bed To Be Cleaned call. Touch the banner to display Client Notes if required. Press the Accept button on the banner to silence the alarm and notify all other panels the call is being dealt with. The screen banner changes to purple when a call is accepted. TO CANCEL THE CALL Once the bed has been cleaned, CURRENT BED press the DARK GREY button on STATUS the Call Point to show the current ... -
Page 22: Call Point Removed Alert
17. CALL POINT REMOVED ALERT If a Call Point is un‐clipped and removed from its wall bracket this will be displayed on the panel as shown below; The screen banner is grey for a Call Point Removed alert. Touch the banner to display Client Notes. Press the Accept button on the banner to silence the alarm and notify all other panels the call is being dealt with. The screen banner changes to purple when a call is accepted. Note: Call Point Removed alerts can be disabled in the panel setup TO CANCEL THE ALERT You must visit the Call Point CALLING CANCEL and press the LIGHT GREY HC. 345 ID. 001 button to cancel the alert ... -
Page 23: Tamper Alert
18. TAMPER ALERT If a Pear Push or Accessory Lead is un‐plugged from a Call Point this will be displayed on the panel as shown below; The screen banner is grey for a Tamper alert. Touch the banner to display Client Notes. Press the Accept button on the banner to silence the alarm and notify all other panels the call is being dealt with. The screen banner changes to purple when a call is accepted. Note: Tamper alerts can be disabled in the panel setup TO CANCEL THE ALERT You must visit the Call Point CALLING CANCEL and press the LIGHT GREY HC. 345 ID. 001 button to cancel the alert ... -
Page 24: Device Status Alert
19. DEVICE STATUS ALERT If the batteries are running low in a Call Point, Pullcord, Door Monitor or Pendant this will be displayed on the panel as shown below; The screen banner is white for a Device Status alert. Touch the banner to view details of the Device Status alert. This will identify exactly which device has a low battery. A Device Status alert cannot be Accepted from the screen. TO CANCEL THE ALERT You must visit the Call Point CALLING CANCEL and press the LIGHT GREY HC. 345 ID. 001 button to cancel the alert ... -
Page 25: Please Test Alert
20. PLEASE TEST ALERT All radio devices send a signal every 4 hours to confirm they are still on the Network. If a signal is not received for a known device this will be displayed on the panel as shown below; The screen banner is grey for a Please Test alert. Touch the banner to identify exactly which device needs testing. Press the Accept button on the banner to silence the alarm and notify all other panels the call is being dealt with. The screen banner changes to purple when a call is accepted. TO CANCEL THE ALERT Possible causes of “Please Test” alerts are flat batteries, the batteries have been removed or the device has been moved outside the range of radio coverage. You must visit the Call Point, CALLING rectify the problem and press ... -
Page 26: Pullcord Call
21. PULLCORD CALL If a ceiling Pullcord Orange cord is pulled this will be displayed on the panel as shown below; The screen banner is orange for a Nurse Call from a Pullcord. Touch the banner to display Client Notes. Press the Accept button on the banner to silence the alarm and notify all other panels the call is being dealt with. The screen banner changes to purple when a call is accepted. The screen banner will be yellow for an Assistance Call or red for an Emergency Call An Emergency Call cannot be accepted and silenced from the screen TO CANCEL THE CALL You must visit the Call Point CALLING associated with the Pullcord ... -
Page 27: Pullcord Wc Call
22. PULLCORD WC CALL If the Orange cord is pulled on a ceiling Pullcord fitted in a WC (i.e. toilet) this will be displayed on the panel as shown below; The screen banner is yellow for a Pullcord WC call. Touch the banner to display Client Notes. Press the Accept button on the banner to silence the alarm and notify all other panels the call is being dealt with. The screen banner changes to purple when a call is accepted. TO CANCEL THE CALL You must visit the Call Point CALLING associated with the Pullcord CANCEL HC. 345 ID. 001 and press the LIGHT GREY ... -
Page 28: Pendant Call
23. PENDANT CALL If the Orange Nurse Call button is pressed on a Pendant this will be displayed on the panel as shown below; The screen banner is orange for a Nurse Call from a Pendant. Touch the banner to display Client Notes. Press the Accept button on the banner to silence the alarm and notify all other panels the call is being dealt with. The screen banner changes to purple when a call is accepted. TO CANCEL THE CALL You must locate the Pendant and press the LIGHT GREY button to cancel the call ... -
Page 29: Telecare Call
24. TELECARE CALL A range of Telecare Devices are available for personal wellbeing and environmental monitoring. A list of devices currently available is given below; please contact Aidcall customer services for more details. If an Enuresis Sensor is activated this will be displayed on the panel as shown below; The screen banner is yellow for an Enuresis alarm. Touch the banner to display Client Notes. Press the Accept button on the banner to silence the alarm and notify all other panels the call is being dealt with. The screen banner changes to purple when a call is accepted. TO CANCEL THE CALL CALLING You must visit the Call Point associated CANCEL with the Enuresis alarm and press the HC. 345 ID. 001 ... -
Page 30: Door Open Alarm
25. DOOR OPEN ALARM If a monitored door is opened (with the key switch in the ACTIVE position) this will be displayed on the panel as shown below; The screen banner is orange for Door Open alarms. Touch the banner to display notes. Press the Accept button on the banner to silence the alarm and notify all other panels the call is being dealt with. The screen banner changes to purple when a call is accepted. The screen banner will be yellow for an Assistance Call or red for an Emergency Call An Emergency Call cannot be accepted and silenced from the screen TO CANCEL THE ALARM You must visit the Door Monitor then; Turn the key to the RESET ... -
Page 31: Door Override Alert
26. DOOR OVERRIDE ALERT If a Door Monitor key is turned to the OVERRIDE position this will be displayed on the panel as shown below; Door Override means the door can be opened without an alarm being reported. The screen banner is black for a Door Override alert. Touch the banner to display notes. Press the Accept button on the banner to silence the alarm and notify all other panels the call is being dealt with. The screen banner changes to purple when a call is accepted. Door Override alerts can be disabled or set to repeat after a delay of 1 to 240 minutes in the Door Monitor setup. ... -
Page 32: Fixed Reminders
27. FIXED REMINDERS Fixed Reminders for Medication can be enabled per client and will repeat at the same time every day (unless disabled). These reminders are set to start at a specific time each day and repeat at a set interval for a set duration. For example; start at 08:00 with an interval of 4 hours for a duration of 12 hours would give reminders at 08:00, 12:00, 16:00 & 20:00. Fixed Reminders will be displayed on the panel similar to below; The screen banner is black for a Medication Reminder. Touch the banner to display Client Notes (which can be set to include details of the medication). Press the Accept button on the banner to silence the alarm and notify all other panels the call is being dealt with. The screen banner changes to purple when a call is accepted. TO CANCEL THE CALL You must visit the Call Point CALLING associated with the CANCEL ... -
Page 33: Variable Reminders
28. VARIABLE REMINDERS Variable Reminders can be enabled per client and will repeat every day (unless disabled). These differ from Fixed Reminders as they repeat at the set interval from the time each reminder is cancelled. For example; if set to start at 08:00 with an interval of 4 hours for a duration of 12 hours, but it was 08:30 before the first reminder was cancelled then the next reminder will occur at 12:30. If this reminder was cancelled at 13:00 then the next would be at 17:00. If this reminder was cancelled at 17:15 then there will be no further reminders until 08:00 the next day (i.e. 4 hours on from 17:15 is after the 12 hour duration). Variable Reminders will be displayed on the panel similar to below; The screen banner is black for a Reminder. Touch the banner to display Client Notes (which can be set to include details of the reminder). Press the Accept button on the banner to silence the alarm and notify all other panels the call is being dealt with. The screen banner changes to purple when a call is accepted. TO CANCEL THE CALL You must visit the Call Point CALLING ... -
Page 34: Map Screen
29. MAP SCREEN When a call is received the location of the Call Point can be shown on a map of the building by touching the Map button on the top of the screen, this will be displayed on the panel similar to below; The colour of the icon shown denotes the type of call – this will match the Alarms screen banner colour. Once the location of the call is established press the Alarms button on the top of the screen to revert back to the call details. ... -
Page 35: Doors Screen
30. DOORS SCREEN The status of Door Monitors can be viewed on the Touchsafe Pro Nursecall panel by touching the Doors button on the top of the screen; this will be displayed on the panel similar to below; A list will show the location and unit ID of each Door Monitor on the system along with the status of the door (open/closed) and the status of the Door Monitor (active/override), there are 4 possible states; 1. Open/Override indicates the door is currently OPEN and the key switch on the Door Monitor is in the OVERRIDE position – this means an alarm will not be reported on the panel. 2. Closed/Override indicates the door is currently CLOSED and the key switch on the Door Monitor is in the OVERRIDE position – this means an alarm will not be reported on the panel should the door be opened. 3. Closed/Active indicates the door is currently CLOSED and the key switch on the Door Monitor is in the ACTIVE position – this means an alarm will be reported on the panel should the door be opened. 4. Open/Active indicates the door is currently OPEN and the key switch on the Door Monitor is in the ACTIVE position – this means an alarm will be on the panel now. The List button will open the system log showing the last 500 events. This will only show Door ... -
Page 36: Beds Screen
31. BEDS SCREEN The status of all beds can be viewed by touching the Beds button on the top of the screen; this will be displayed on the panel similar to below; The Bed Status list is prioritised with beds “To Be Cleaned” at the top, followed by beds “Available” then all the beds that are “Occupied” underneath. The time and date identifies the last event for each bed. Once a bed has been cleaned the Bed Status should be set back to “Available” or “Occupied” from the client’s Call Point as shown in Section 15. This will prevent the “Bed To Be Cleaned” call re‐reporting and the Bed Status will be updated in the Bed List. If the call is cancelled by pressing the Light Grey button on the client’s Call Point (instead of changing the Bed Status to “Available” or “Occupied”) then it will re‐report as top of the Beds To Be Cleaned list. If the bed is not cleaned within a preset time the call will re‐report as an alarm on the main screen ‐ this interval can be set as 10, 20 or 30 minutes during panel setup by an Engineer. ... -
Page 37: Multiple Calls Screen
32. MULTIPLE CALLS SCREEN If multiple calls exist they will be stacked on the main alarm screen in priority order. Cardiac is the highest priority followed by Emergency, Accepted calls and Nurse Present is the lowest priority. Multiple calls will be displayed on the panel as shown below; Accept the calls in any order, this will silence the alarm and the banner will change to purple. Note: Cardiac and Emergency calls cannot be accepted and silenced from the panel. All other panels on the Network will be able to see when calls have been accepted. If accepted calls are not cancelled within a preset time they will revert to active calls. MUTE ALL The alarm sounder can be silenced by pressing the Mute All button; the sounder will start again after a preset time. PREVIOUS/NEXT If there are more calls waiting than can be displayed on the screen, then “Previous” and “Next” buttons will appear to scroll up and down the list. ... -
Page 38: Push Notifications
33. PUSH NOTIFICATIONS The optional Push Notifications feature allows certain system events to be displayed on a mobile phone. Note: the Touchsafe Pro Call Logger software (V2.00a onwards) must be installed on a local PC and each mobile phone requires the Pushover app installed. New alert… Call history… The following events can be displayed; Bed Status calls, Tamper alerts, Fault alerts and Low Battery. If the Call Logger software is not running on the local PC then Push Notifications cannot be forwarded to the mobile network and an error message will appear on the Nursecall panel. This message will prompt you to disable the function in the Panel Settings… Error Pushing a Message to: 192.168.168.41 Please Check that the PC Server is Running This feature can be Disabled by a Manager in Panel Settings ...
Need help?
Do you have a question about the Touchsafe Pro and is the answer not in the manual?
Questions and answers