Bunn Sure Immersion 312 Installation & Operating Manual
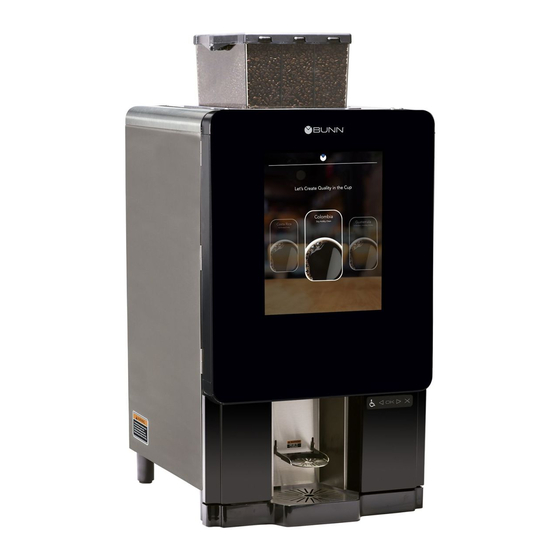
Bean-to-cup single serve brewer
Hide thumbs
Also See for Sure Immersion 312:
- Programming manual (56 pages) ,
- Installation & operating manual (80 pages)
Table of Contents
Advertisement
Advertisement
Table of Contents

Related Manuals for Bunn Sure Immersion 312


Summary of Contents for Bunn Sure Immersion 312
- Page 1 Sure Immersion ® Bean-to-Cup Single Serve Brewer INSTALLATION & OPERATING GUIDE Bunn-O-Matic Corporation Post Office Box 3227, Springfield, Illinois 62708-3227 Phone (217) 529-6601 | Fax (217) 529-6644 www.bunn.com 53565.0001 A 5/18 © 2018 Bunn-O-Matic Corporation...
-
Page 2: Warranty
SOLE OPTION AS SPECIFIED HEREIN, TO REPAIR, REPLACEMENT OR REFUND. In no event shall BUNN be liable for any other damage or loss, including, but not limited to, lost profits, lost sales, loss of use of equipment, claims of Buyer’s customers, cost of capital, cost of down time, cost of substitute equipment, facilities or services, or any other special, incidental or consequential damages. -
Page 3: Table Of Contents
No user-serviceable parts inside. FAILURE TO COMPLY RISKS EQUIPMENT Authorized service personnel only. DAMAGE, FIRE OR SHOCK HAZARD. LIQUID Disconnect power before servicing. READ THE ENTIRE OPERATING MANUAL BEFORE USING THIS PRODUCT 00986.0002M 10/14 ©1994 Bunn-O-Matic Corporation 00986.0002 35710.0000 37881.0000 053118... -
Page 4: North American Requirements
CE REQUIREMENTS NORTH AMERICAN REQUIREMENTS • This appliance must be installed in locations where it can be overseen by trained personnel. • This appliance must be installed in locations Accessories • For proper operation, this appliance must be where it can be overseen by trained personnel. installed where the temperature is between 5°C •... -
Page 5: Site Requirements
1⁄2" water supply line. A tight coil of copper tubing in the water line will facilitate moving the brewer to clean the counter top. Bunn-O-Matic does not recom- mend the use of a saddle valve to install the brewer. The... -
Page 6: Electrical Hookup
INITIAL SET-UP - FOR INDOOR USE ONLY - Electrical Hook-Up Plug for 120V Models CAUTION Improper electrical installation will damage electronic components. 120 Volt AC Models 1. An electrician must provide electrical service NOTE: This electrical service consists of 2 current as specified. -
Page 7: Bean Hopper Set-Up
INITIAL SET-UP (continued) Bean Hopper Set-up 1. Remove the bean hopper from the packaging; taped to the lid is the lid lock key - DO NOT LOSE THIS KEY. When not being used, keep the lid key in a secure place. the hopper is divided into three compartments with a lockable lid. - Page 8 INITIAL SET-UP (continued) Bean Hopper Set-up - Continued 4. Install the Bean Hopper into the machine as shown. Some minor movement may be required to settle the hopper into its proper seating. 5. Lock the Bean Hopper into place by pushing the hopper lock mechanism (Red Ball) to the left as shown.
-
Page 9: Powder Hopper Set-Up
INITIAL SET-UP (continued) Powder Hopper Set-up 1. Remove the powder hoppers from the packaging. Before filling each with the appropriate product, verify that the auger spring is in it's correct posi- tion. If the auger spring is not engaged, rotate the auger driveshaft clockwise till the auger spring is fully seated as shown. -
Page 10: Waste Bin/Drip Tray
INITIAL SET-UP (continued) Waste Bin / Drip Tray 1. Remove the waste bin from the packaging, and install as shown. A magnet is located on the back of the bin. NOTE: An optional through counter waste bin is avail- able for unattended sites 2. -
Page 11: Filter Paper Installation
INITIAL SET-UP (continued) Filter Paper Installation Install filter paper roll and then route the filter paper through the tractor drive as shown. THE PAPER WEIGHT MUST BE ON TOP OF THE ROLL 1. Pull the end of the paper roll up, and over left 2. -
Page 12: Operating Interface
OPERATING INTERFACE 1. The first screen to appear is the "Screen Saver". Touch the screen to begin. 2. From the main menu (Selection) screen, the user is offered beverage choices. The user selects one to proceed. 3. Once a selection has been made, the user then presses the "OK"... -
Page 13: Ada Selection Menu
OPERATING INTERFACE (continued) 4. From the "COFFEE" screen, the user is prompted to make a size selection. The user is offered up to 4 cup sizes, plus optional carafe. "SMALL", "MEDIUM", "LARGE" and "EXTRA LARGE". Once a selection has been made, successive screens walk the user through the chosen beverage preparation, step-by-step with static and video imagery. - Page 14 OPERATING INTERFACE (continued) 5. The chosen beverage preparation is shown in step-by-step visuals... Grinding... Immersion... Brewing... and dispensing. 053118...
-
Page 15: Filter Paper Replacement
FILTER PAPER REPLACEMENT Removing Filter Paper When the "Paper Take Up Roll Full" indication has been reached, the machine will lock out brewing. The spent paper must be removed. NOTE: This only applies when the take-up roller is used. This can be applicable for "through" counter installations depending on how the site prefers to dispose of the waste. - Page 16 FILTER PAPER REPLACEMENT (continued) 2. Pull end of paper between the Brew Funnel and Brew Box 3. Continue paper over the top spindle, then on the left side of the middle spindle. Feed the paper in front of the pick-up (bottom) spindle with the handle.
- Page 17 FILTER PAPER REPLACEMENT (continued) 5. With the paper inserted into the slot of the bottom spindle, 1) push the spindle in, 2) then down a quarter turn to the right. NOTE: There are notches on the pick-up spindle handle that need to be lined up before pulling the handle down.
-
Page 18: Service Access
For "Advanced" screen access, the user will require security access pass codes. Please check with your Manager or Supervisior for your pass code. NOTE: Pressing the BUNN icon at the bottom of the screen will return the user to the main screen. 053118... -
Page 19: Paper Advance
NOTE: Pressing the BUNN icon at the bottom of the screen will return the user to the main screen. Clean Screen Function 1. From the "SERVICE ACCESS" screen, the user can utilize the "CLEAN SCREEN"... -
Page 20: Care And Cleaning
Care and Cleaning - General Cleaning Note The use of a damp cloth rinsed in any mild, non- abrasive, liquid detergent is recommended for clean- ing all surfaces on Bunn-O-Matic equipment. Exterior Surfaces: • Do not use any abrasive materials. - Page 21 SERVICE ACCESS (Care and Cleaning continued) Care and Cleaning - Rinsing, Please Wait Once the "Start" button has been pressed, the care and cleaning screen will show a progress bar - with the message "Please Wait - Rinsing". If for any reason the rinsing process needs to be halted, press the "Stop"...
- Page 22 SERVICE ACCESS (Care and Cleaning continued) 3. Follow the instructions. Press continue. 4. The machine will begin rinsing any loose grounds from the brew funnel. Care and Cleaning - Cleaning Tablets 1. After the funnel has been rinsed, the user will be prompted with a new screen and directions.
- Page 23 SERVICE ACCESS (Care and Cleaning continued) 2. The machine will begin the cleaning cycle - hot water will be added to the cleaning tablet, disolv- ing it for use as a cleaning agent. The cleaning process can take up to five (5) minutes to complete.
-
Page 24: Weekly
SERVICE ACCESS (Care and Cleaning continued) Weekly Cleaning Brew Funnel: Removal & Washing The brew funnel can be removed for a more thorough cleaning; this is recommended weekly or more often if required (heavy usage of the machine). 1. Open front door to remove brew funnel. Funnel must be in the upper position to be removed. - Page 25 SERVICE ACCESS (Care and Cleaning continued) Weekly Cleaning - Continued 4. Clean the funnel using any mild, non-abrasive, liquid detergent. Do Not use abrasives to clean as this can damage the surface of the funnel. Rinse and Dry. 5. To reinstall the funnel, position the metal pins on the flat springs.
- Page 26 SERVICE ACCESS (Care and Cleaning continued) Weekly Cleaning - Continued • Remove the powder mixing chambers, steam traps, frothers and mixing chamber bases. • Remove the dispense hoses from the dispense nozzle assembly. • Clean all parts removed in warm soapy water. Use the provided cleaning brush (PN 26367.0000) to clean bores and orifices.
-
Page 27: Active Notices
"Active Notices" button to access the Active Notices and Events Log screens. NOTE: Pressing the BUNN icon will return the user to the main screen. 2. The "Active Notices" screen will display any faults that have occurred by name and descrip- tion. -
Page 28: Customer Care Alerts
CUSTOMER CARE ALERTS These alerts appear on the information bar at the bottom of the screen. They can be done by someone without technical knowledge. Example of Information Bar at bottom of screen showing alert. CUSTOMER CARE ALERTS RECOMMENDED STEPS Brew Lockout Wait, Tank is Heating Door Open...
Need help?
Do you have a question about the Sure Immersion 312 and is the answer not in the manual?
Questions and answers
E011 funnel position
The funnel must be in the upper position to be removed from the Bunn Sure Immersion 312.
This answer is automatically generated